The building and launch of “Crwban” a 10′ Herreshoff Pram.

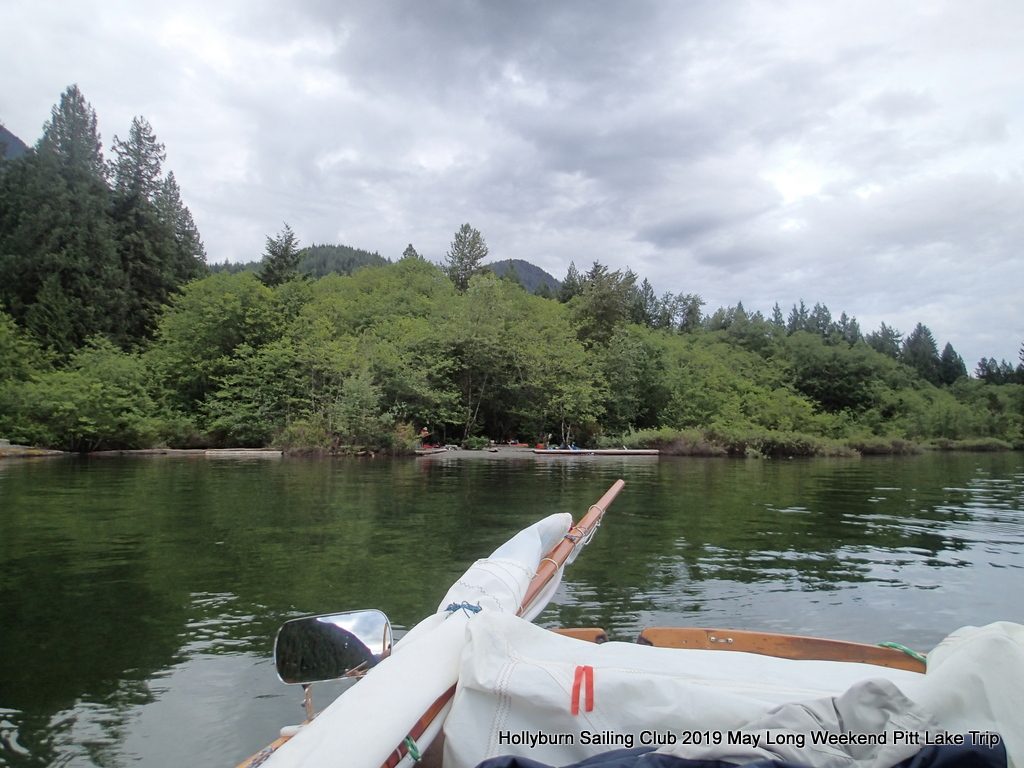
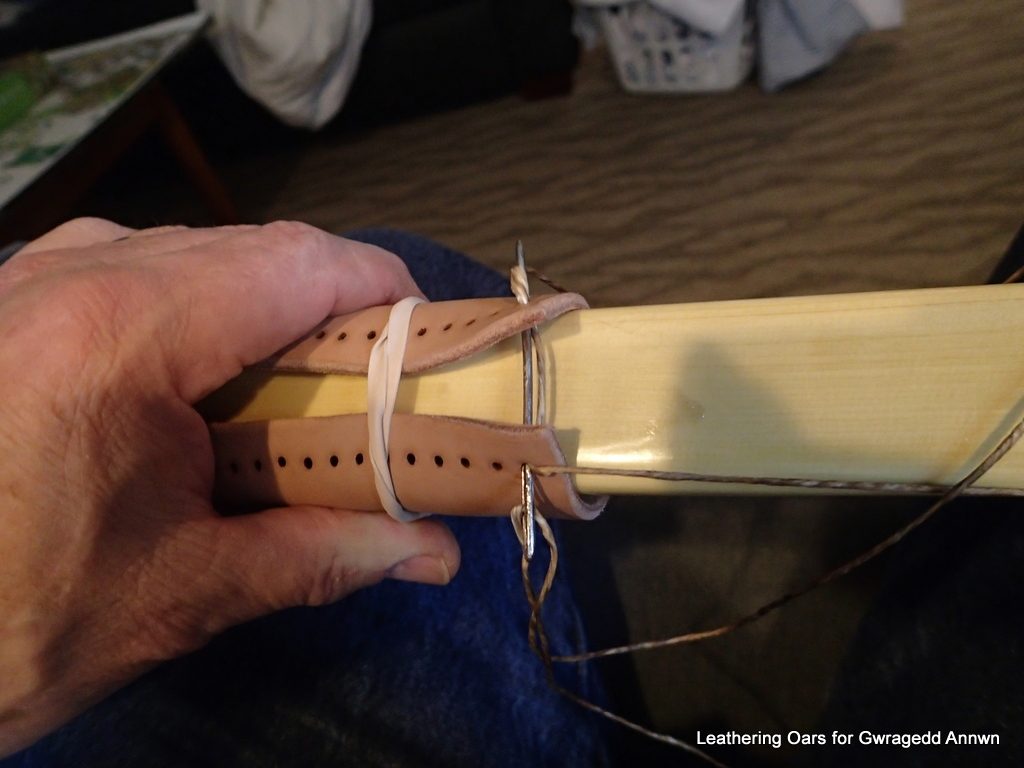
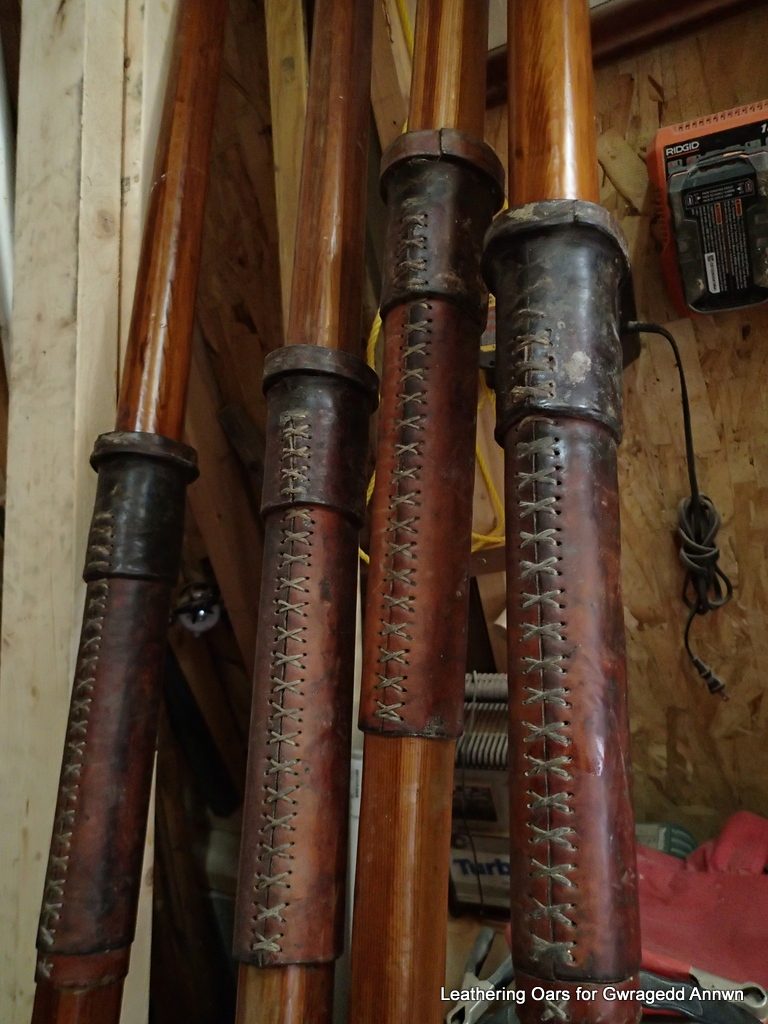
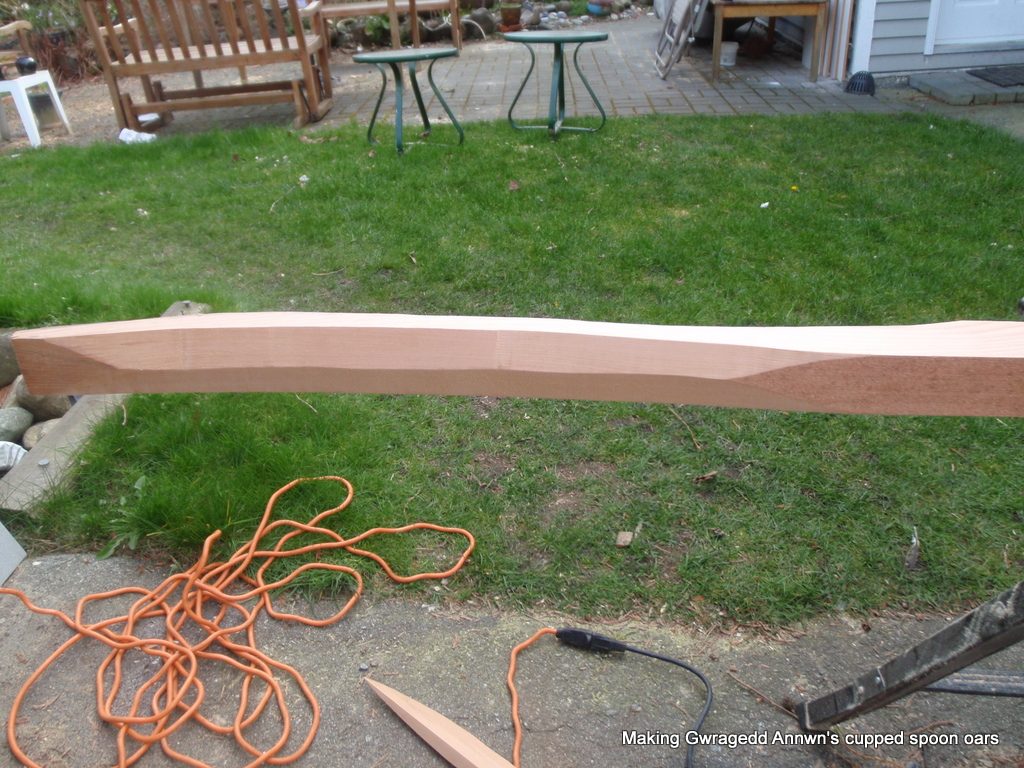
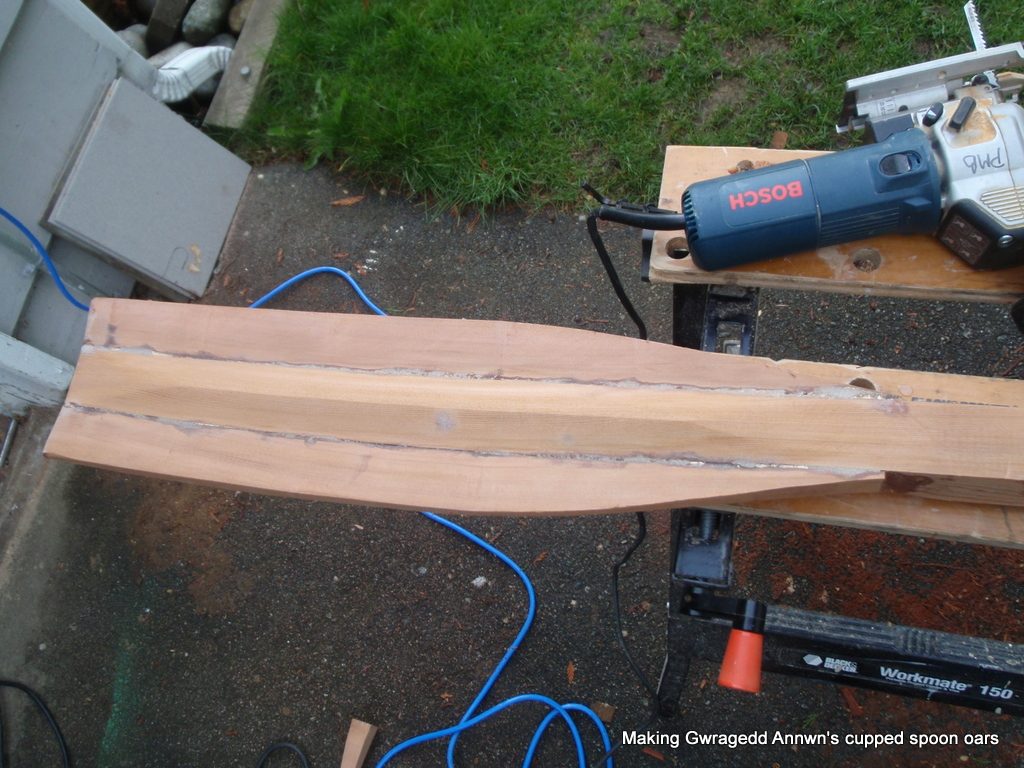
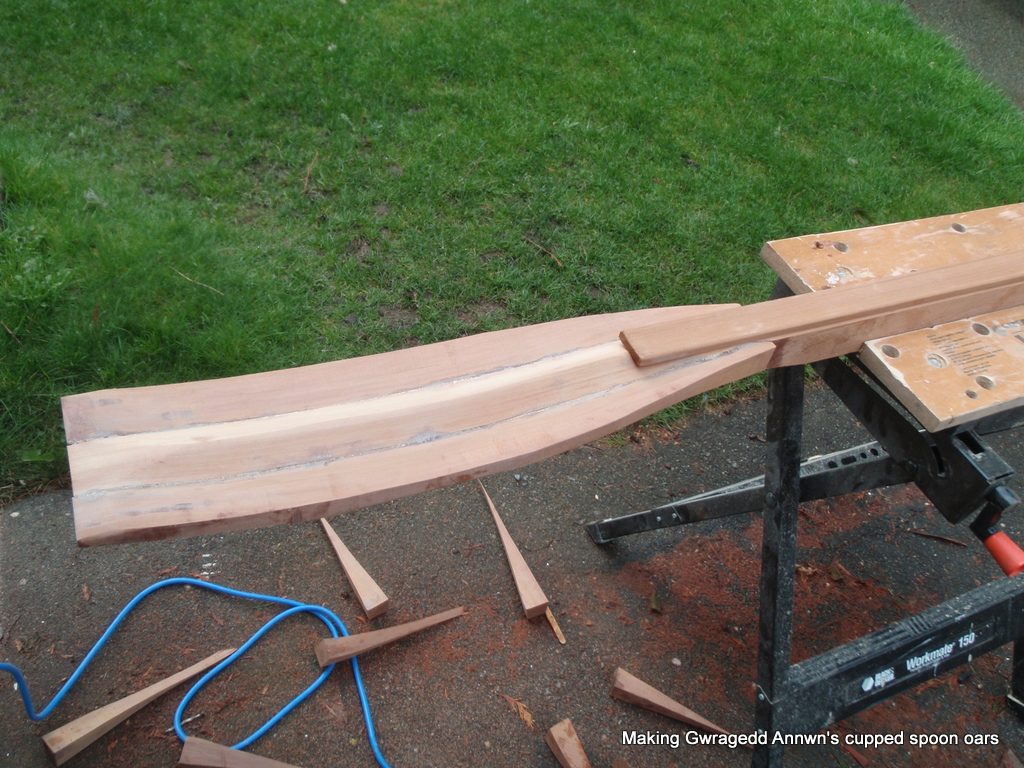
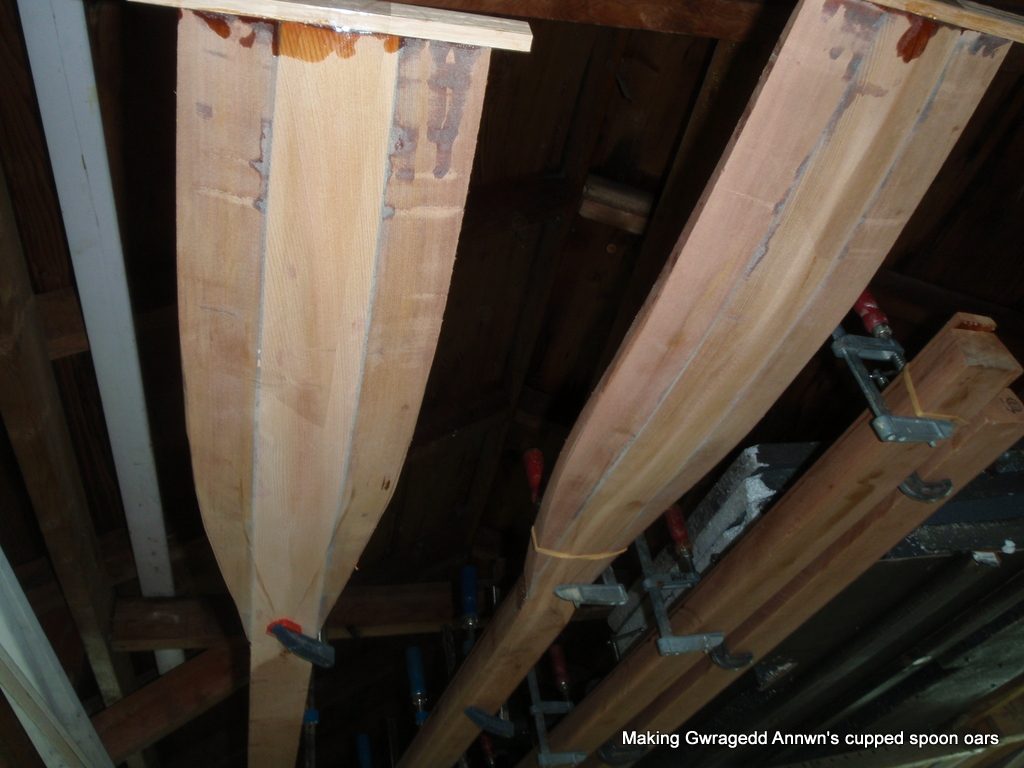
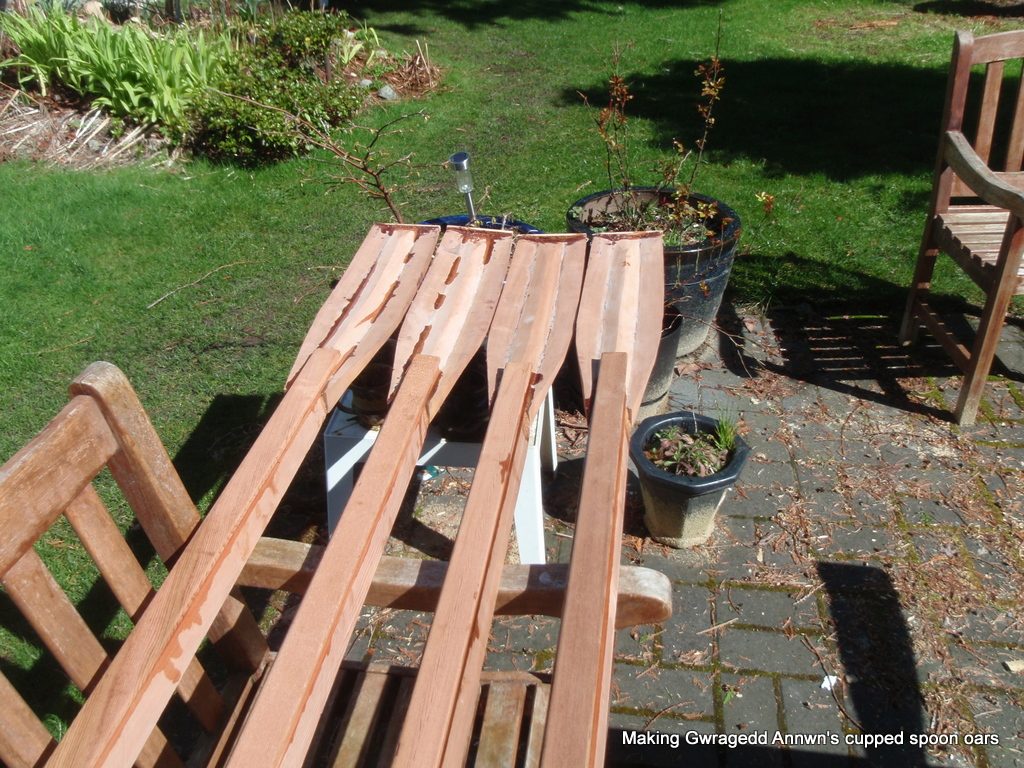
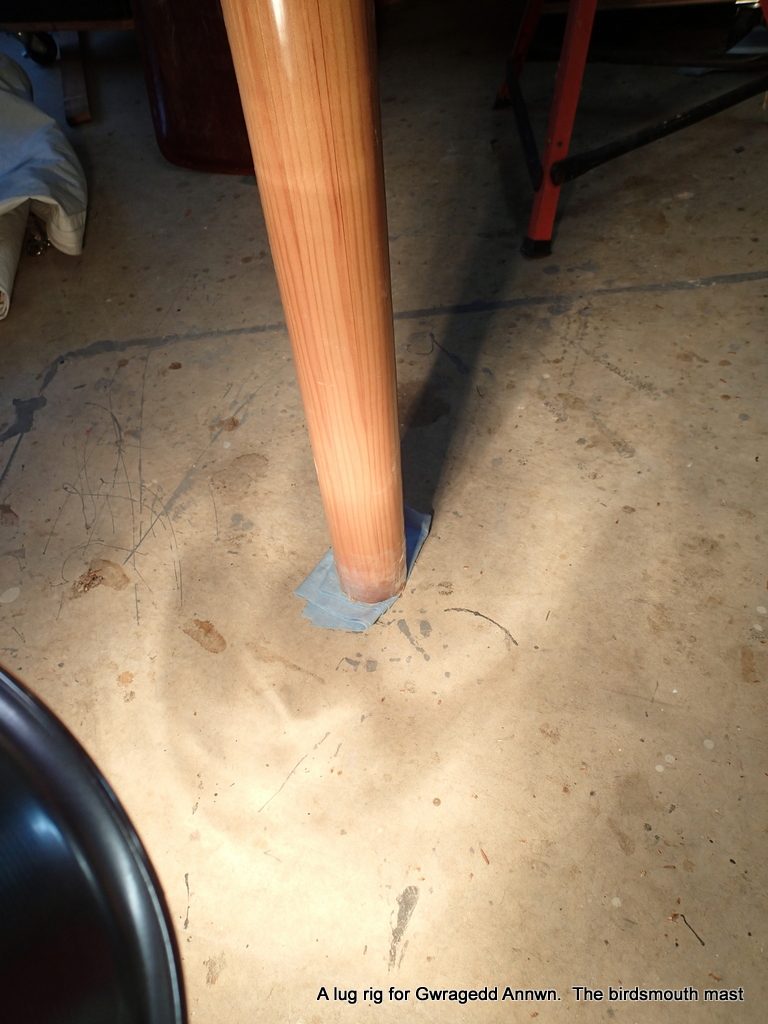
With the Covid-19 pandemic breaking out, it seemed as if “Social Distancing” by building a boat would be a good idea. I have always admired the Herreshoff Pram design in John Gardner’s “Building Classic Small Craft” book. I thought I could build her light enough to car-top and she would be big enough for two . I began to build “Crwban” a 10′ Herreshoff Pram on March 29th, 2020.

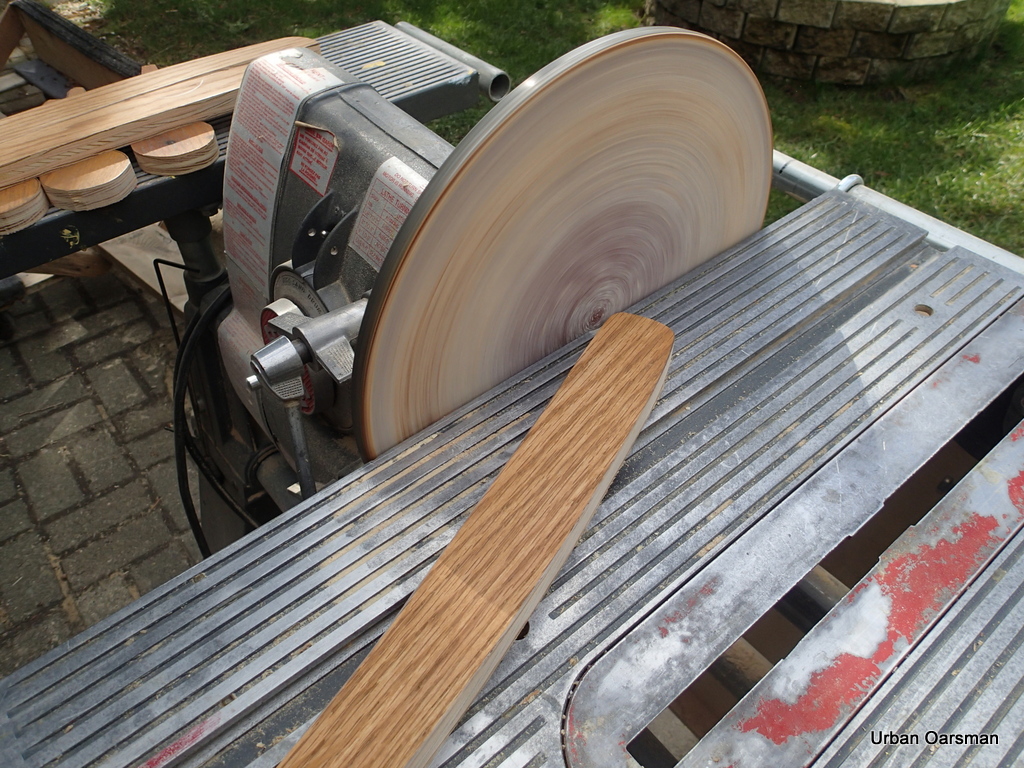
I will build her using the Glued-Lap method. I will use light ribbands to determine the plank lines. In the book, the plans have suggested plank widths at three of the stations.

Herreshoff Pram build

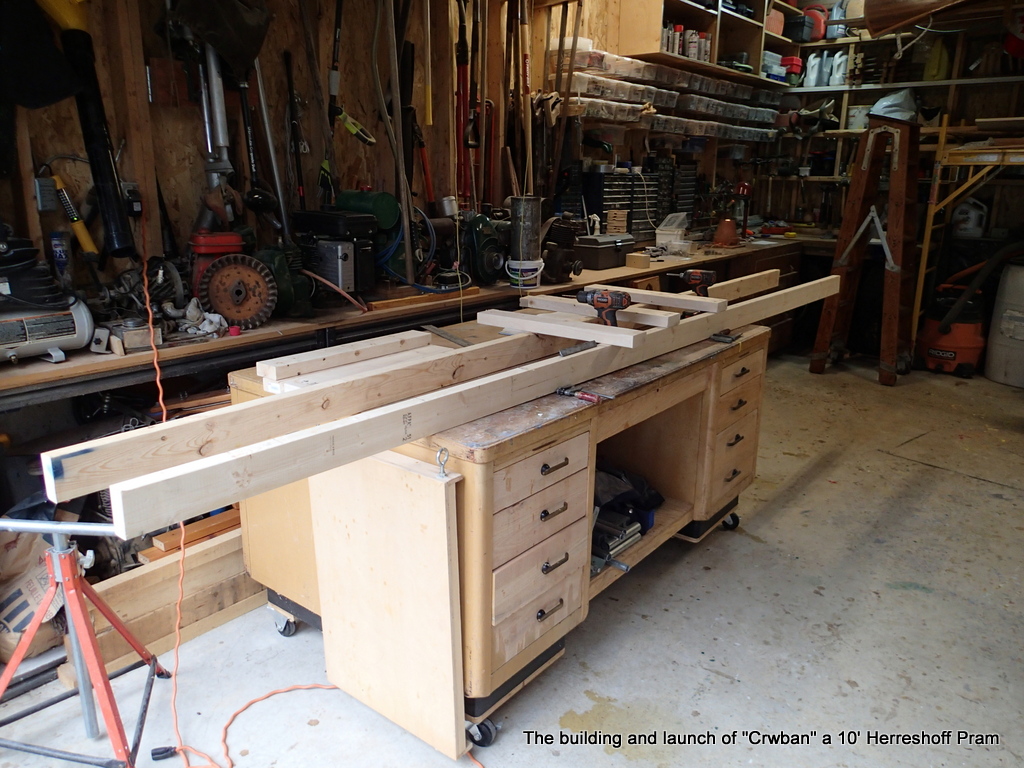
My first step was to build a building frame for the station molds. I picked through a lot of 2 by 4s to get two relatively straight ones.

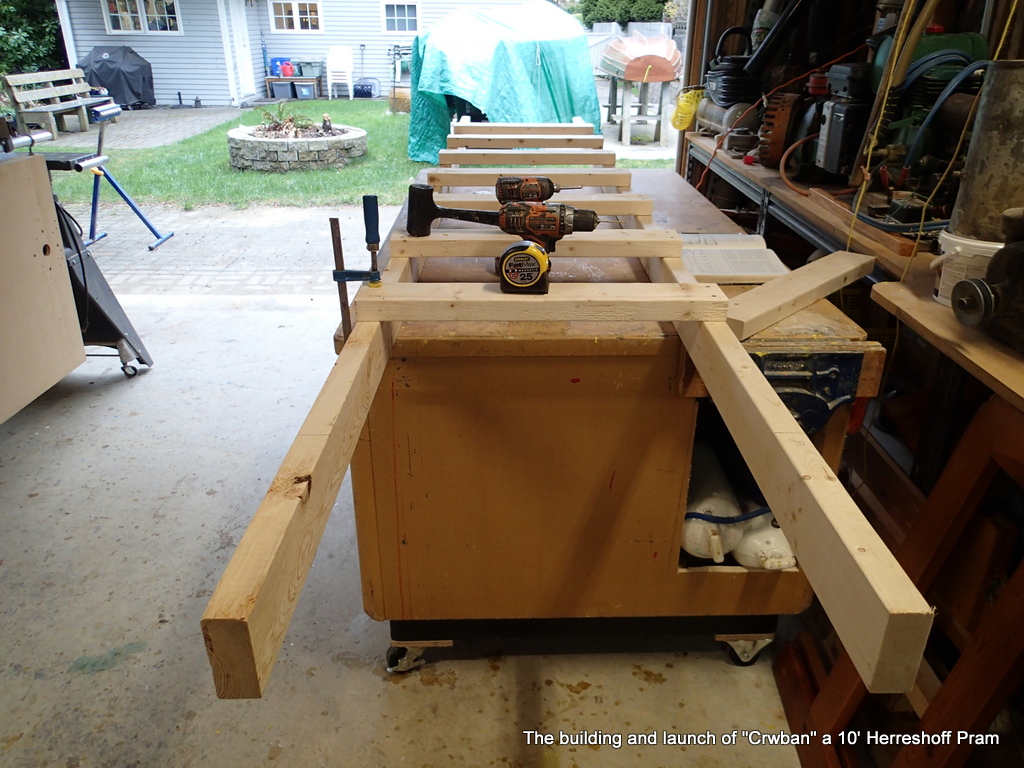
A crosspiece for each station mold. Trying to keep the base as “square” as possible.

Herreshoff Pram build

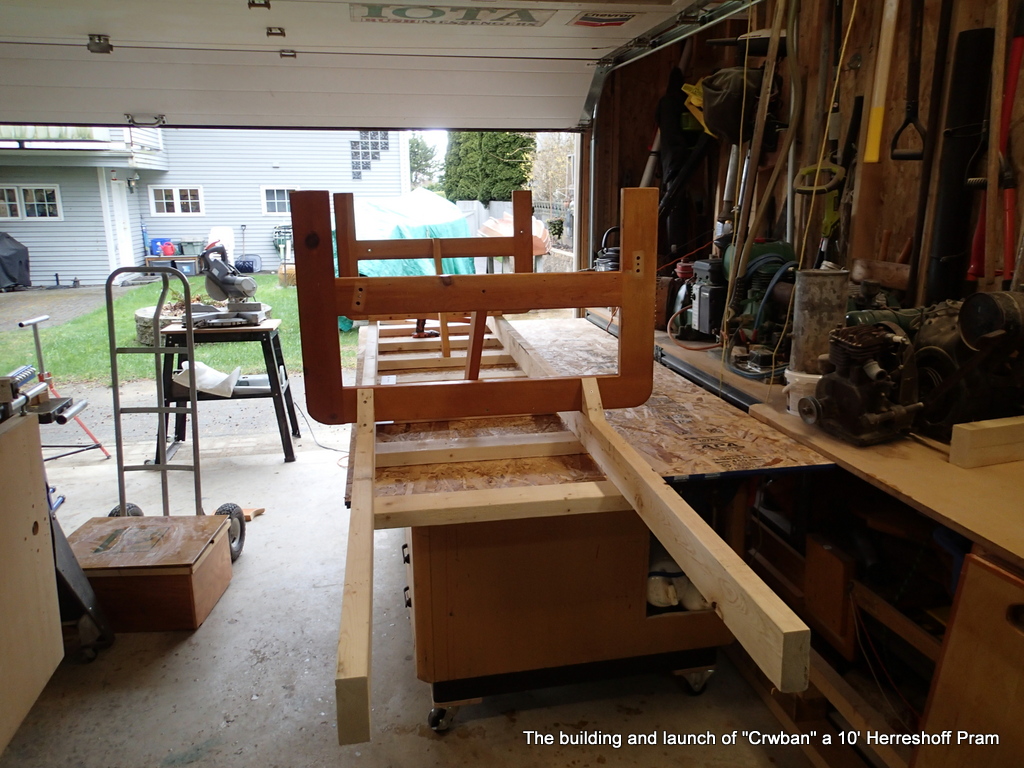
The legs for the base are repurposed pieces from a futon frame.

Herreshoff Pram build

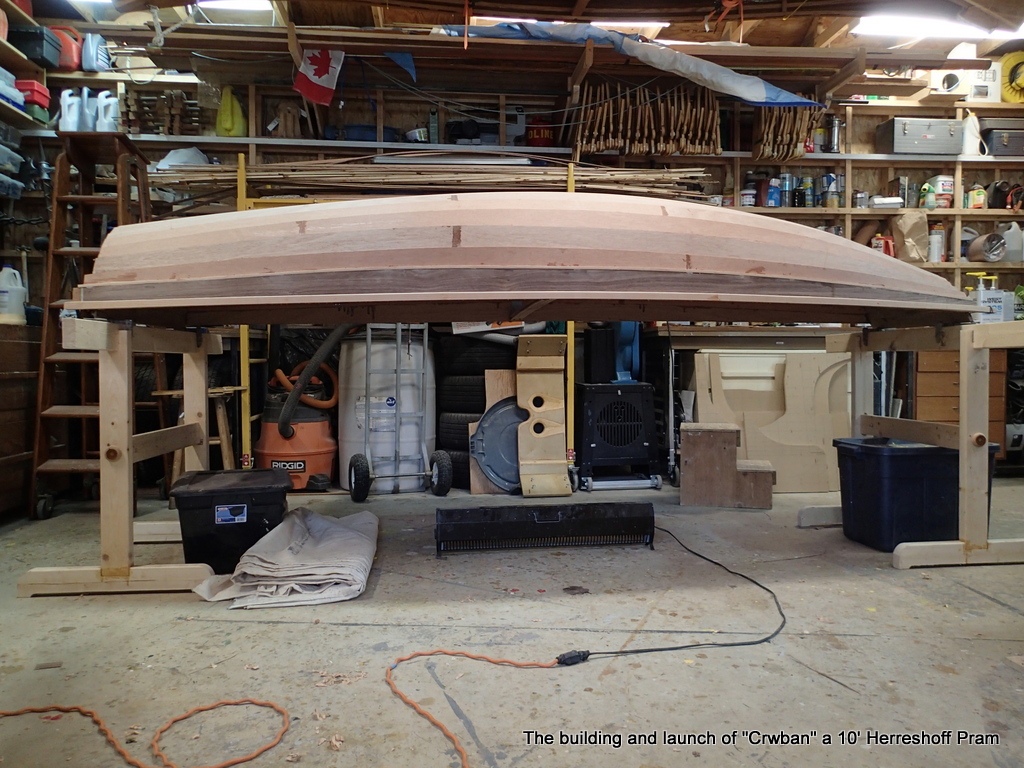
The building frame is complete and as “square” as I can make it.

Laying out the station molds

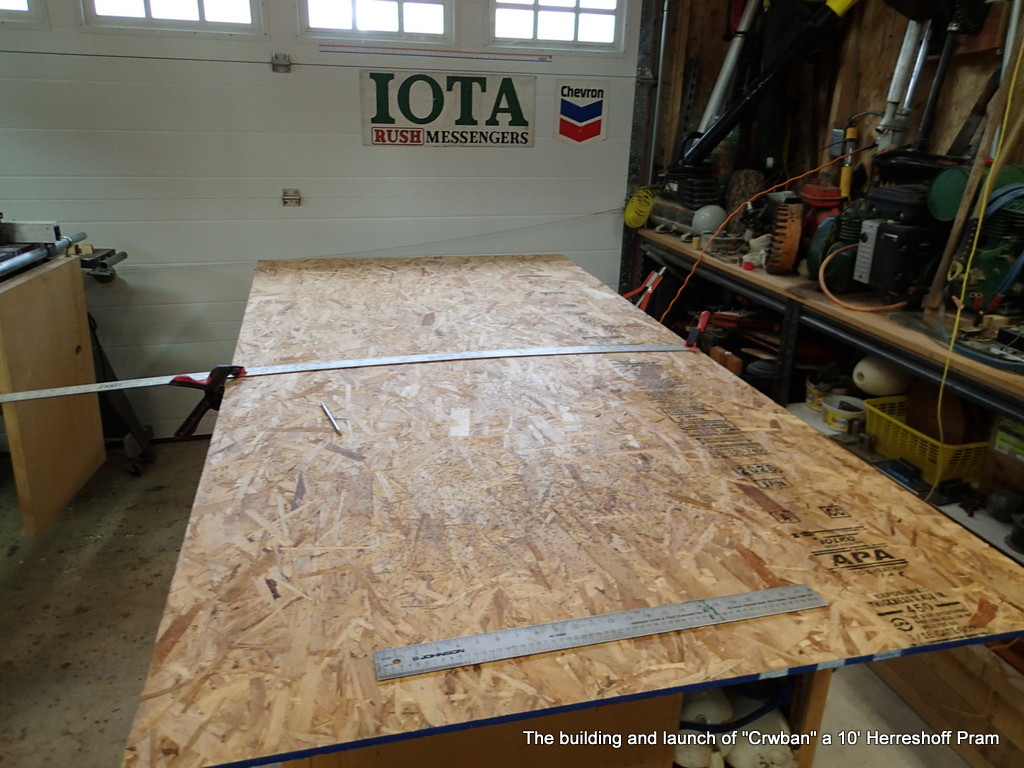
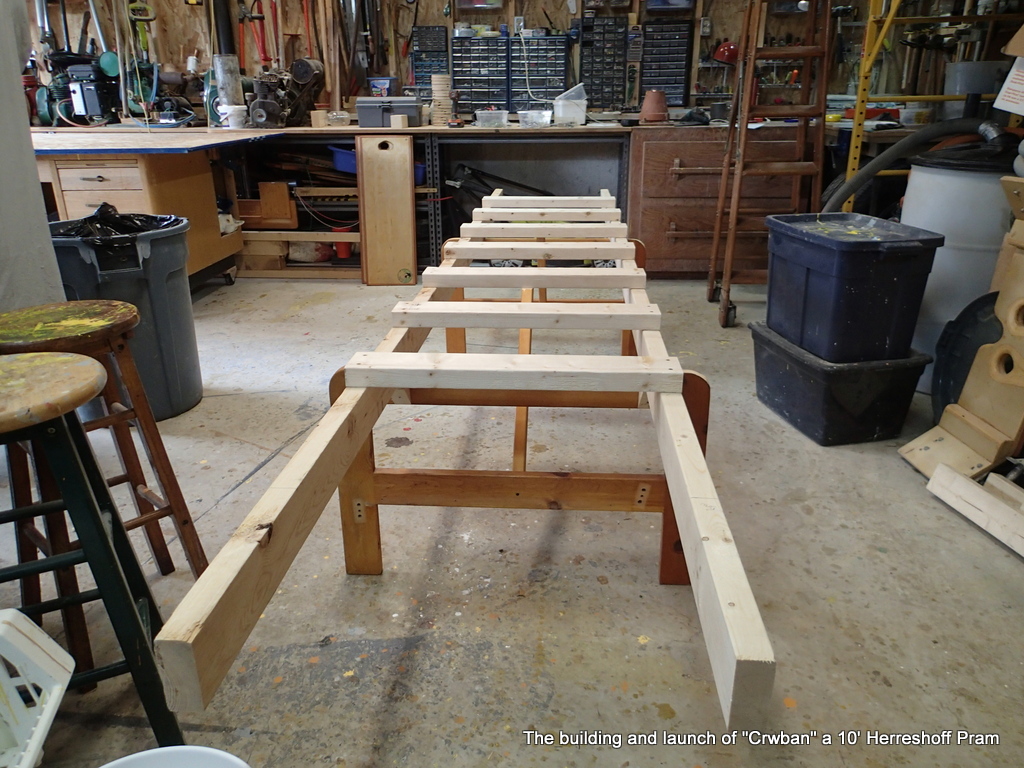
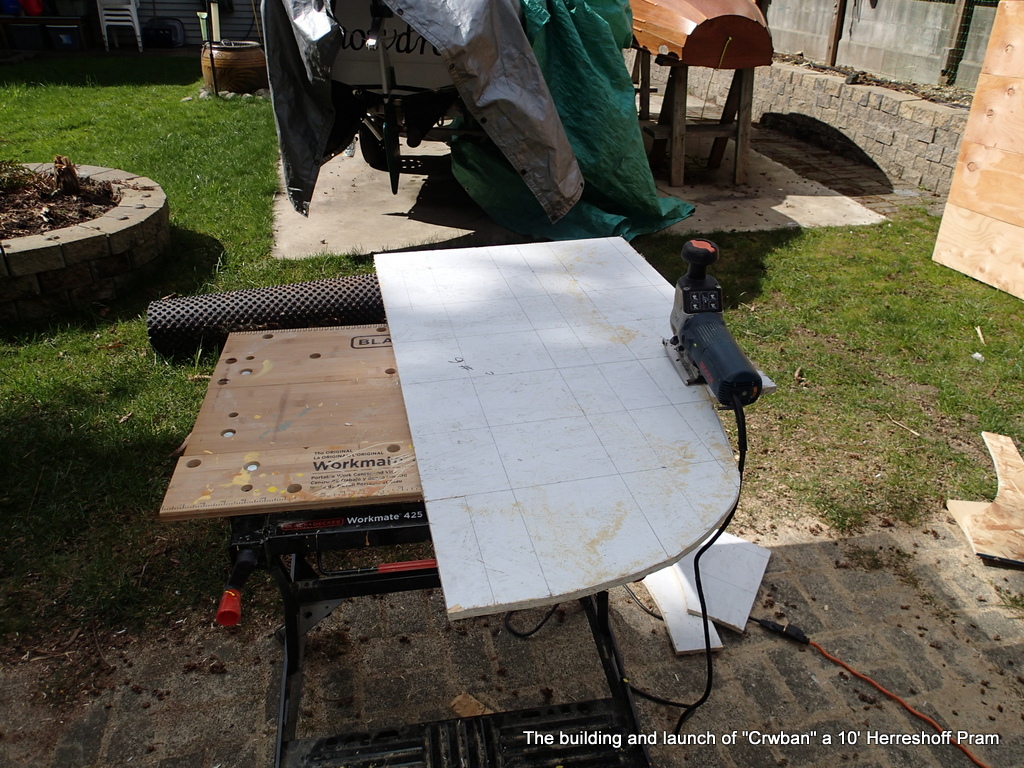
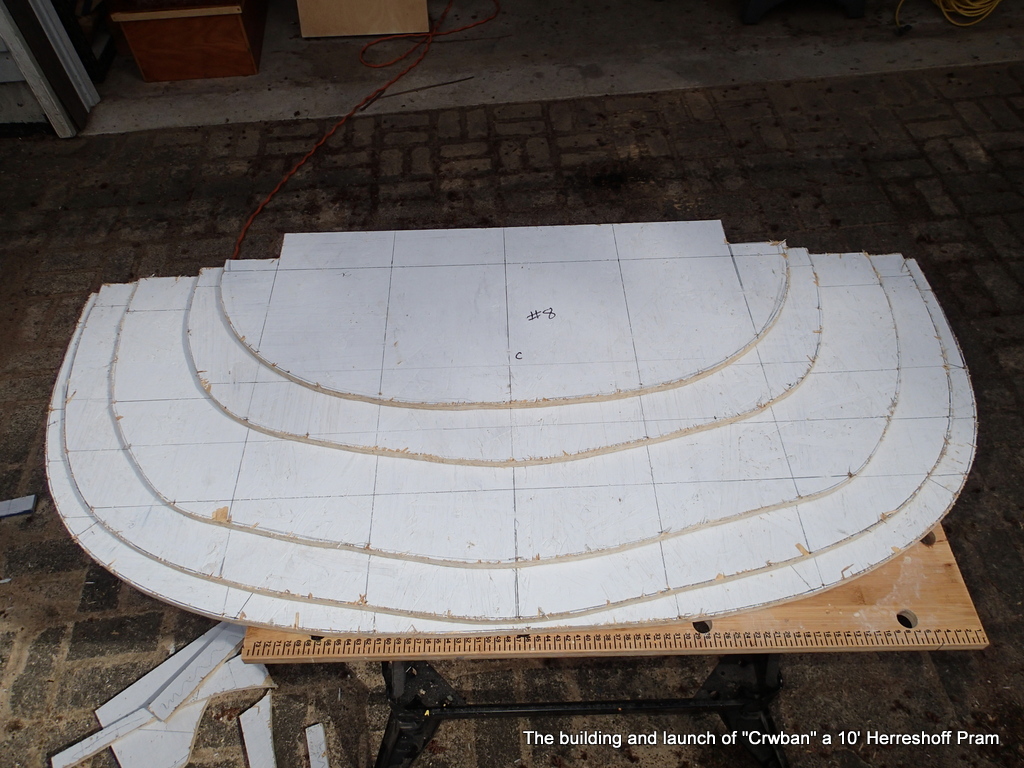
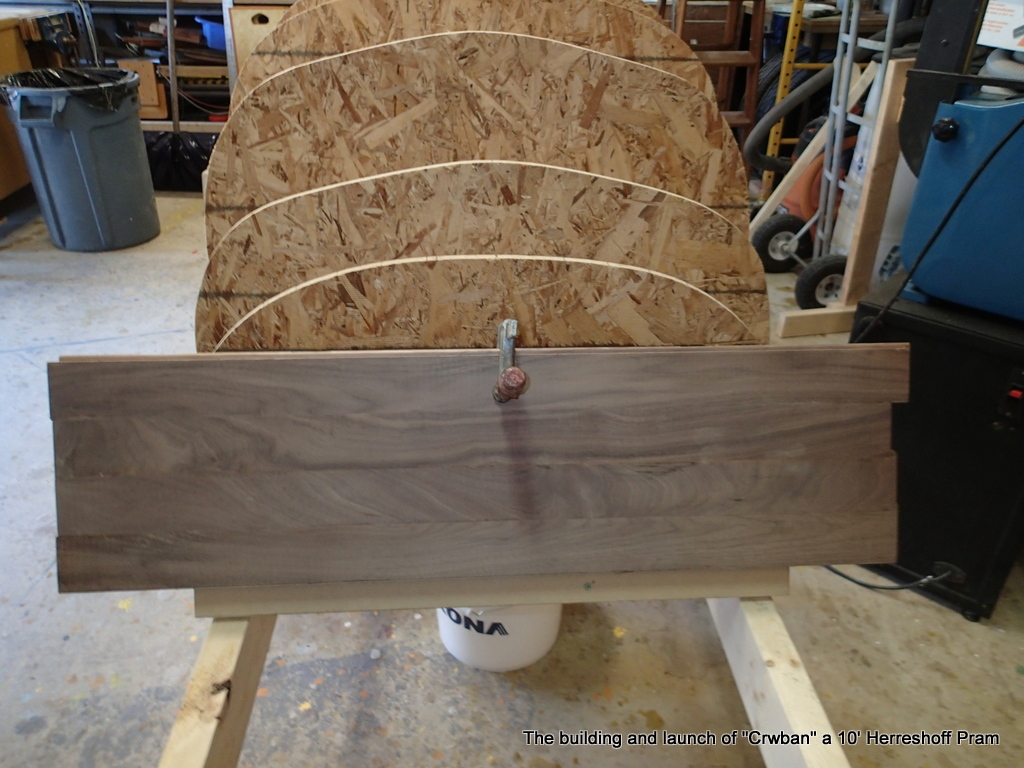
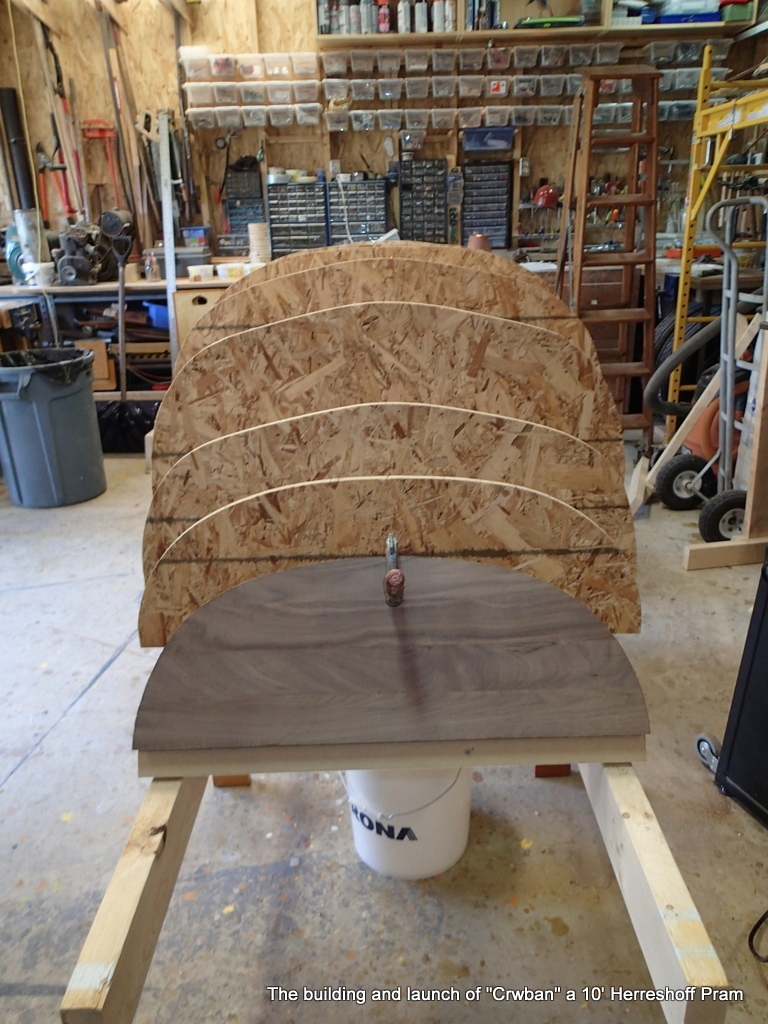
I have gotten a deal on some chipboard. I am laying the molds out on them. I am cutting the chipboards down to the mold size.

White shows the pencil lines better

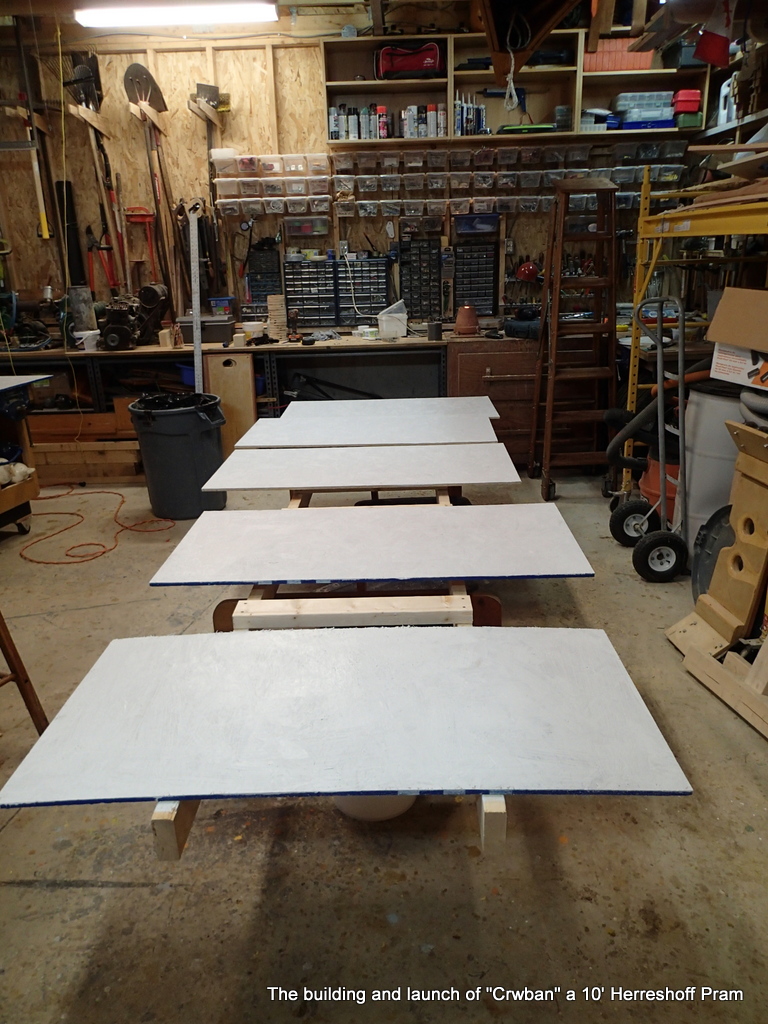
Laying out the molds onto the chipboard is hard, so I paint the boards white so the lines will show better and it is also a better surface to draw on.

Drawing the lines

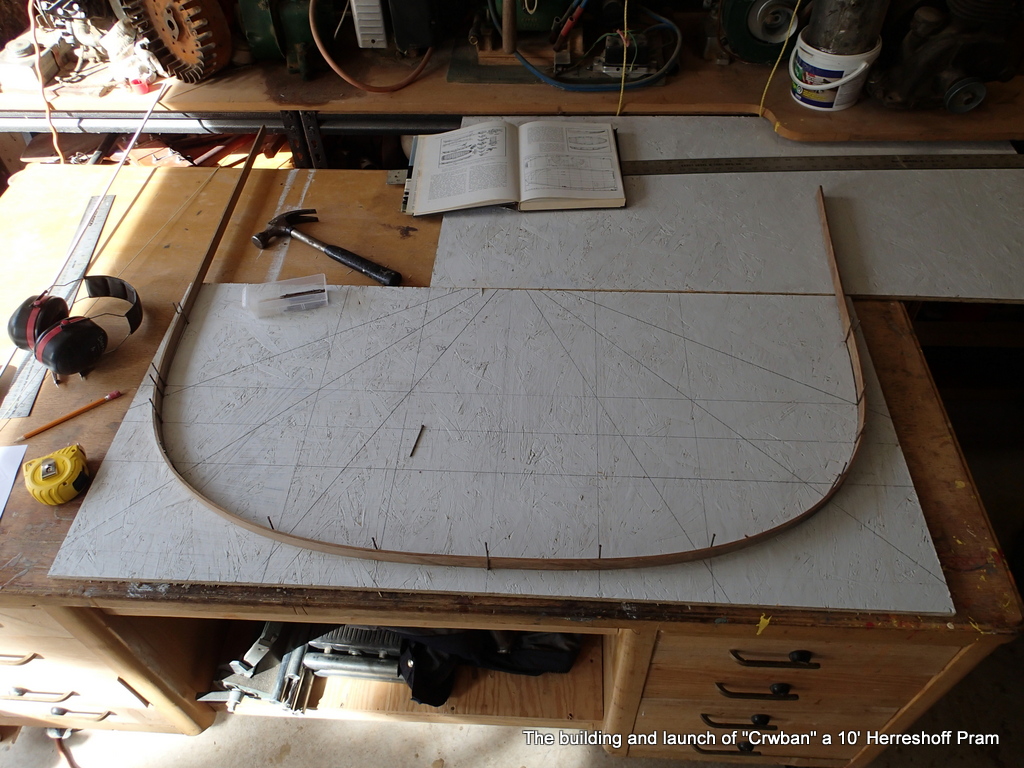
Here I am drawing the lines for the mold. I am using a flexible piece of oak strip to draw the outside mold line. I will be building the boat upside down and have adjusted all of the measurements for this.

Bow transom glue-up

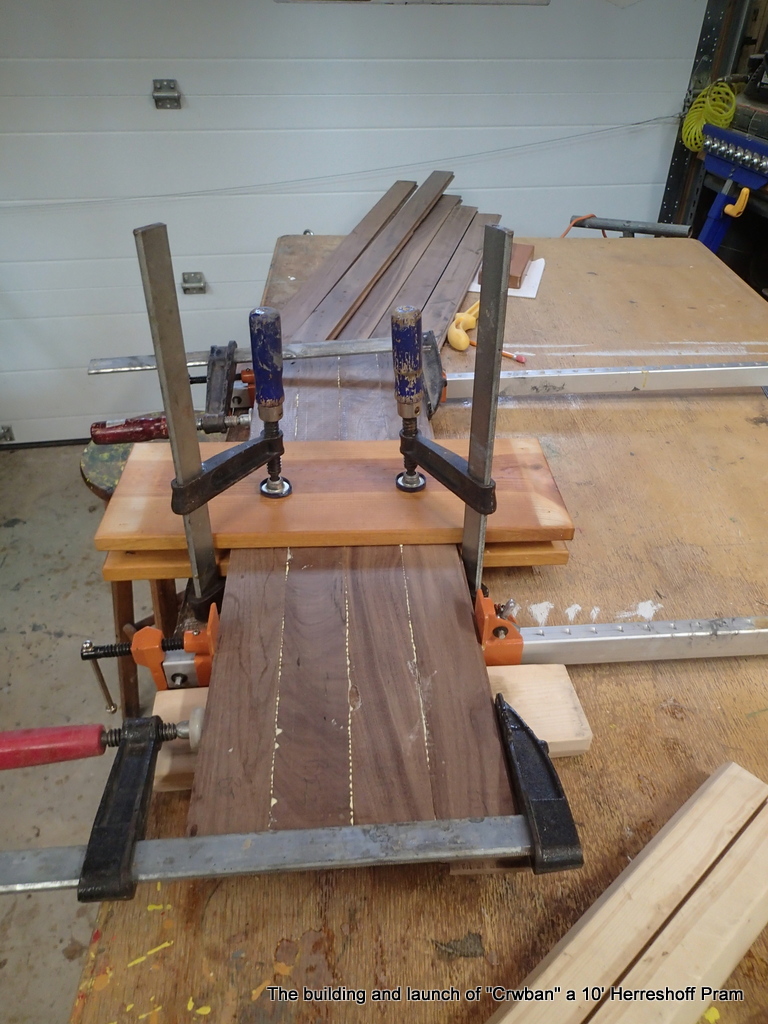
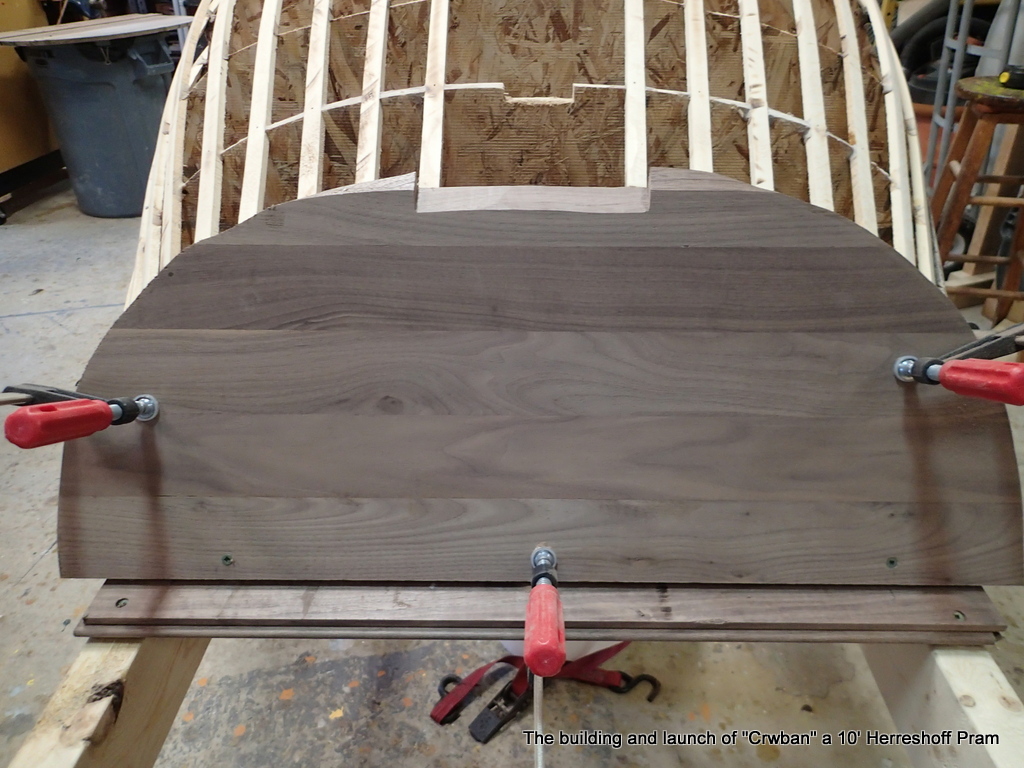
I recently acquired some walnut flooring. I mill the flooring pieces and glue them together getting a 1/2″+ bow and stern transom.

Stern transom glue-up

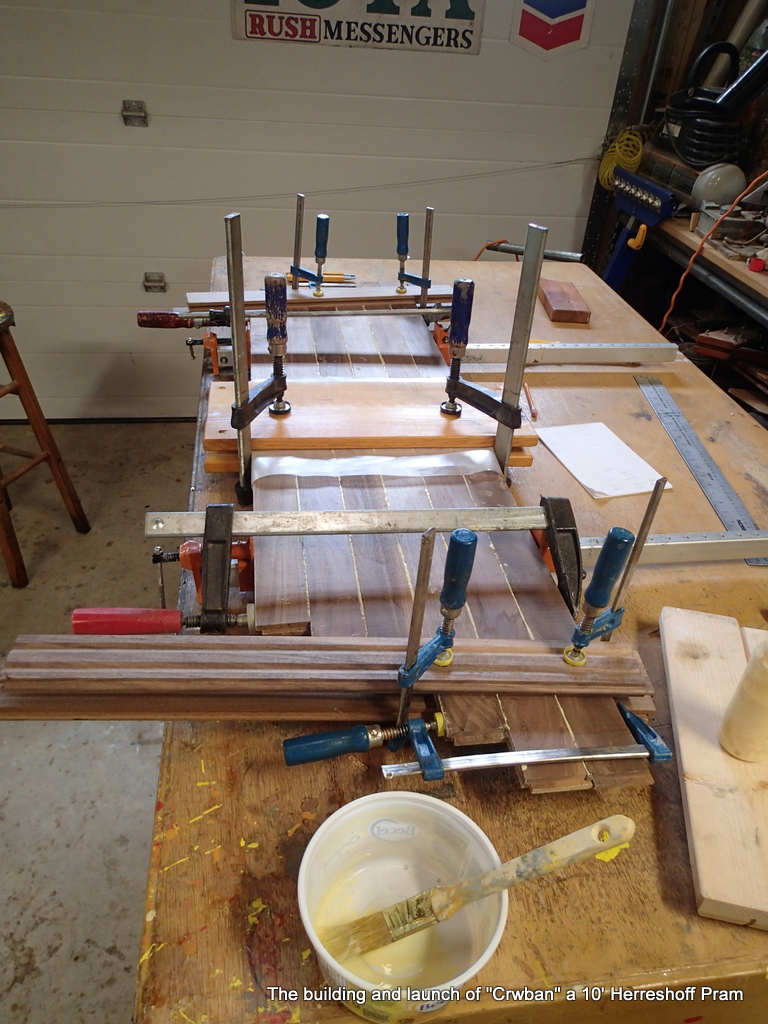
I am using Titebond II to glue-up the transoms.

Cutting out the station molds

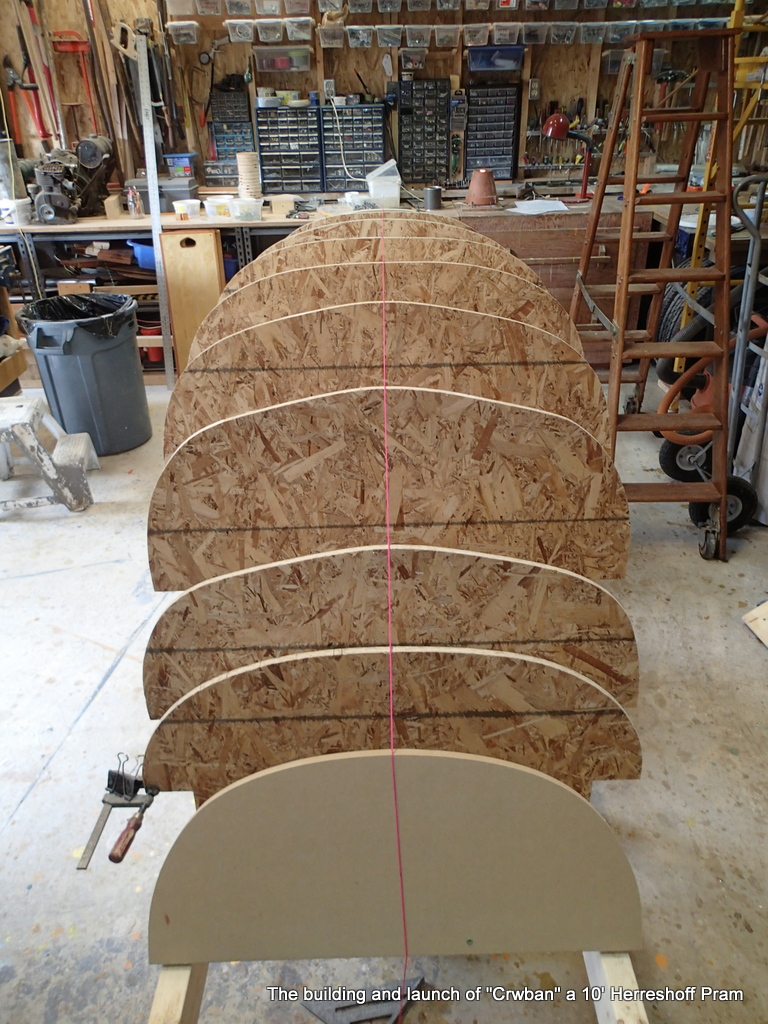
I cut all of the station molds out using my jig saw.

Rough cut on the molds

With the molds rough-cut out, I will use my disk sander to fair the curves.

Fairing the curve on the bow transom template

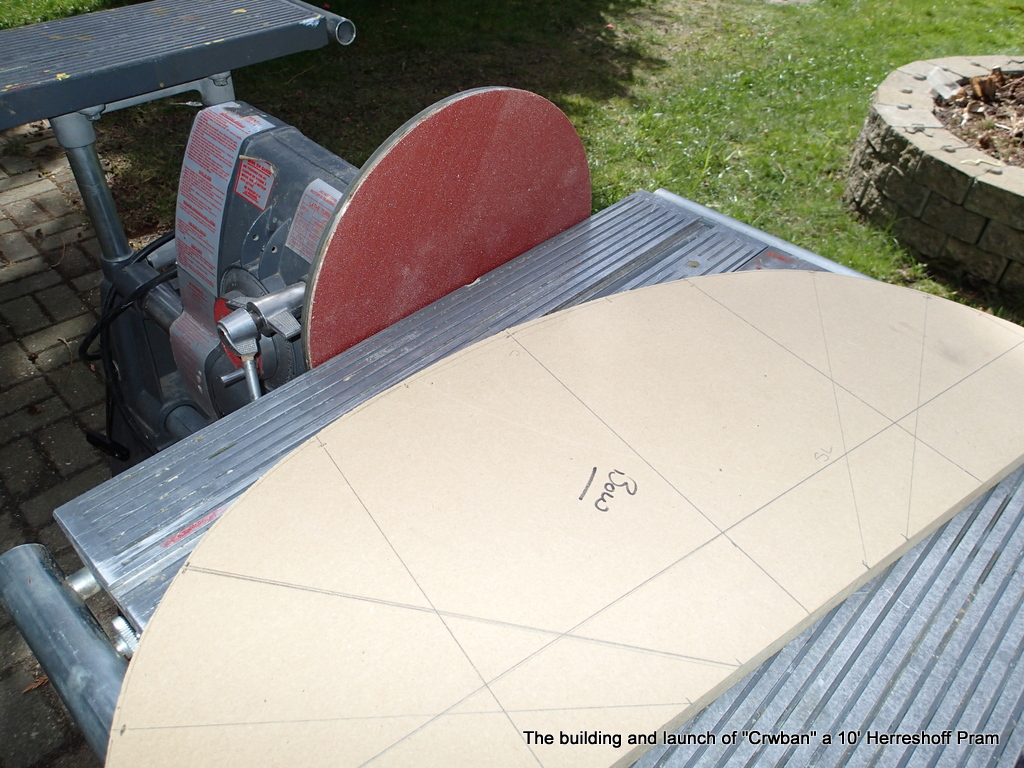
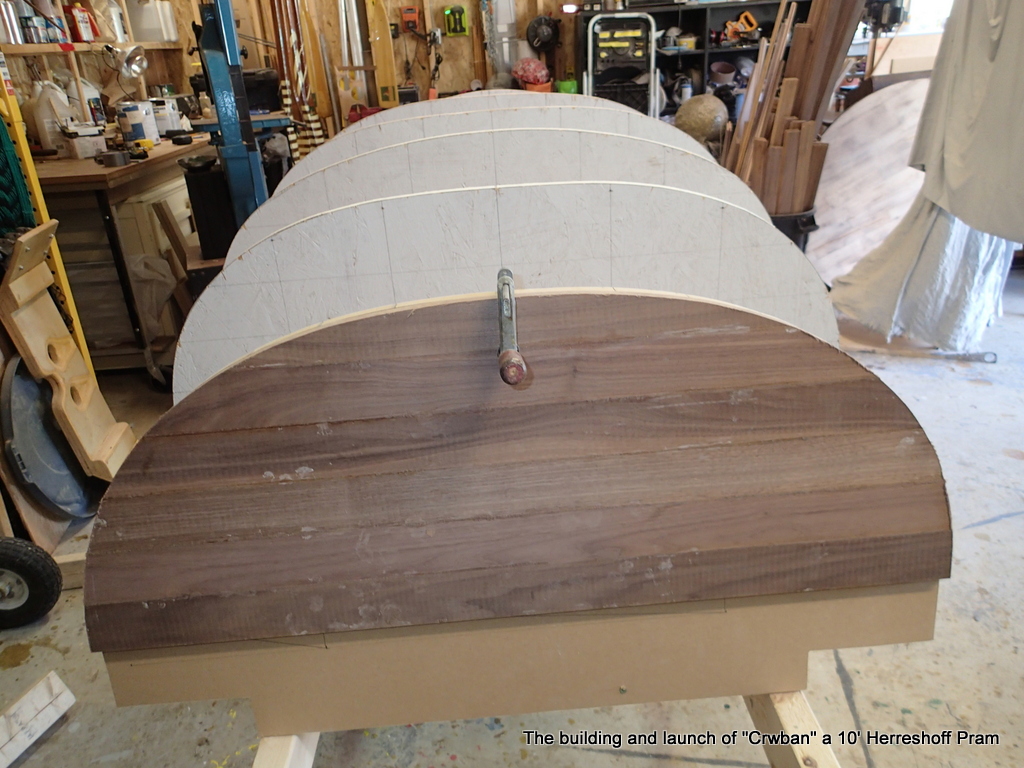
I sand the molds and the bow and stern templates to get a fair and even curve.

Setting up the station mold and the bow and stern transom templates.

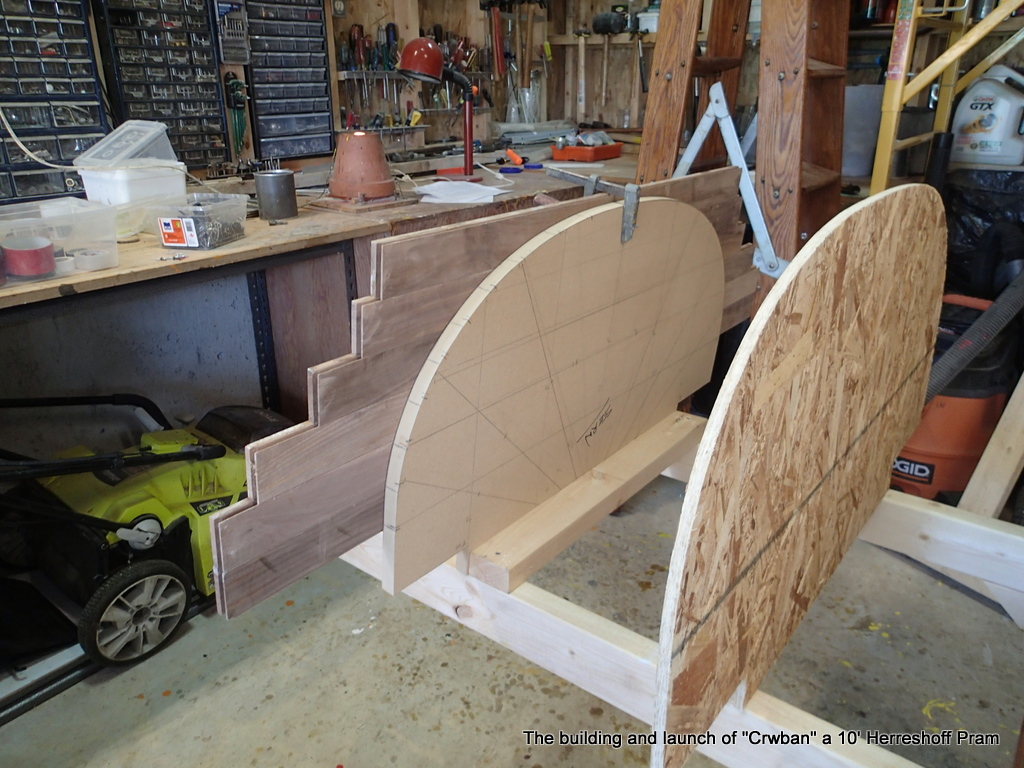
This is the most finically part of the process. The pieces are held in by screws to the cross members. I can adjust the height and sideways placement until all the marks line up. I then clamp everything up. Double check the alignments, then, screw it all together.

Stern transom

I am fitting the stern transom for a rough cut to shape…Final shaping will be when the planks are laid.

Bow transom rough shaping

Getting everything roughed out and aligned.

Cutting out the transoms

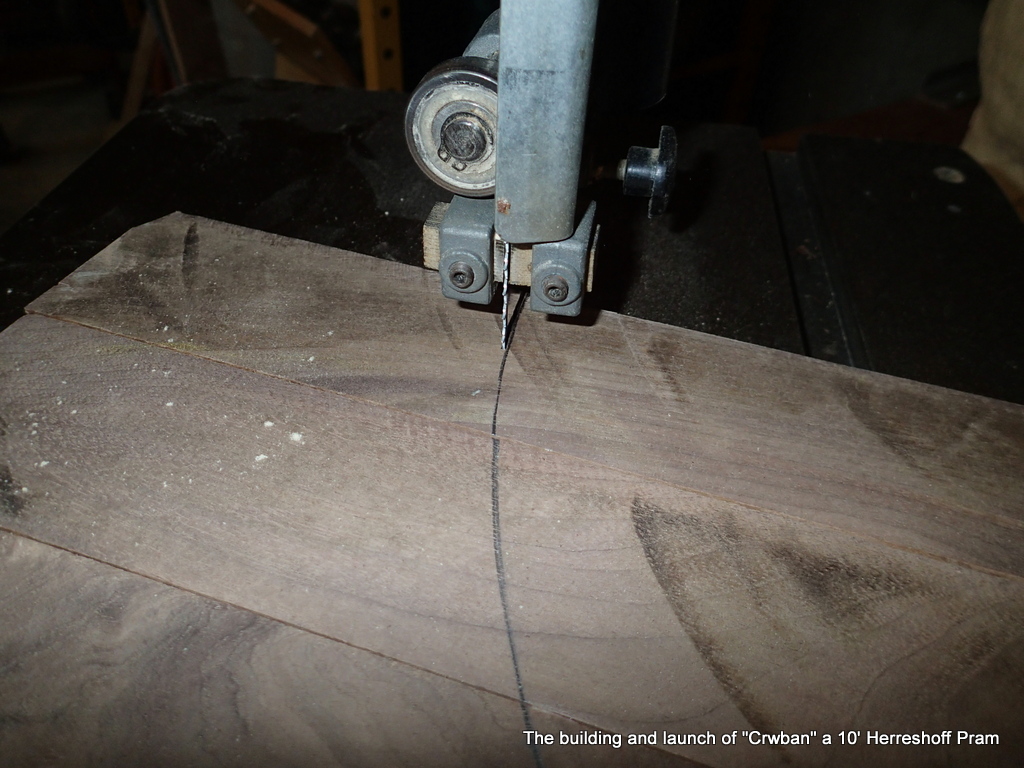
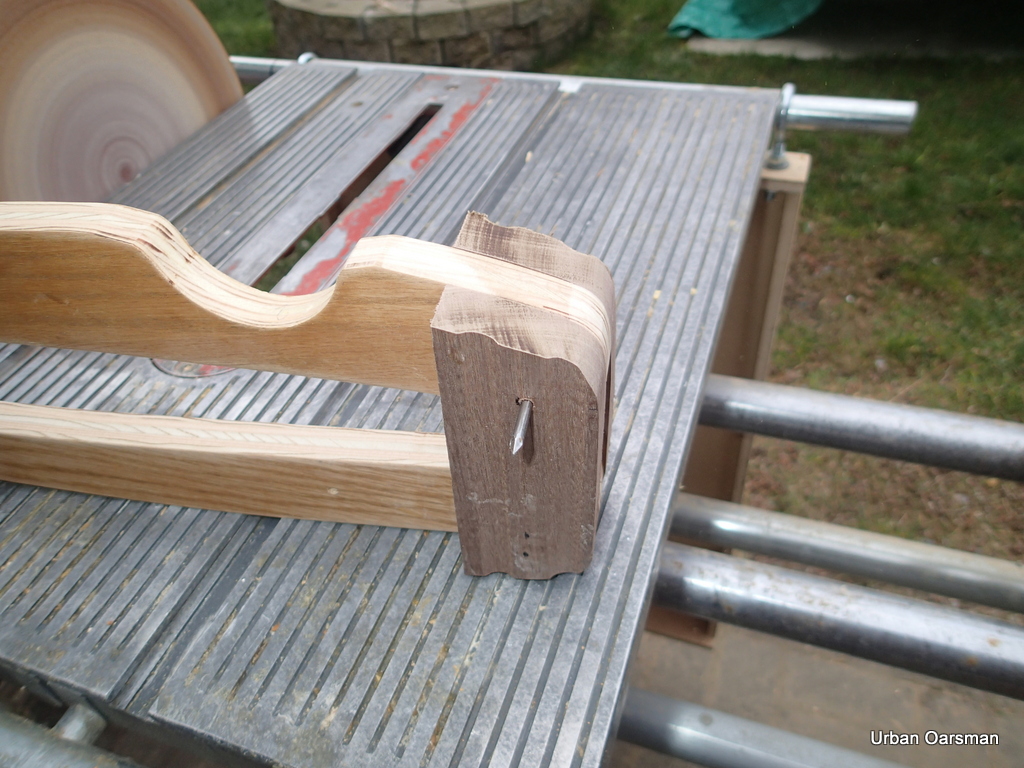
I use my 14″ bandsaw to cut out the transoms.

Bow transom
Stern transom

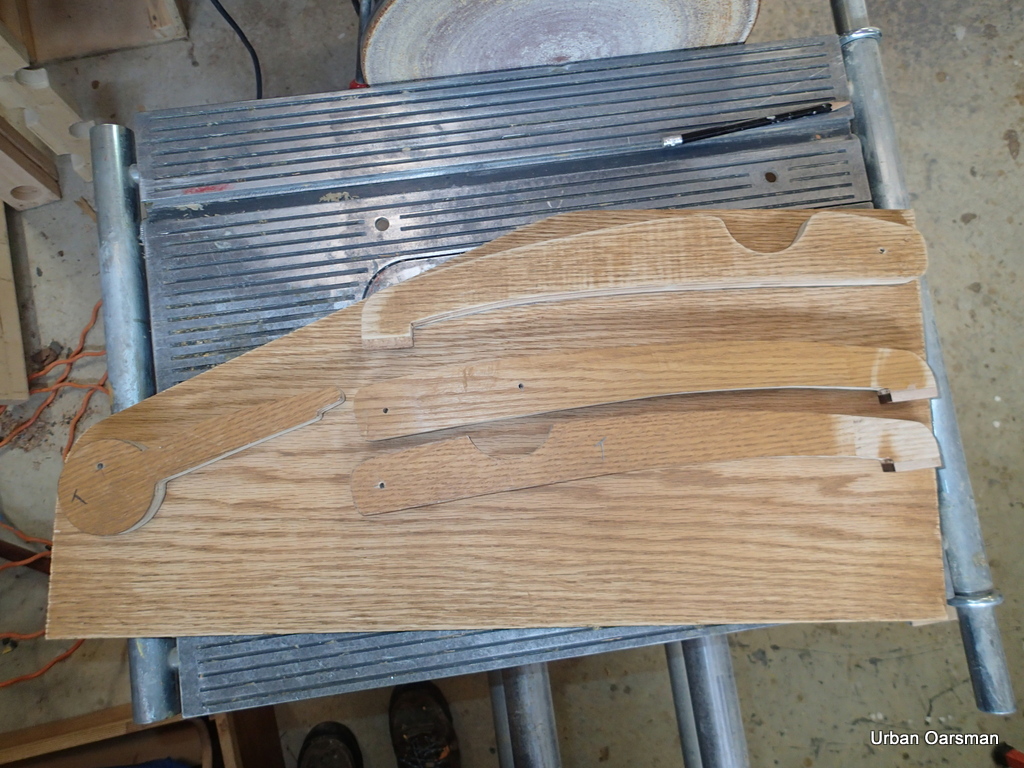
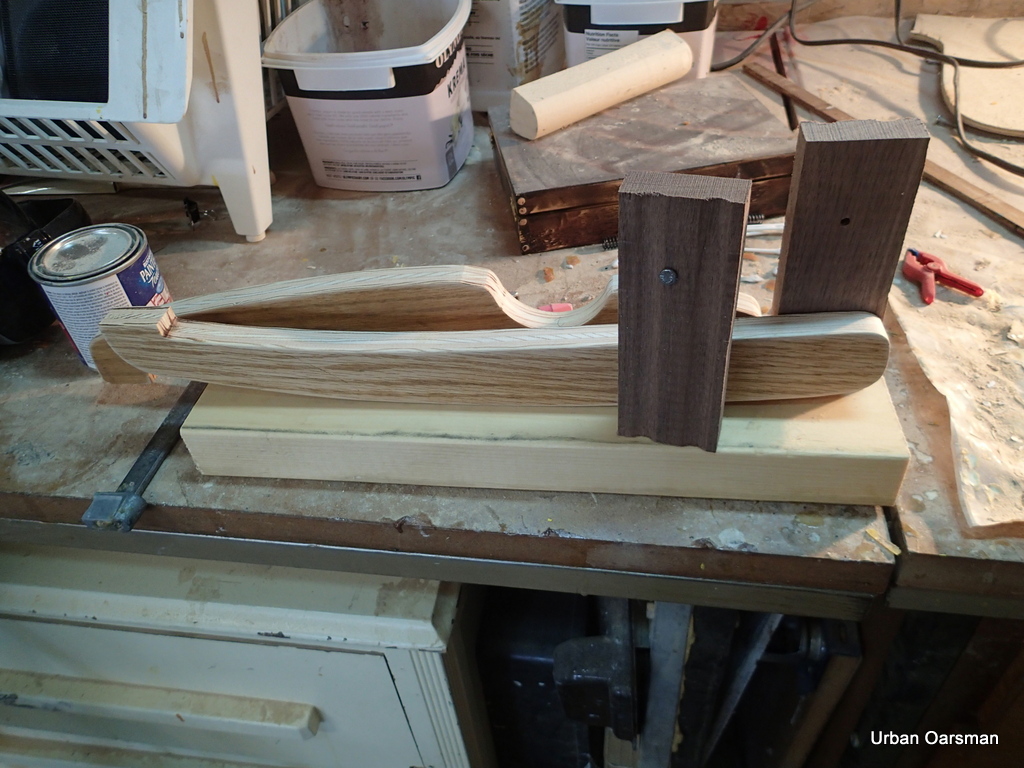
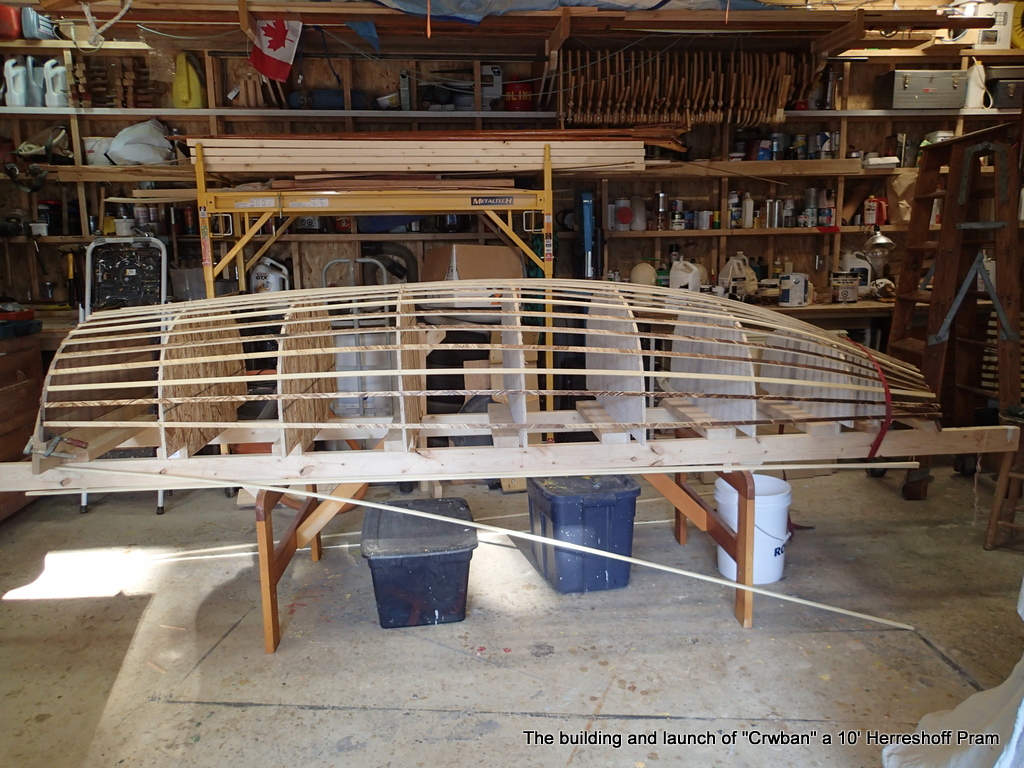
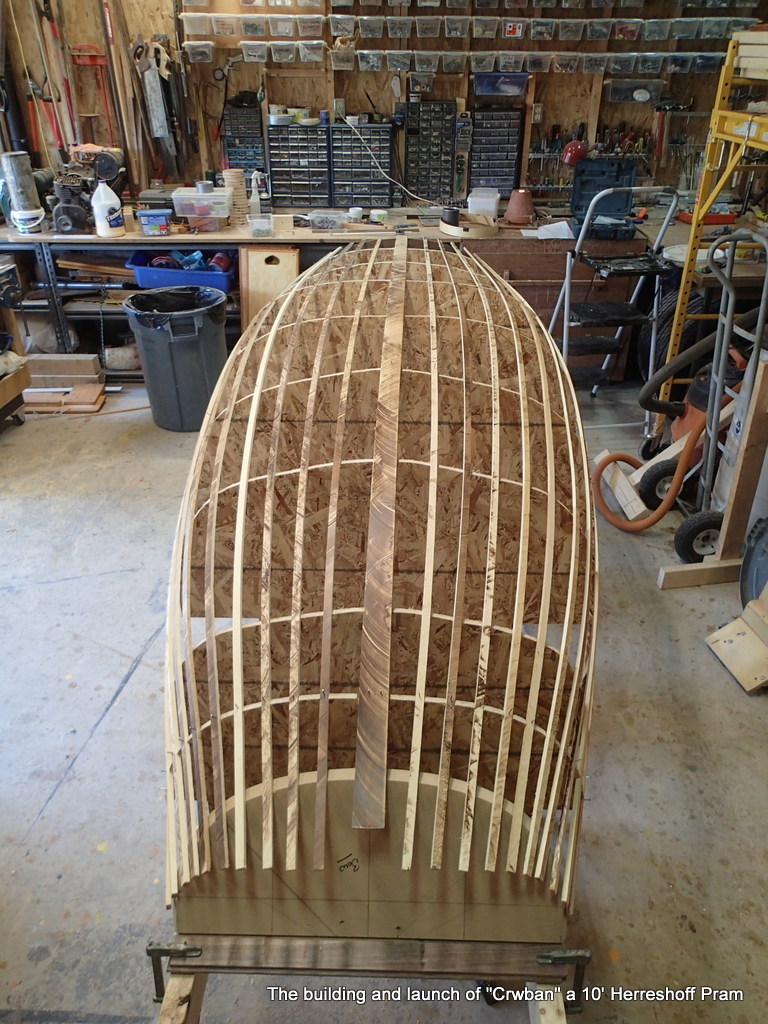
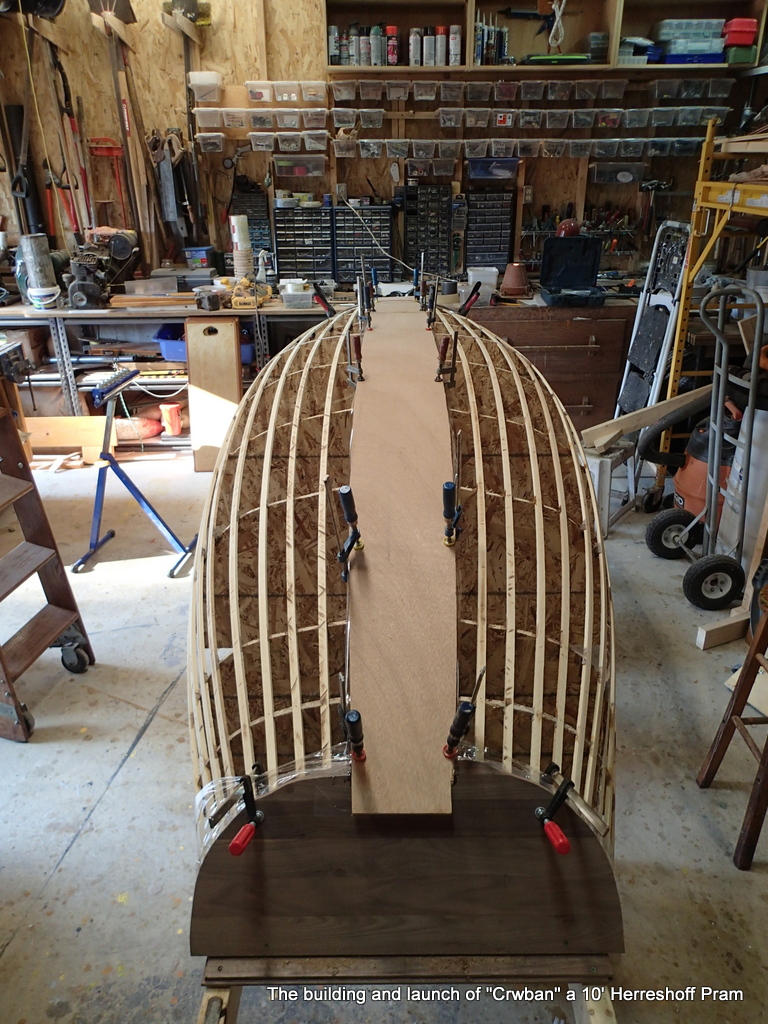
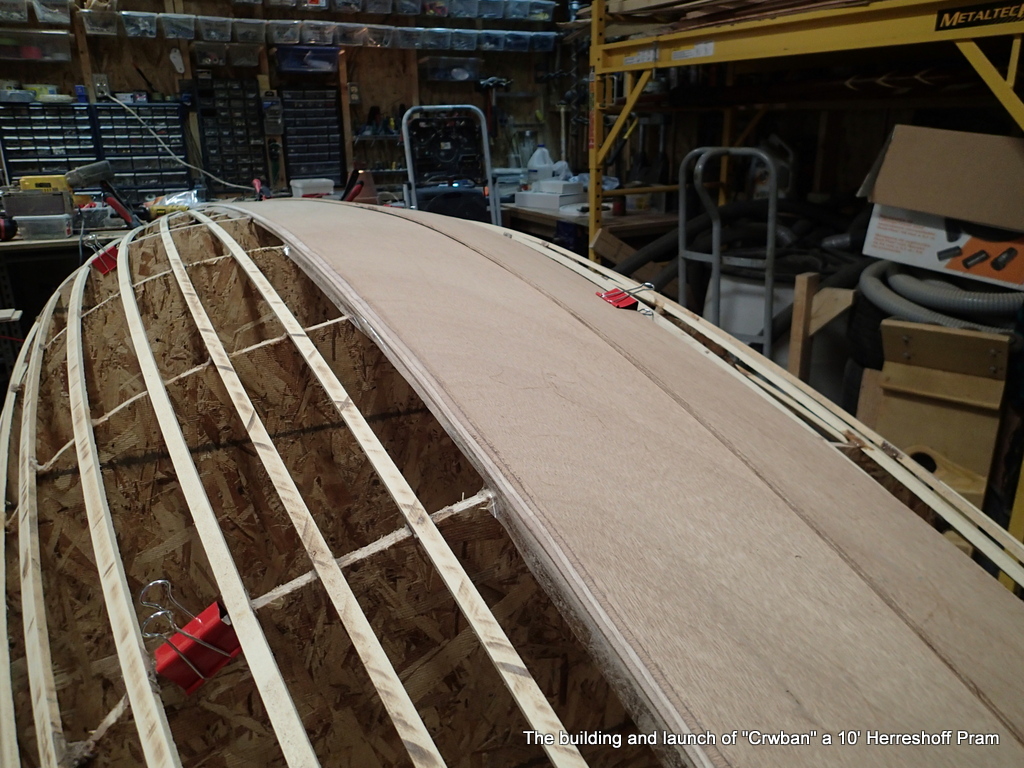
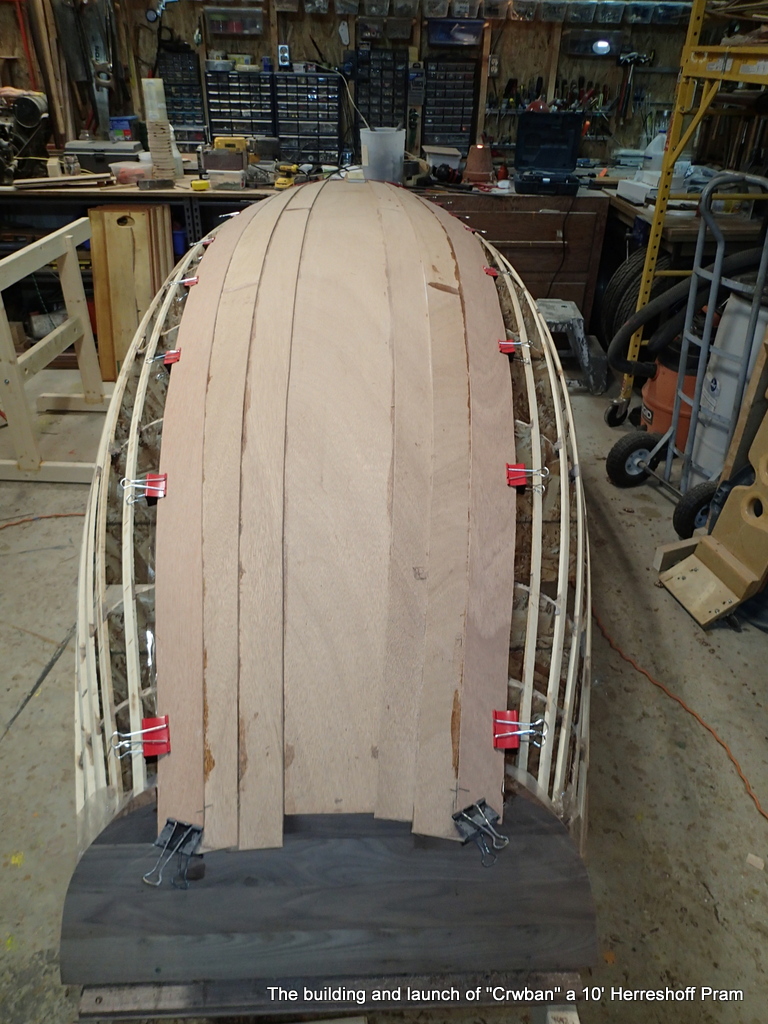
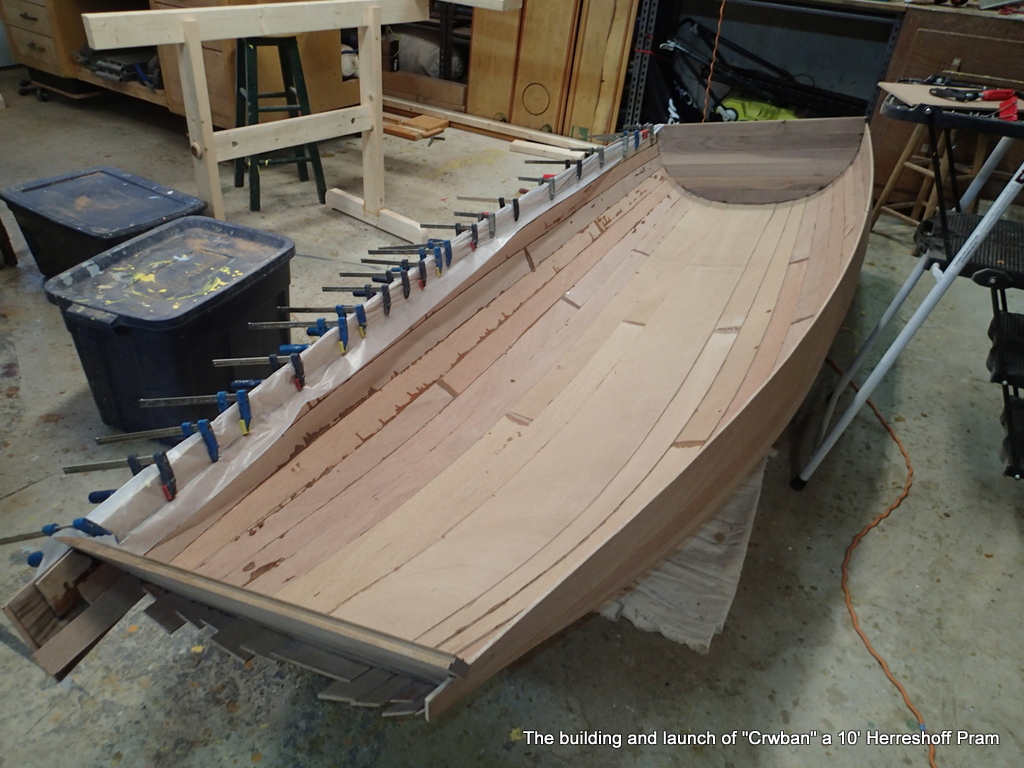
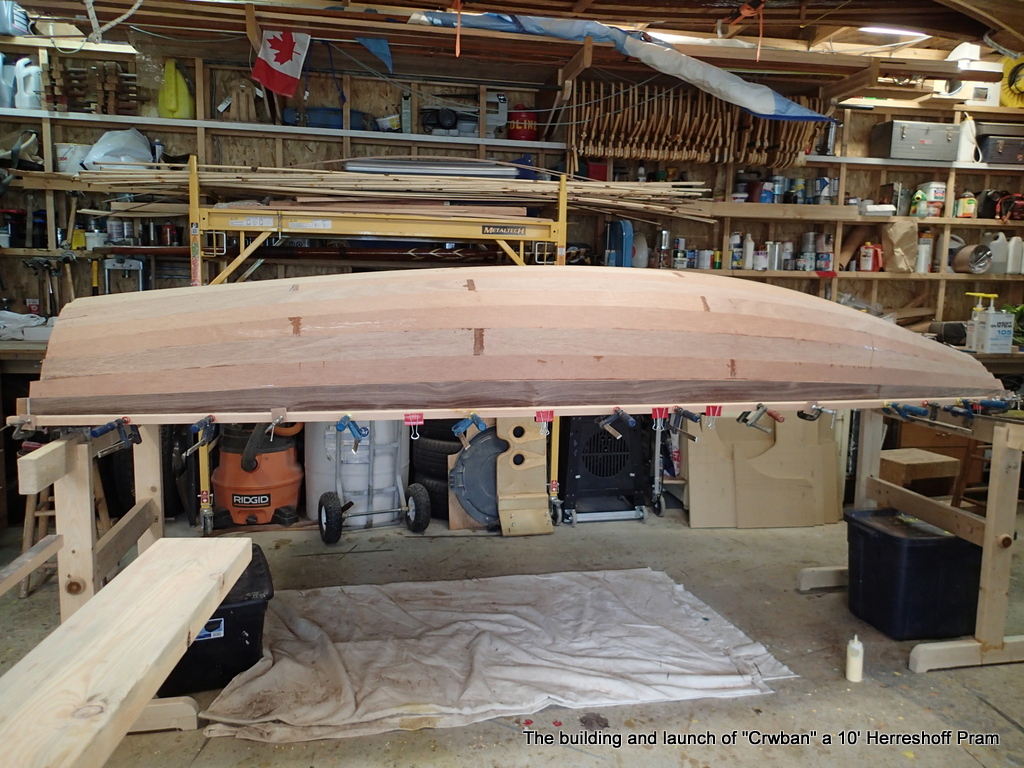
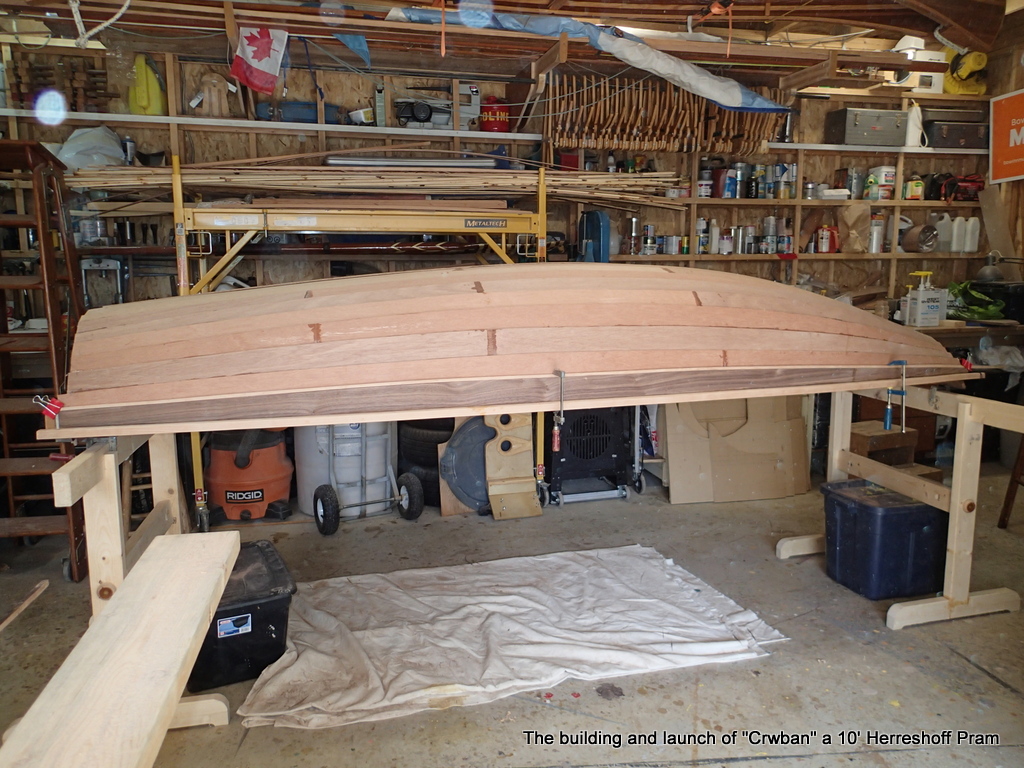
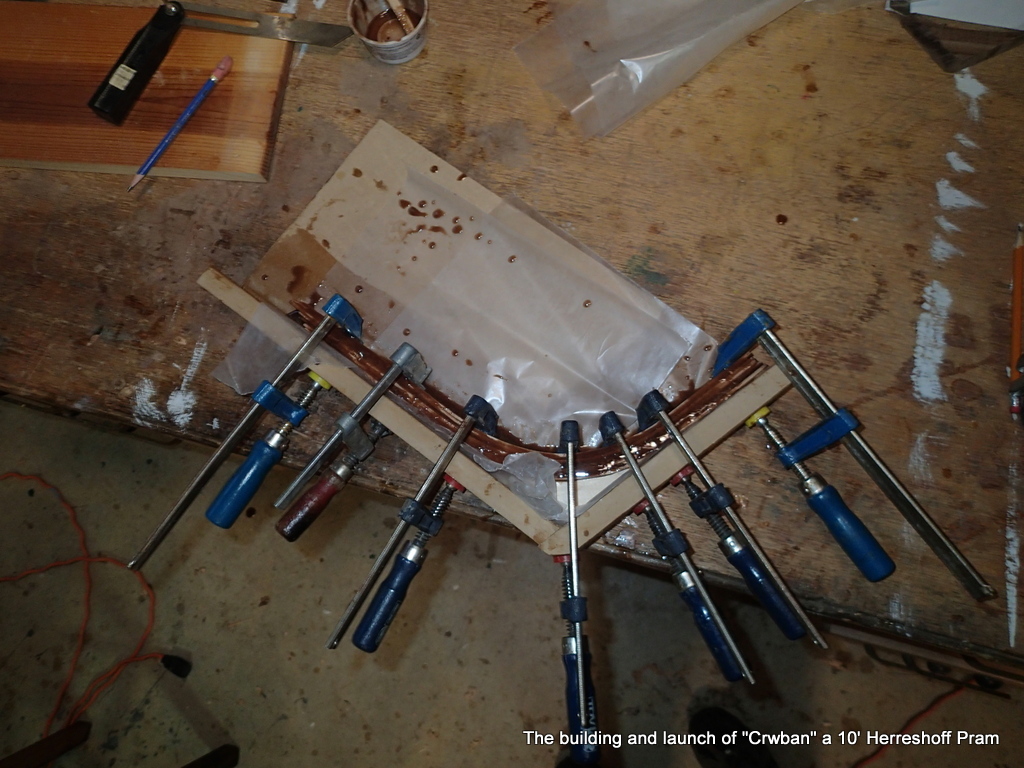
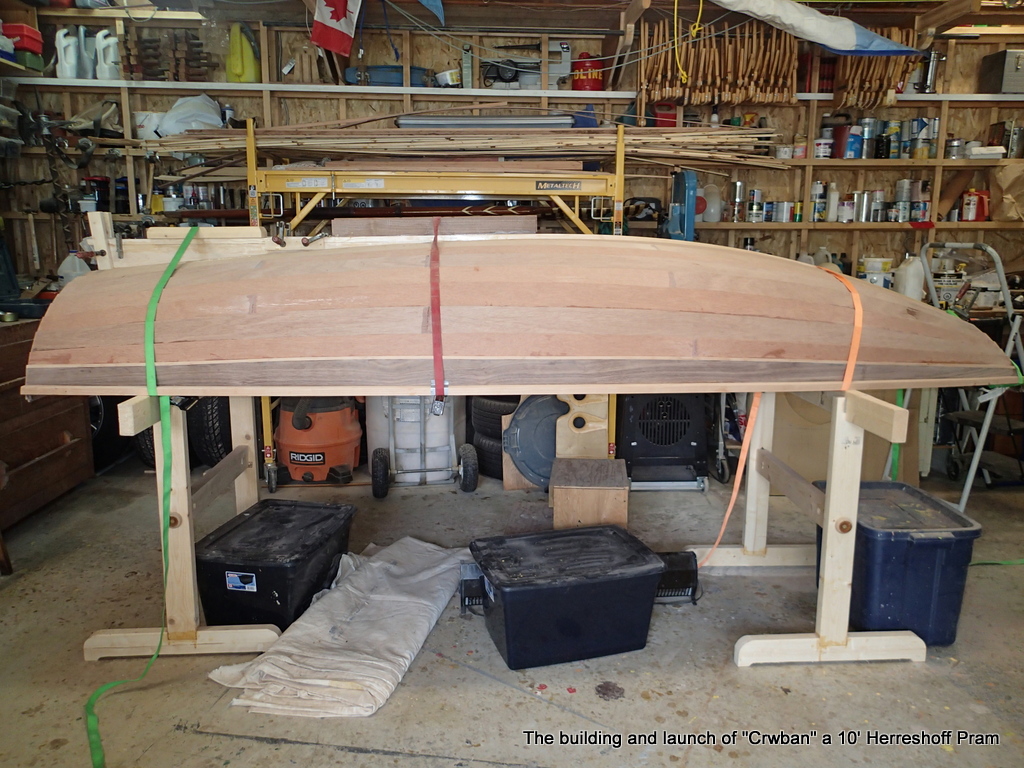
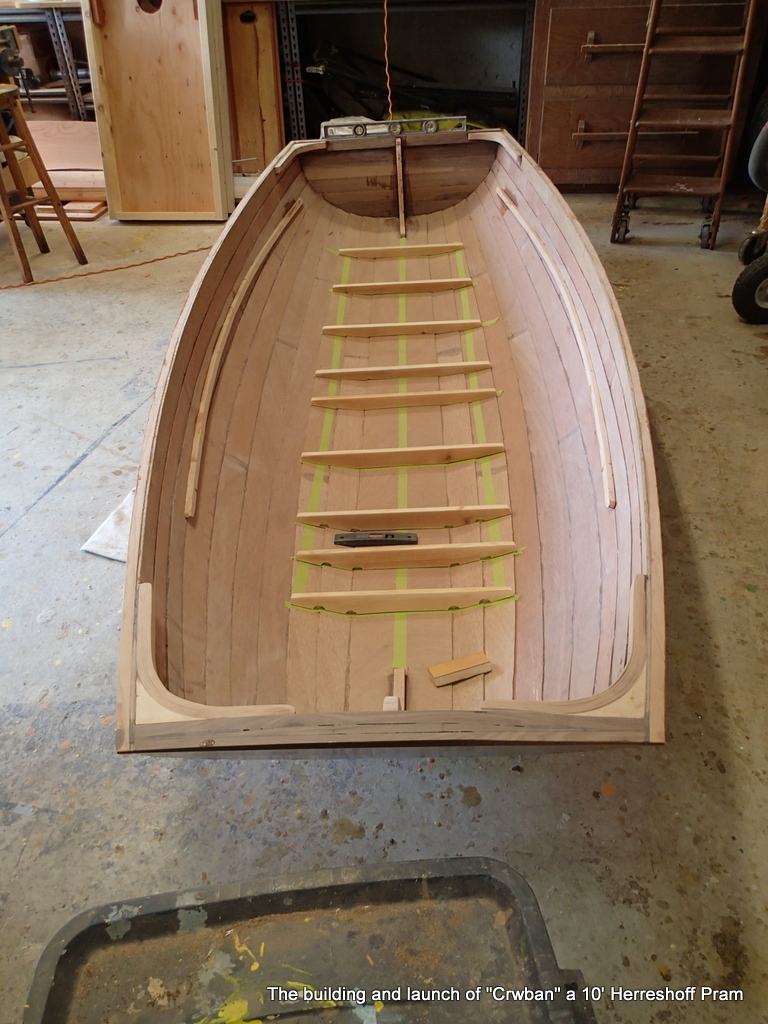
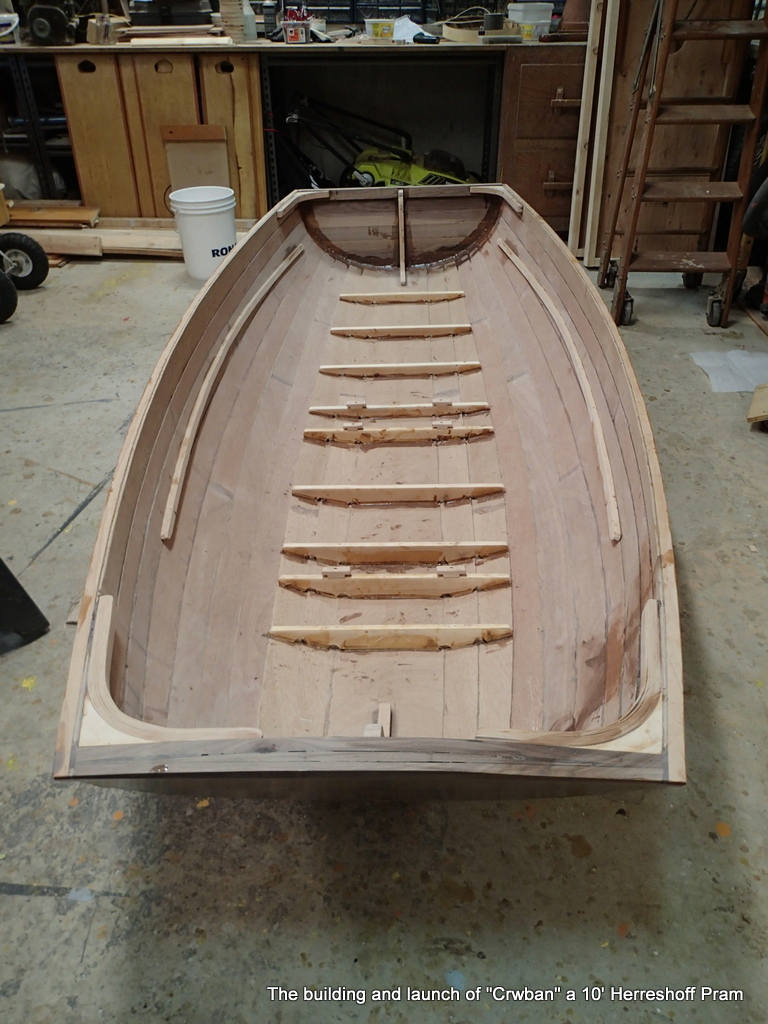
With the transoms roughed out, I begin to put the ribbands on.

Yellow cedar ribbands.

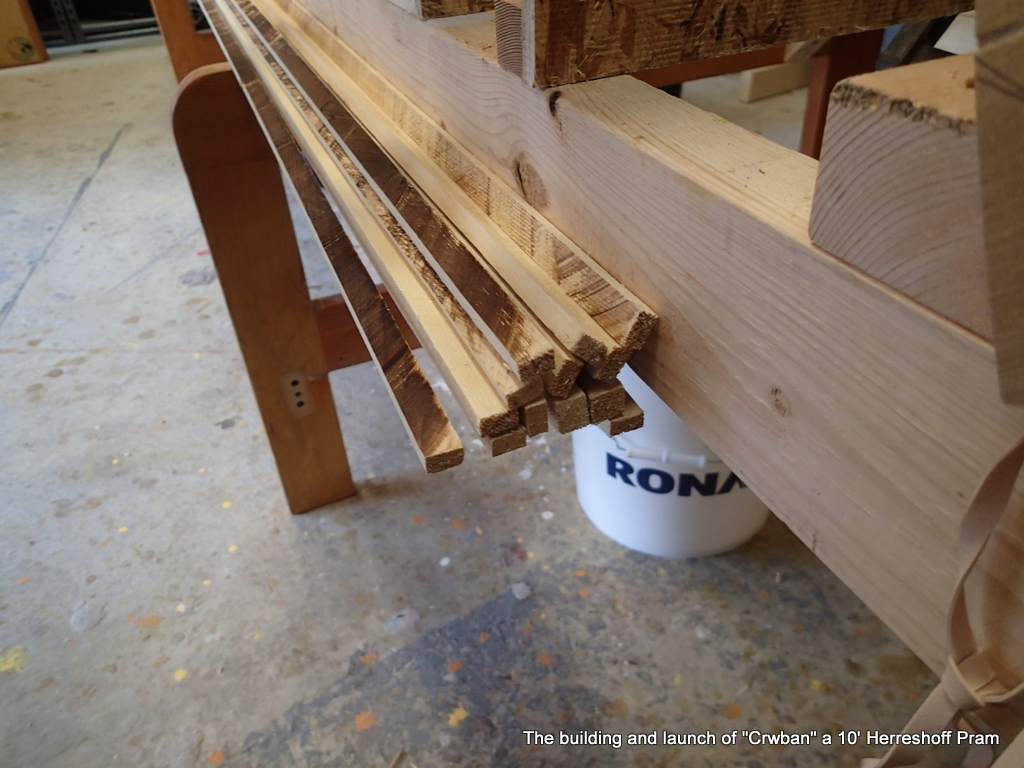
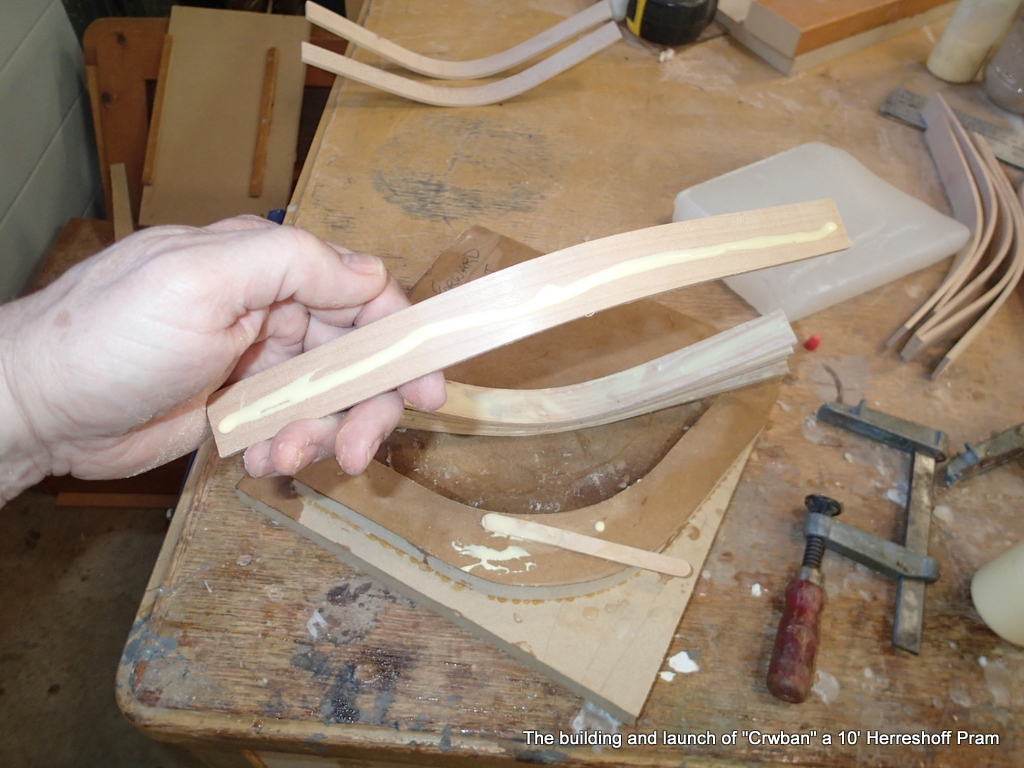
I am going to use the ribbands to determine the plank shapes.

Fitting the ribbands.

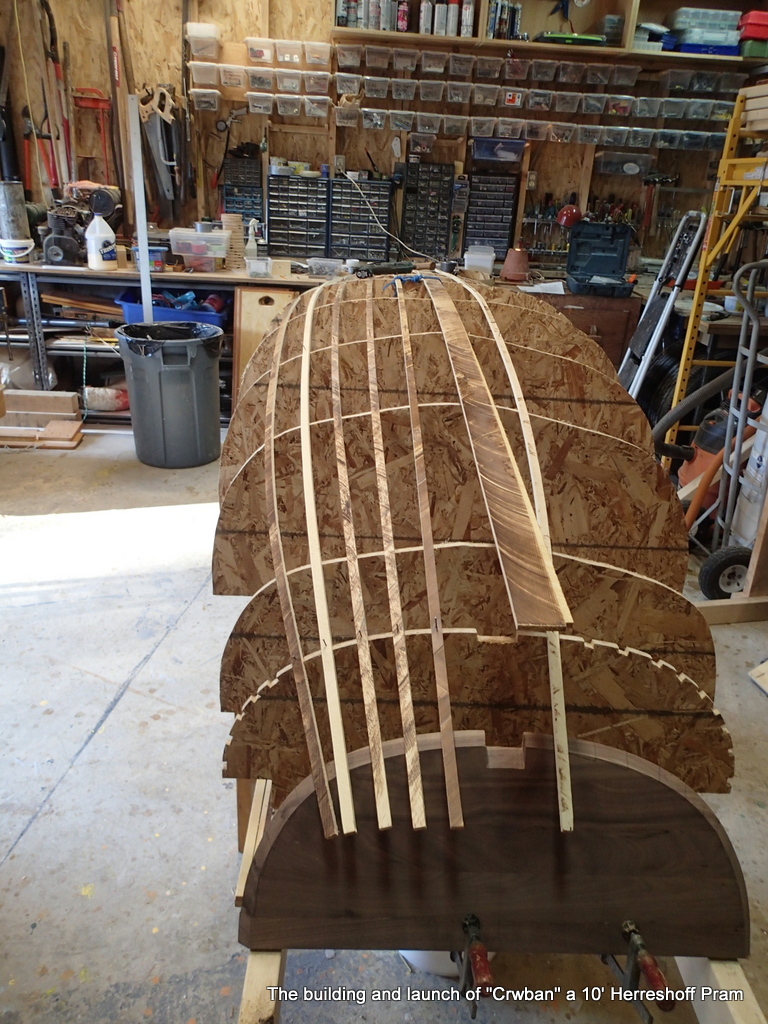
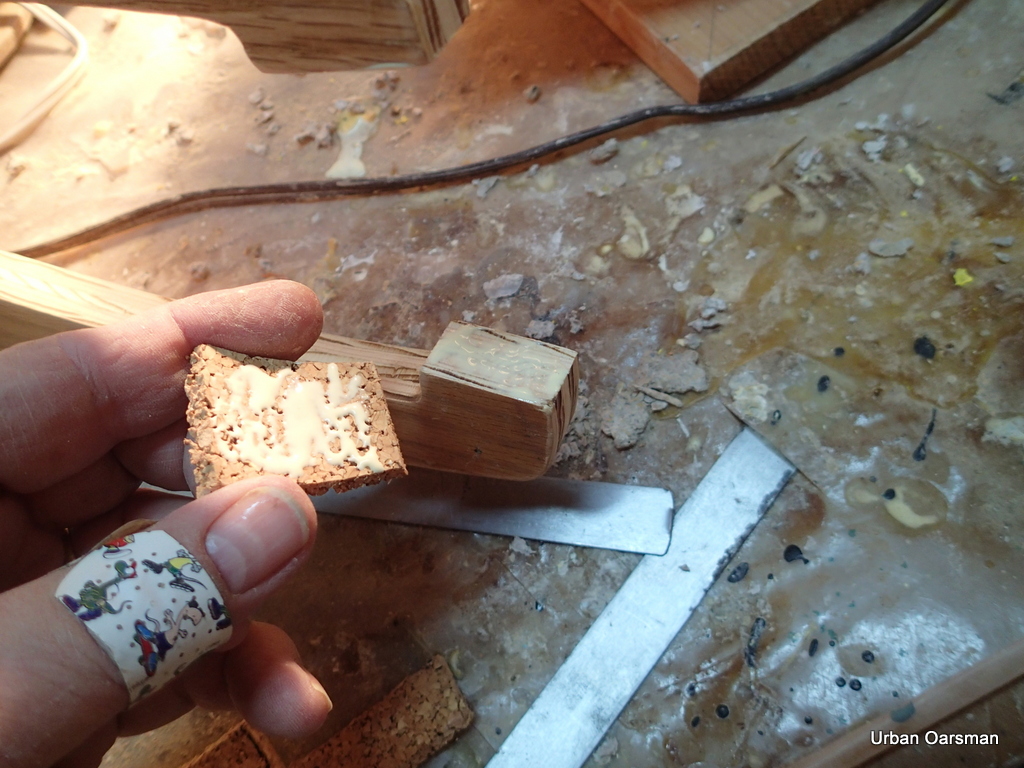
The plans have plank widths for station #8, station #3 and the stern transom. I cut notches in stations #8 & #3 for the ribbands.

Eyeballing the planks

This is another finically operation. Put the ribband onto the molds, have a look and see if the plank outlines look good…maybe adjust one which makes you adjust another…and so on.

Half done

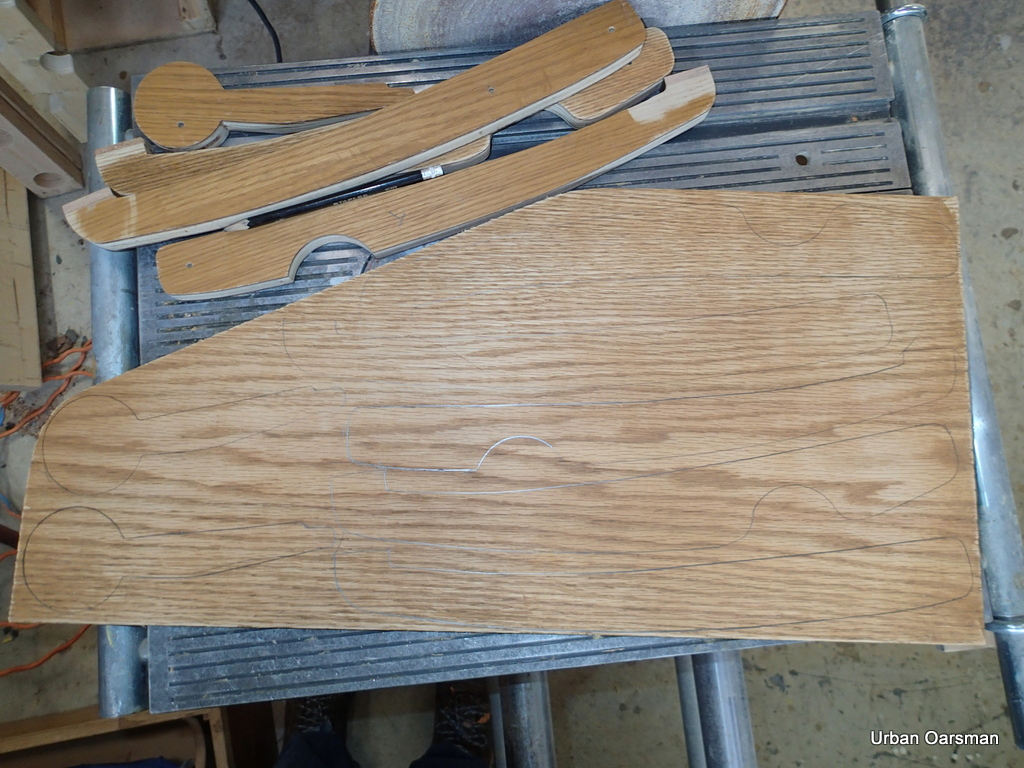
When I am satisfied, I duplicate the measurements to the other side.

All the ribbands fitted and faired. Time to “lock them down”. A dab of epoxy will keep them from moving. I have to remove all of the finishing nail to lay the planks.

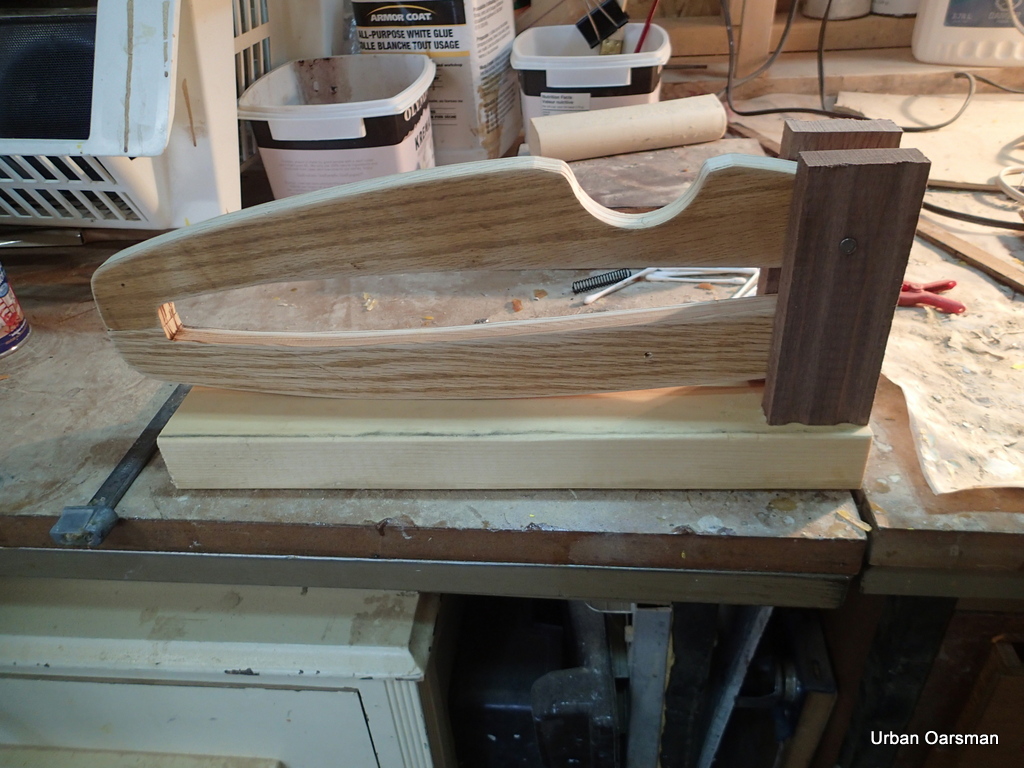
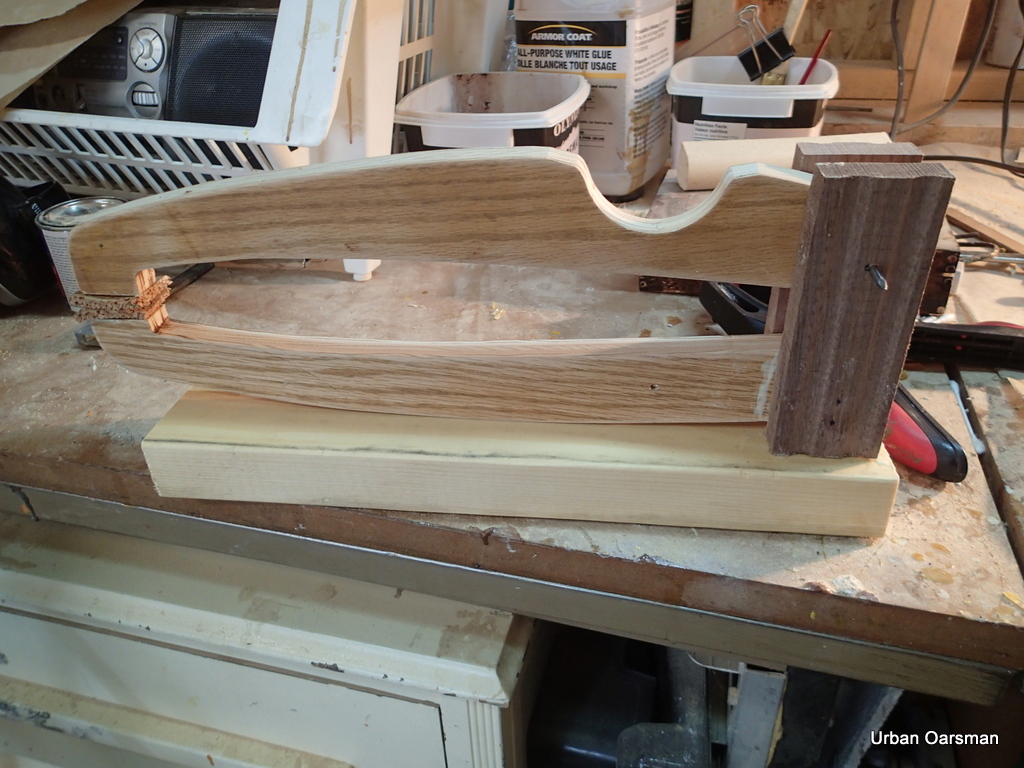
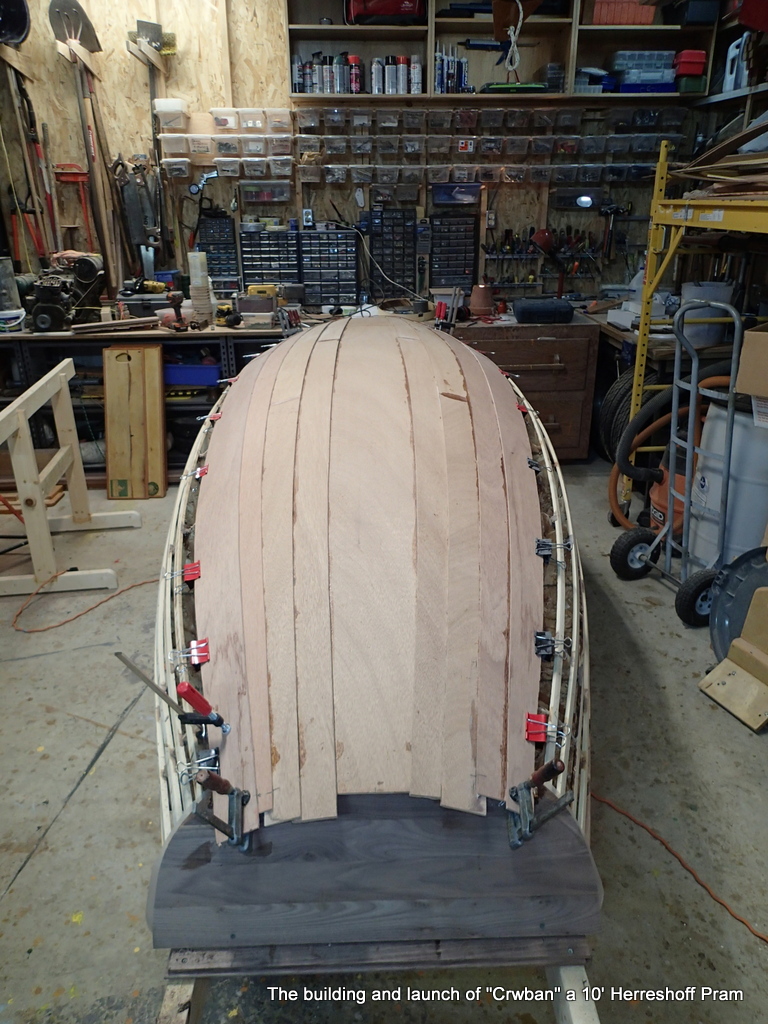
I decide to take the ribbands to the transoms. I will trim off all of these ends.

Epoxy holding the ribbands to the bow transom form.

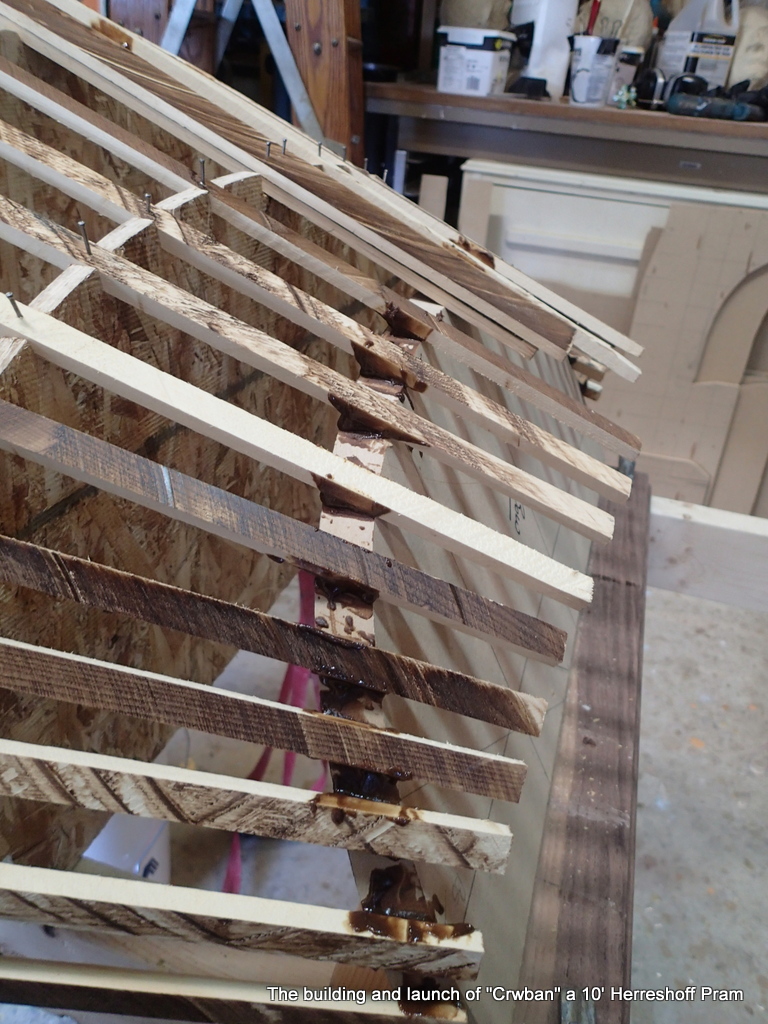
I lock all of the ribbands down with epoxy and remove all of the finishing nails.

Ends trimmed

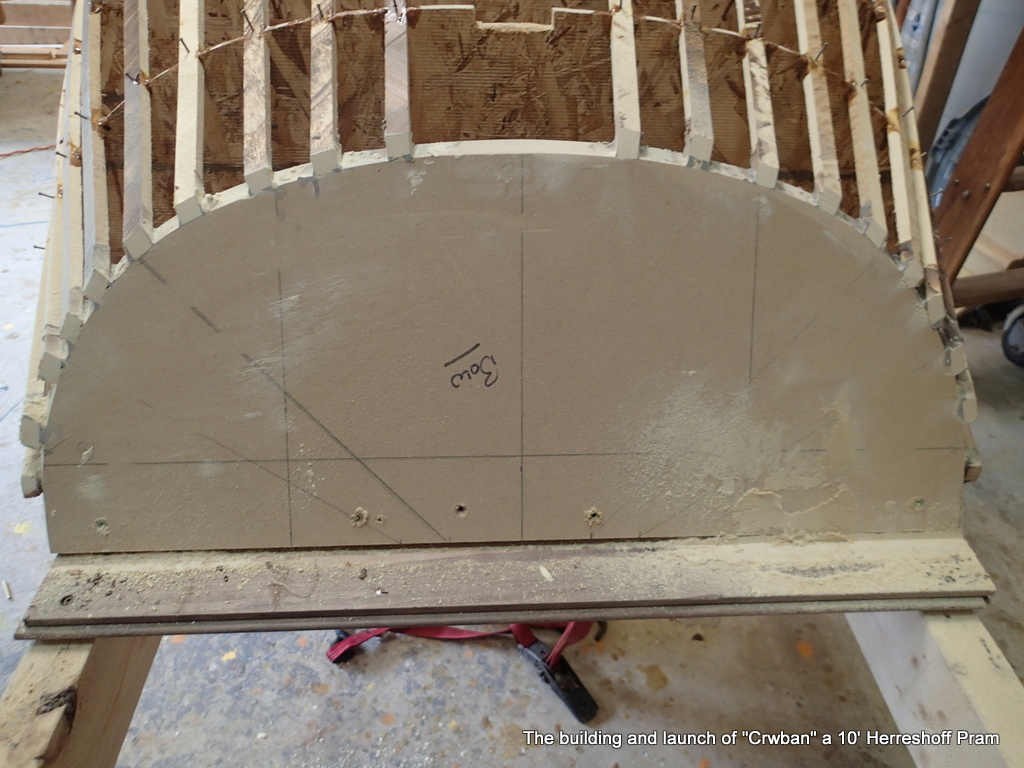
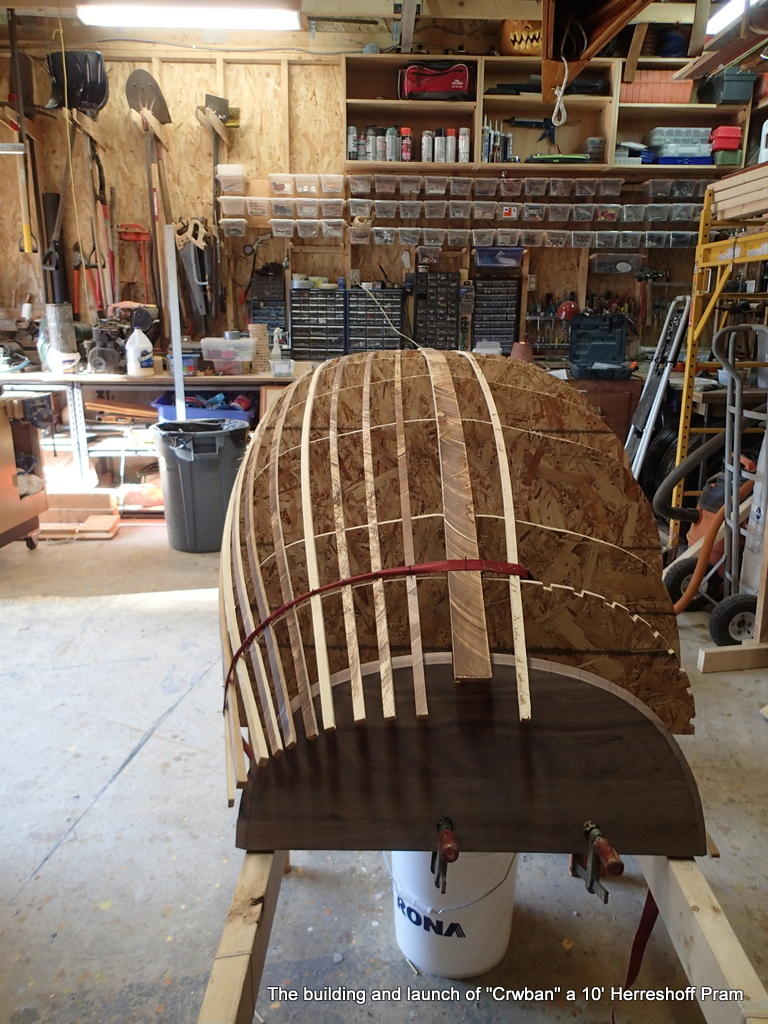
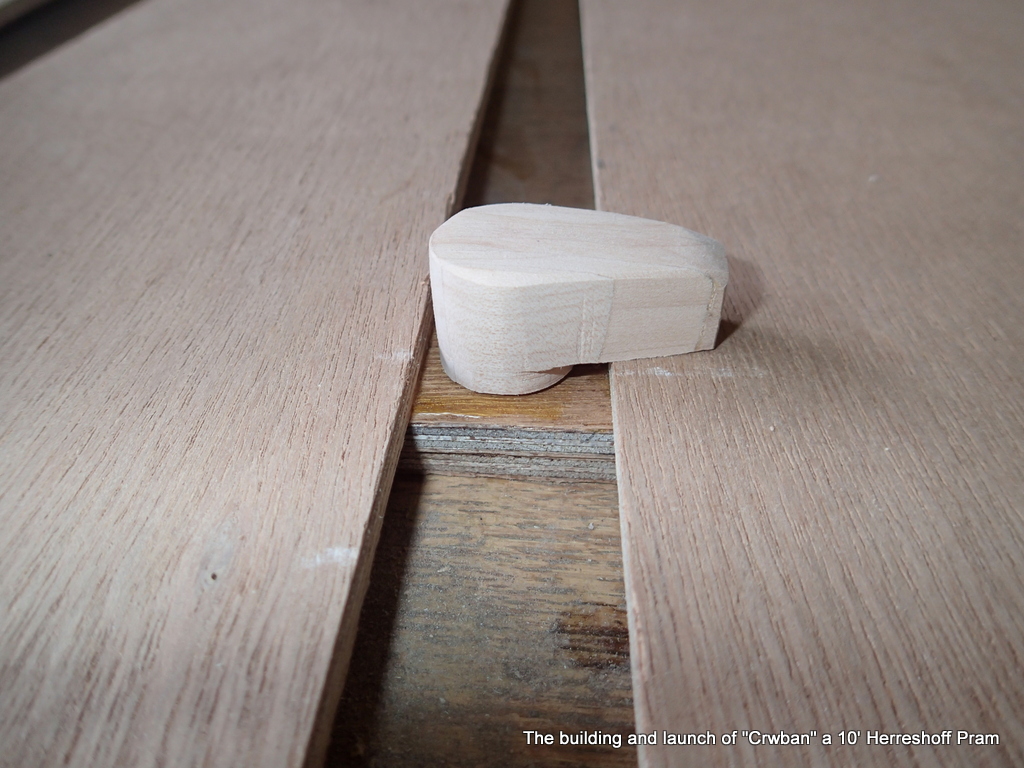
I have trimmed off all of the ribband ends and the bow transom will be rough cut and have its final shaping when the planking goes on.

Bow transom roughed out and ready for planking

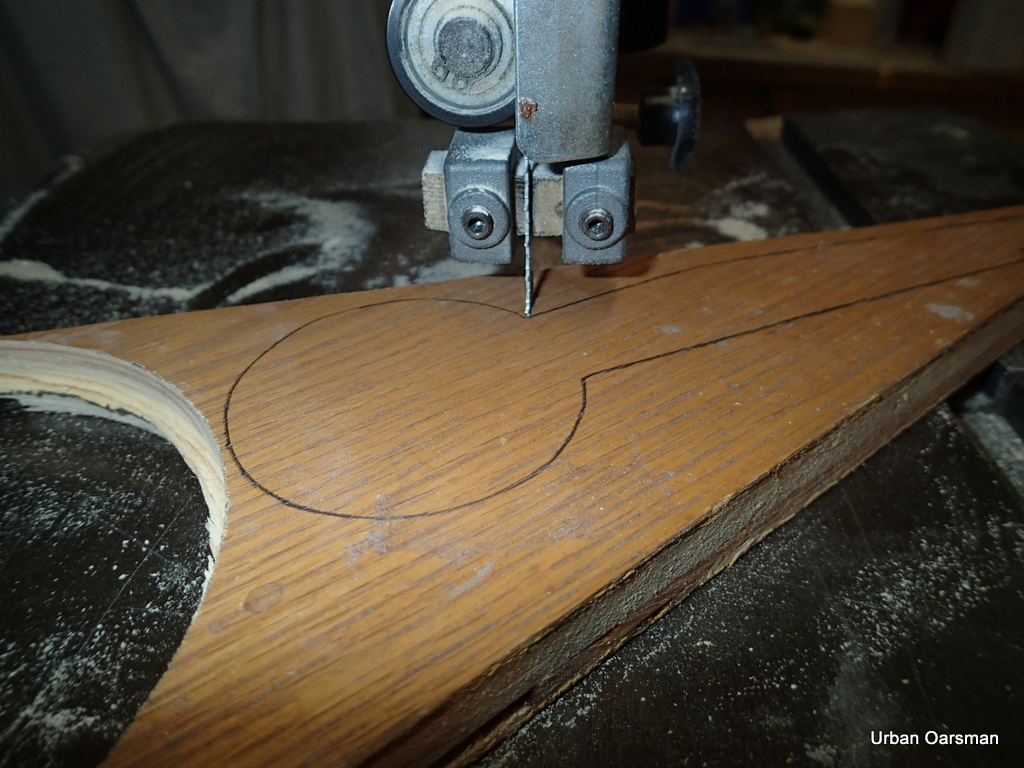
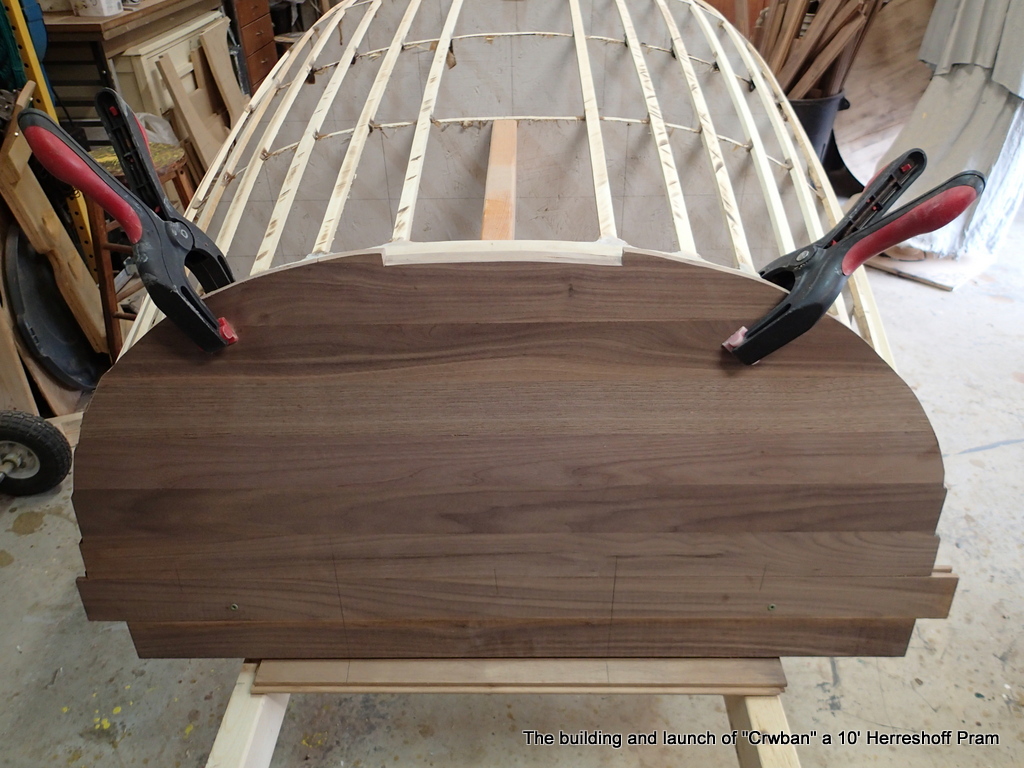
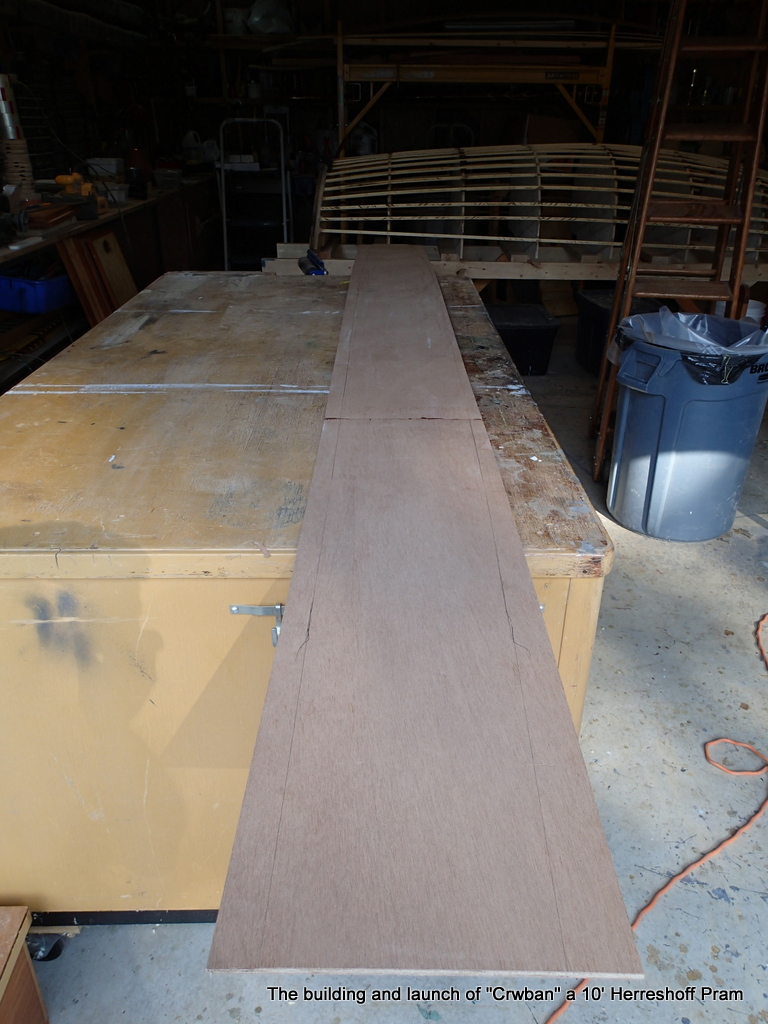
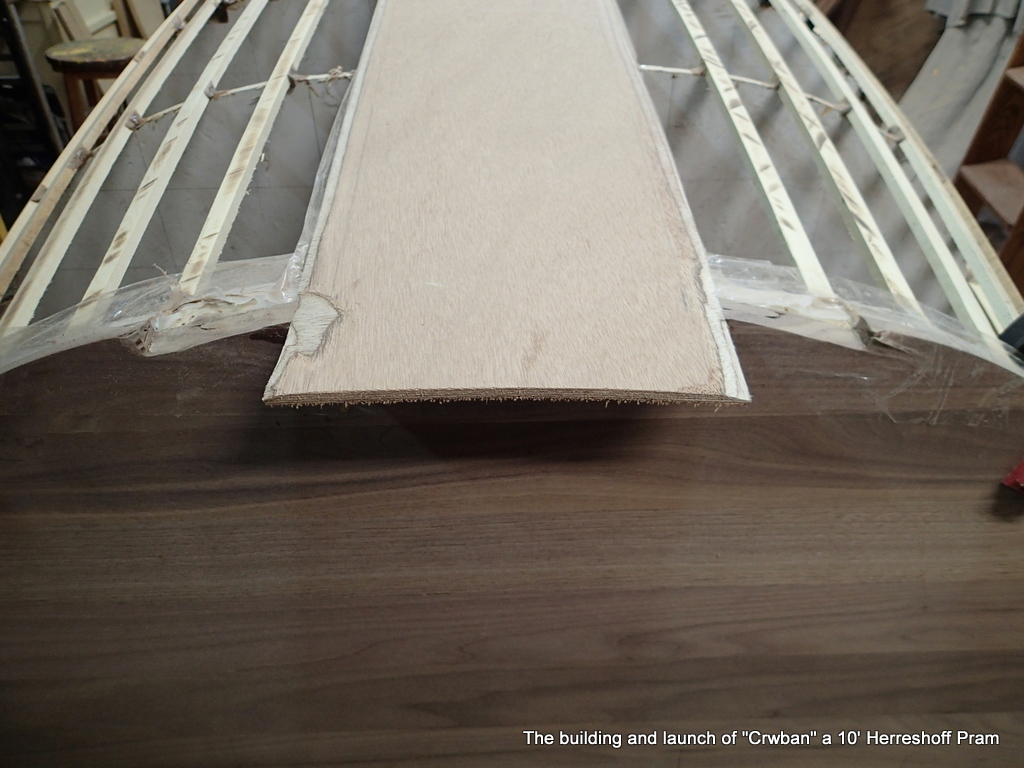
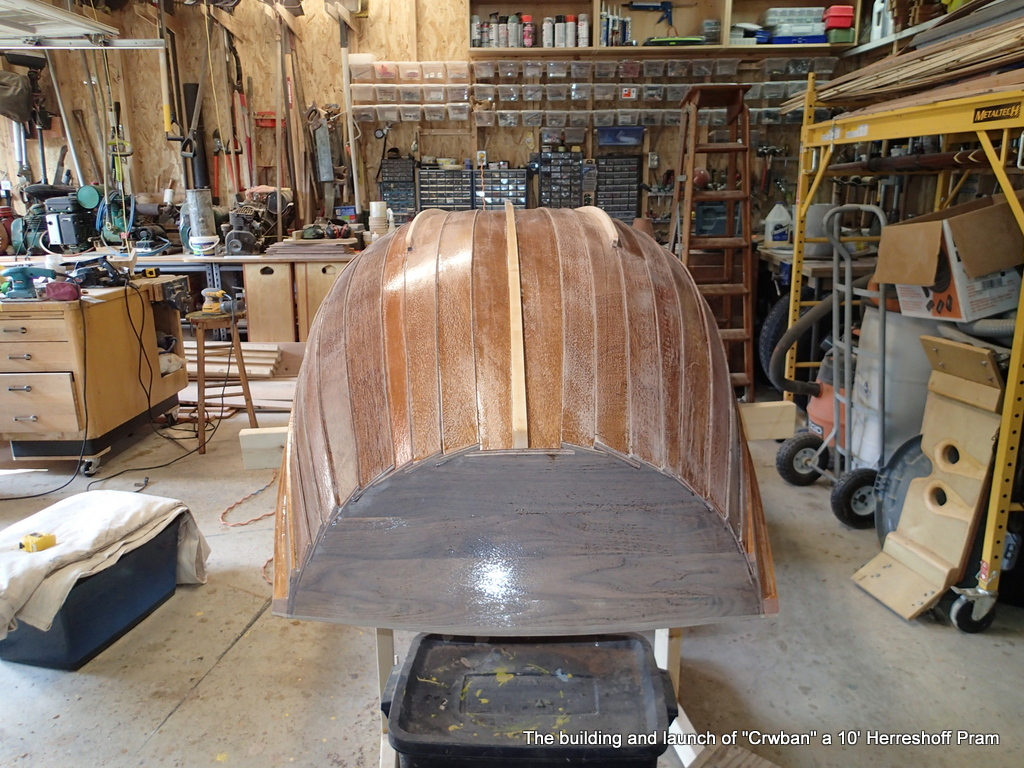
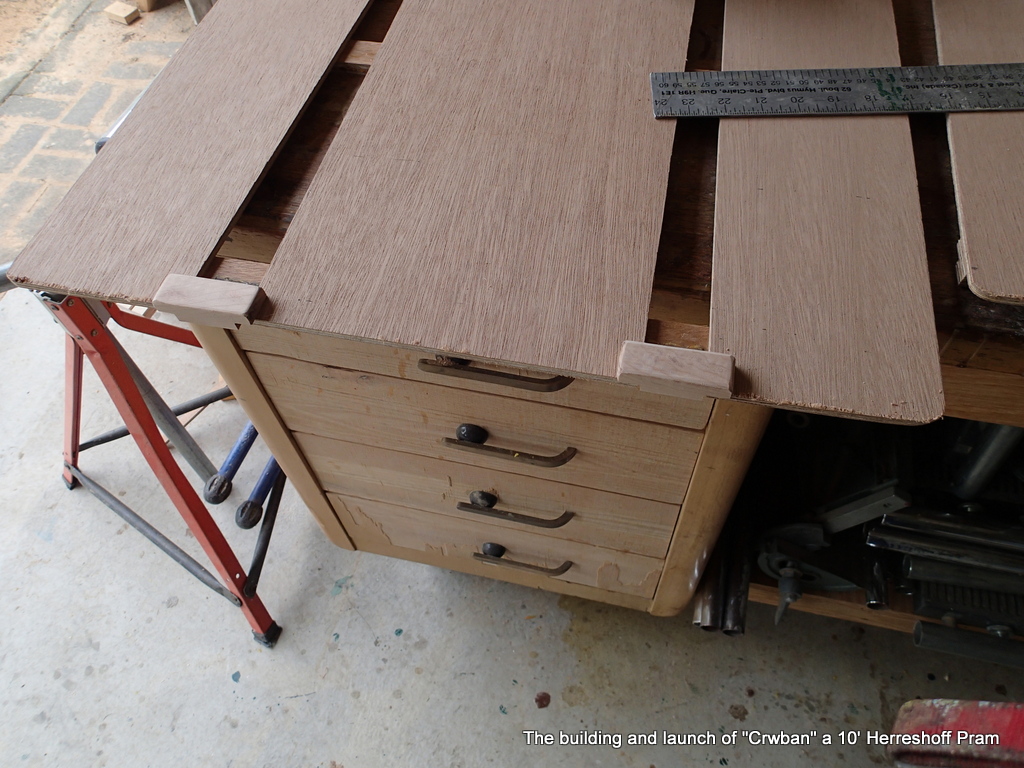
The bow transom is ready to start planking. The wide notch is for the garboard plank…I decided to do a plank keel instead of two planks with a keel piece.

Stern transom ready for planking

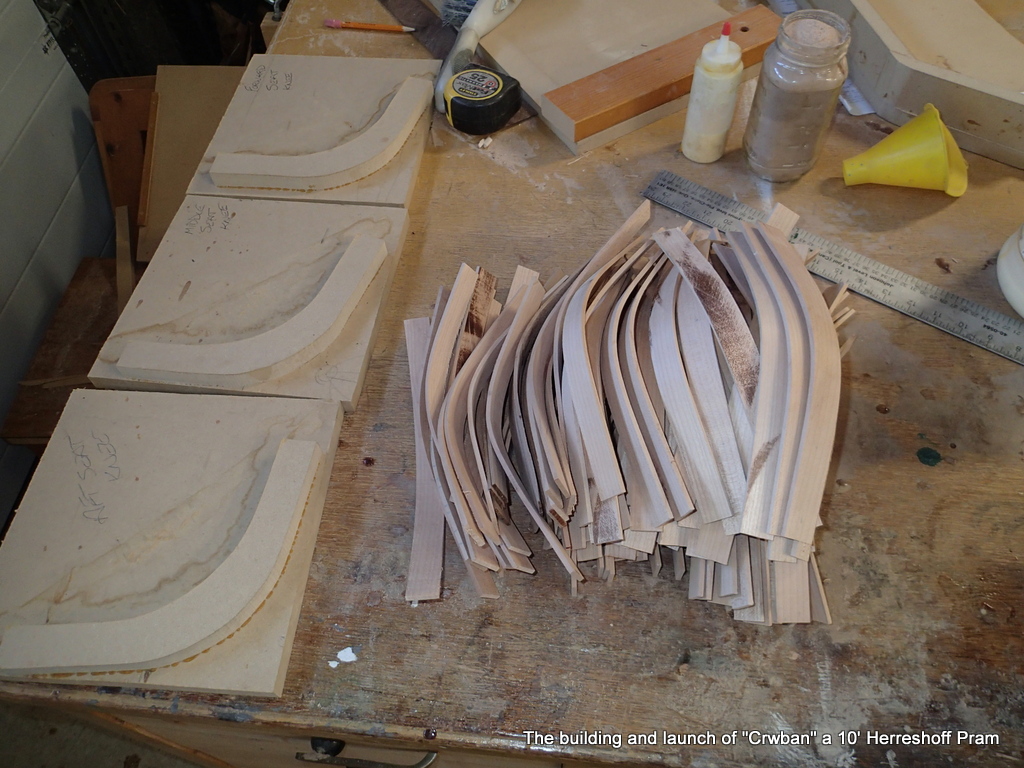
It was my intention to use that stiff floor protector construction cardboard (Ramboard) stuff to get a pattern for the planks. Place a strip along the ribbands, draw to the outside of the ribbands. Presto! a plank pattern.

Sadly, due to the Covid-19 pandemic, my supplier of floor protector is closed and Ramboard is out of my budget. After a lot of thought, trial and error I develop an alternate plan.

Bevelling jig on the 12″ disk sander.

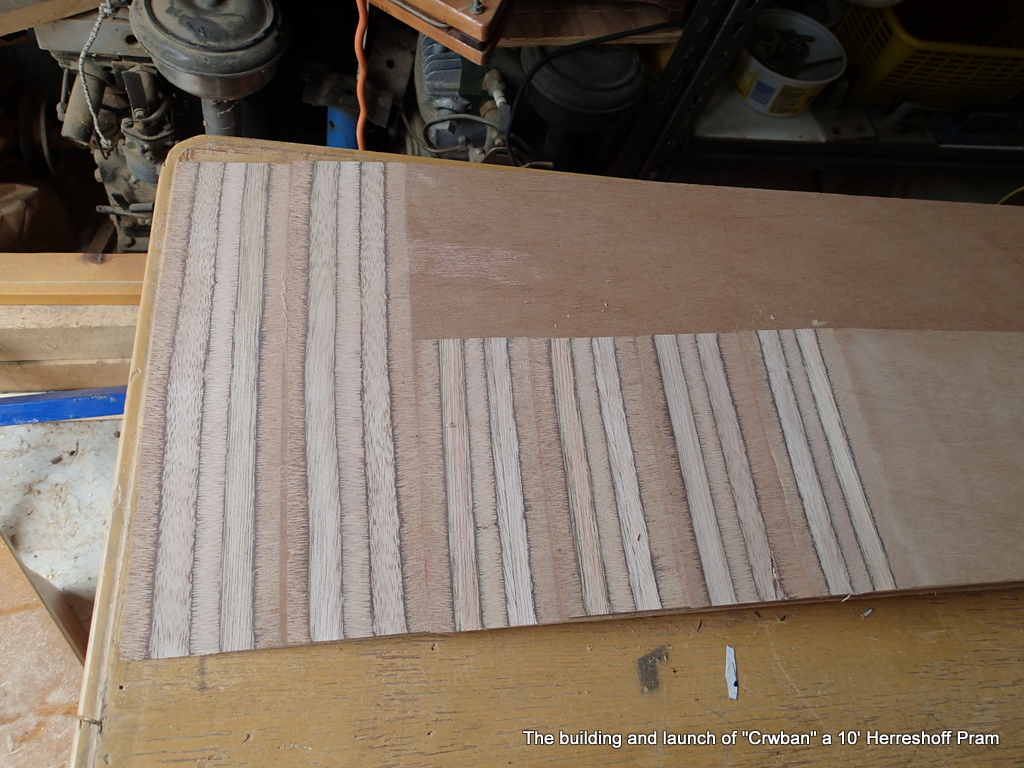
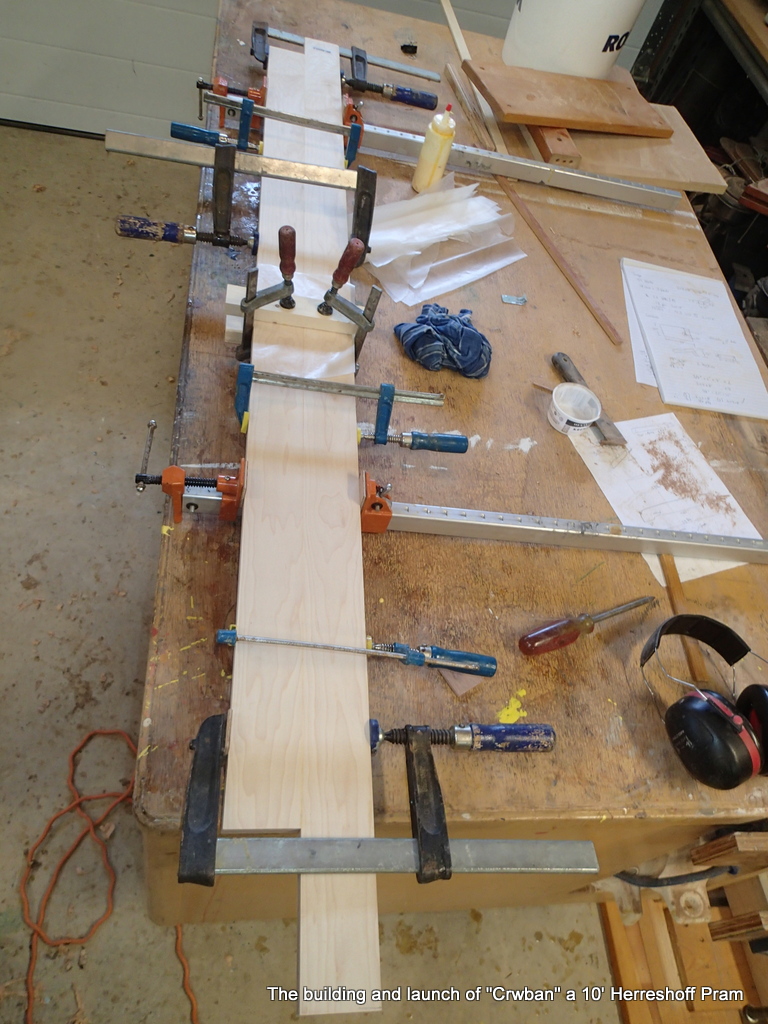
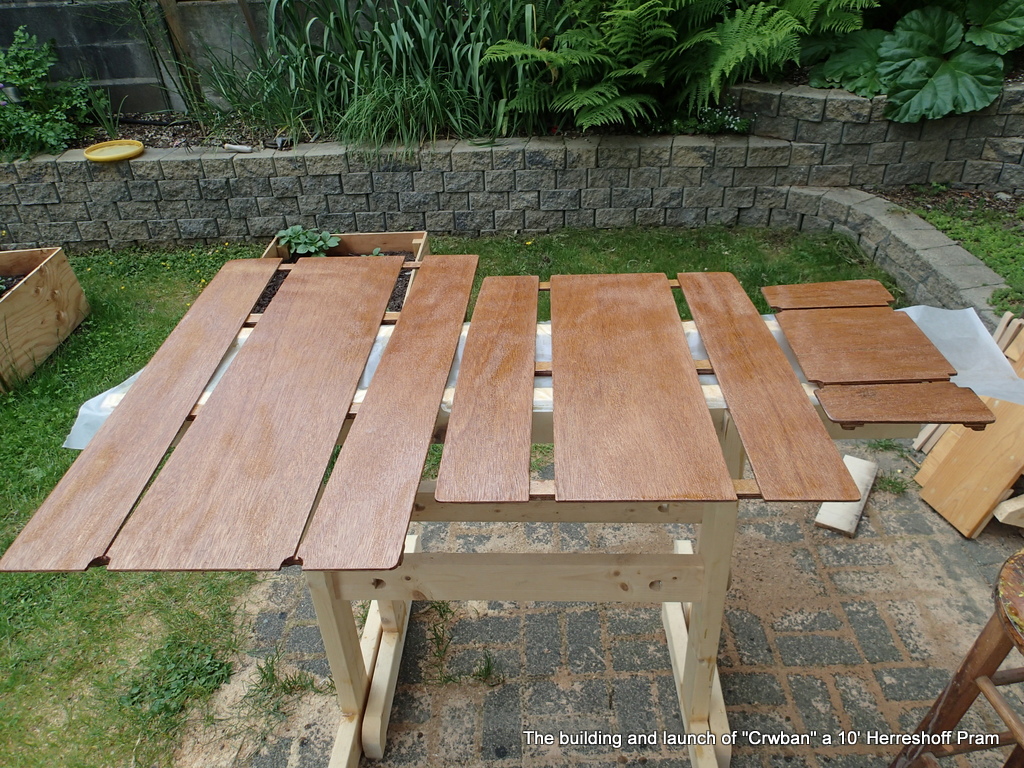
I am going to cut all of my plywood into strips, splice them together to get planks and then lay the planks onto the form to get the plank shapes. To quote John Gardner: “Fortunately, our pram has an easy shape to plank. Strakes can be lined out nearly straight, for the greater part, and go on without twist or sny.” “Building Classic Small Craft, pg 27)

6mm Garboard plank keel and what will be two planks.

The bevel for the scarf joint cut with the sanding disk jig. 8 to 1.

Epoxy glue

I am using epoxy glue for the scarfs.

A little weight while the epoxy cures.

I just have to insure that the epoxy does not soak into the wood and starve the joint.

probably the best scarf joint I have ever made.

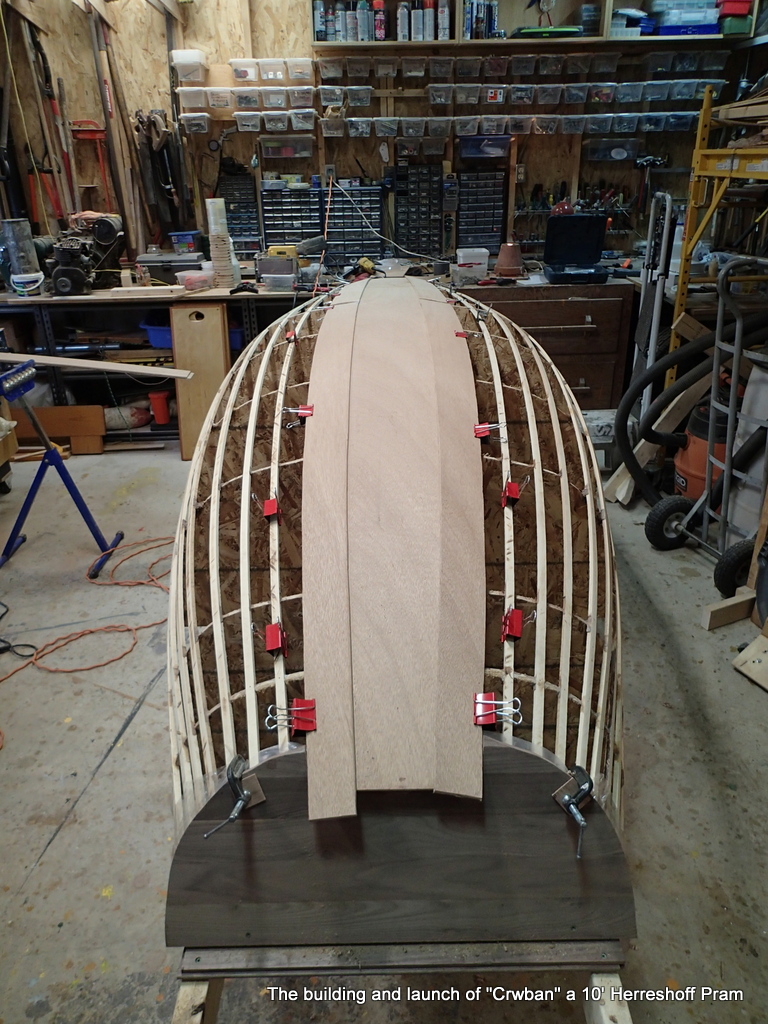
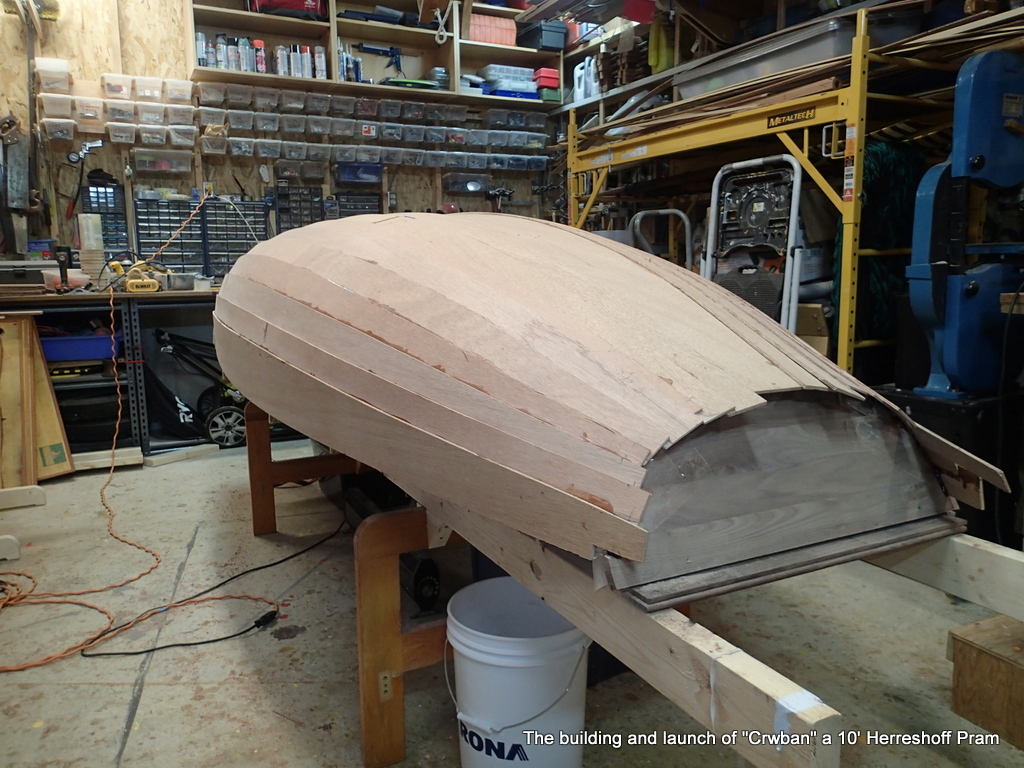
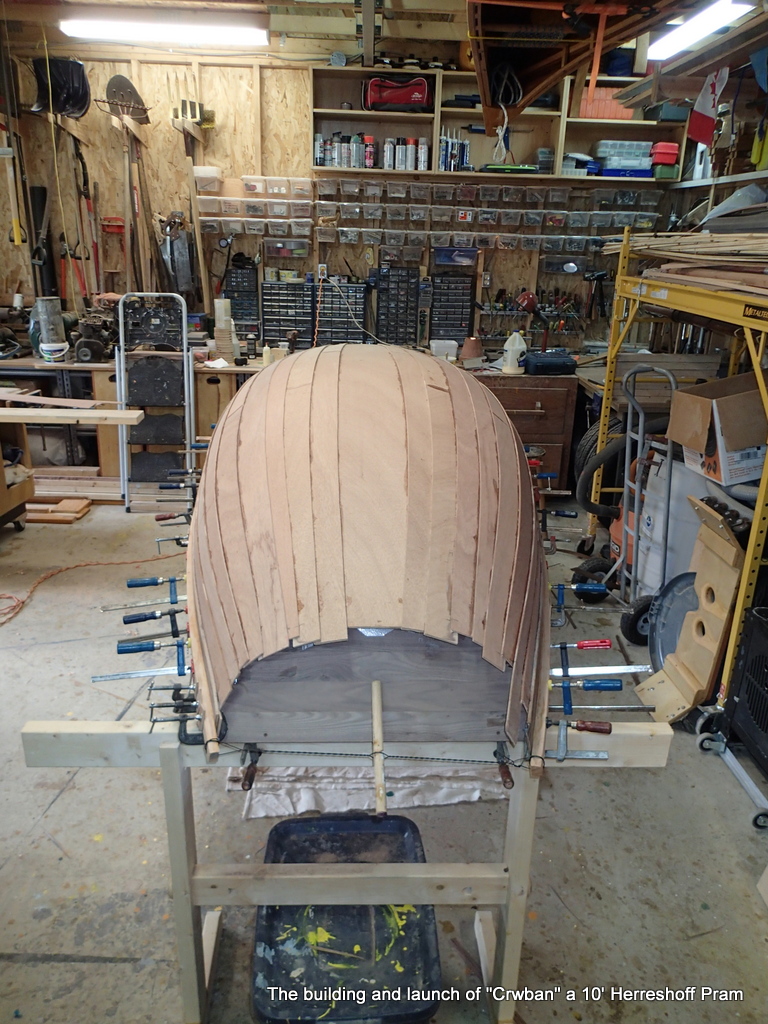
In trying to make the pram light, I am using 6mm marine plywood for the first three planks, 4mm marine plywood for plank 4, 5, 6, 7, 8, & 9. Back to 6mm fo the sheer plank.

Modifying the block plane

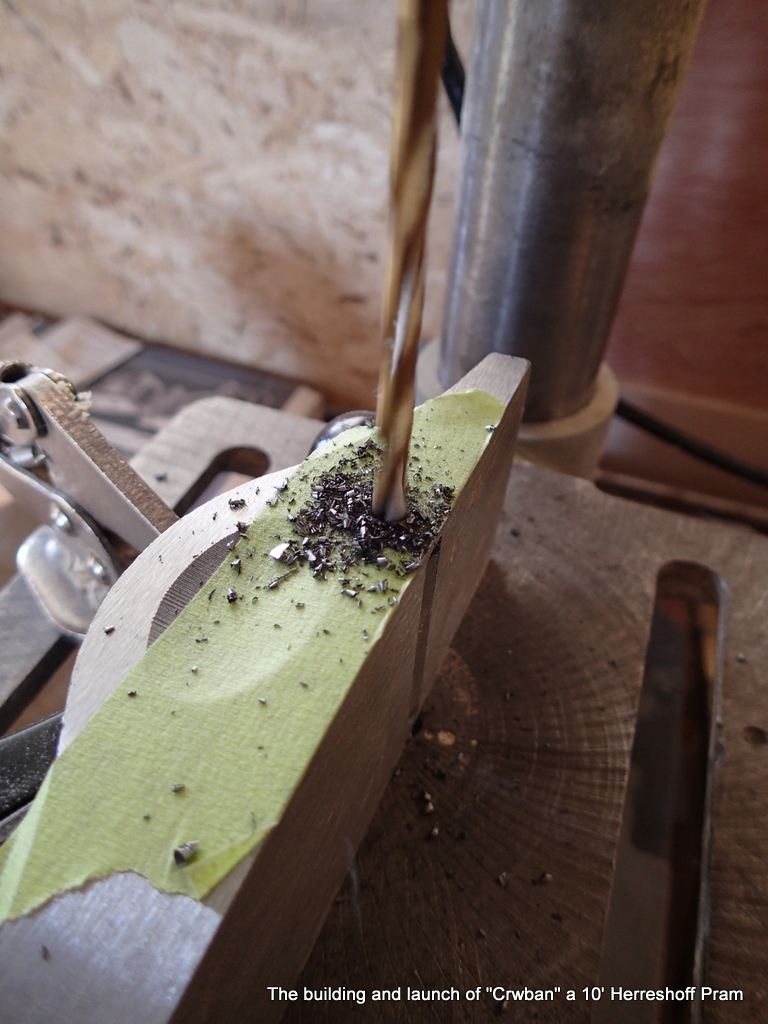
To cut the plank bevels, I am using an idea I saw in Tom Hill’s book, “Ultralight Boatbuilding”, where you take a block plane and attach a guide to it.

Tapping the hole for the guide rod.

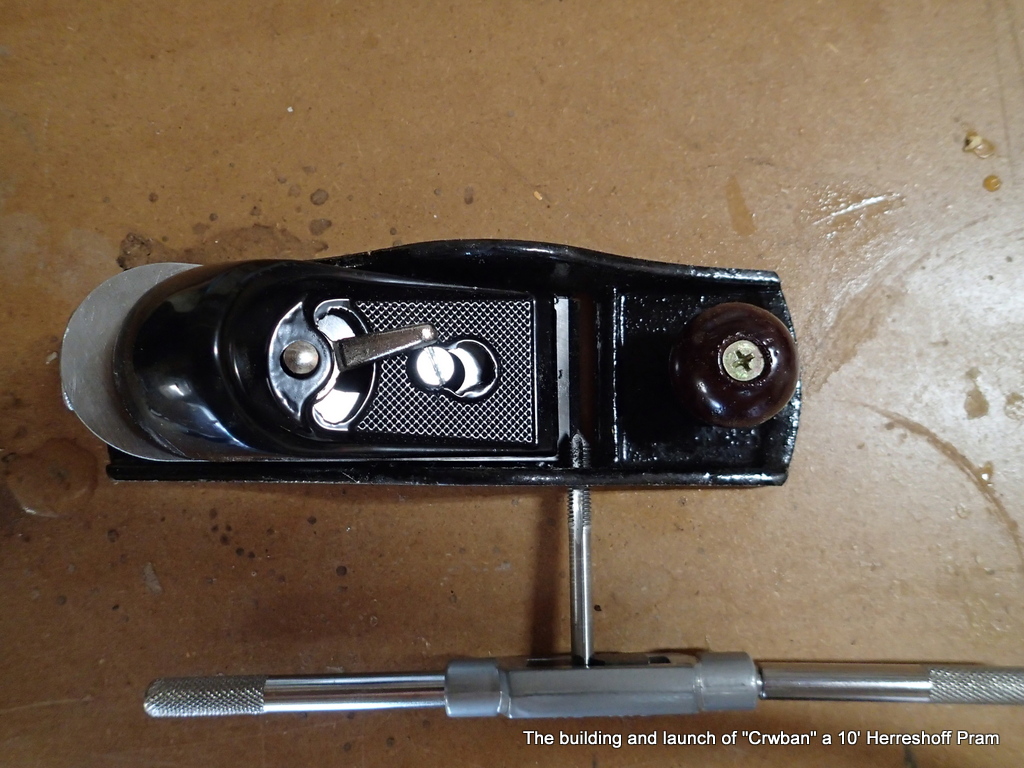
I drill a hole in the side of my block plane for a guide and tap it.

Such a good idea, I do it to the other side of the plane as well.
The other side as well.
Edges marked for the plank edges for the “garboard plank/ plank keel.

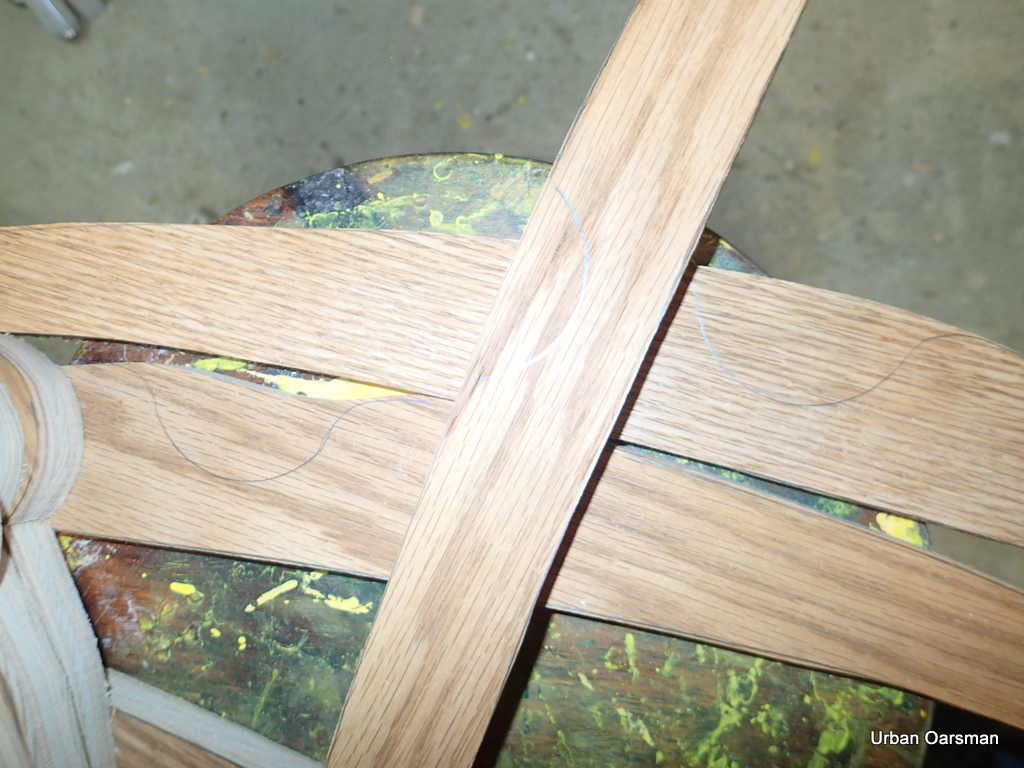
So the procedure is as follows: place plank onto form. Insure that plank covers appropriate ribbands. Mark plan with pencil. Edge nearer to the keel is the overlap mark. Edge closer to the sheer strake is the edge of the plank. This garboard/keel plank has two plank edge marks.

Garboard plank/plank keel cut and fitted.

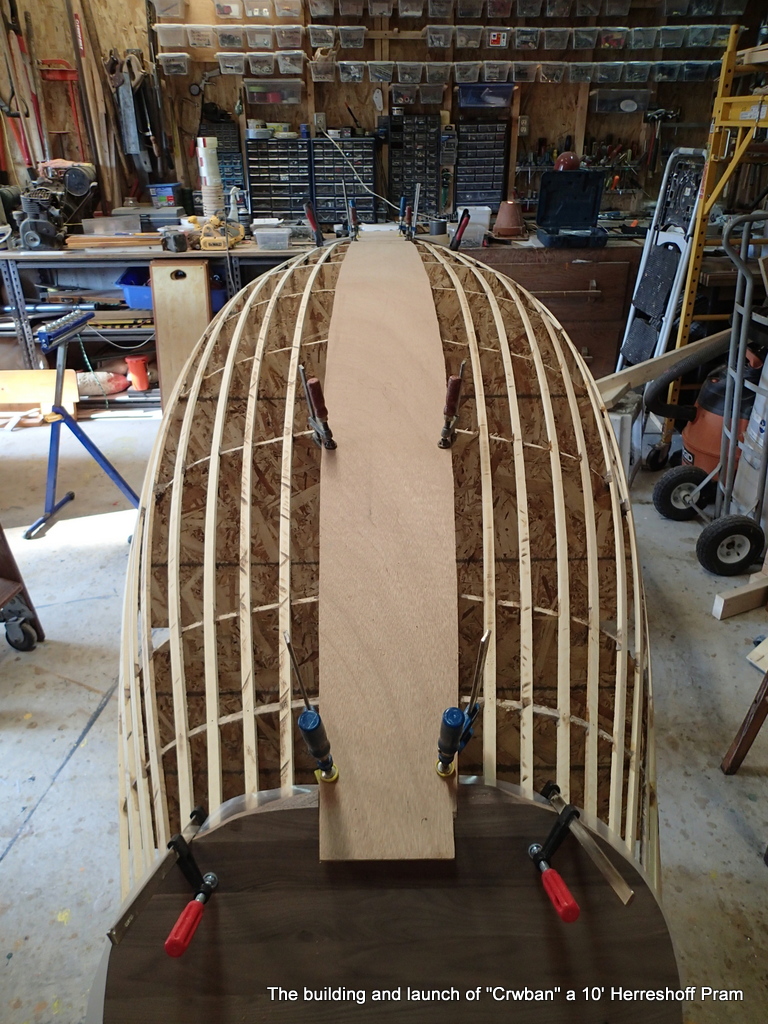
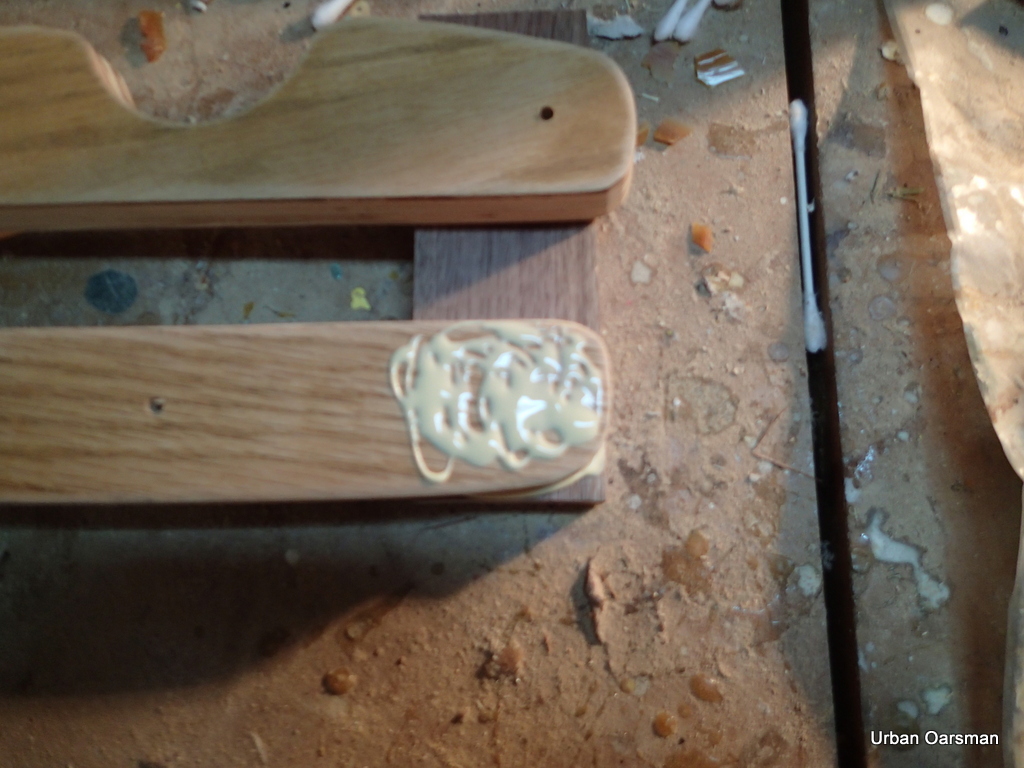
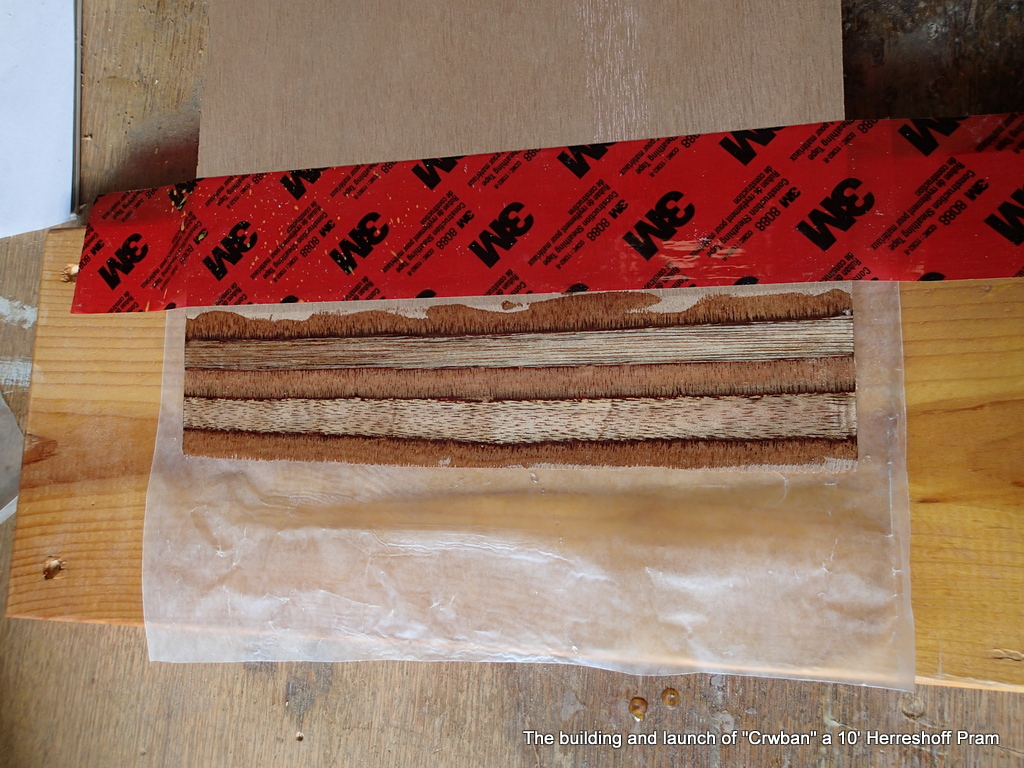
Now I attach the plank to the bow and stern transoms.

Cellophane tape keeps the epoxy from sticking where it should not stick.

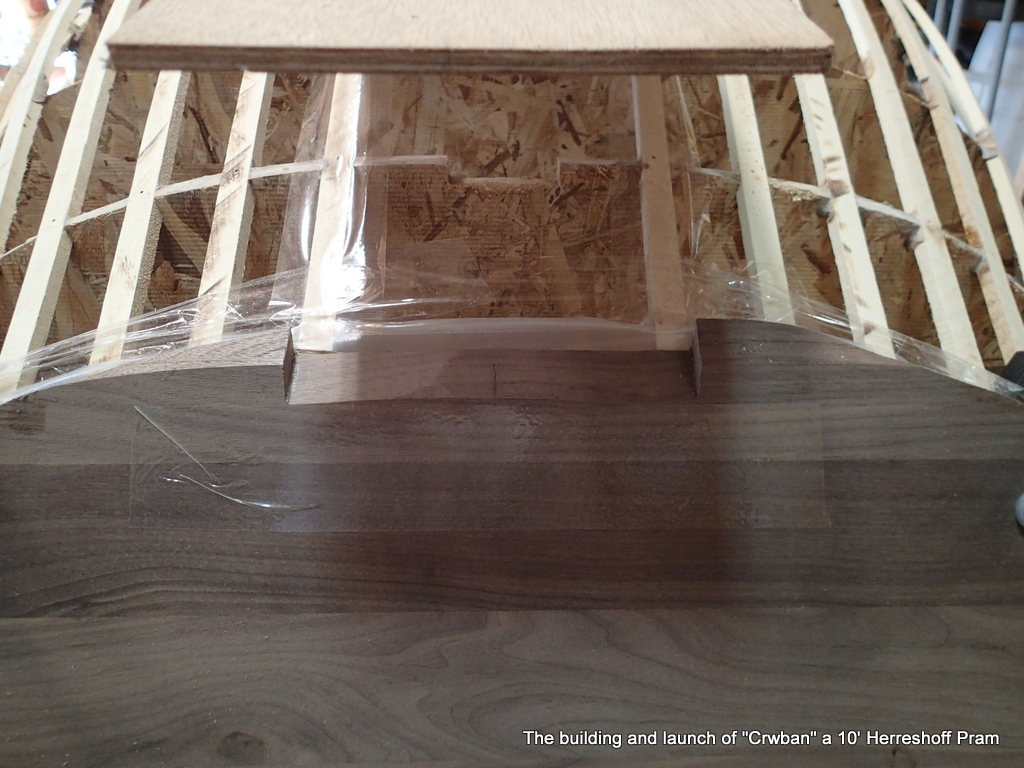
I use a barrier of cellophane tape to keep the plank from sticking to the forms and the ribbands.

Strapped

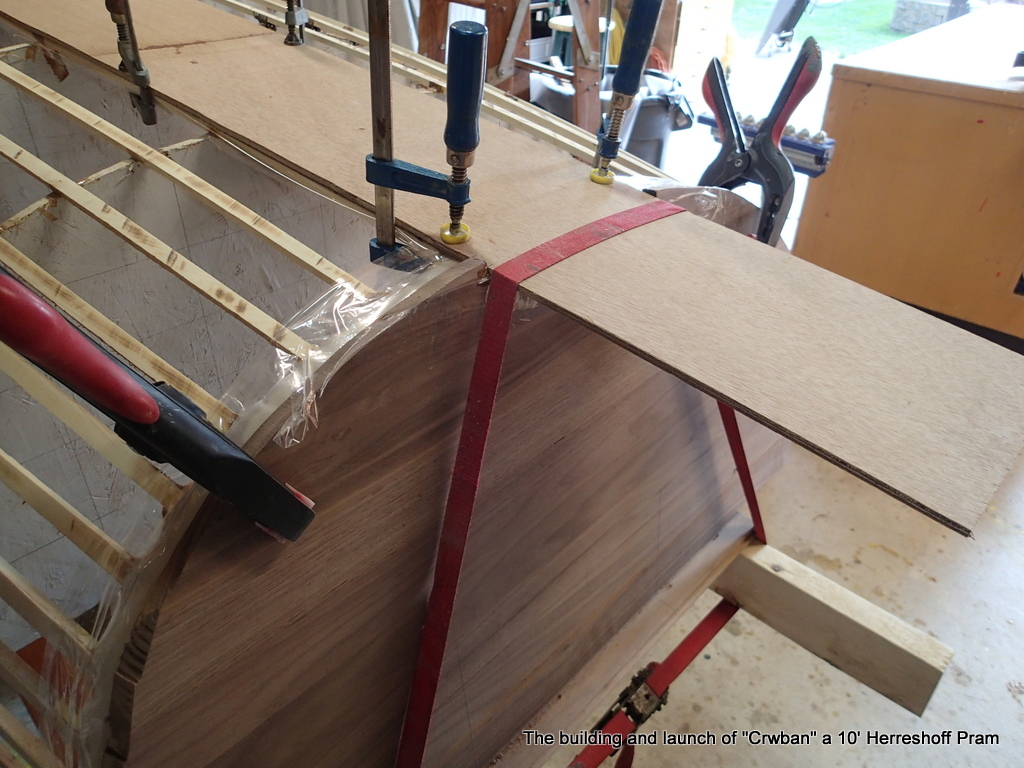
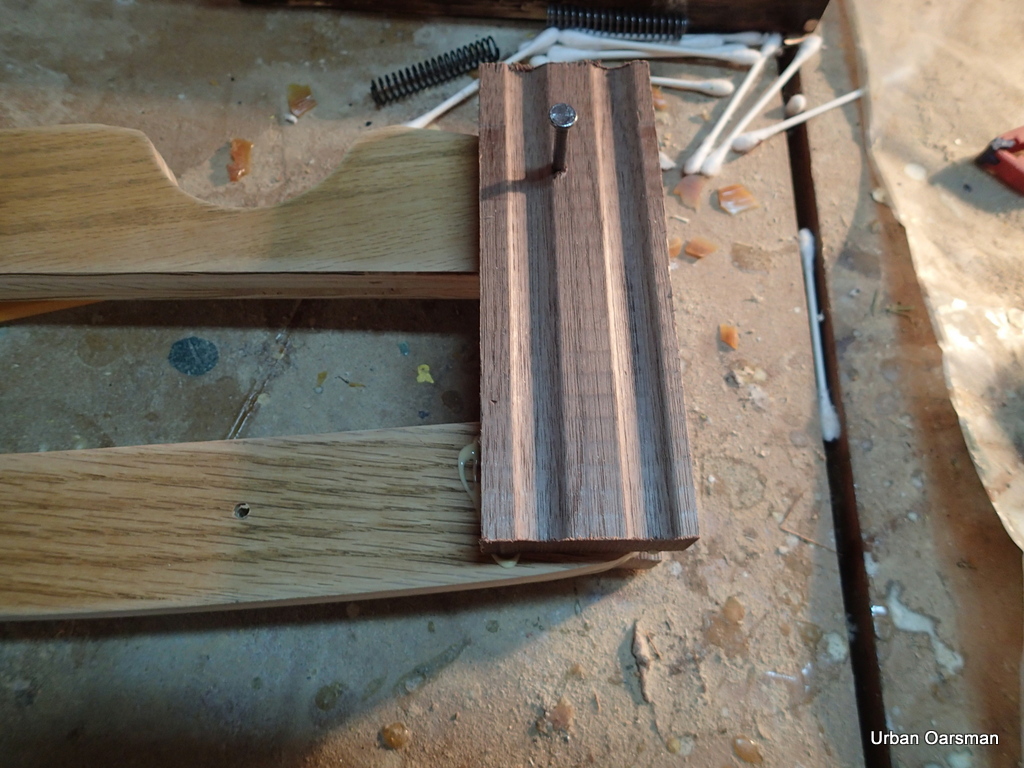
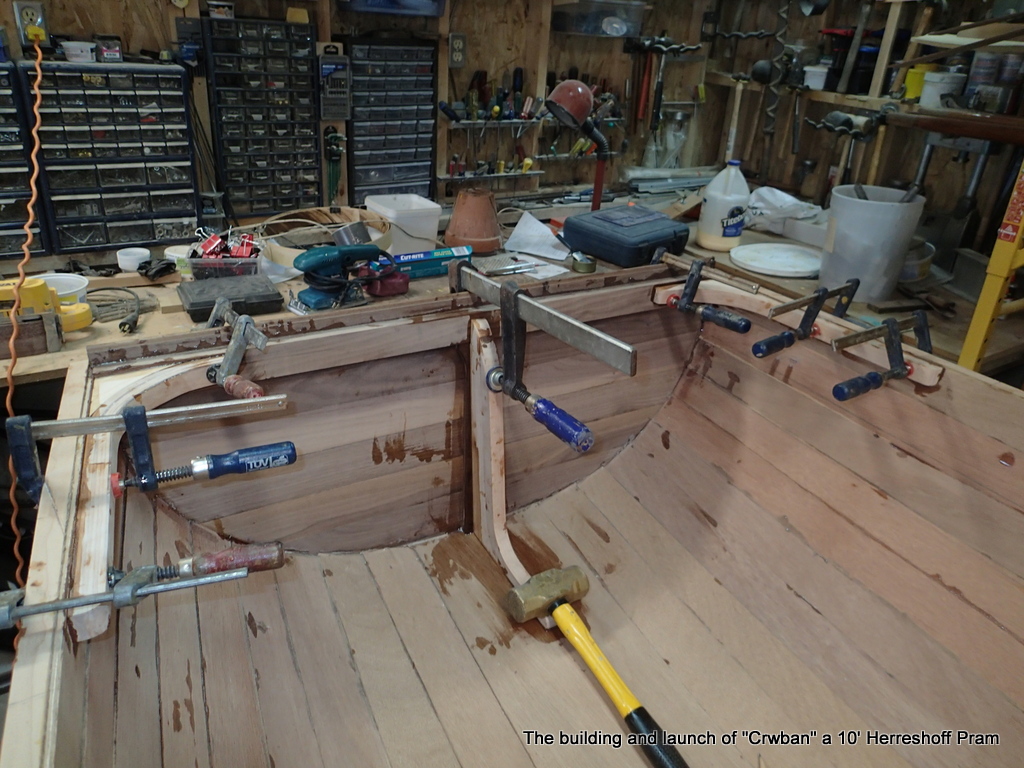
Lots of room for the clamps. I am using the ribbands to clamp to.

Insuring that there is not a starved joint.

I am trying not to use any nails/screws in the construction, so, one plank a day.

Time to cure

It is still quite cold, so I leave little heat on under the hull.

Plank edges beveled. You can see the pencil mark for the overlap.

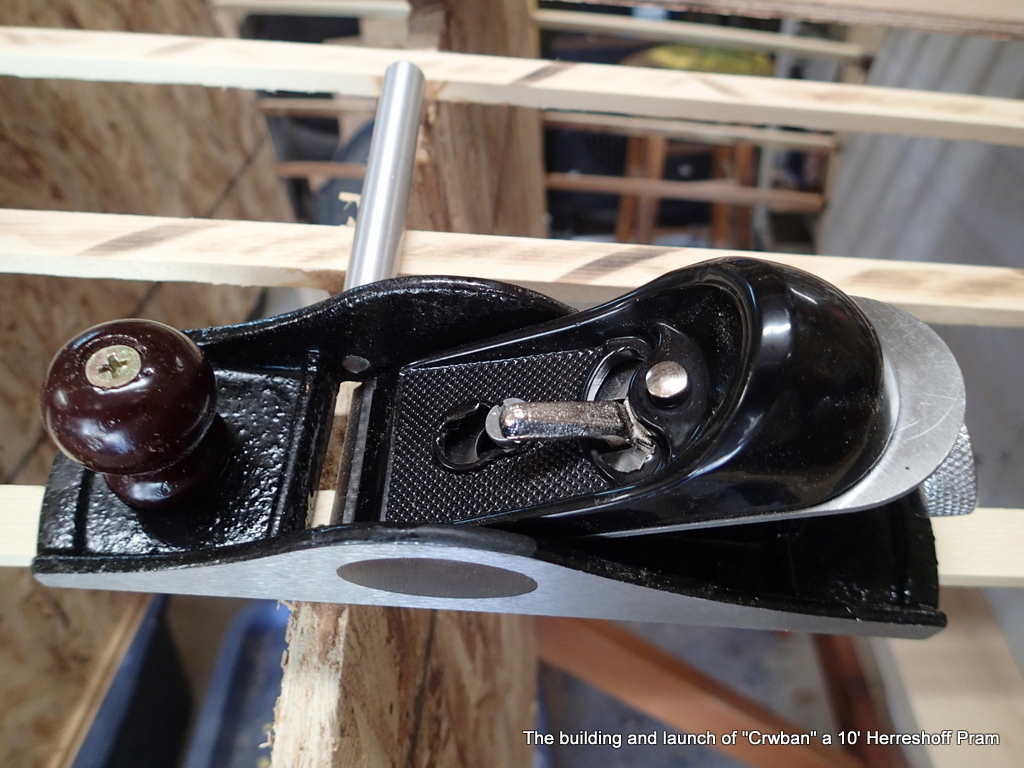
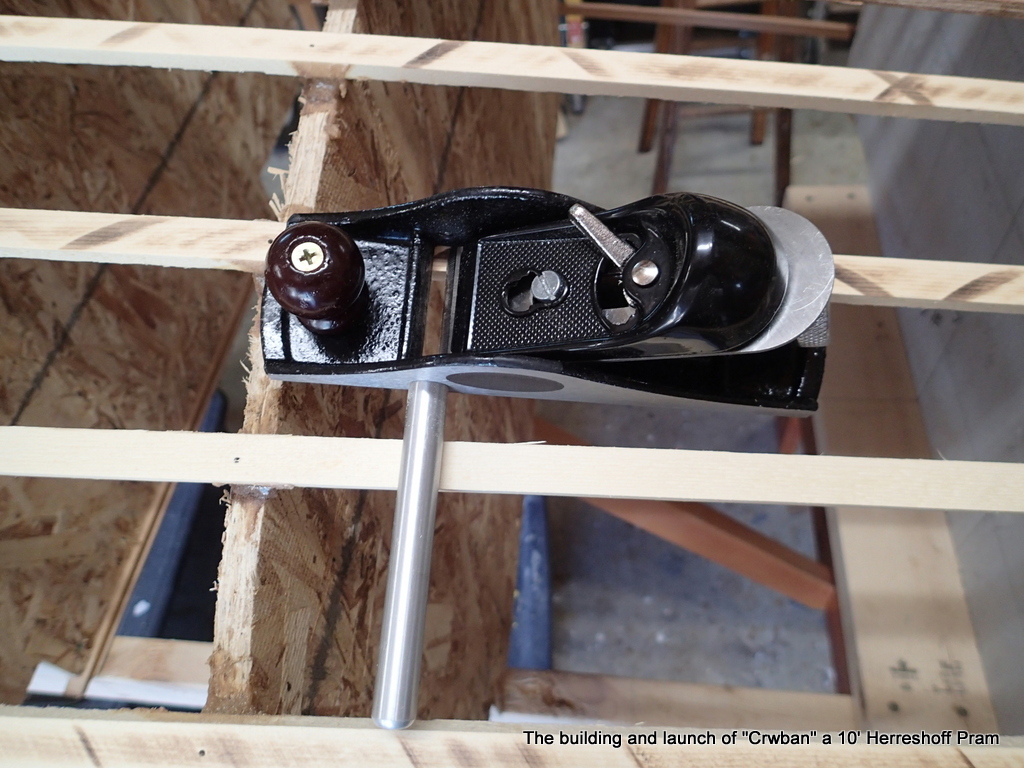
The block plane with the guide works great! Mark the overlap and then plane the plank edge down using the next ribband as a guide. If I was going to use this method again, I would not notch any of the station molds. The plane hits the molds at the notches.

Plank edges beveled and cellophane tape on. Still have to tape up the ribbands.

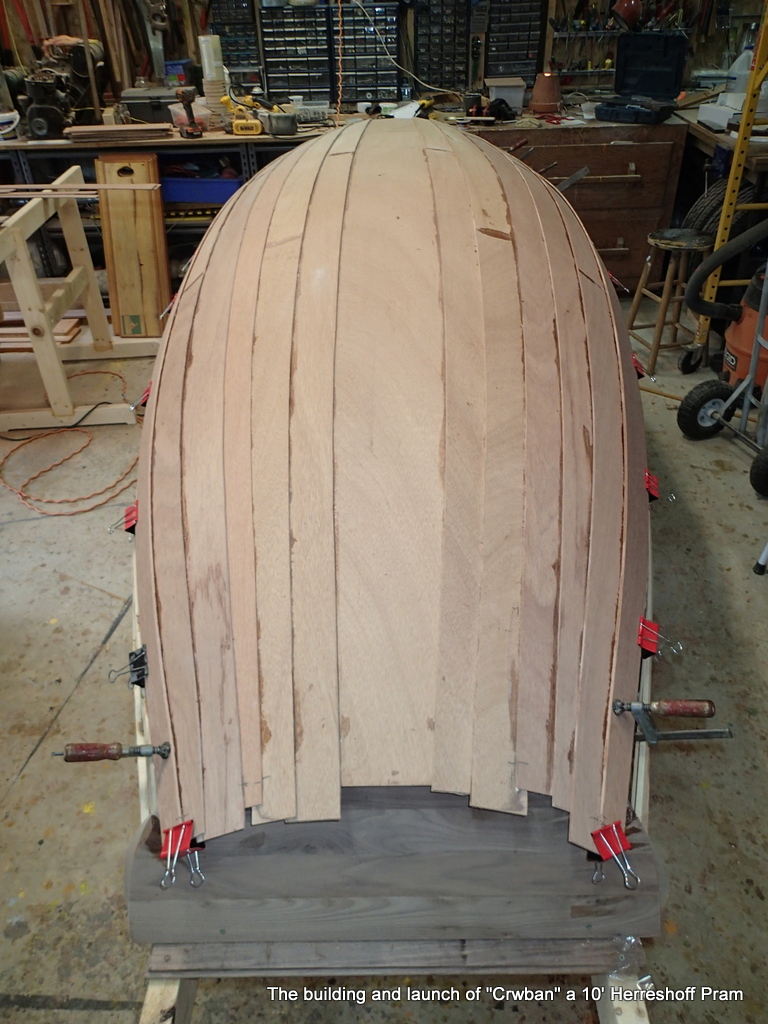
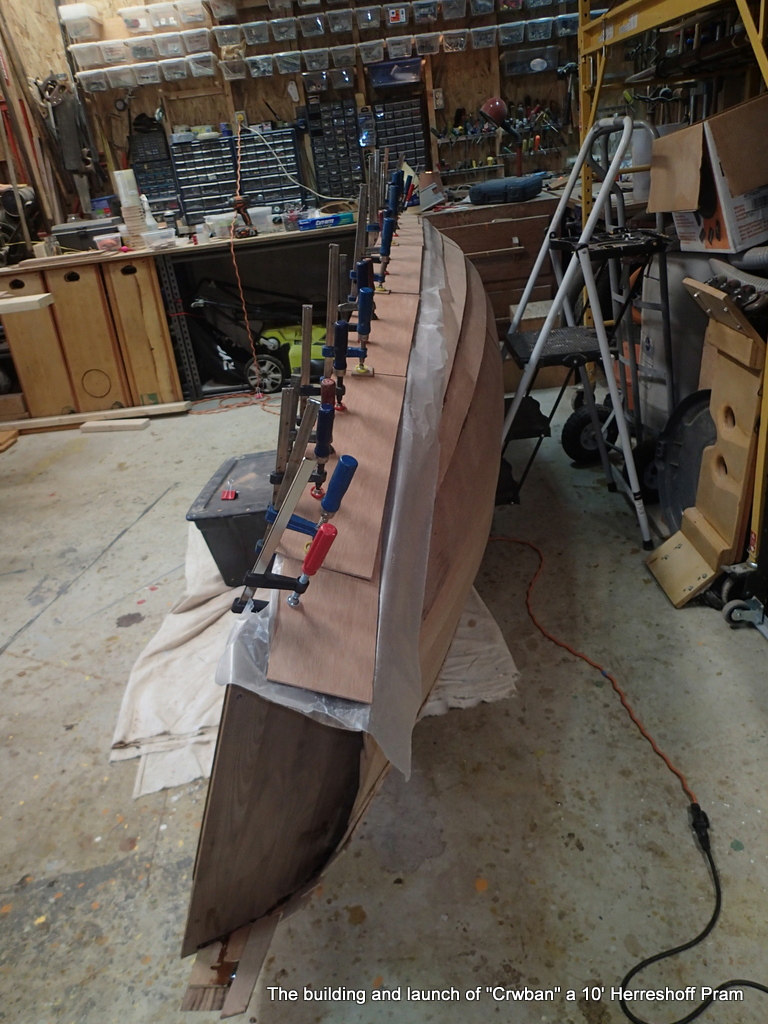
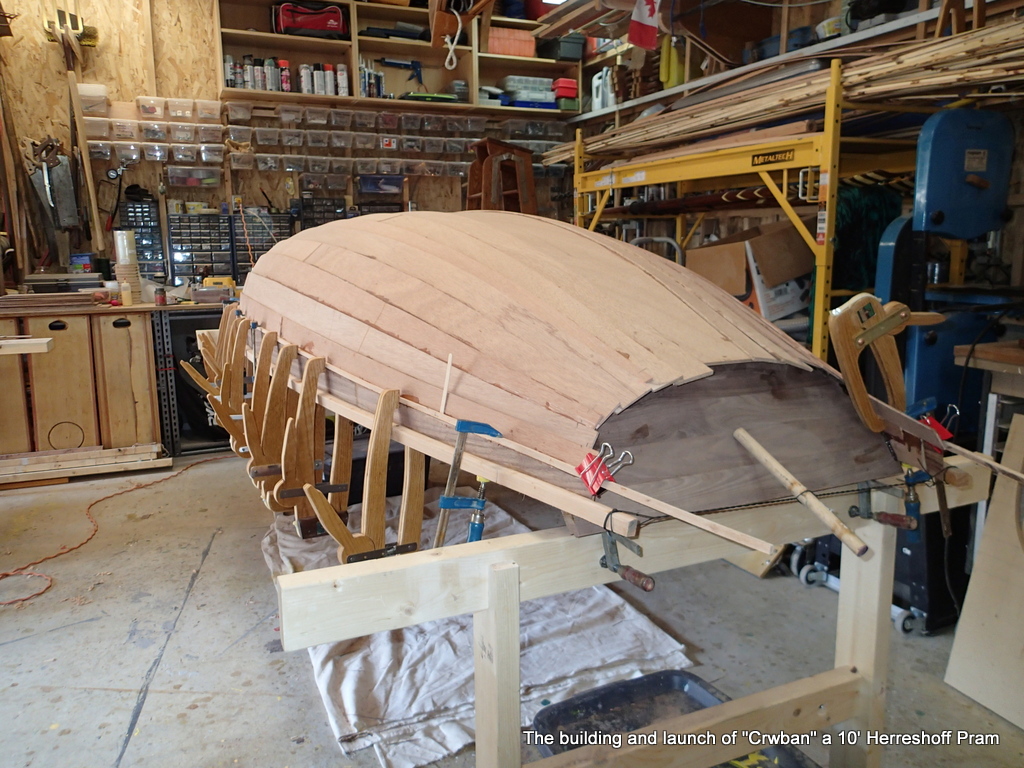
The first three planks are 6mm.

Fitting plank #2

I lay the plank along the ribbands and insure that the plank covers them.

Marking/fitting the planks

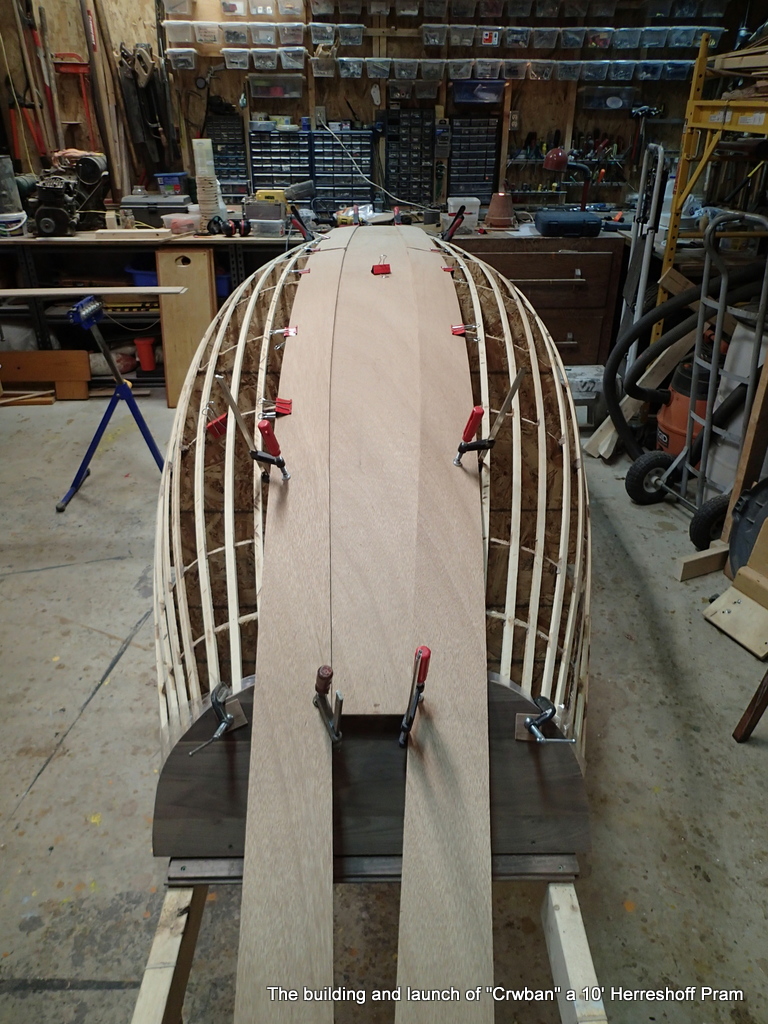
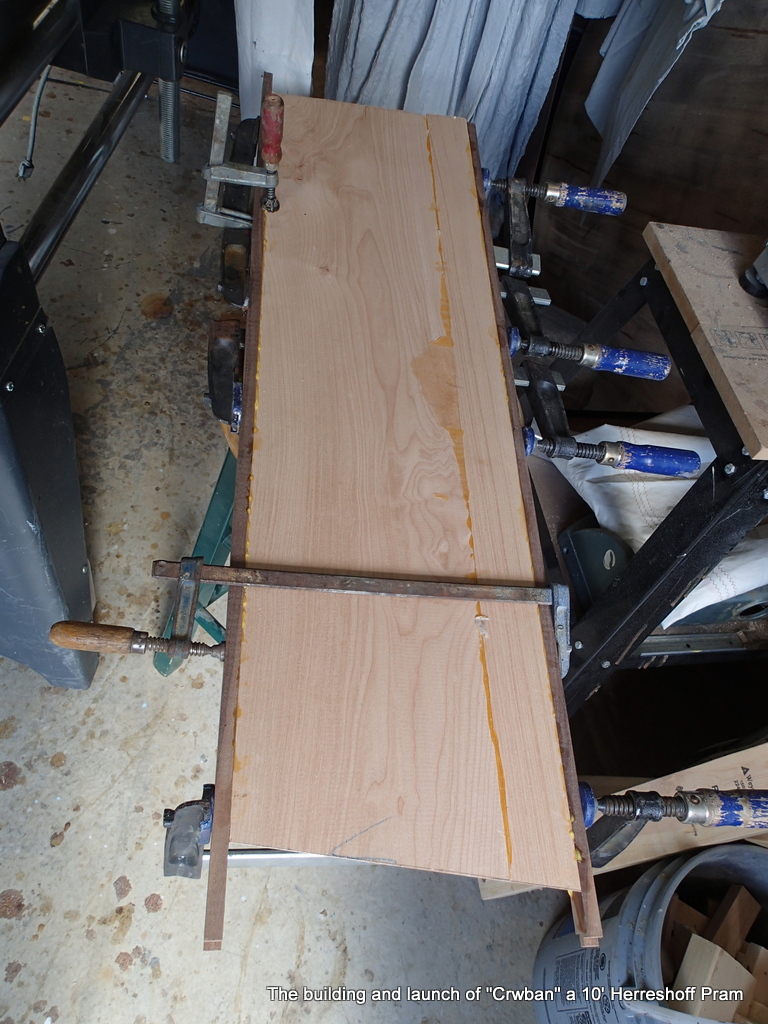
The planks are almost 16′ long so I can stagger the scarf joints well.

Gluing plank two on.

If I have fitted the planks well, I can use bulldog clips to clamp the planks together.

Plank three.

I am putting on a plank a day. So, ten days to plank.

Plank four. Over to 4mm planking

I cut a notch in each transom for each plank. The better the fit, the tighter the seam between the planks.

Plank five.
Plank six.

I have to be careful fitting the planks. Some of the planks are not identical to their sibling on the other side.

Plank seven.
Plank eight.
Plank nine

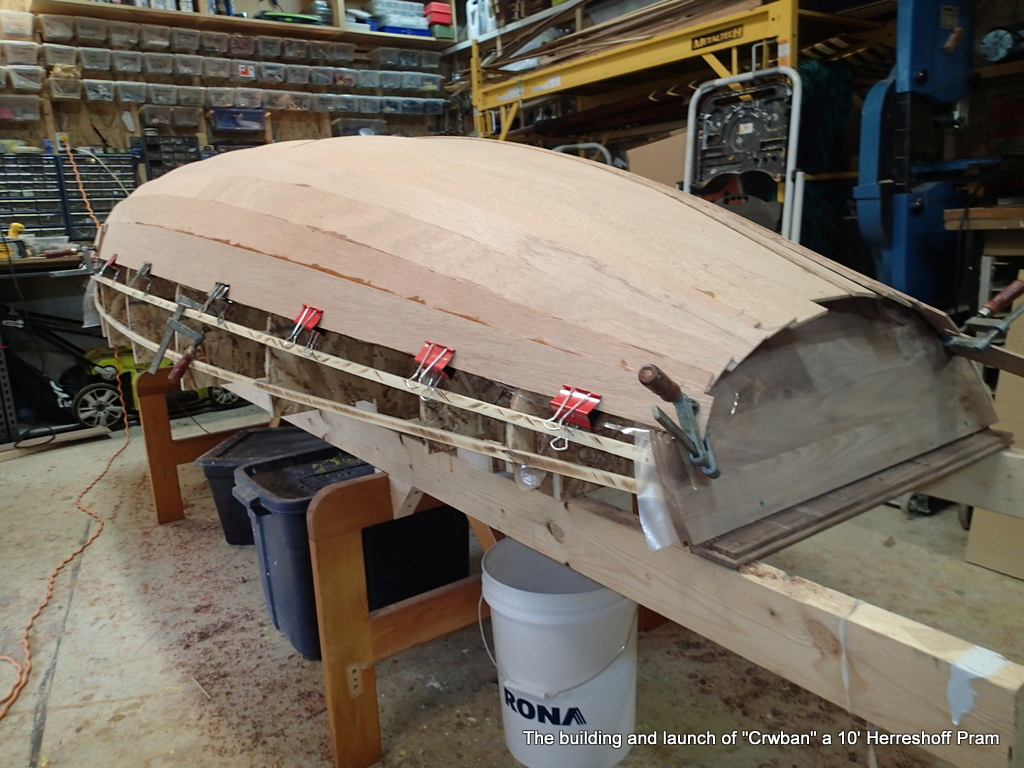
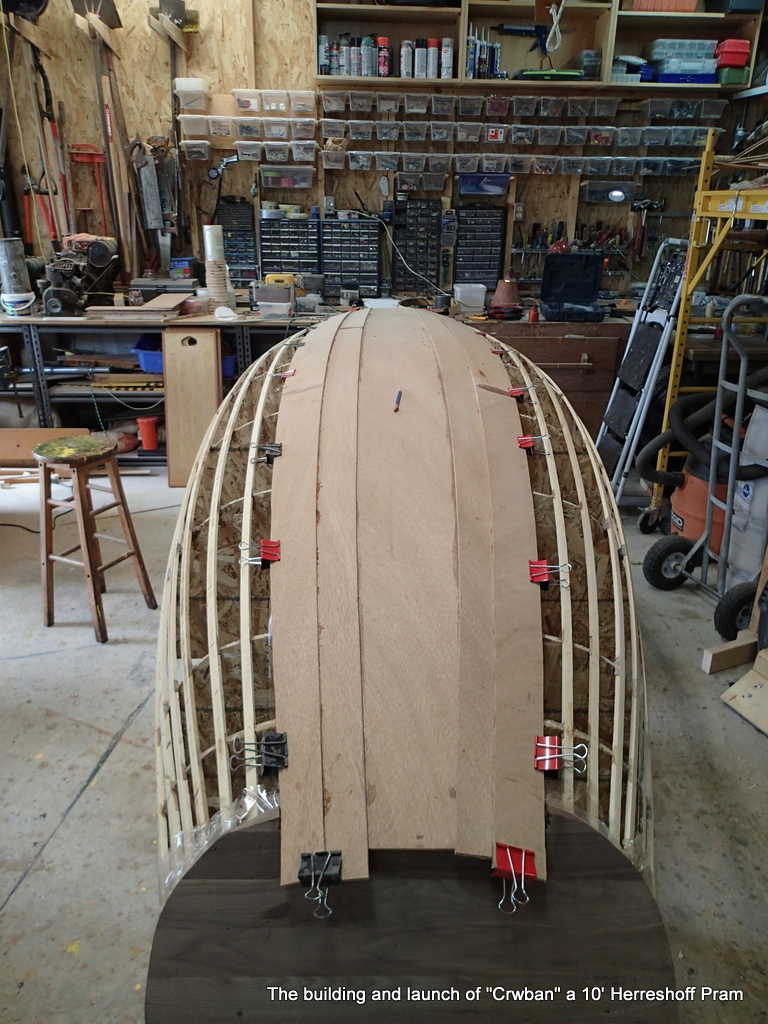
Plank nine is the last of the 4mm planks. Plank ten, the sheer strake, will be 6mm.

Plank ten, the sheer strake. I finally get to use some of those Brenne Clamps I made.
Clamps off. All planked up.

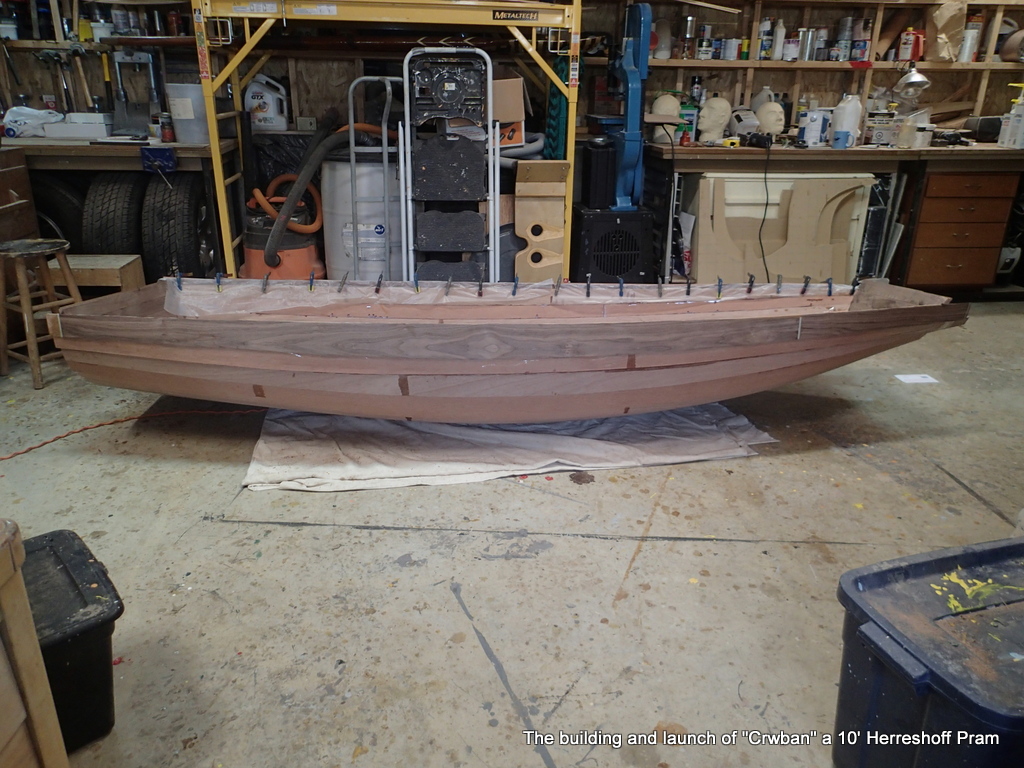
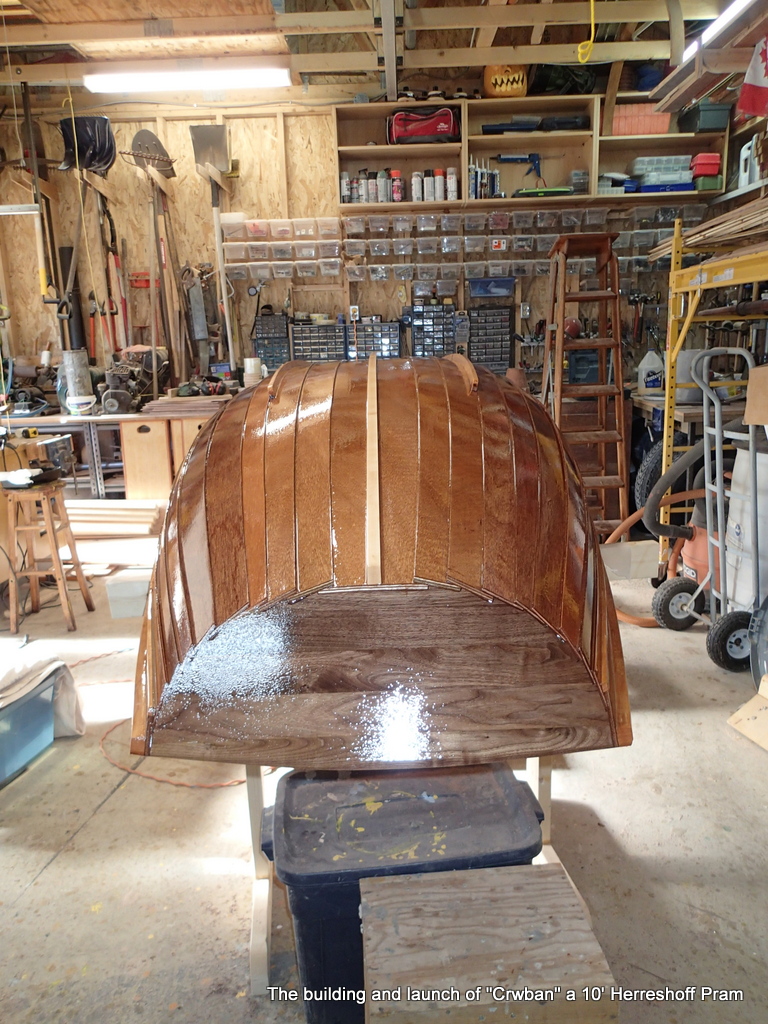
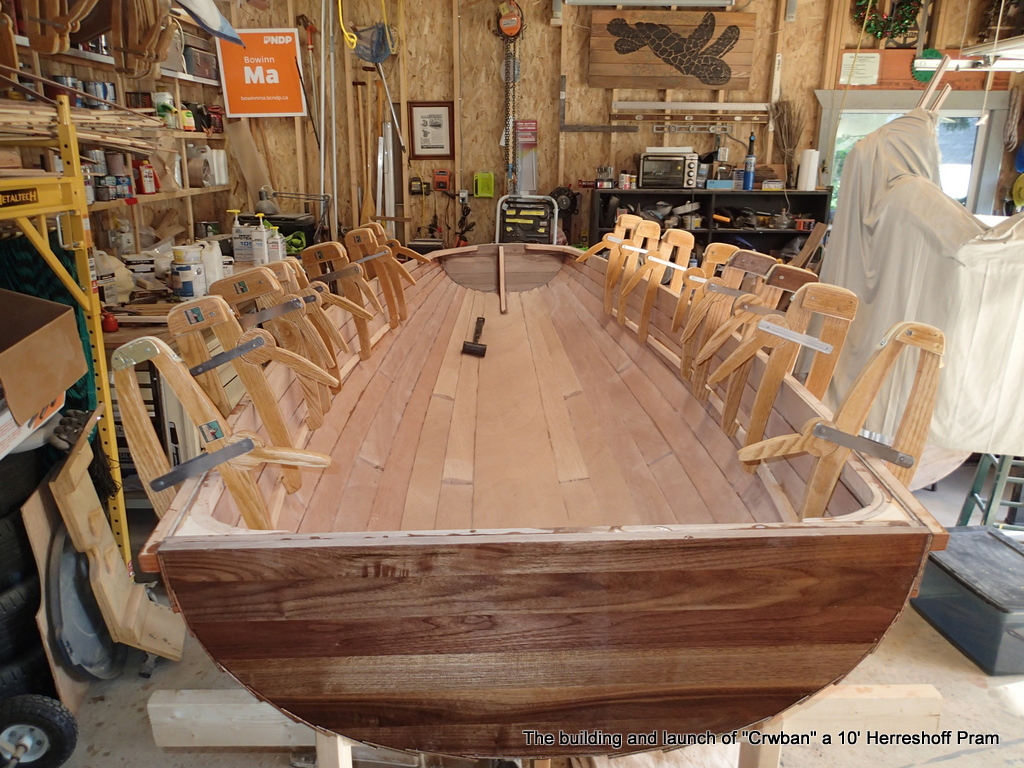
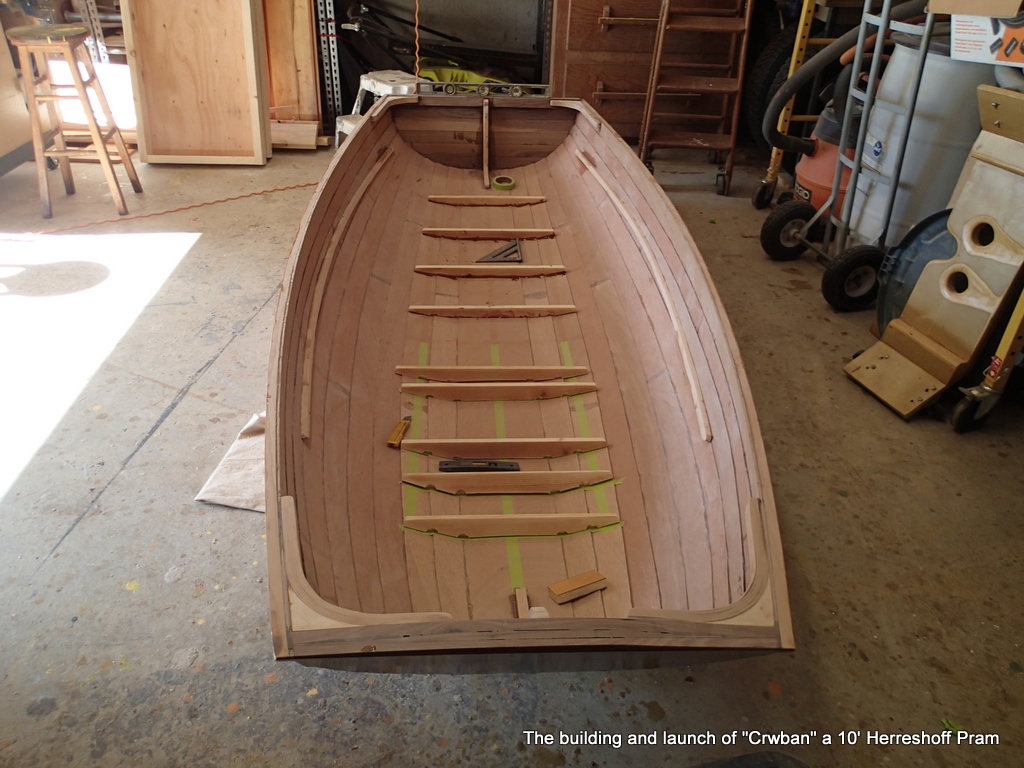
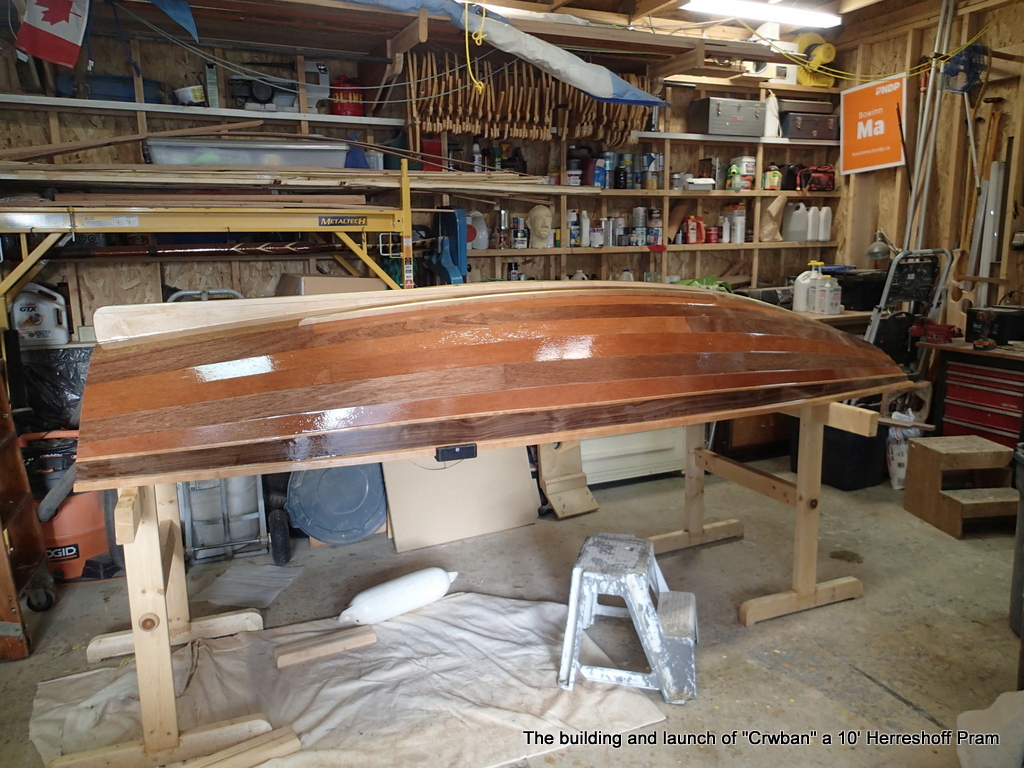
With the hull planked, time to set the sheer line.

sheerline setting

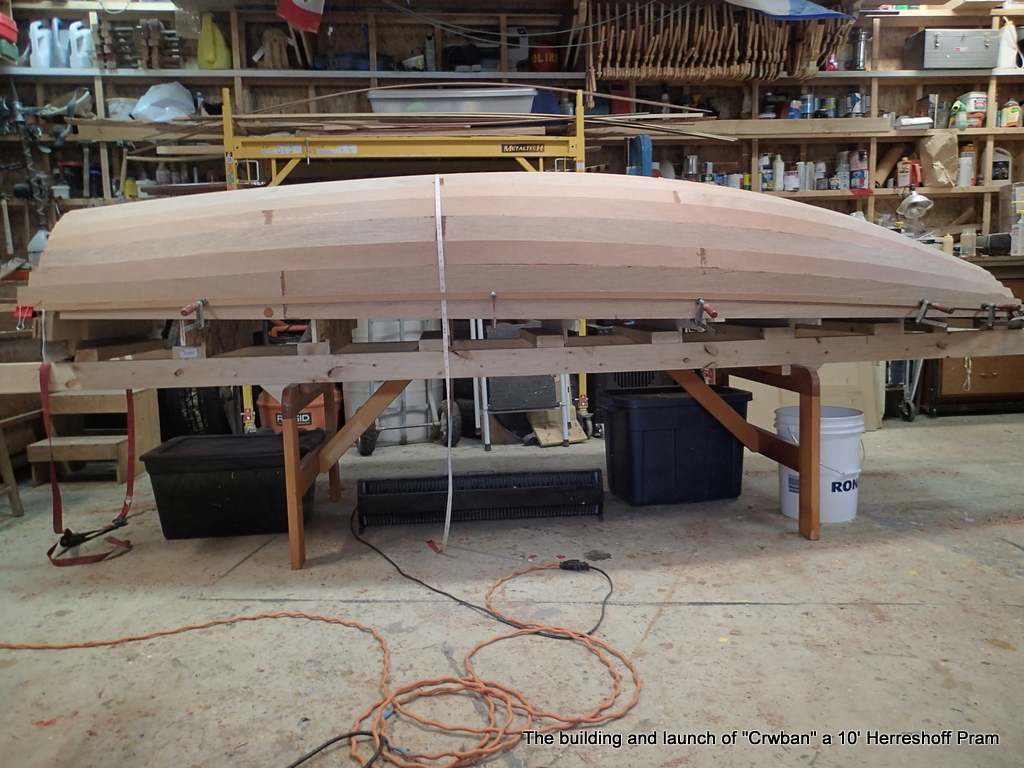
Using the measurements from the plans and a lot of eyeballing, I mark the sheerline.

Marked and ready to cut…almost.

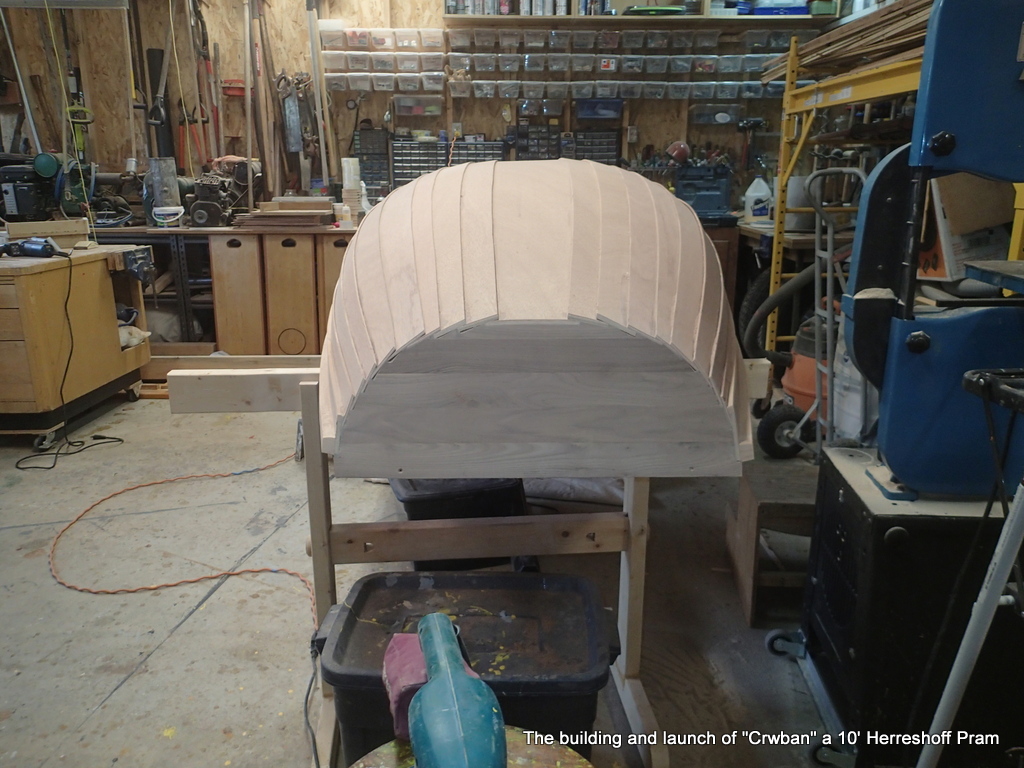
With the sheerline marked, the next step is to cut it out. I will have to remove the boat from the forms to cut the sheerline.

She just “popped” off of the form.

Now I disassemble the form to make space for the boat while I finish her.

Sheerline marked for cutting.

To cushion the hull, I use a big dropcloth.

Gluing on the walnut veneer

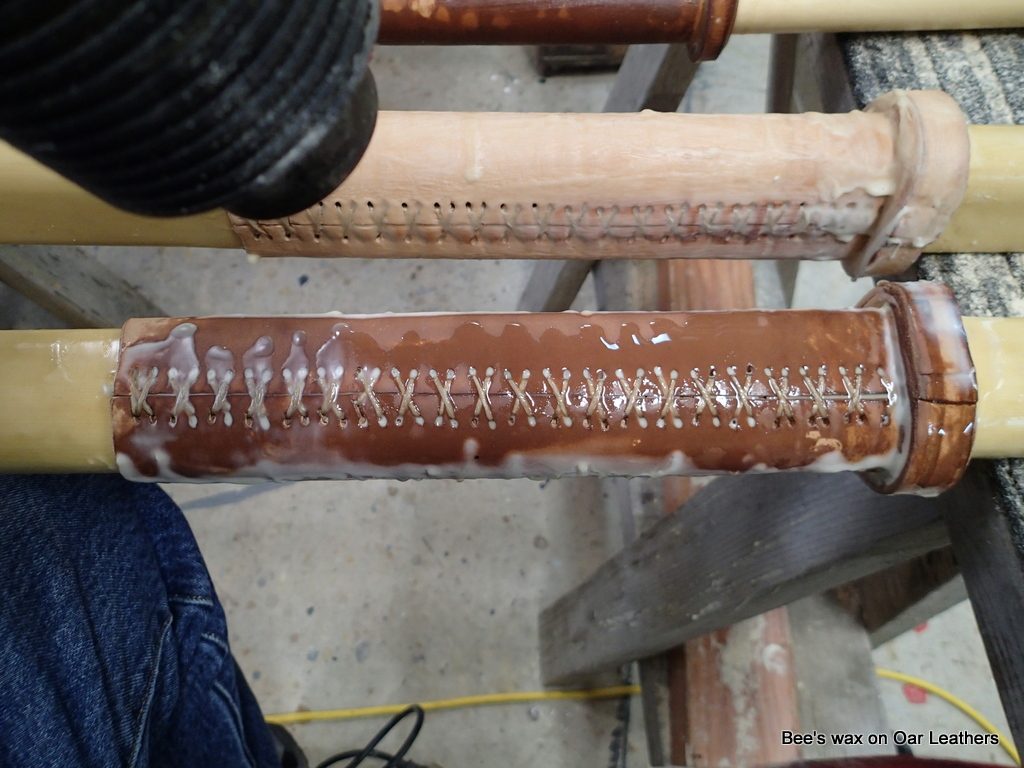
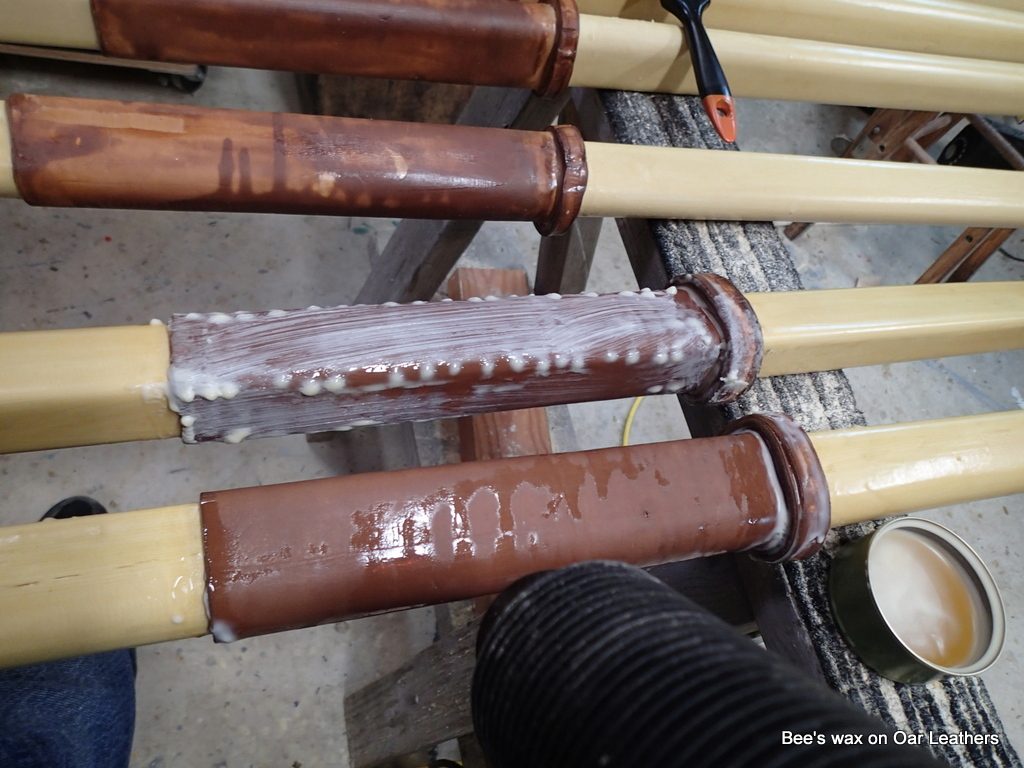
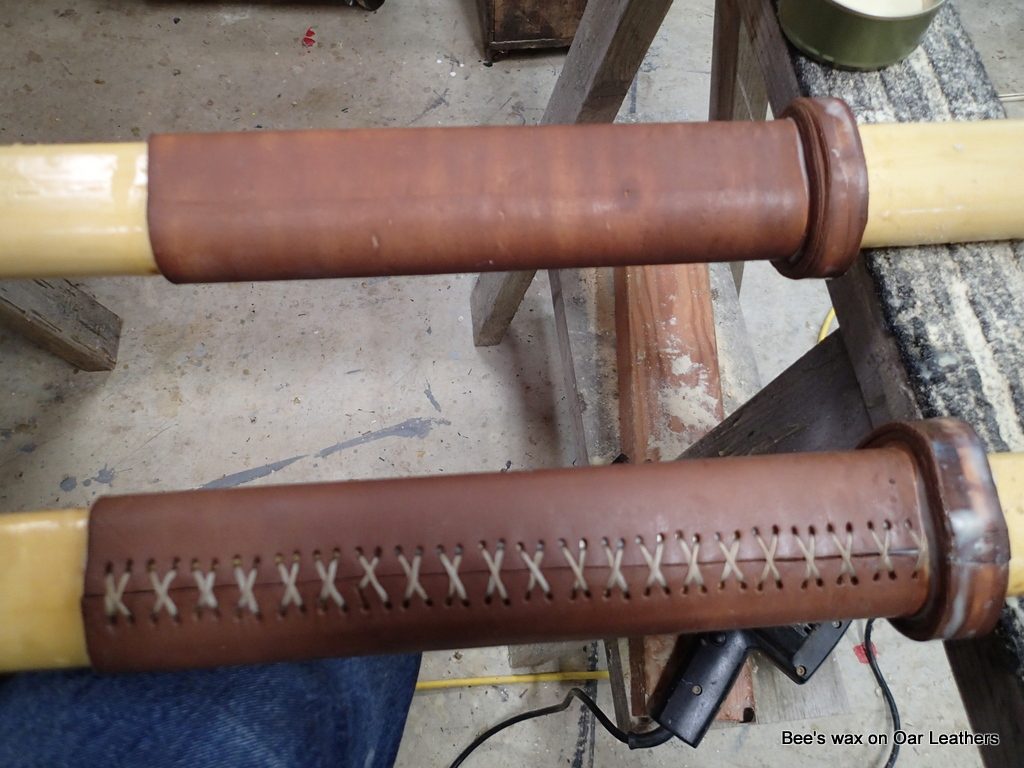
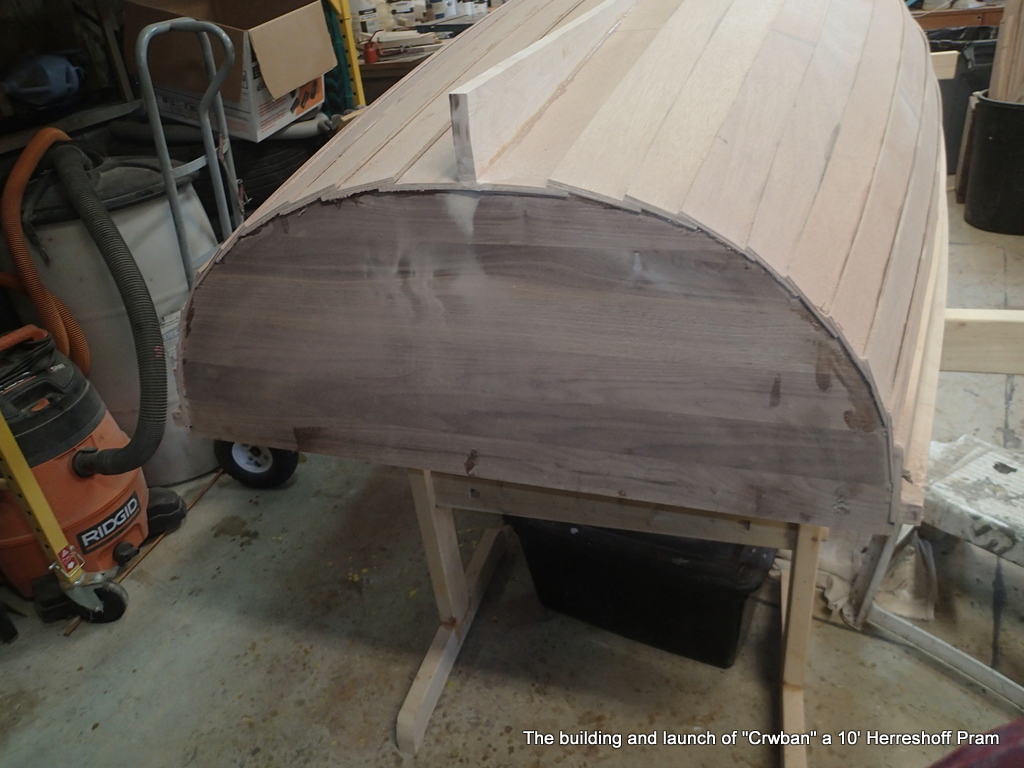
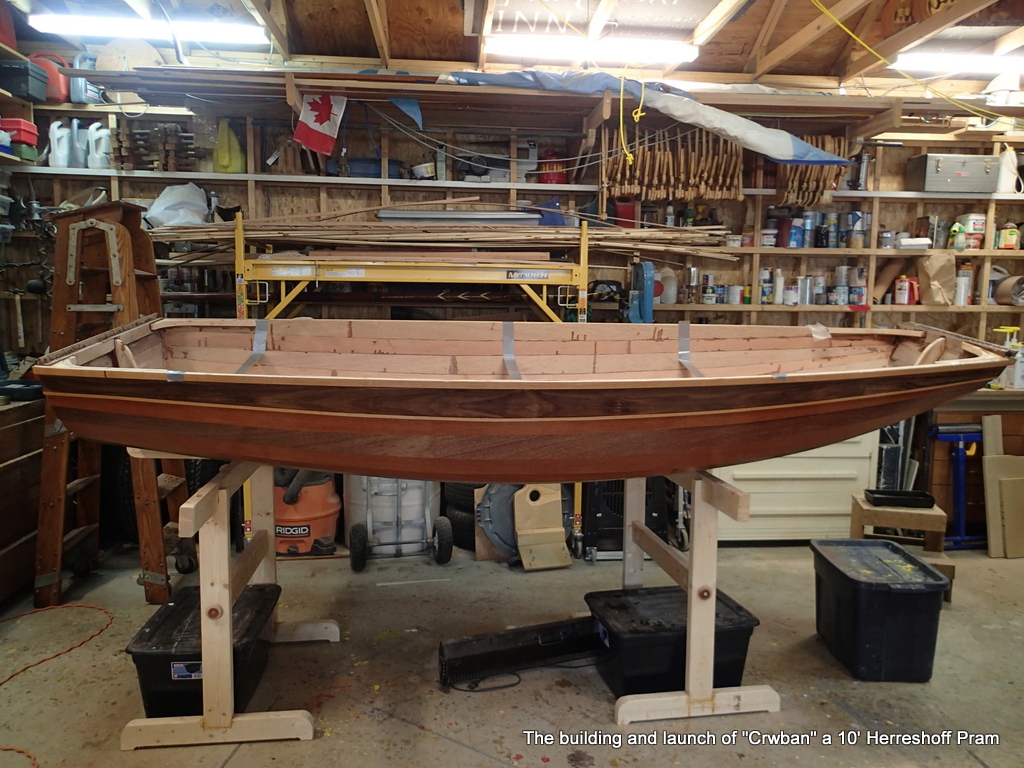
To tie the colour scheme together, I am gluing a walnut veneer to the sheer strake.

Lots of clamps and pads.

I am using Titebond II to glue the walnut veneer on with.

“Walnut” sheer strake.

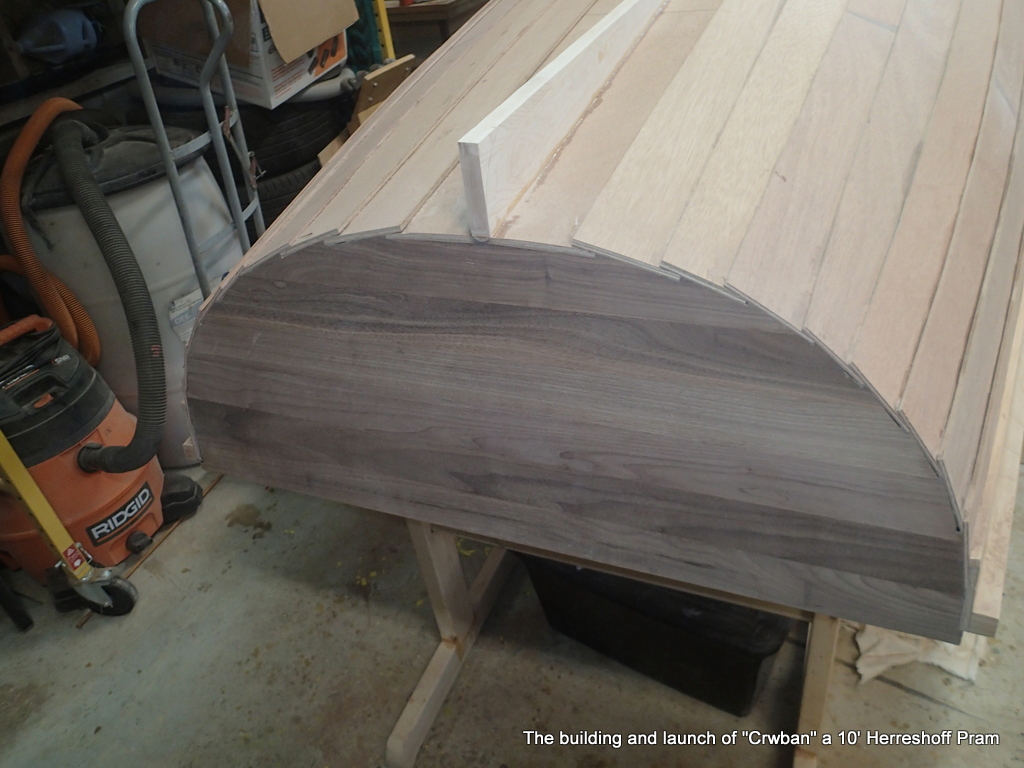
I am going to use maple for the gunnels and along the bottom of the sheer strake to highlight the walnut,

Cutting the scarfs for the maple sheer strakes

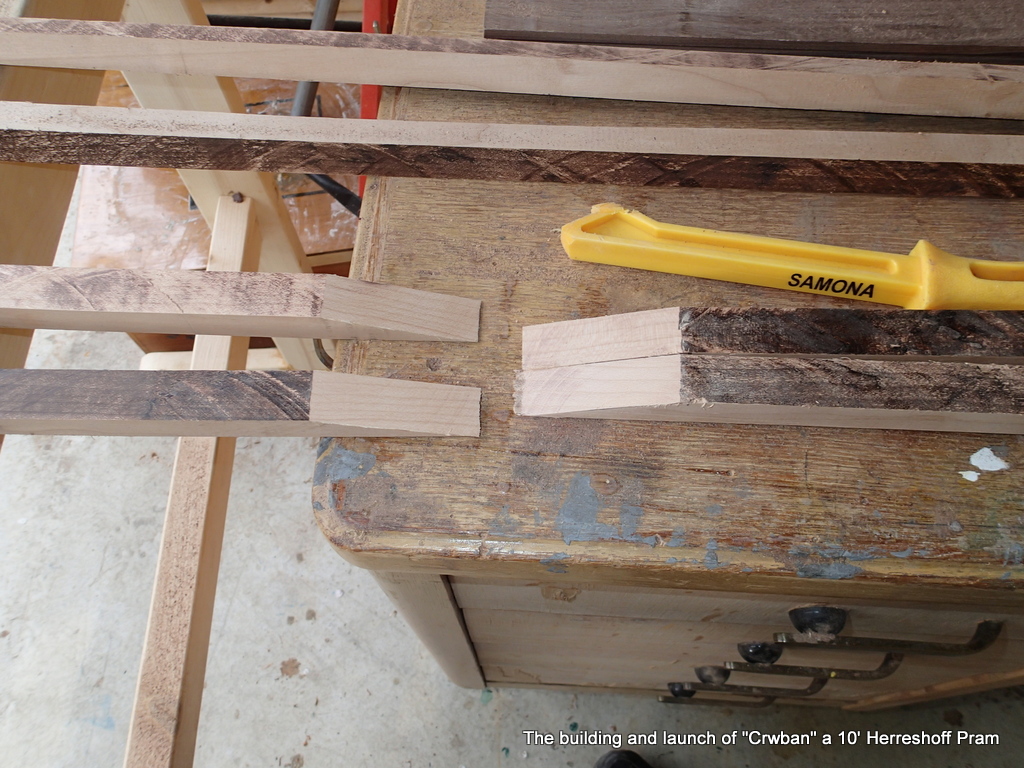
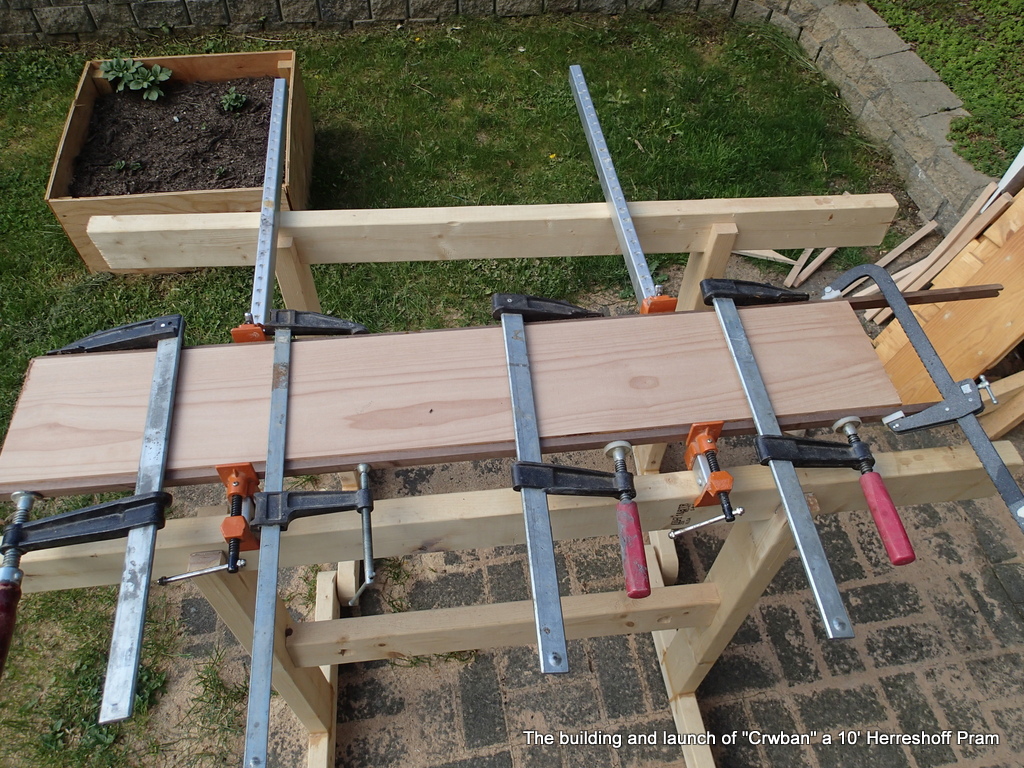
My pieces of maple are not quite long enough…Time for another scarf joint.

Epoxy gluing the gunnels.

I made two sawhorses using Tom Devries’s ideas from Small Boats e-Magazine. (April 2020)

A Spanish windlass pulls the gunnels in.

Lots of clamps help, as I have to pull the gunnel strips in for a tight fit.

Maple accent strip.

To highlight the walnut sheer strake, I am epoxying a maple accent strip to the bottom the the plank. It will look good and protect the bottom edge of the strake.

Laid up

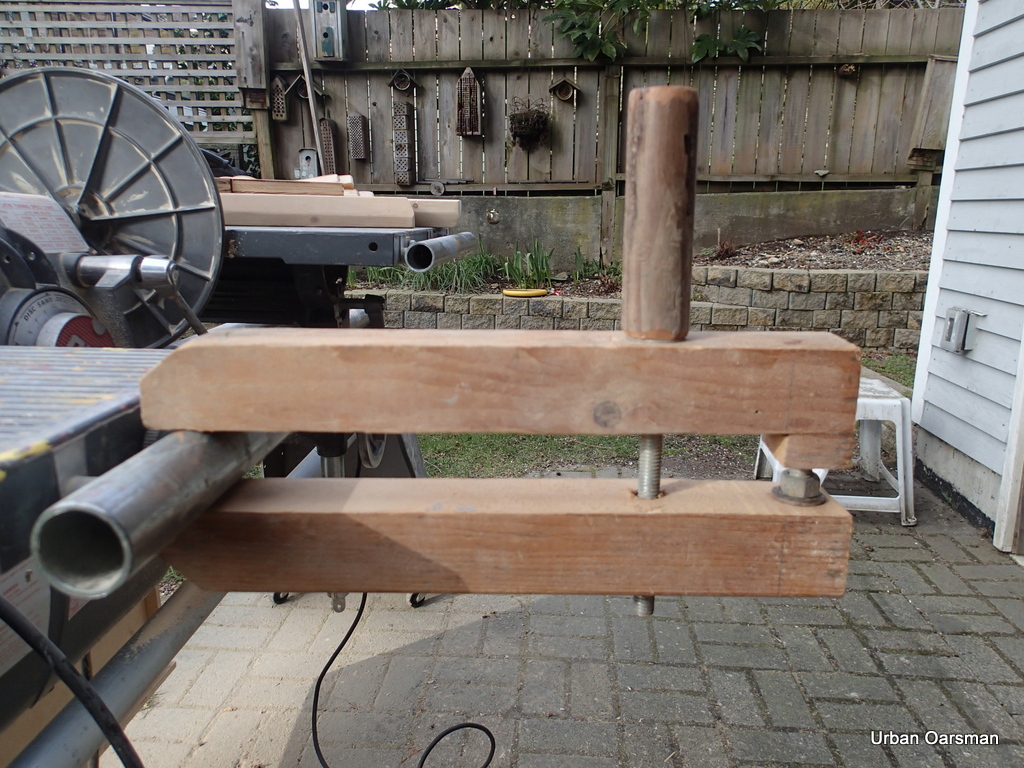
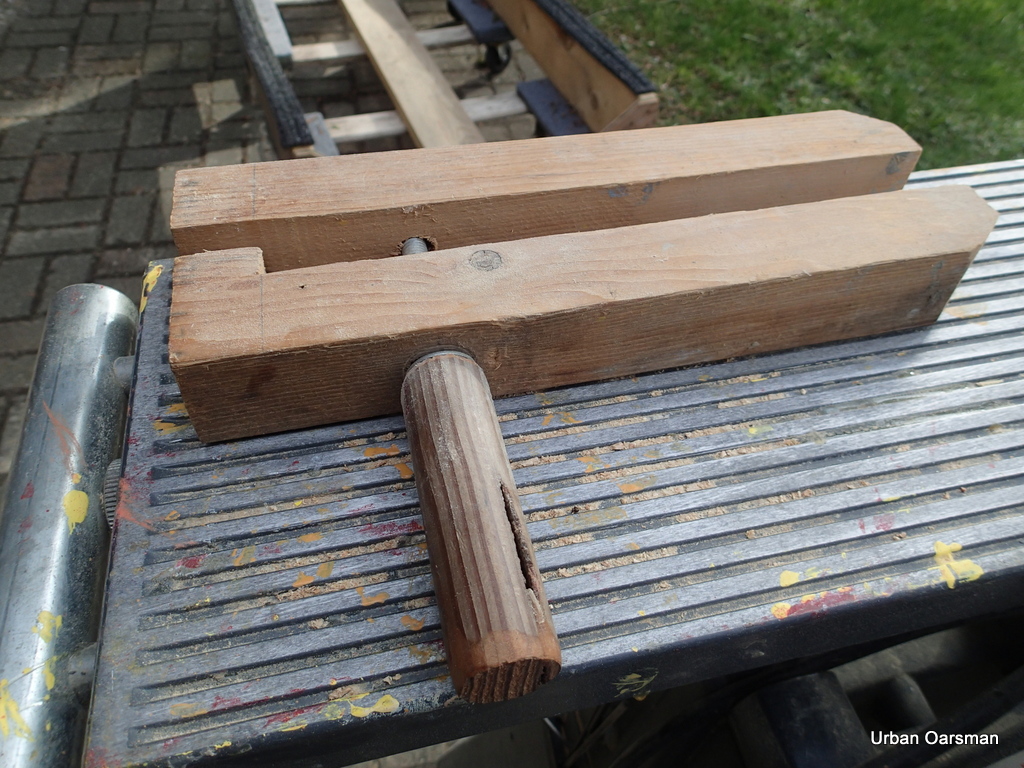
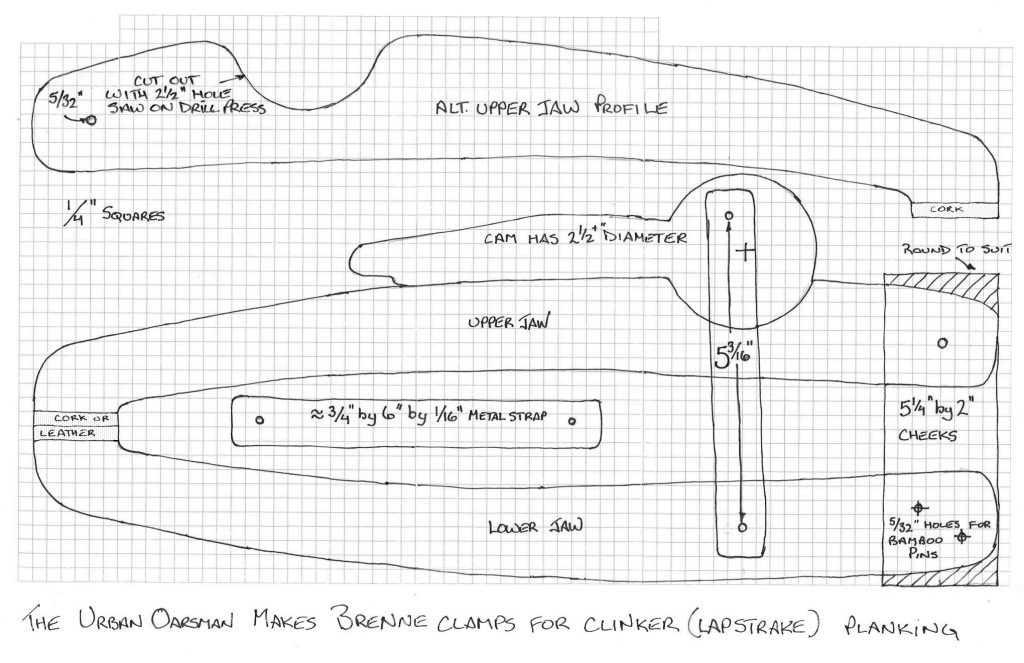
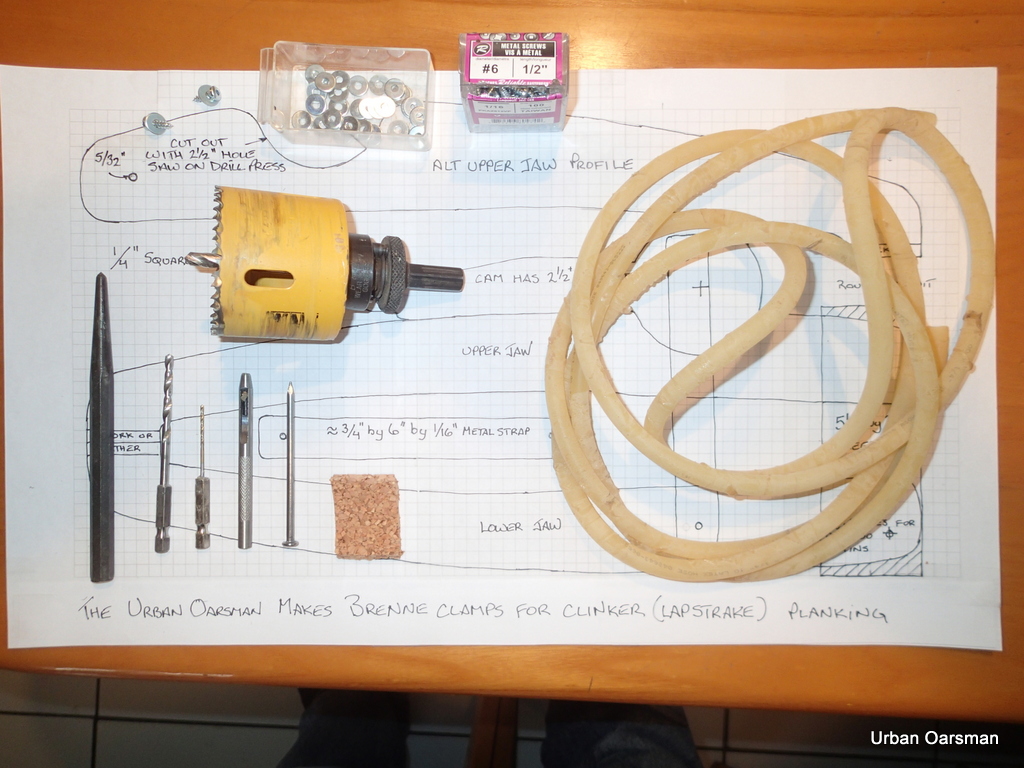
Get to use the Brenne clamps again. They actually work really well.

Time to sand

There will be a lot of sanding to do. I am aiming for a bright finish.

Gluing up the keel

I am making it out of 3/4″ maple.

Maple strips on the boil

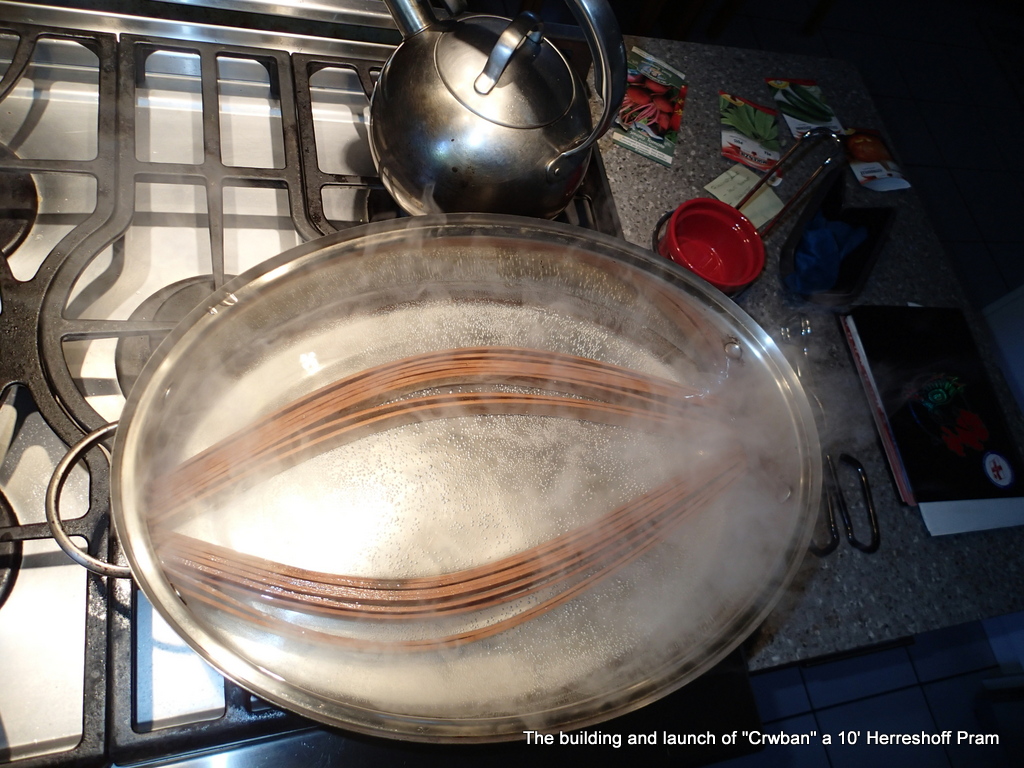
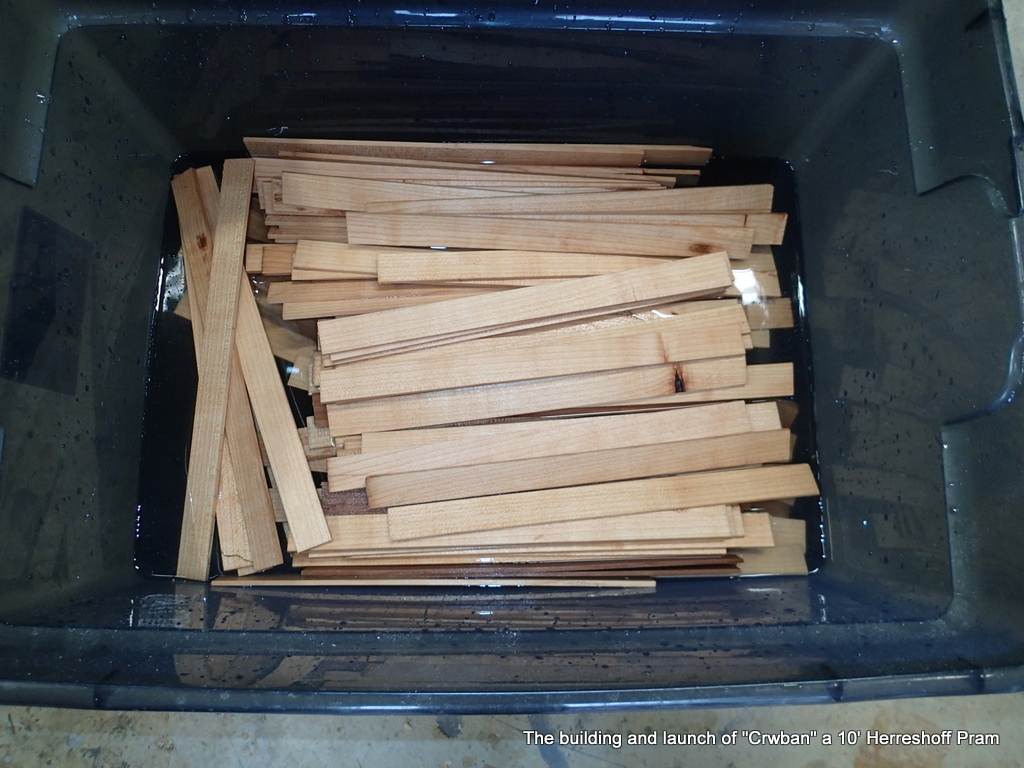
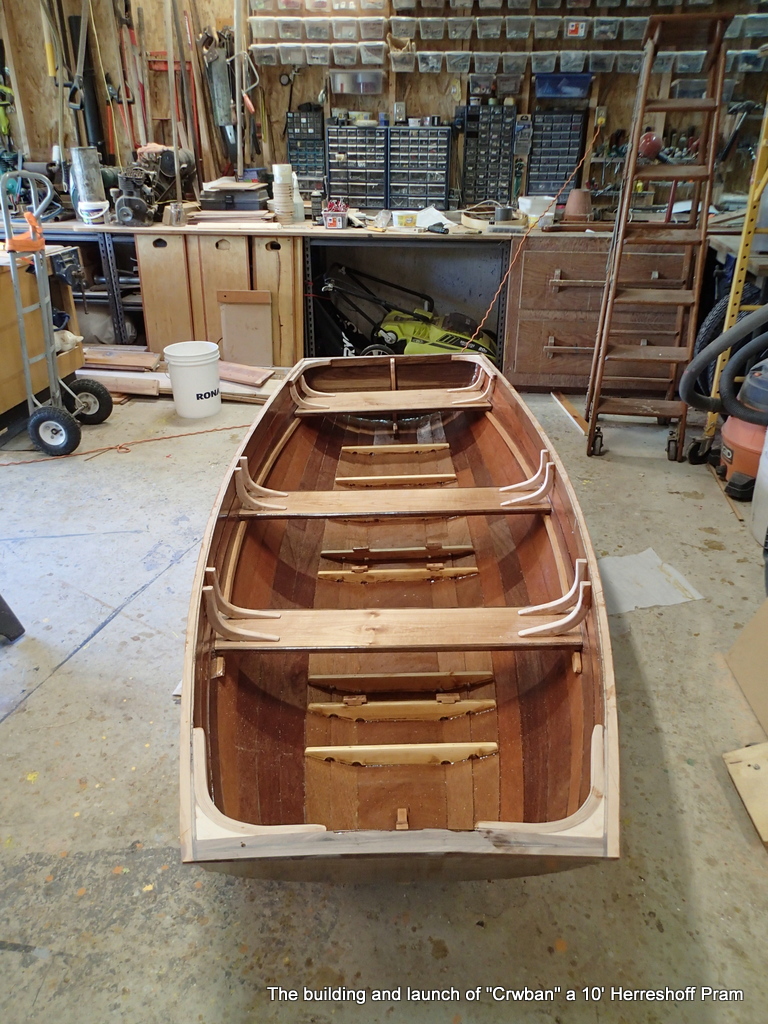
I am going to laminate all of my knees. I rip up the rest of my maple stock and boil them up for bending.

Strips in form

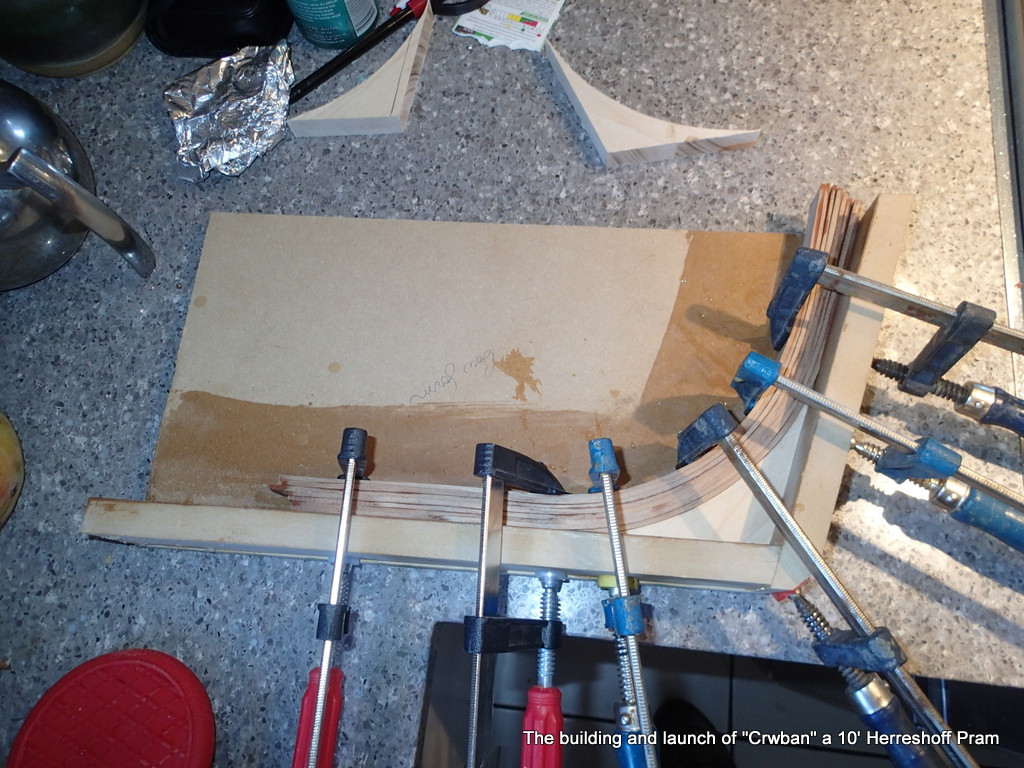
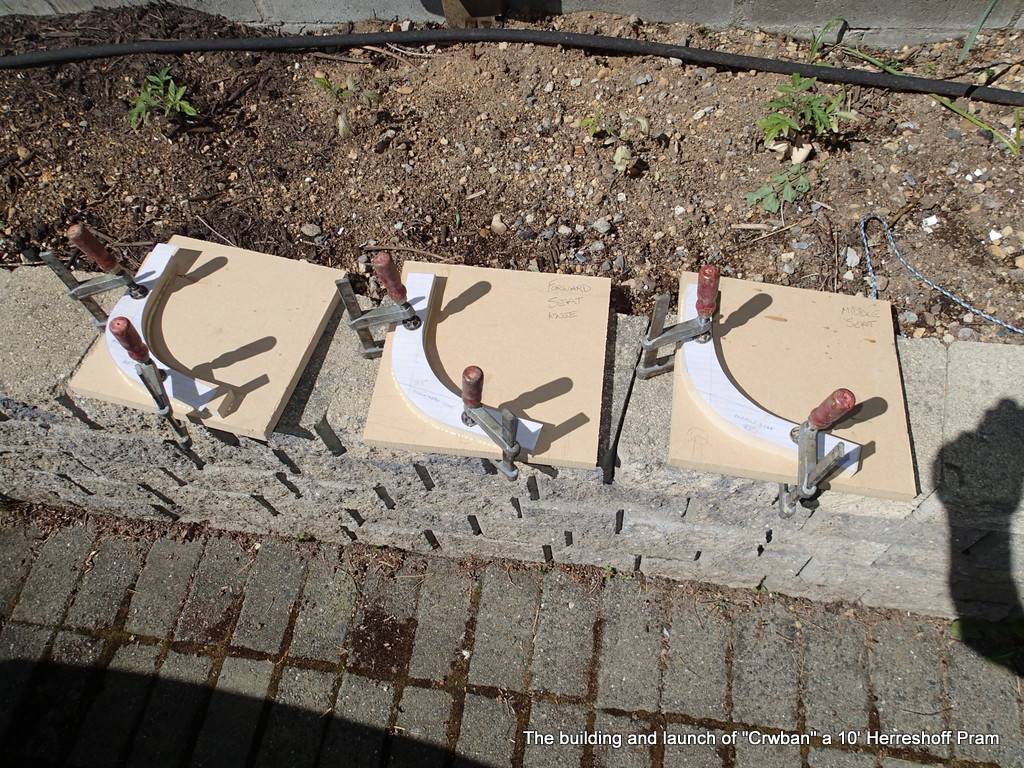
I make up a form for each type of knee. Keel to Stern, Keel to Bow, two Stern to Gunnel and two Bow to Gunnel. I will make up the 12 thwart knees (Each seat will have two knees) when I do the thwarts.

Glue-up

I only have one form for each type of knee. The epoxy cures overnight.

Stern transom knee base epoxied in.
Stern, Bow and quarter knees in.
Bow knee and bow transom knees.
Stern knee and stern transom knees in. Brass mallet holds the knee in position.
Planks trimmed flush

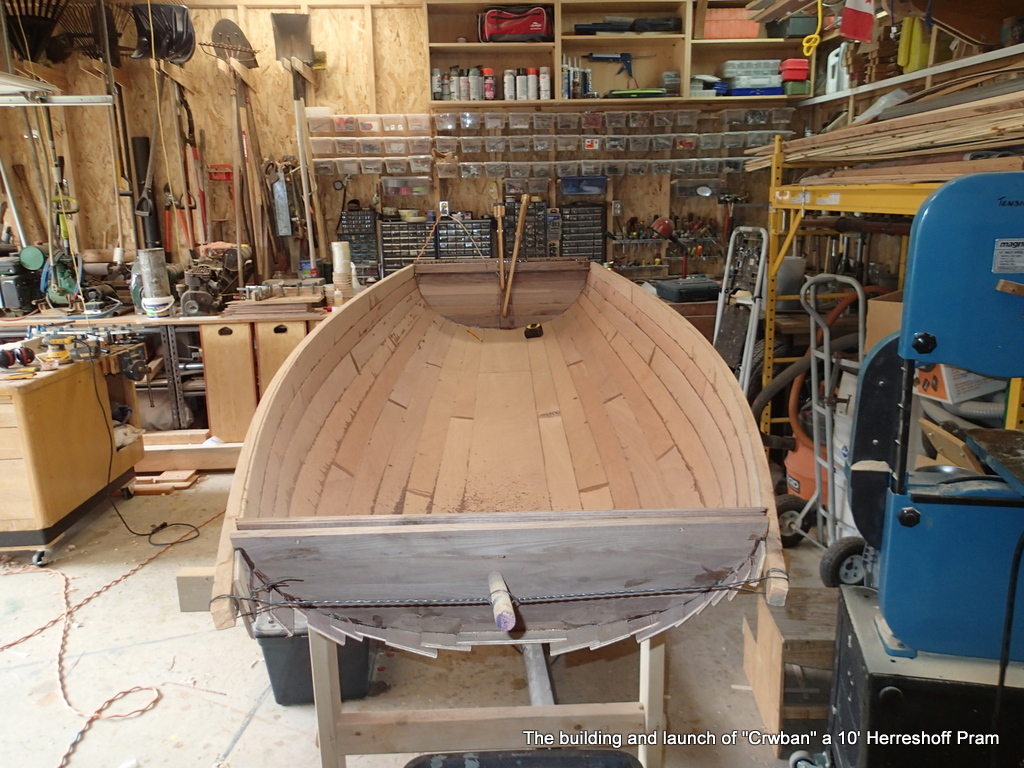
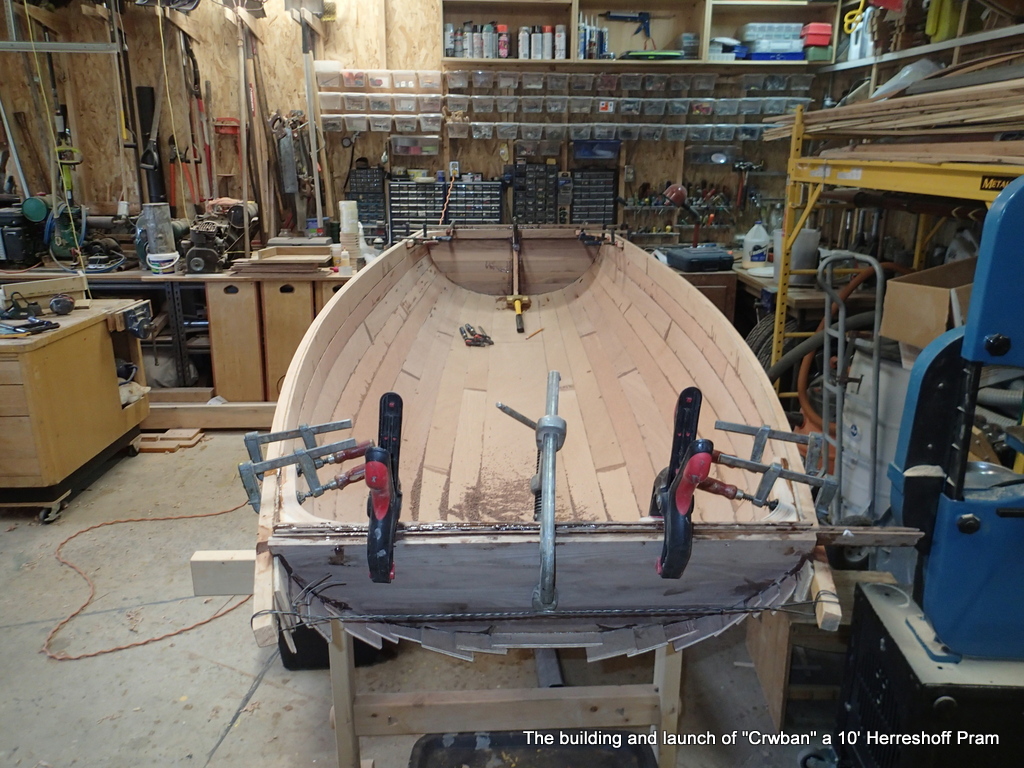
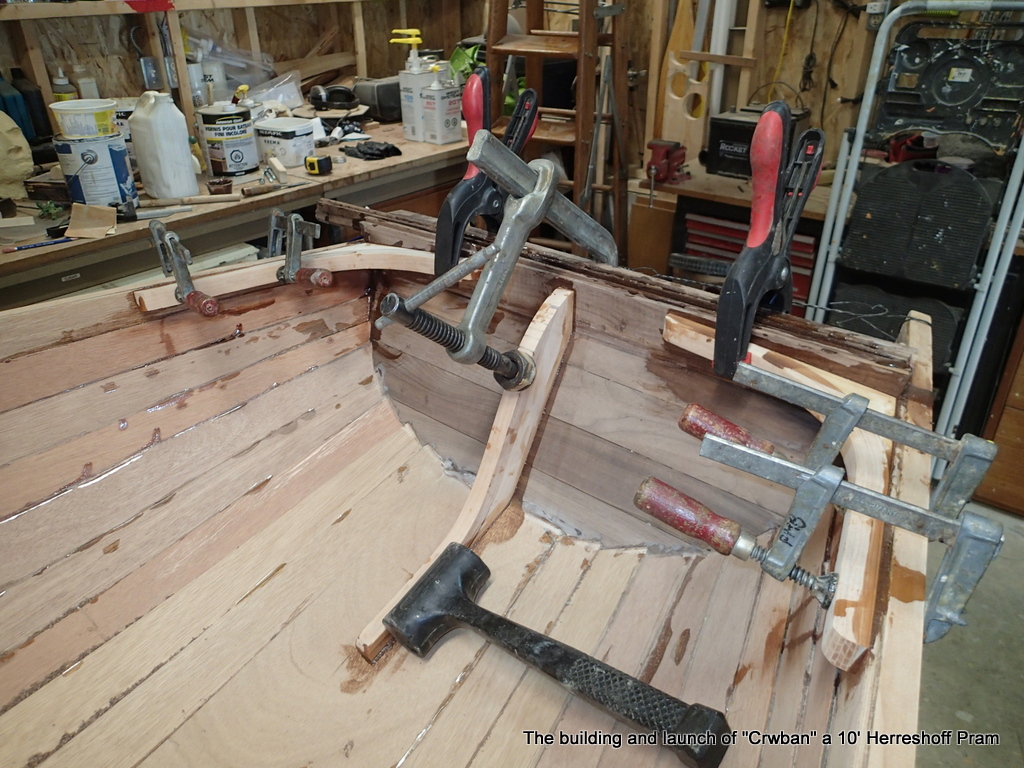
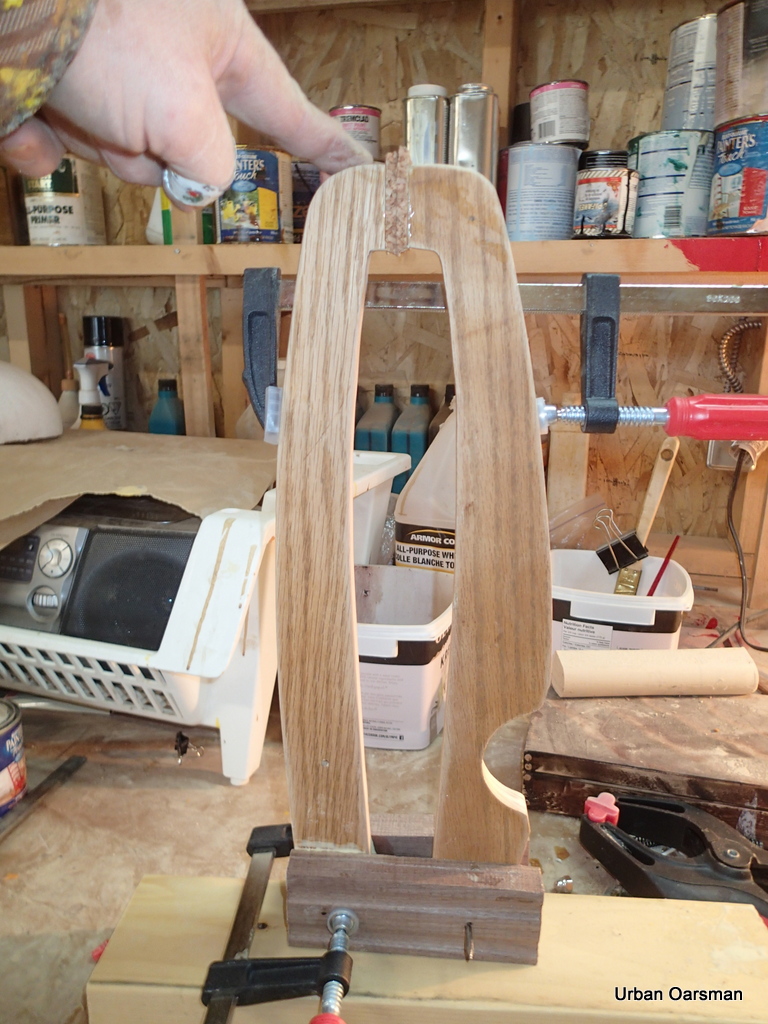
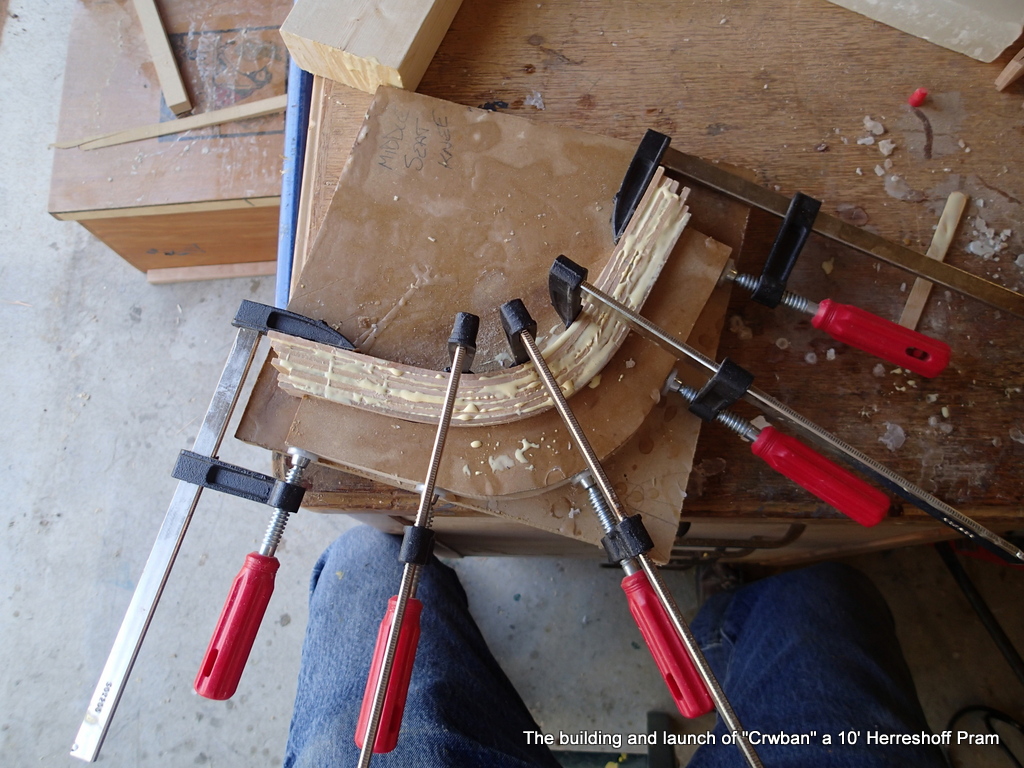
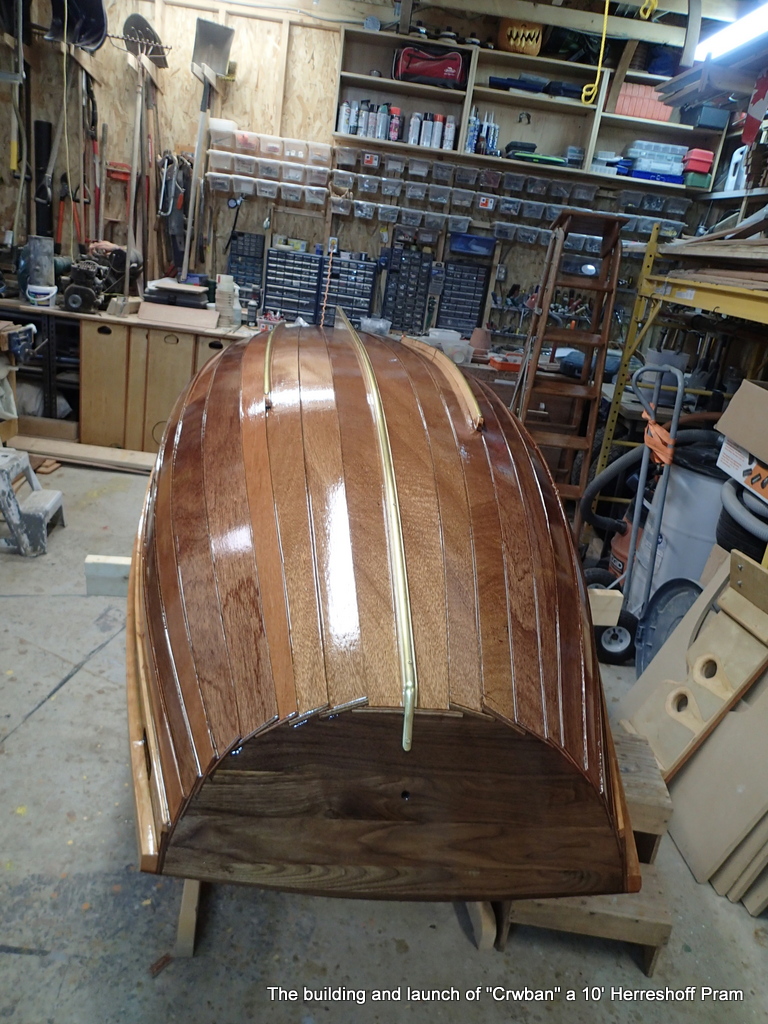
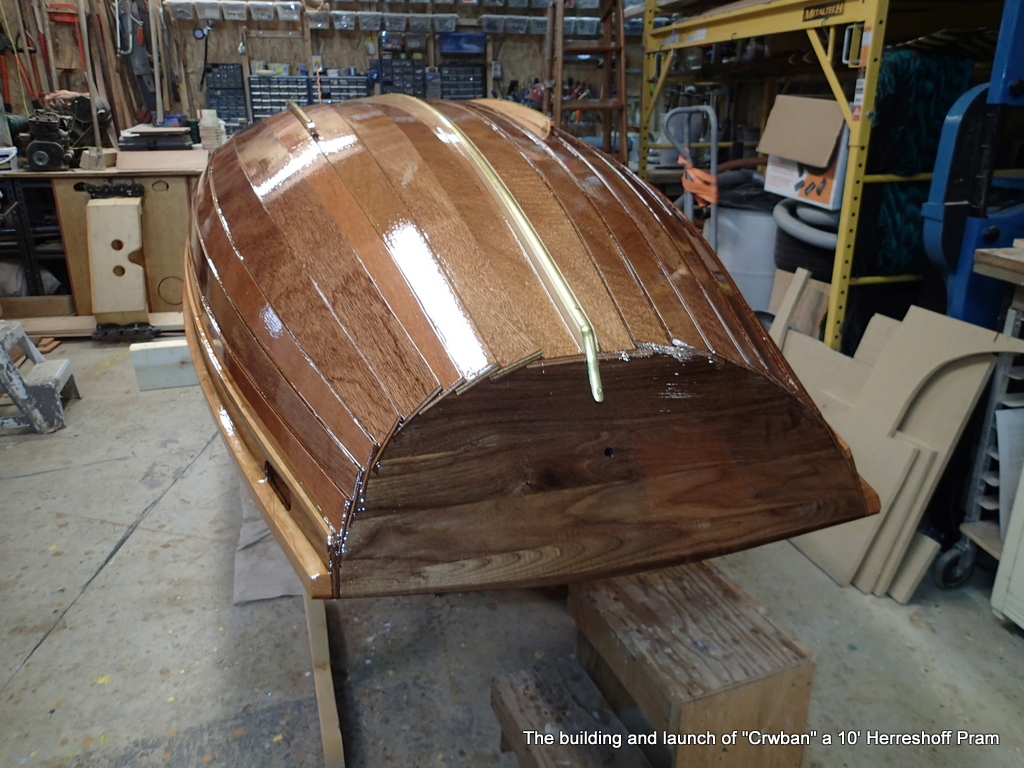
With all of the hull knees in, I trim the planks flush with the bow transom.

Keel build

The keel is going on in two laminations. I glue on the first piece. There is enough plank left to clamp to.

Planks trimmed flush

When the epoxy has cured, I trim the planks flush. Ready for the next piece.

The rest of the keel glued on.

More sanding occurs now

Coat of epoxy

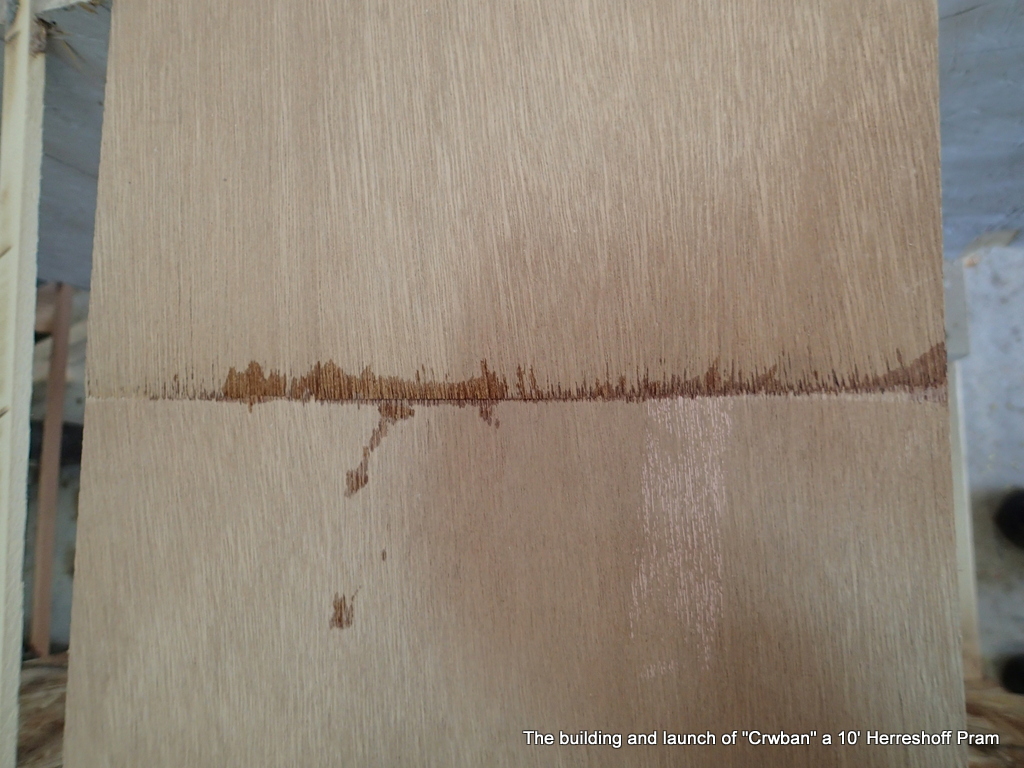
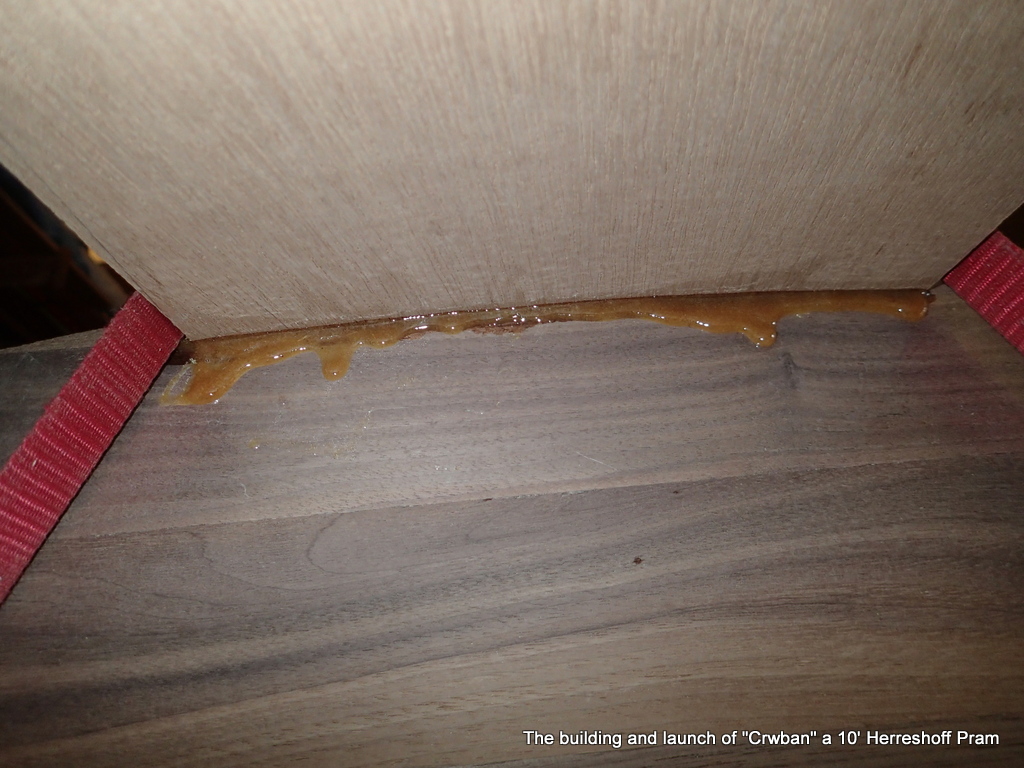
A coat of epoxy seals the marine plywood and insures that all of the plank laps are glued together.

Seat fitting

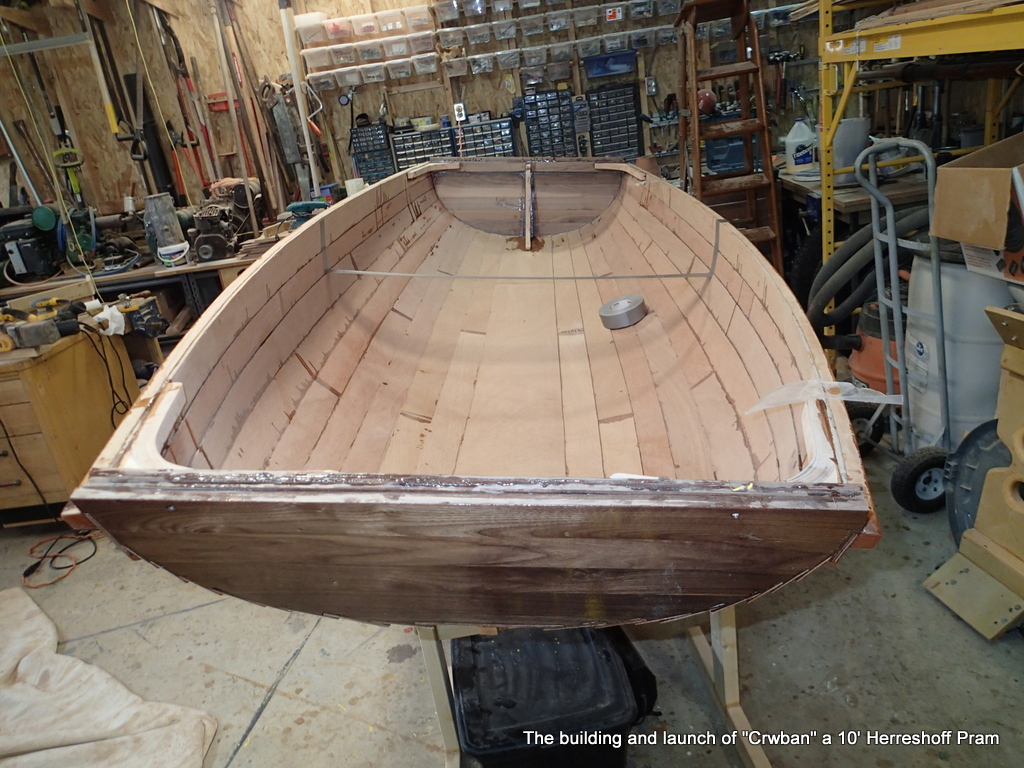
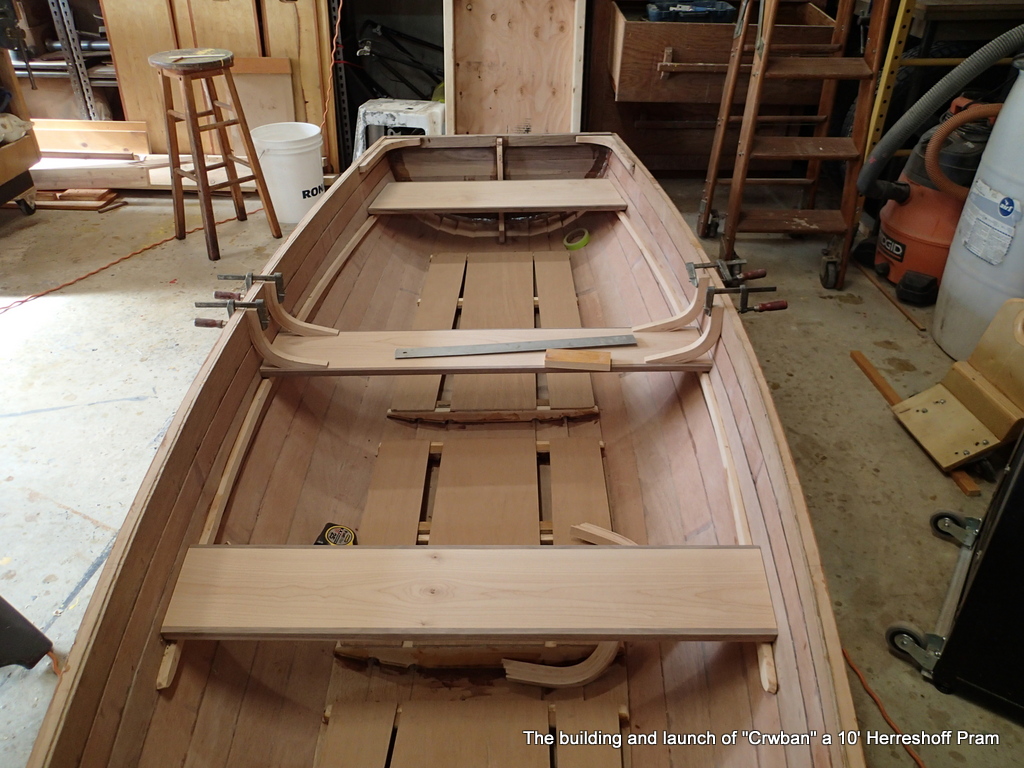
Some of the drips visible on the inside are from gaps in the planks. The tape is marking where the centre thwart will go.

Tape marks seat edges.

I am doing this to determine how much material I need to make the seats. I have not yet decided how I am going to make the seats.

Rub strips

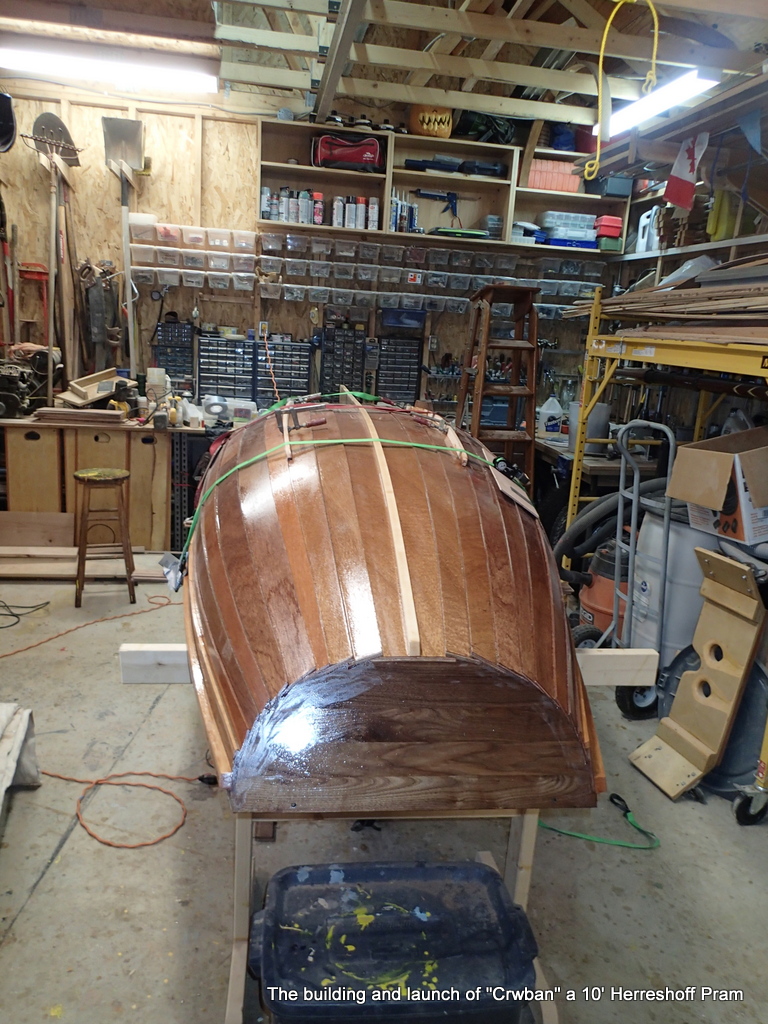
In the meantime, I make and epoxy on the rub strips.

Hull sanded

The hull is prepped for another epoxy coat. Lotsa sanding.

Another coat.

With the outside of the hull more or less finished, I work on the seat knees.

Thwart knee forms

More ripping of maple stock.

Maple strips soaking

While the maple strips soak, I work on the seat risers…maple strips

Brenne clamps to the rescue!

I mark the hull where the seat risers should go…6″ below the gunnel.

Marking the floors.

The floors will be fitted to the first three planks, with limber holes.

Weight?

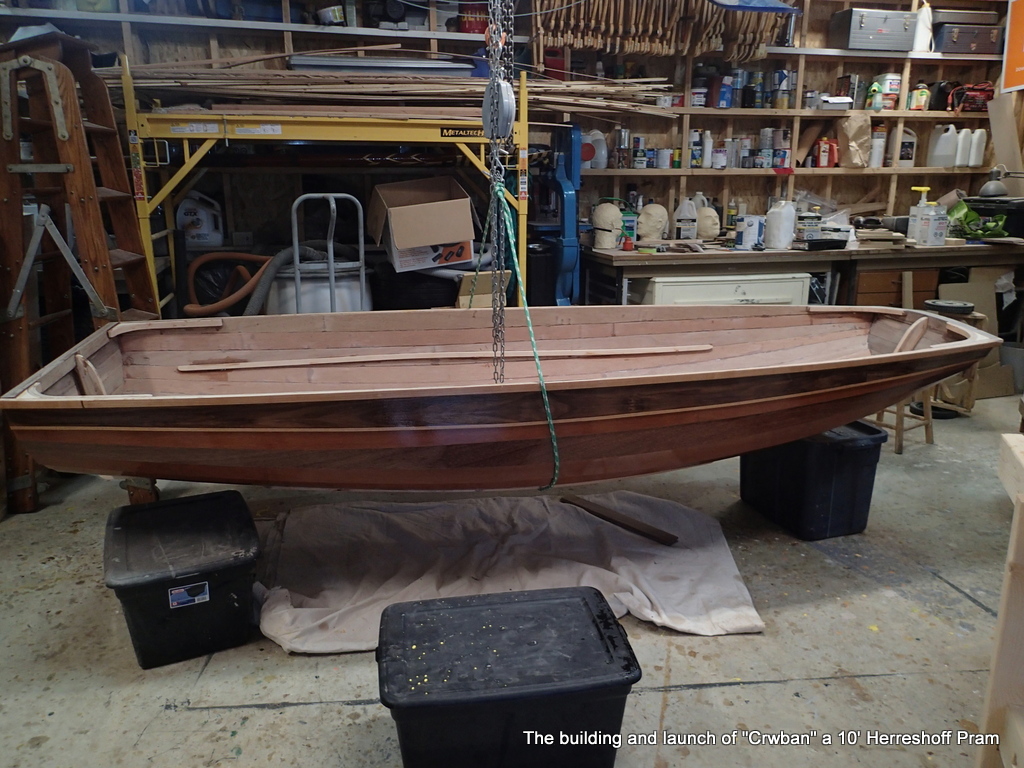
I am going to weigh the boat. I had predicted a hull weigh (planking only) of 60 lbs. What will she weigh with the knees, gunnels, seat riser and keel?

50lbs!

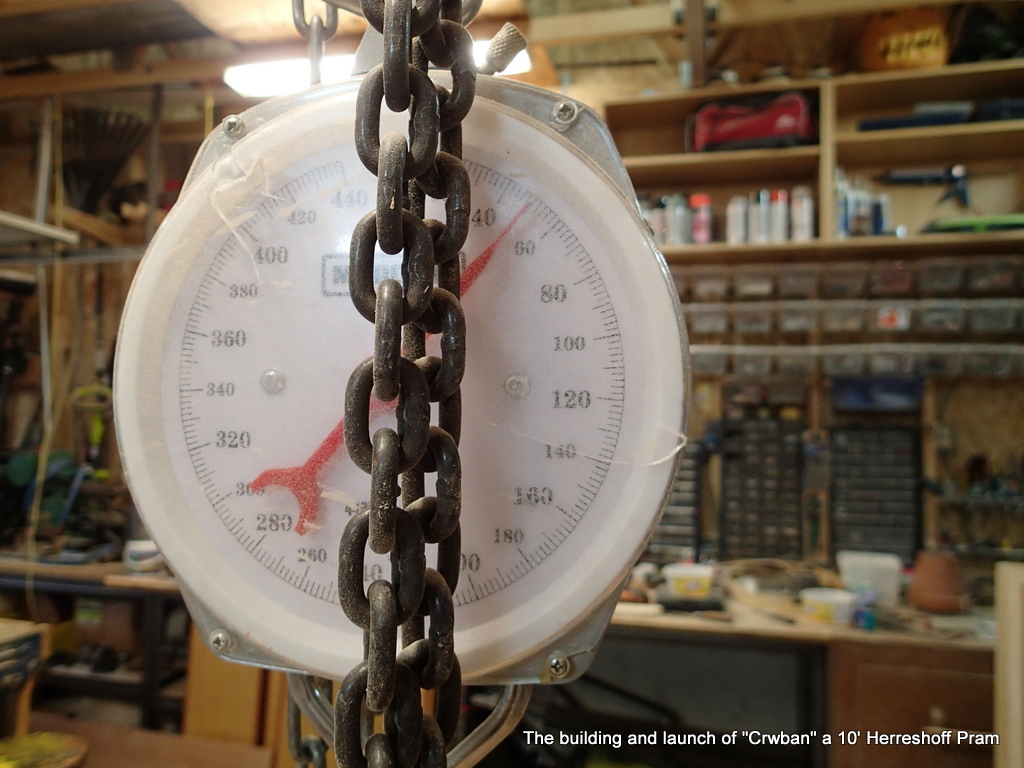
The hull weight is good. I am hopeful for a light boat

Bent strips and forms.

The knee strips are bent and ready to be glued up. Titebond II and lots of clamps.

Glue-up

Each strip is coated on both sides with Titebond II. The form has been waxed to prevent sticking.

Overnight dry

While I am making the seat knees, I begin work on the floors.

Scribing

The floors are scribed and then cut. I use the 12″ disk sander to fine fit them.

Still fitting

I use a pencil on a block to mark the cuts, then the disk sander to fine fit.

Cutting the limber holes

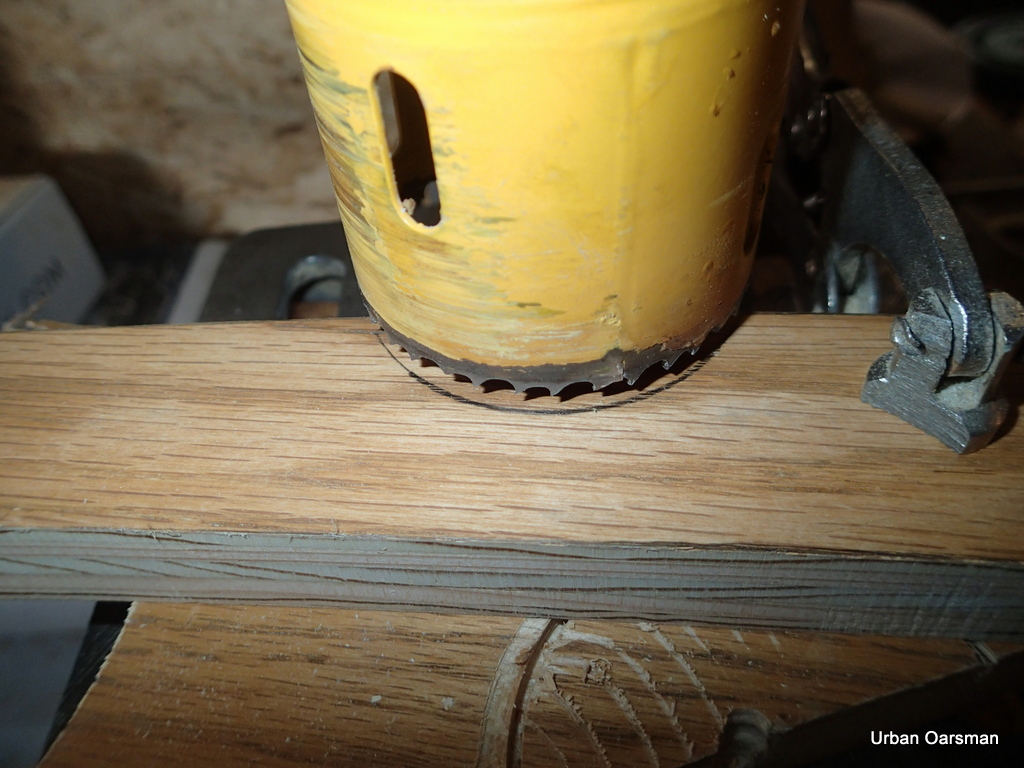
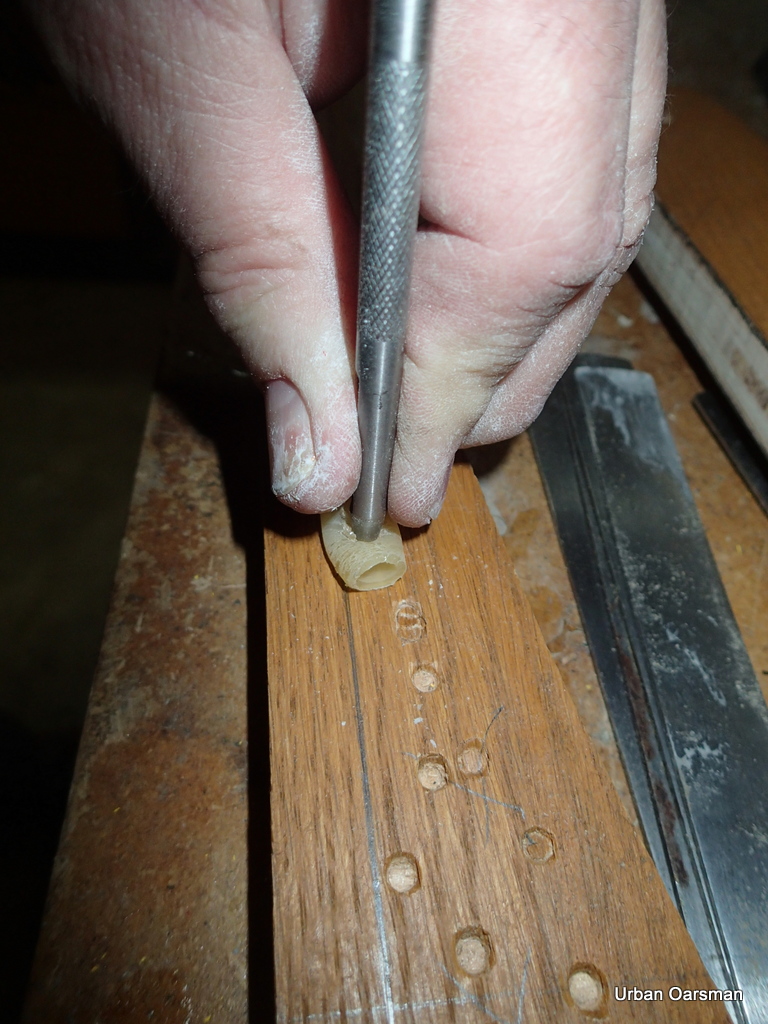
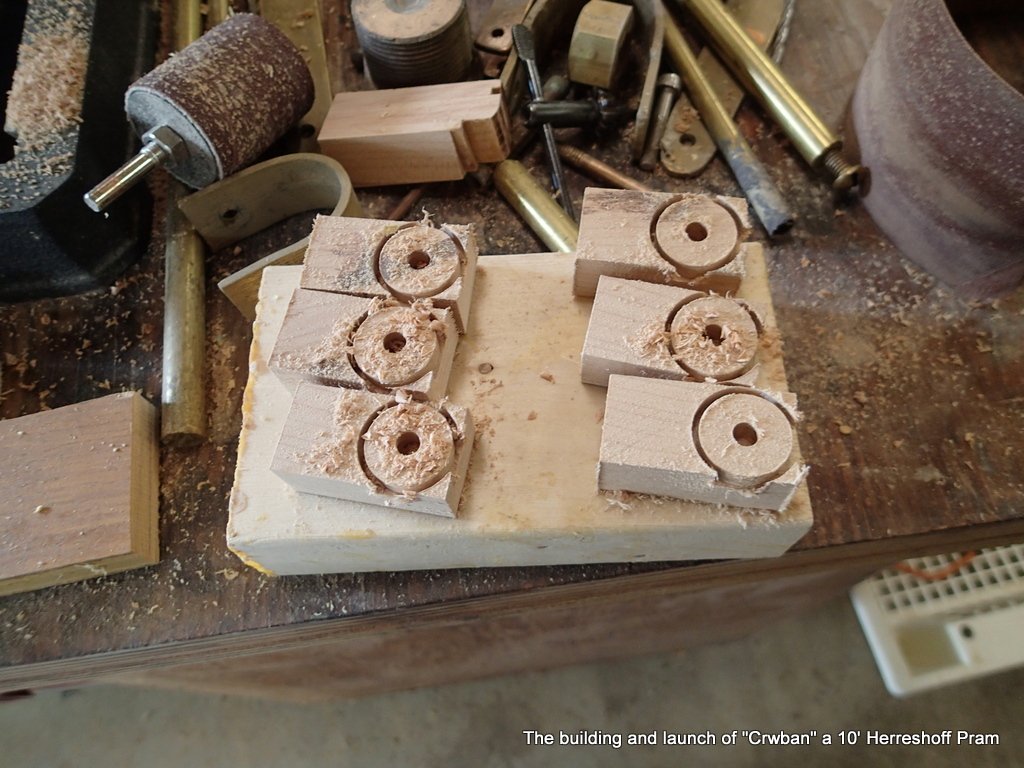
I cut limber holes for drainage.

Cutting

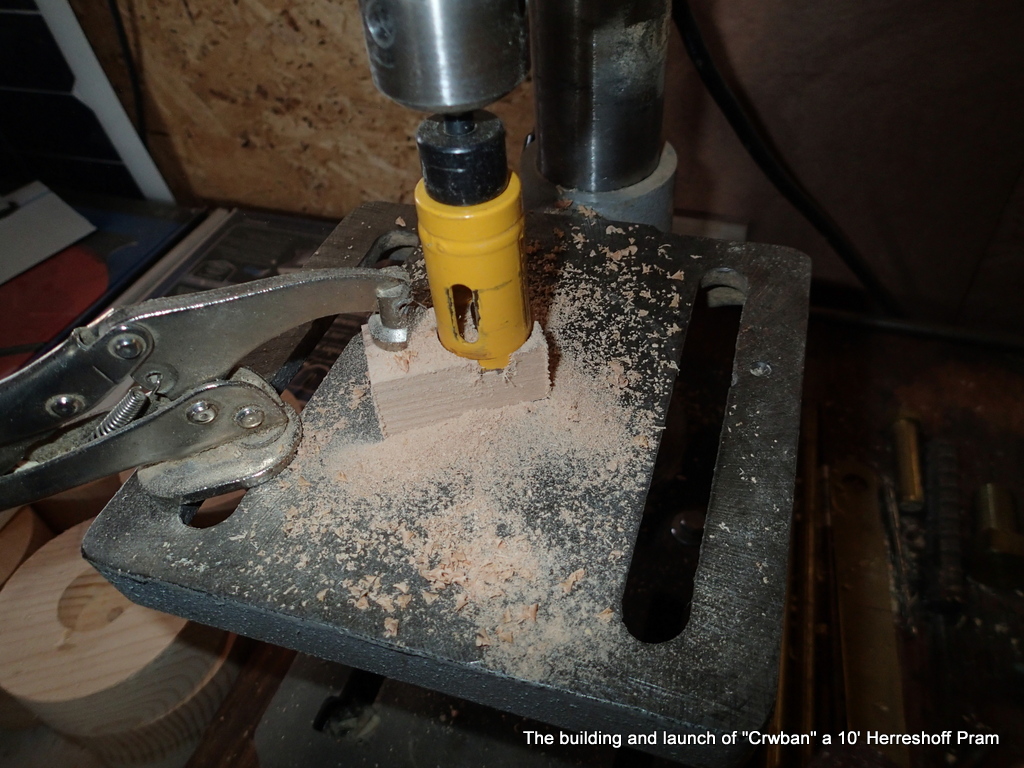
I use my drill press to cut the limber holes. I used a 1″ hole saw, clamped the floor in place to make the cut. I sand the limber holes smooth with a drum sander.

‘poxy time.

I have leveled the hull and level the floors as I epoxy them in.

Test fitting the walkway

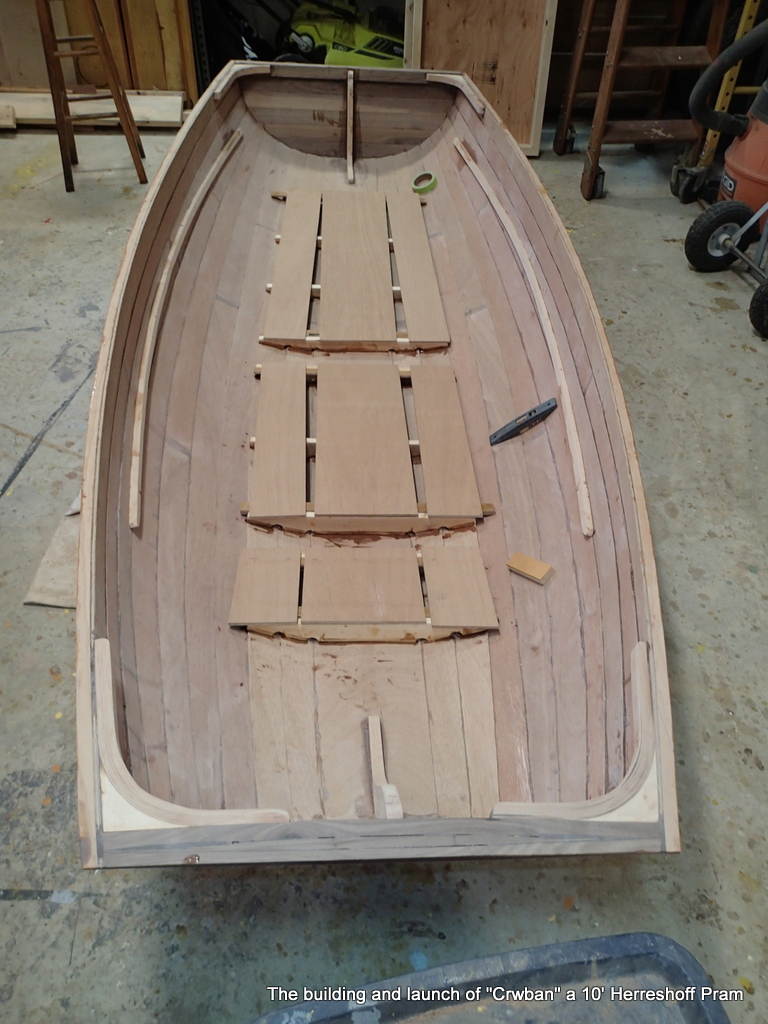
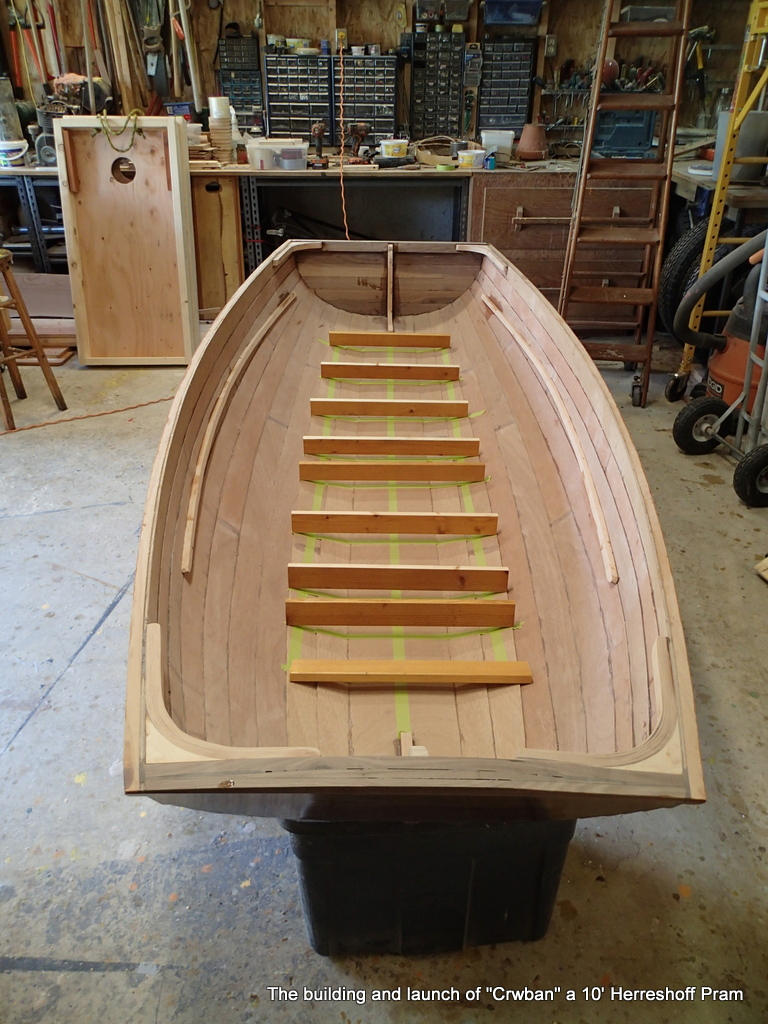
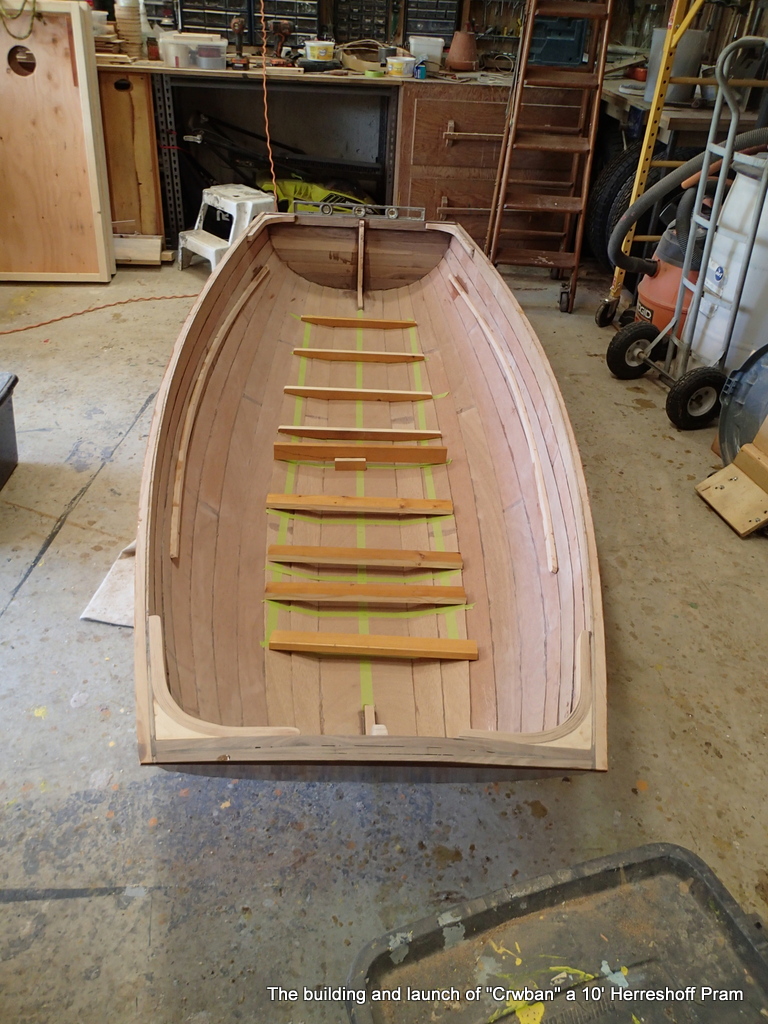
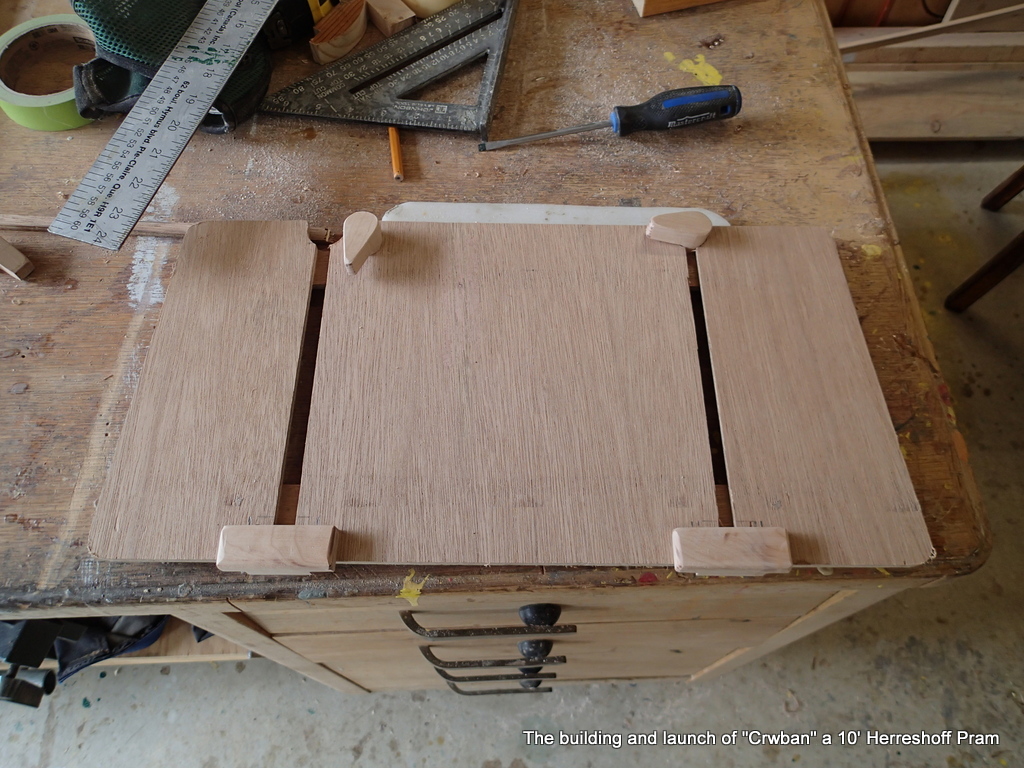
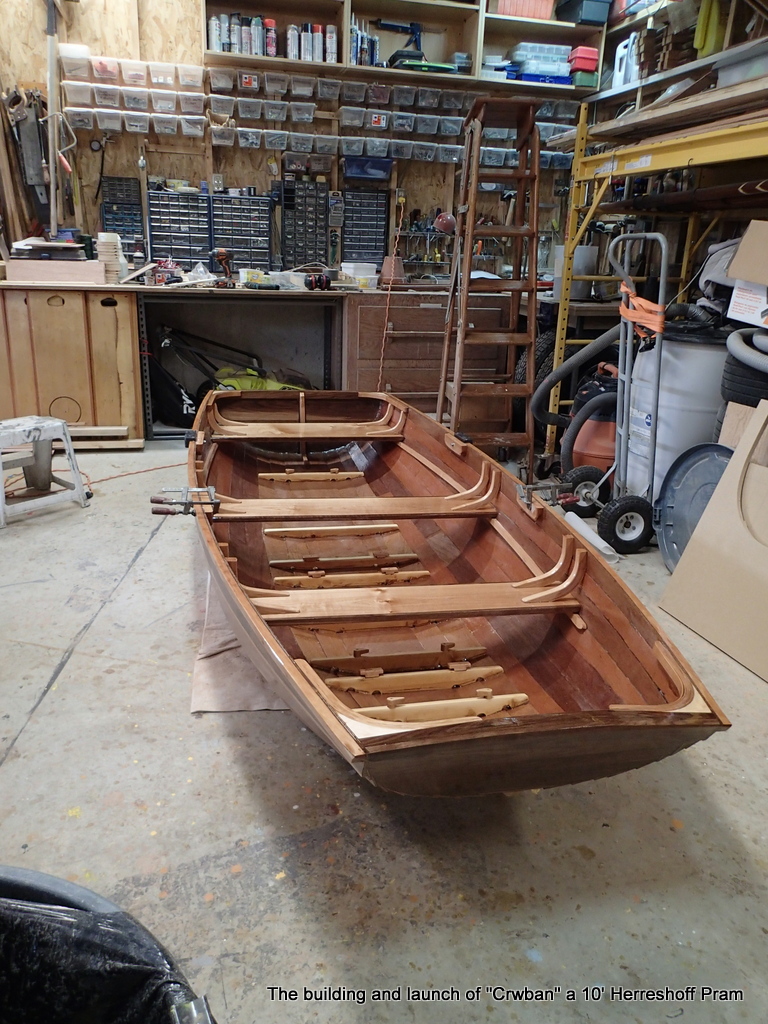
After the floors have been epoxied in, I begin to fit the walkway. I am using leftover 6mm marine plywood. The gaps between the panels are for bailing access. They will be under the thwarts.

Test fitting the thwarts

With the walkways more or less fitted, time to do the seats. I got a deal on “White Maple”. I decide to use the nearly 1″ thick material for the thwarts. They will not need a centre support. I decide to add a walnut trim to the seat edges.

Walnut trim.

I have to laminate up a piece for the stern thwart.

Stern thwart

Using Titebond II for the thwarts

Thwarts laid out.

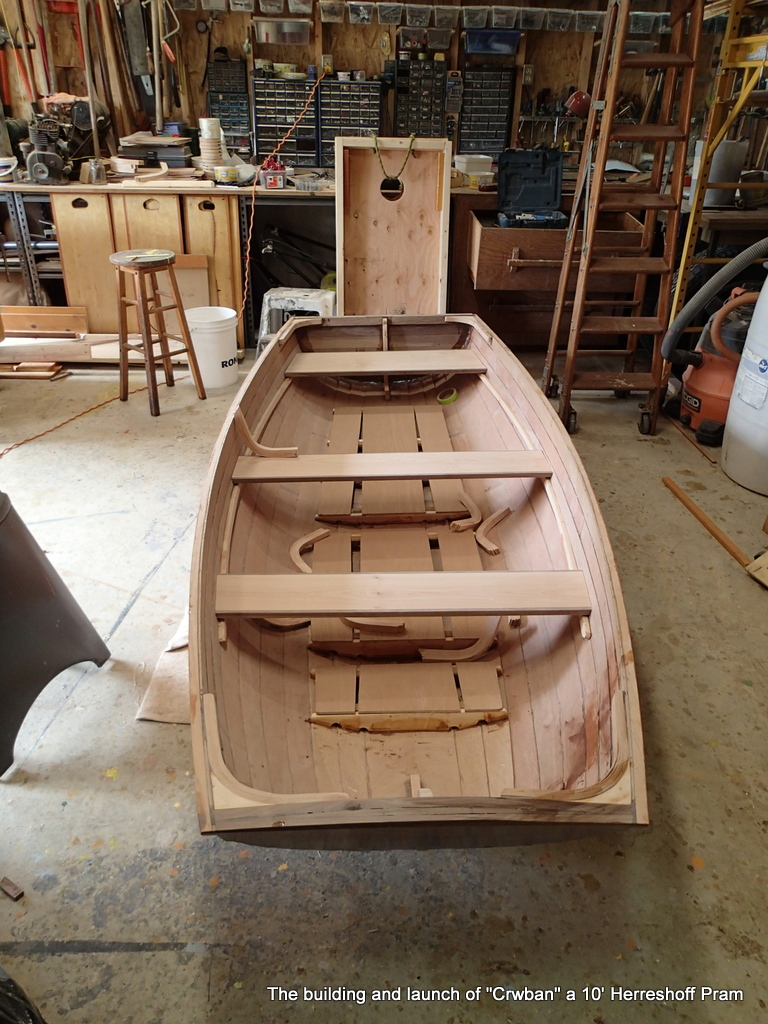
With the thwarts all glued up and sanded, I fit them into the boat.

Knees

Fitting the knees. I mark them out and use the 12″ disk sander to shape.

I will be epoxying them in using a low clamping pressure method.

Thwart knees and walkways fitted

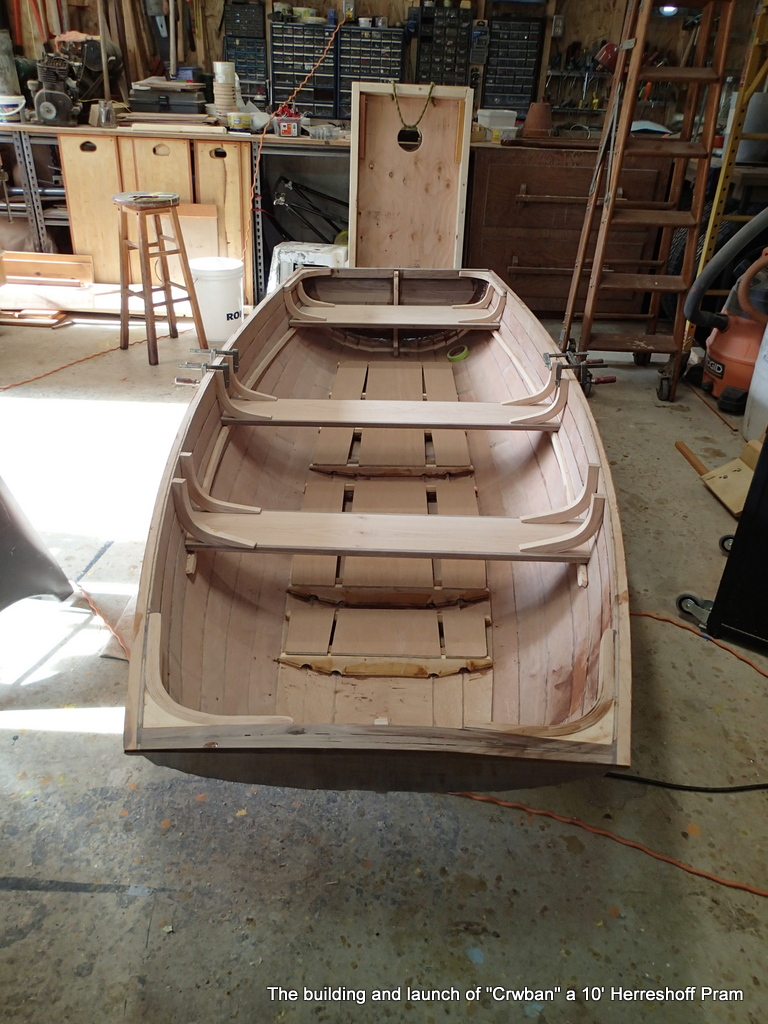
With the thwart knees fitted and ready to go, I finish up the walkways. They need a way to keep them in place.

Maple clips

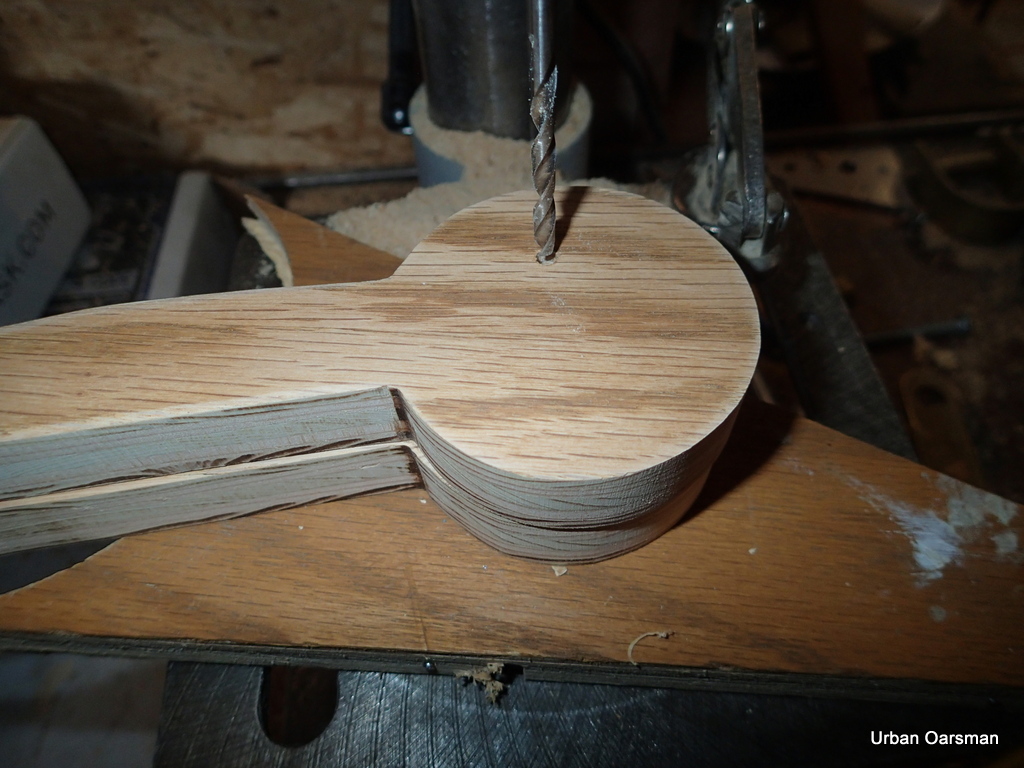
I make up some maple catches to hold one side of the walkways…Six in total.

Maple latch

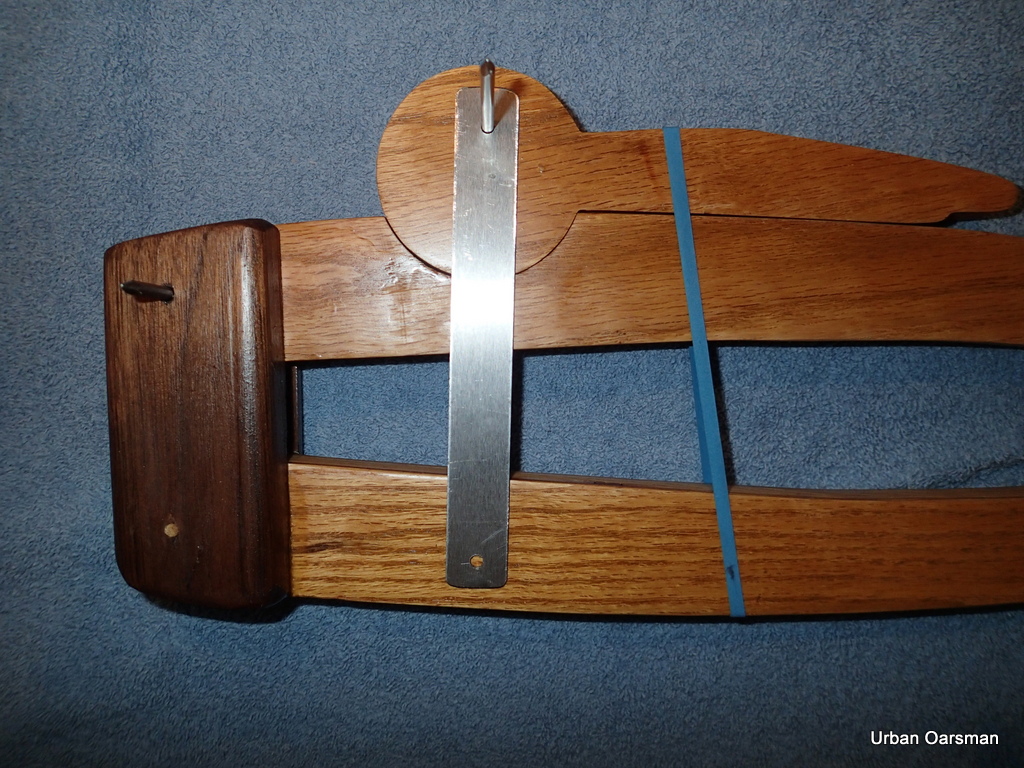
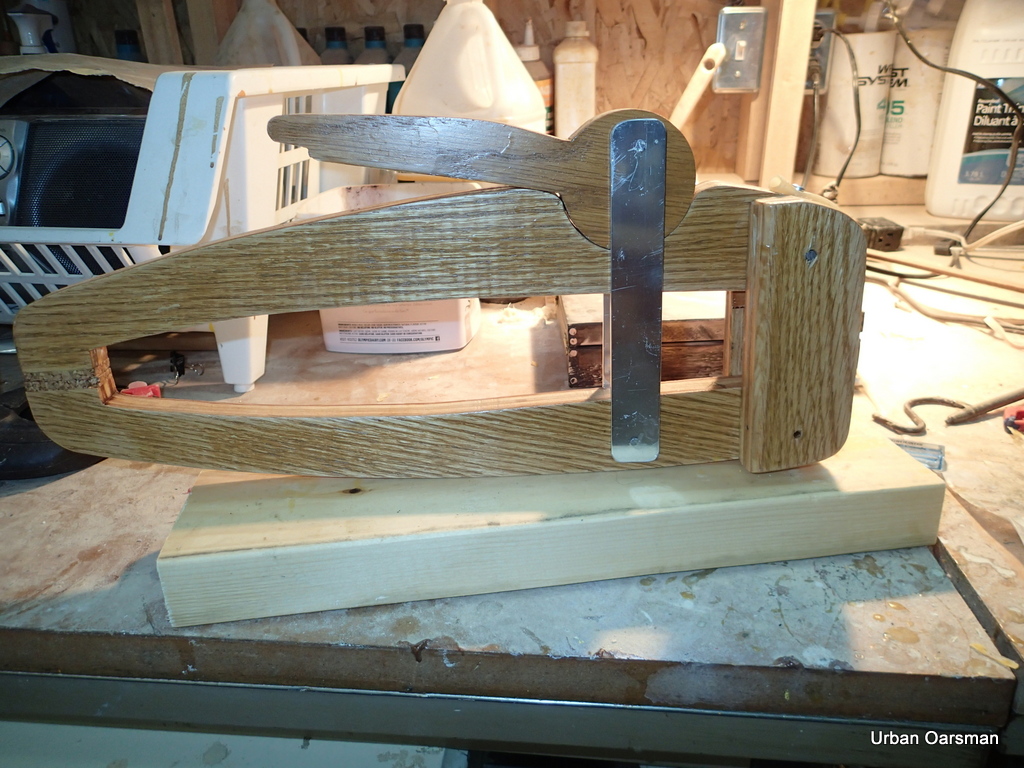
I design a maple latch for the other edge of the walkway. Twist to lock, twist the other way to unlock and remove the walkways.

Making the latches

I cut a guide hole about half way into the block for the base of the latch.

First cut
Using the bandsaw

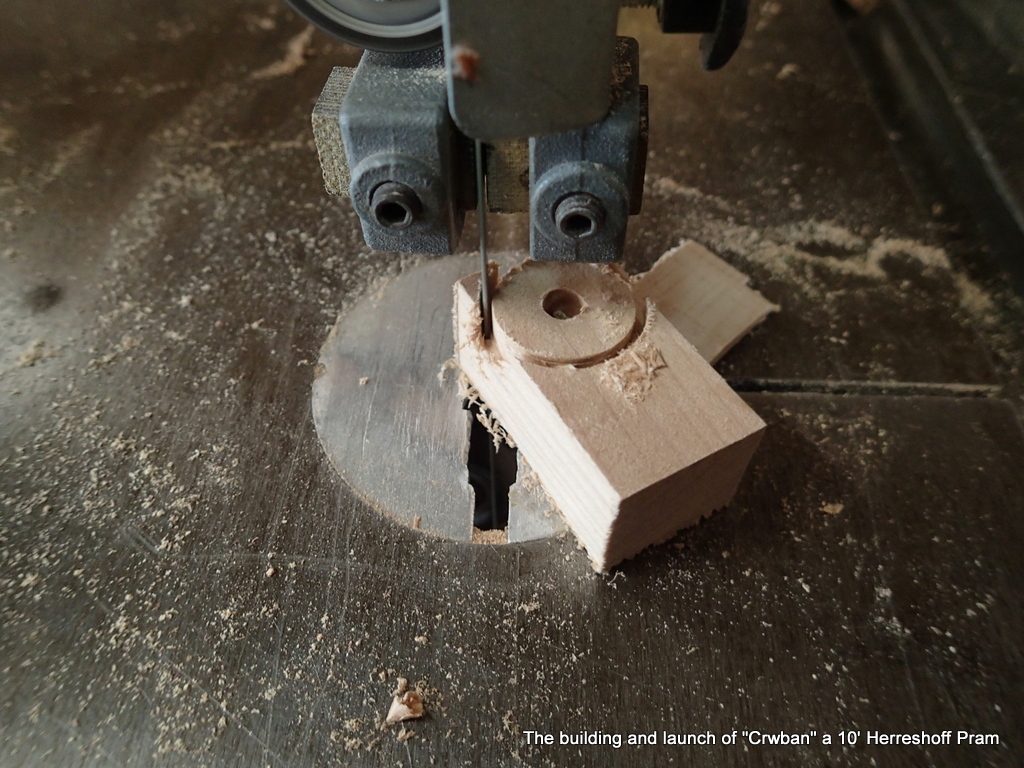
The second cut is done on the bandsaw. The latch is cut to shape.

Work in progress

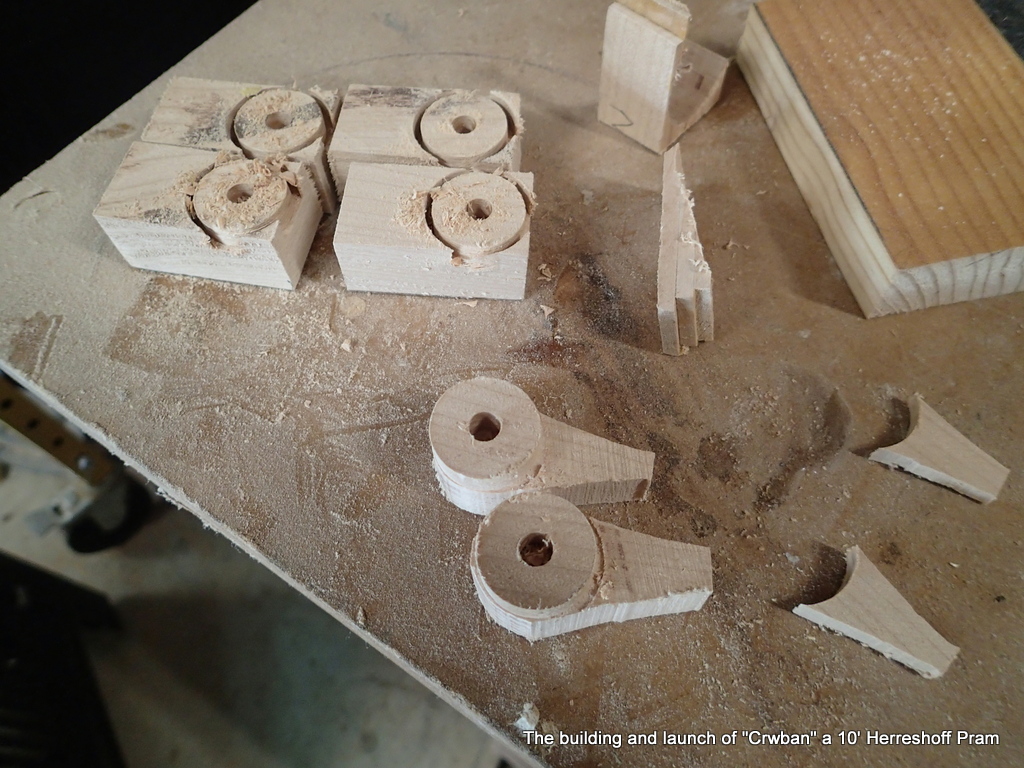
The third cut makes the sloped section that goes over the walkway.

A block keeps my fingers safe.
Mock up on the bench.

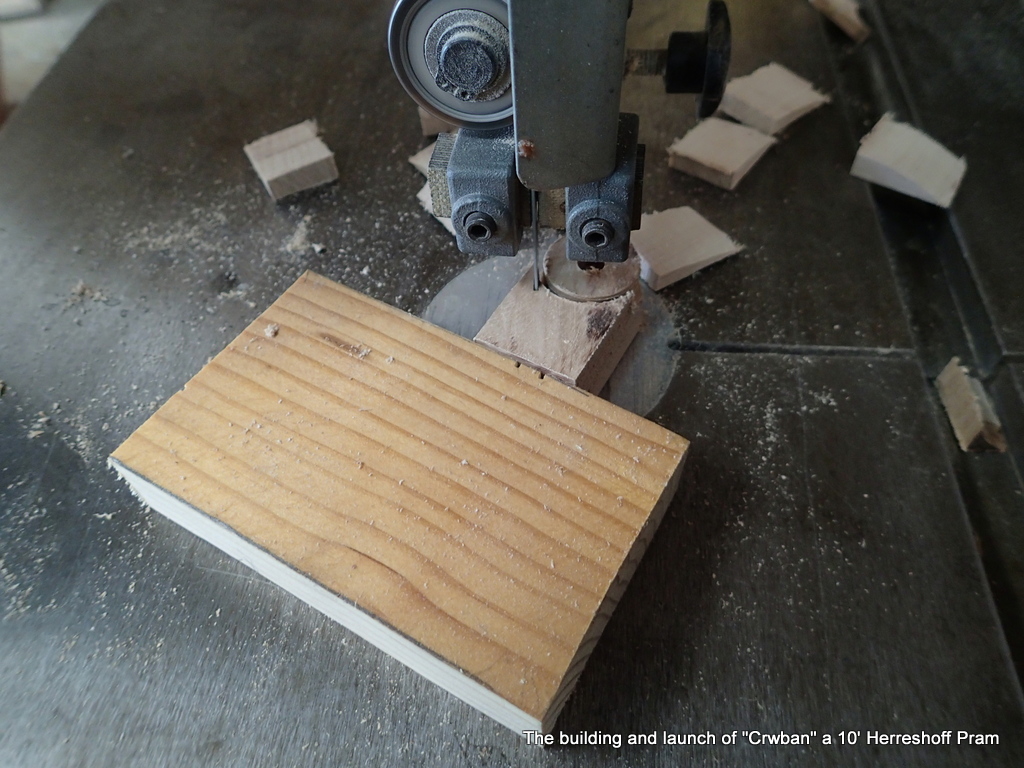
The walkways have a half-circle cut into them for the latch.

Test fit in the boat.

I dry-fit the walkways in the boat. Seems OK.

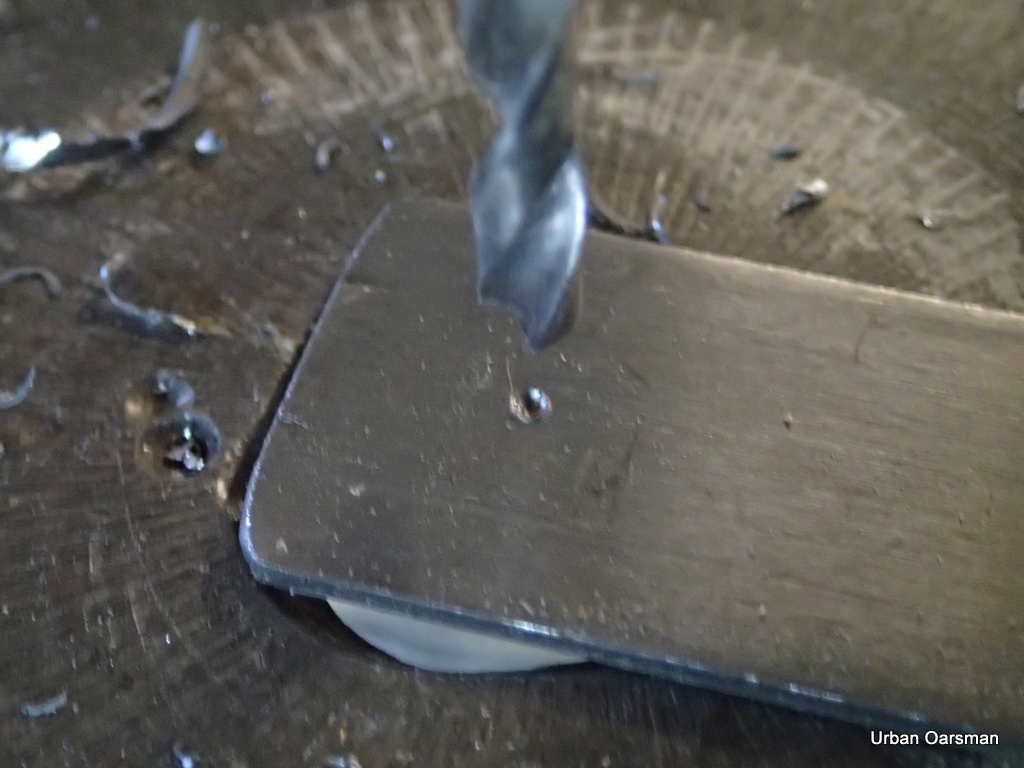
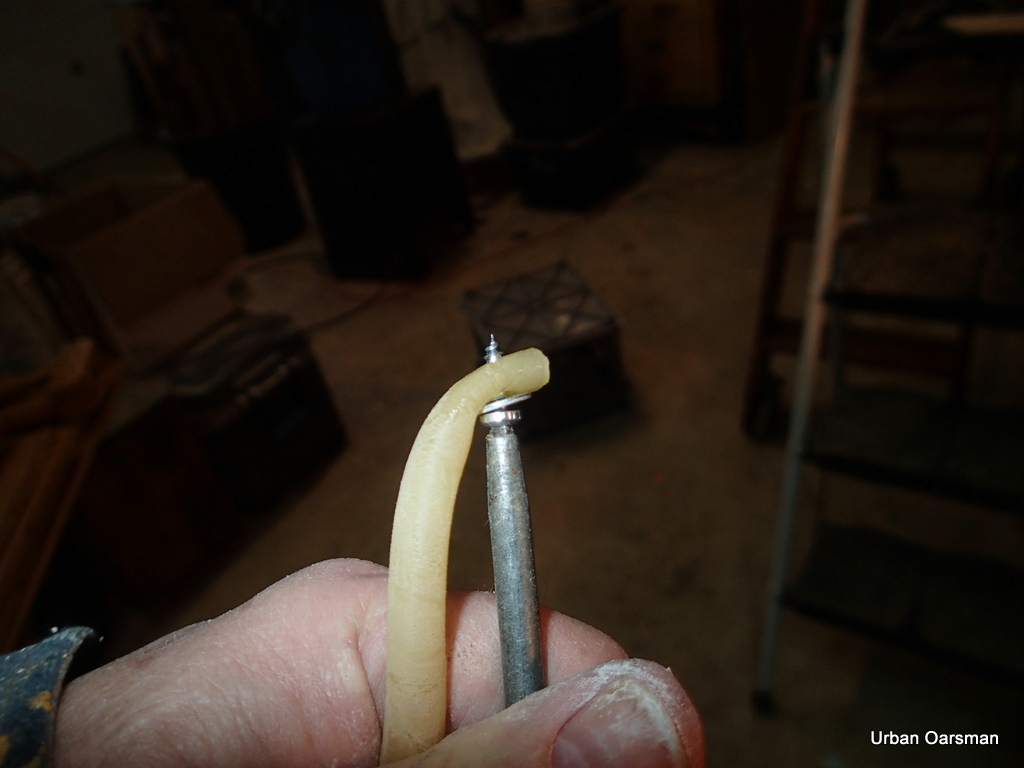
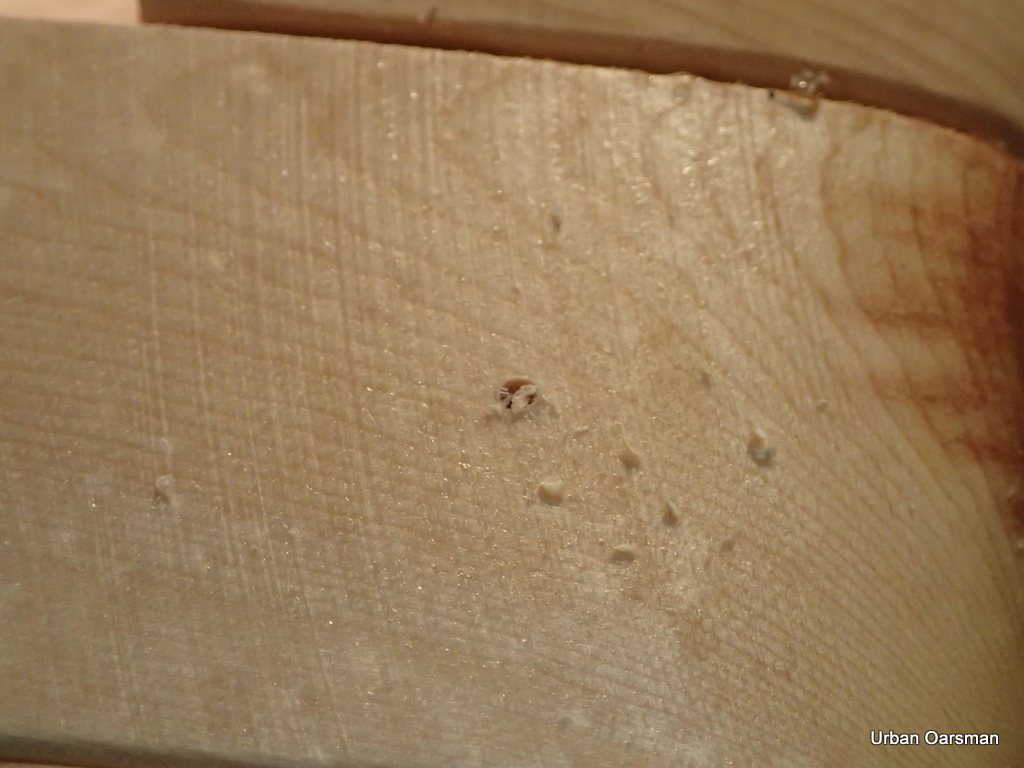
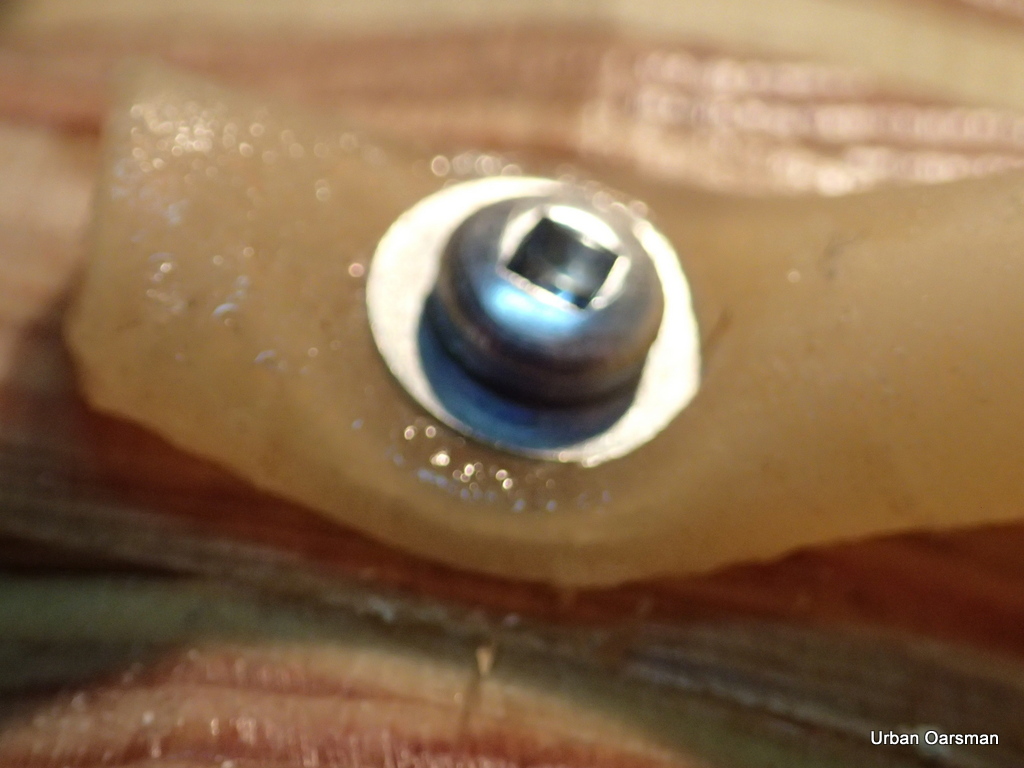
To glue in the clips, I drill a screw hole, epoxy the clip to the floors and when the epoxy has cured, I remove the screw and replace it with a bamboo dowel.

Clips epoxied in.

With the walkways fitted, I am varnishing them. Time to sand the inside of the hull.

Ten coats. You can see the non-slip texture.

After the second coat of varnish, I sprinkle some ground up walnut shells for non-slip.

Two coats of epoxy and the thwarts fitted and epoxied in.

After the epoxy cures, the inside and outside of the hull gets a through sanding in preparation for varnishing.

Oarlock socket blocks fitted. Both sets of clips are in. When the epoxy cures I install the Gaco two position oarlock sockets. I only bought one pair, I order another pair from John Murray.

Flip her over and install the brass half-rounds and we are ready for Varnish, Varnish, Varnish….I drill the bow transom painter hole before varnishing so I can varnish the hole too.

Two coats a day

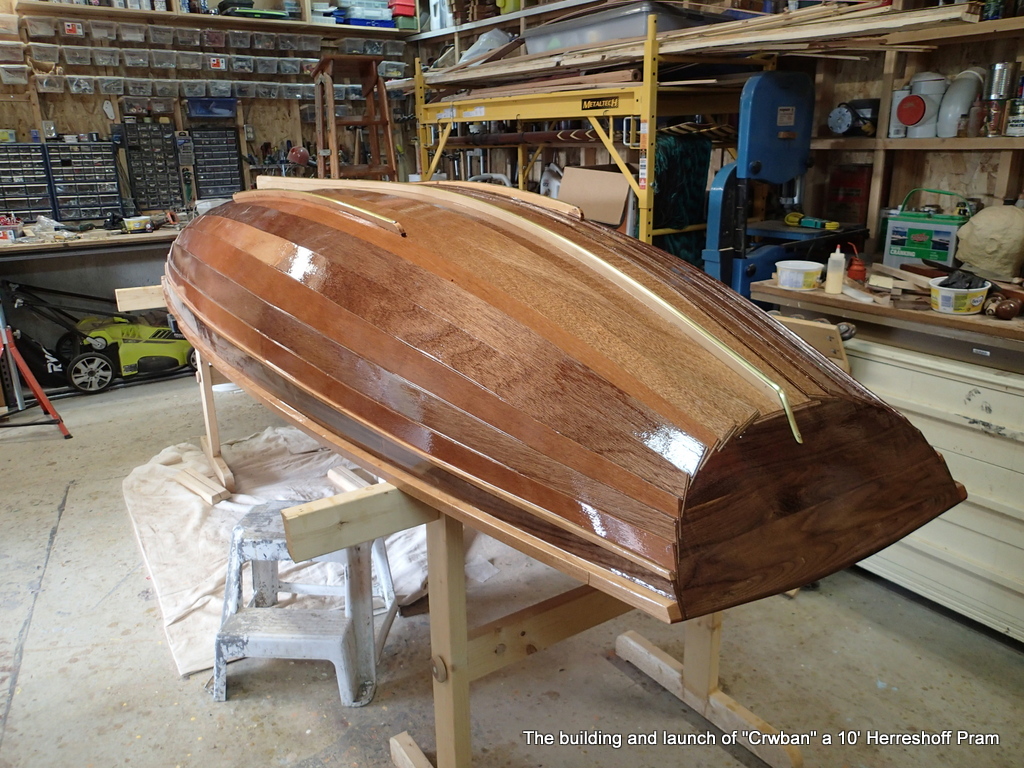
I put two coats a day on the outside of the hull. Rolled and tipped. One in the morning and one in the evening. Eight coats in total on the outside.

Last coat

I then flip the hull over and brush on eight coats on the inside, Thwarts and all.

Eight coats of varnish later. Bow painter hole visible.
Note the hawsehole on the quarter

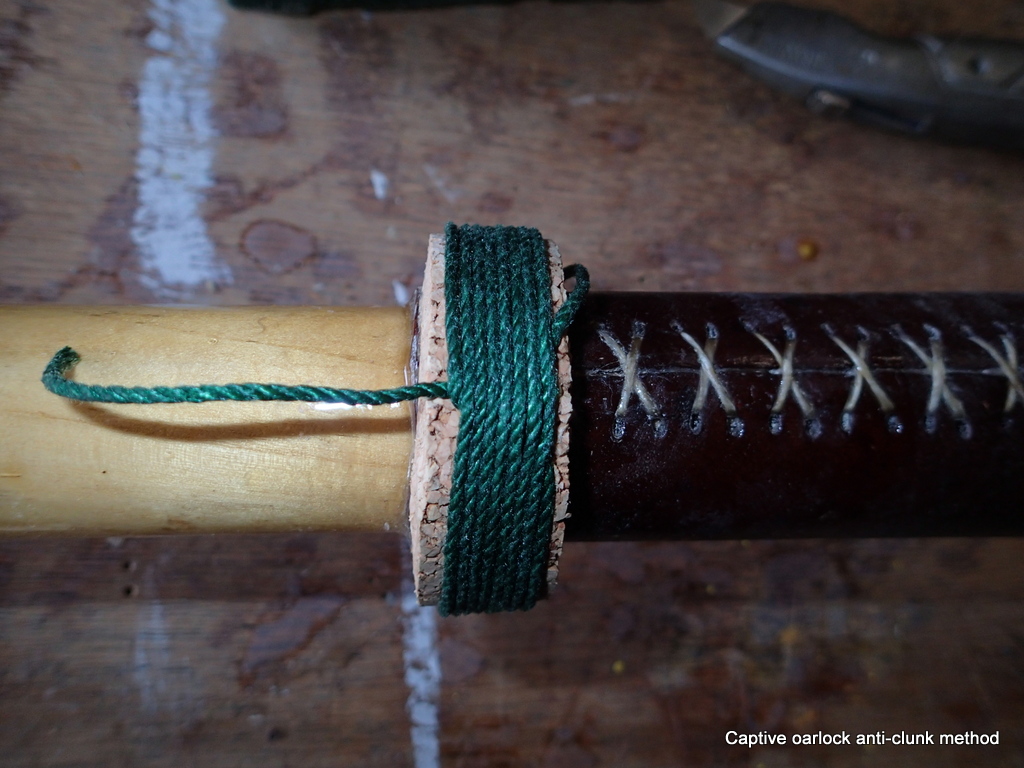
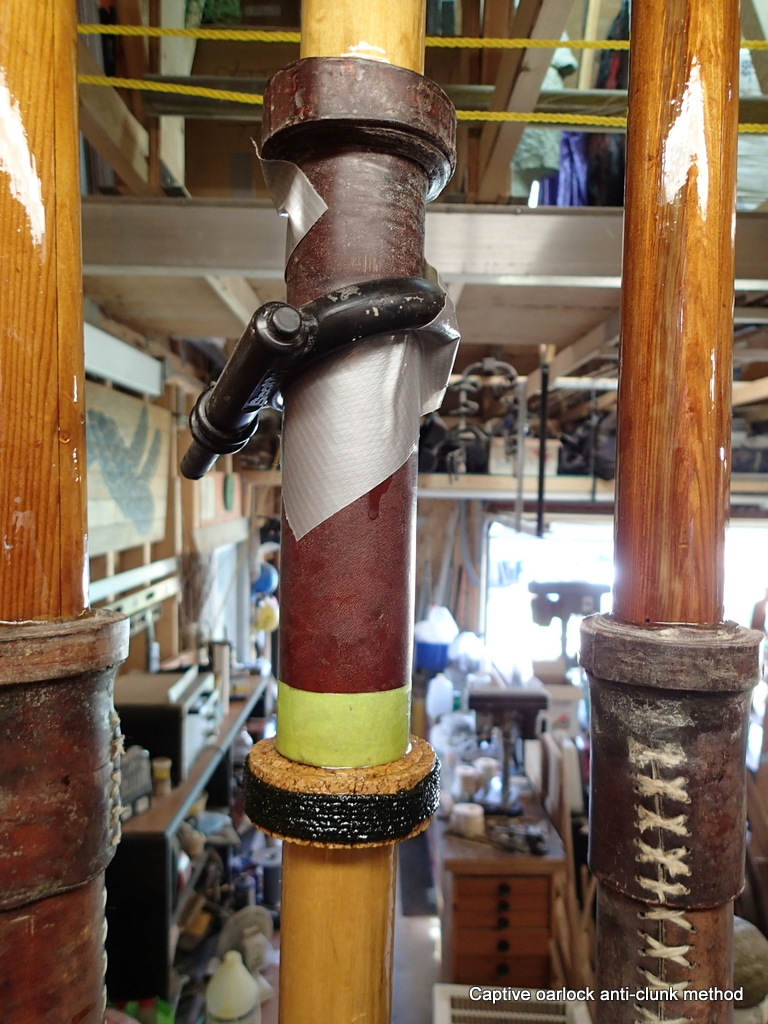
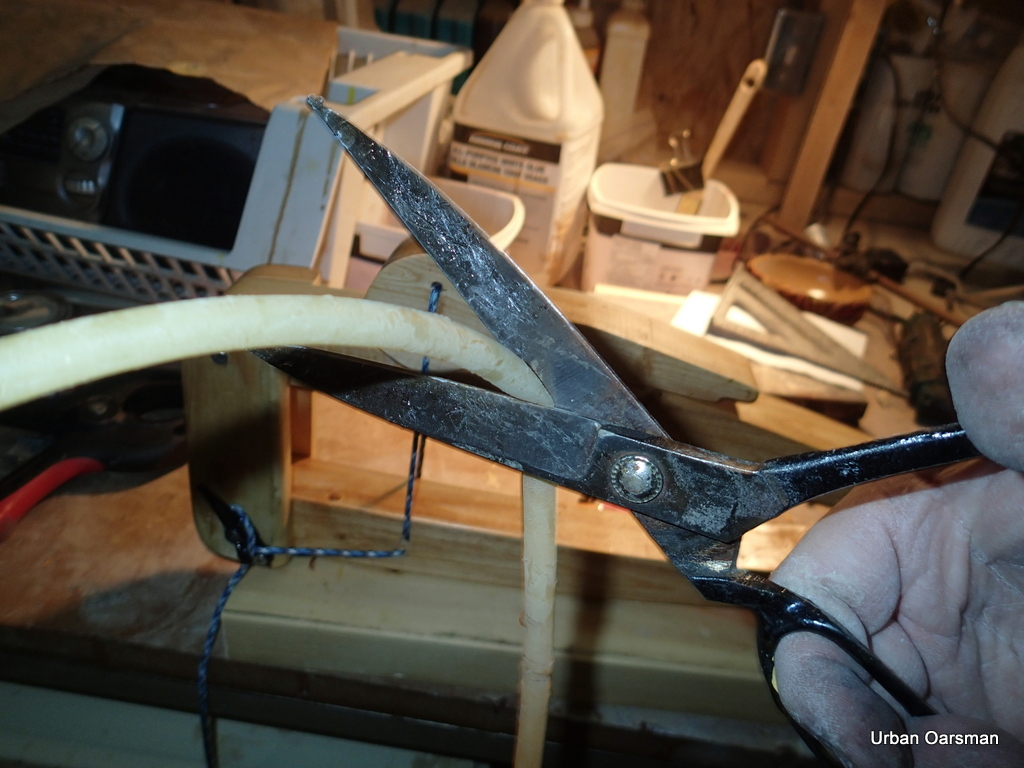
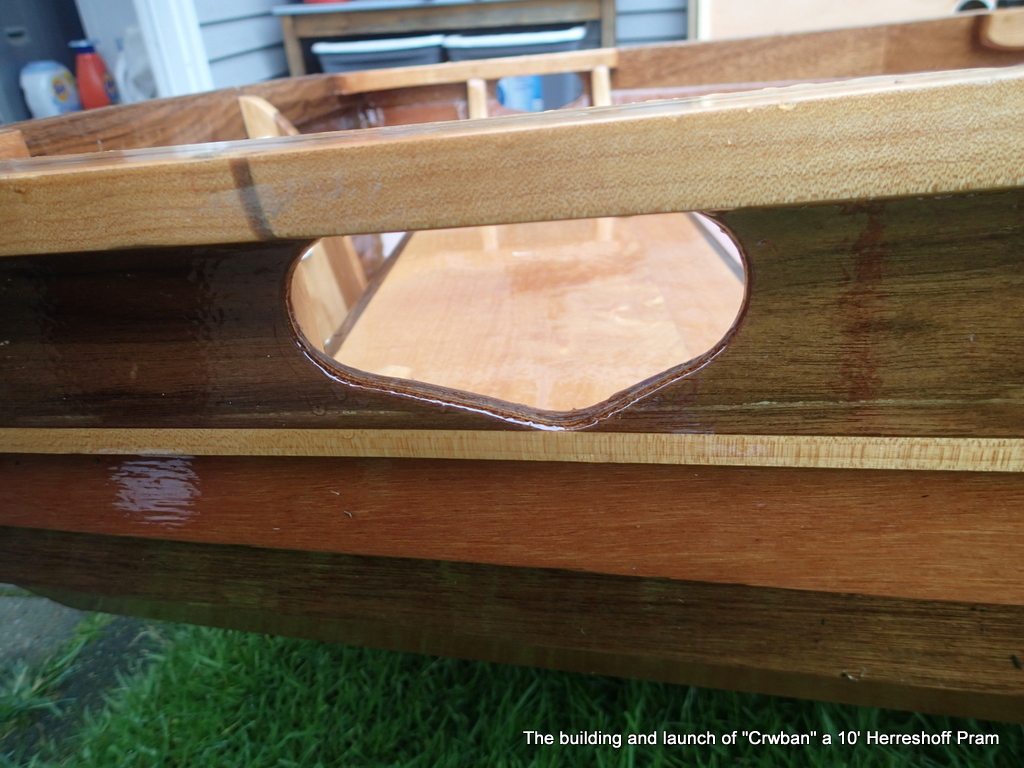
Crwban will have only one line…The painter. I will use the hawseholes to run lines through.

Forward hawsehole

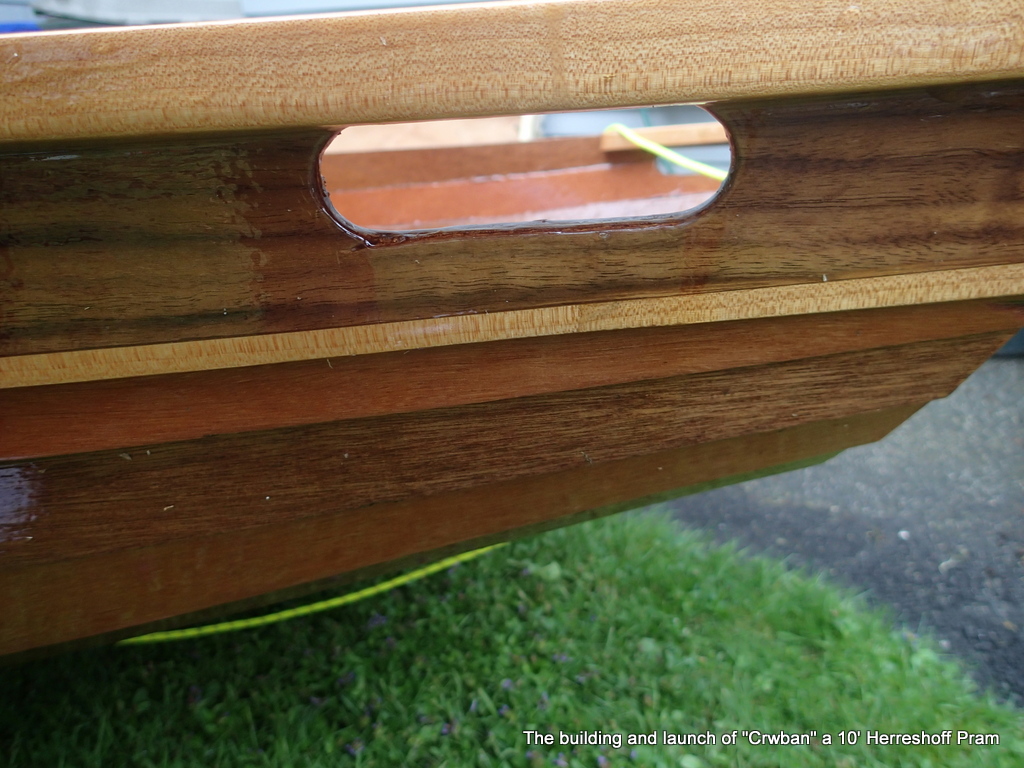
The hawseholes are more hand grips for carrying than hawseholes for hawsers.

After hawsehole.

I flip her right side up and paint on her name using the Papyrus font in white paint.

Crwban ready to go down to the Hollyburn Sailing Club for her launching, June 20th, 2020.

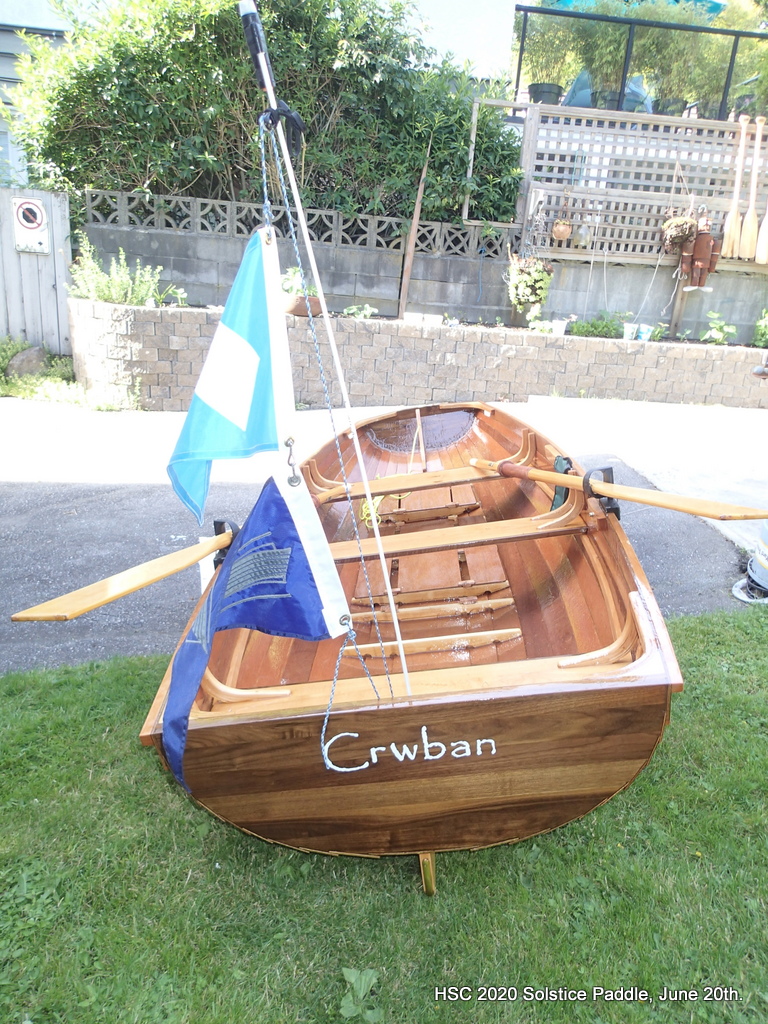
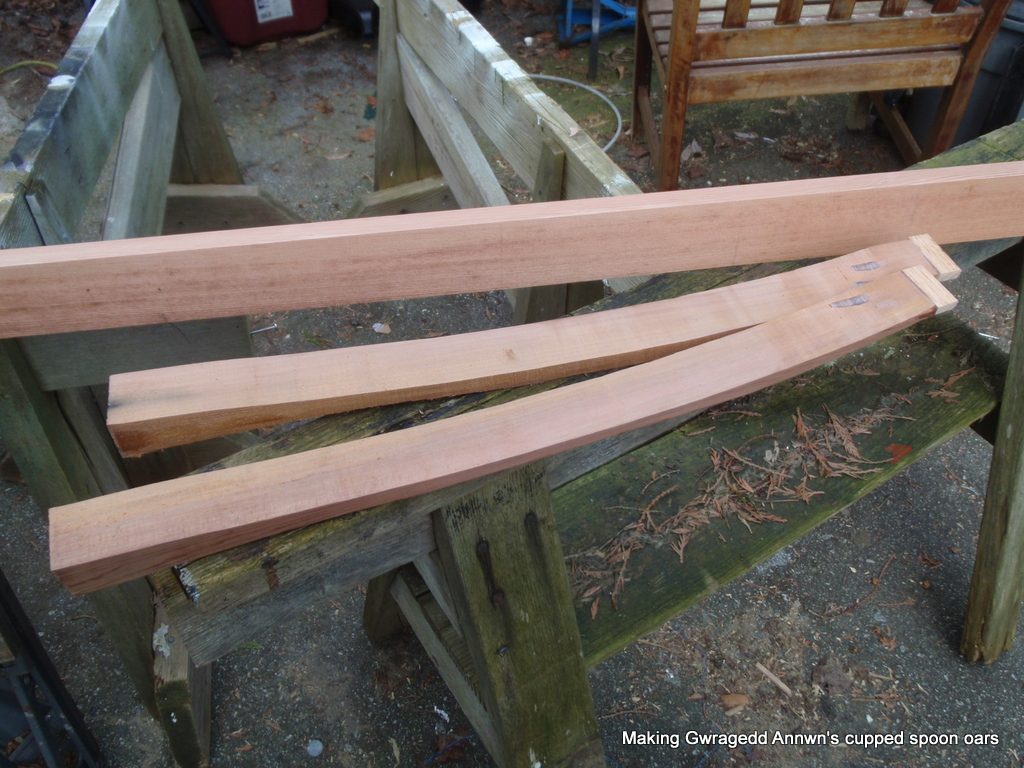
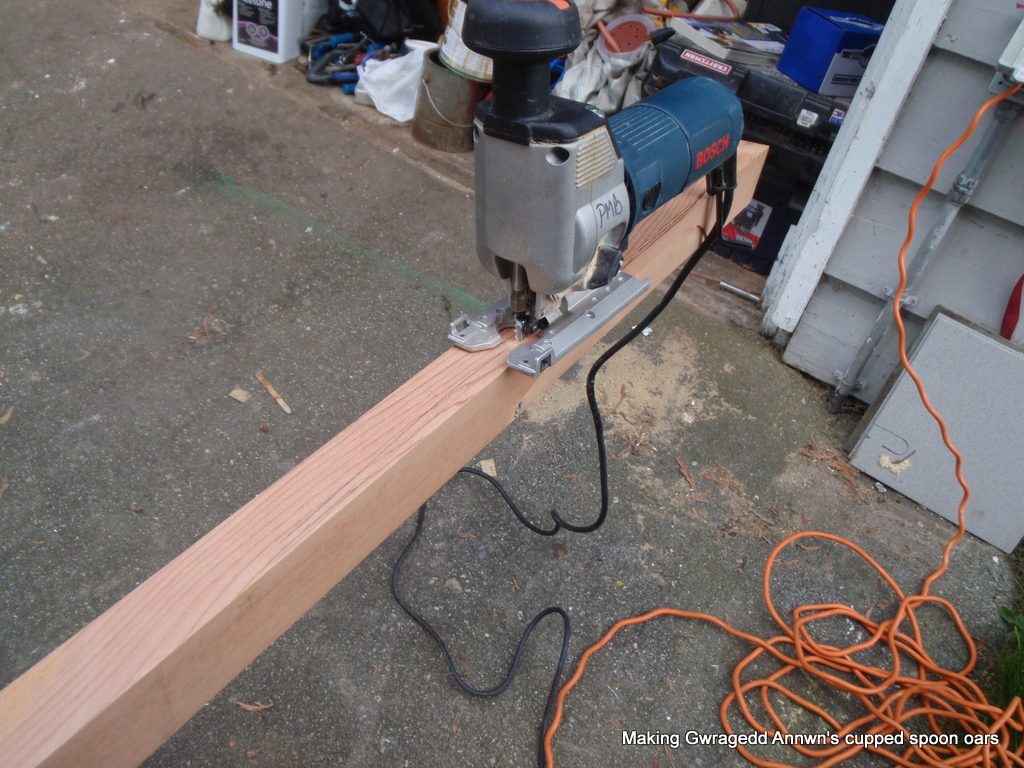
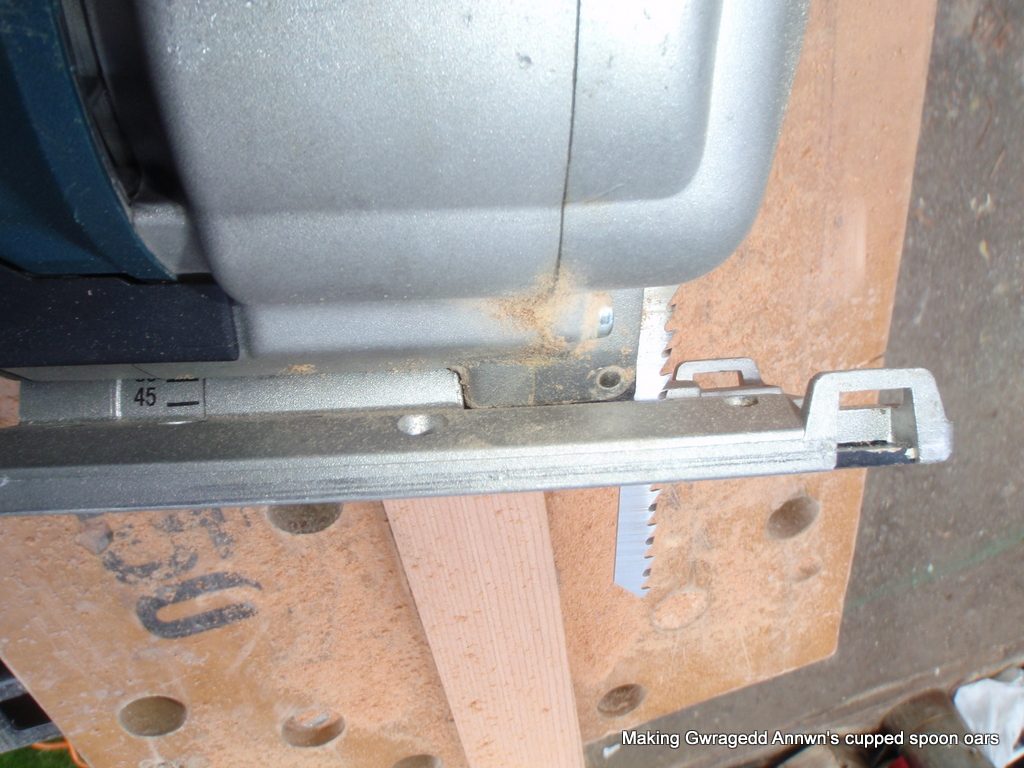
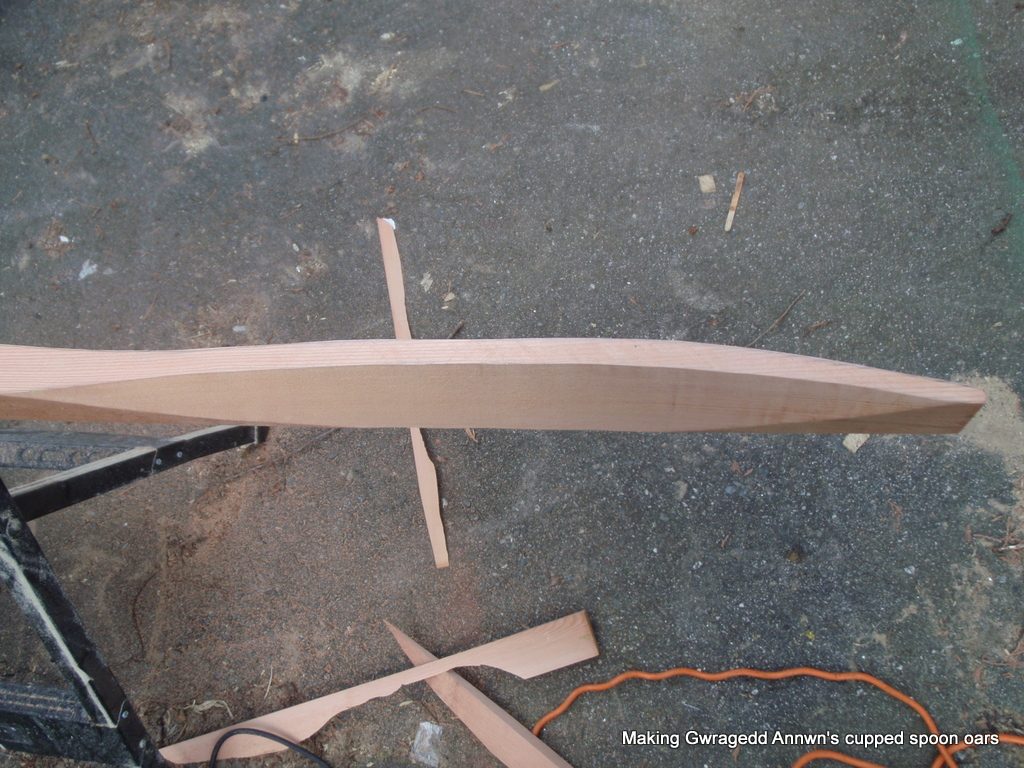
Crwban (pronounced ” Crew-ben”) is the Welsh name for a turtle. Land turtles are not found in Wales, but Leatherback Sea turtles frequent their shores. The backs of Leatherback turtles look a lot like the clinker planking on the pram.

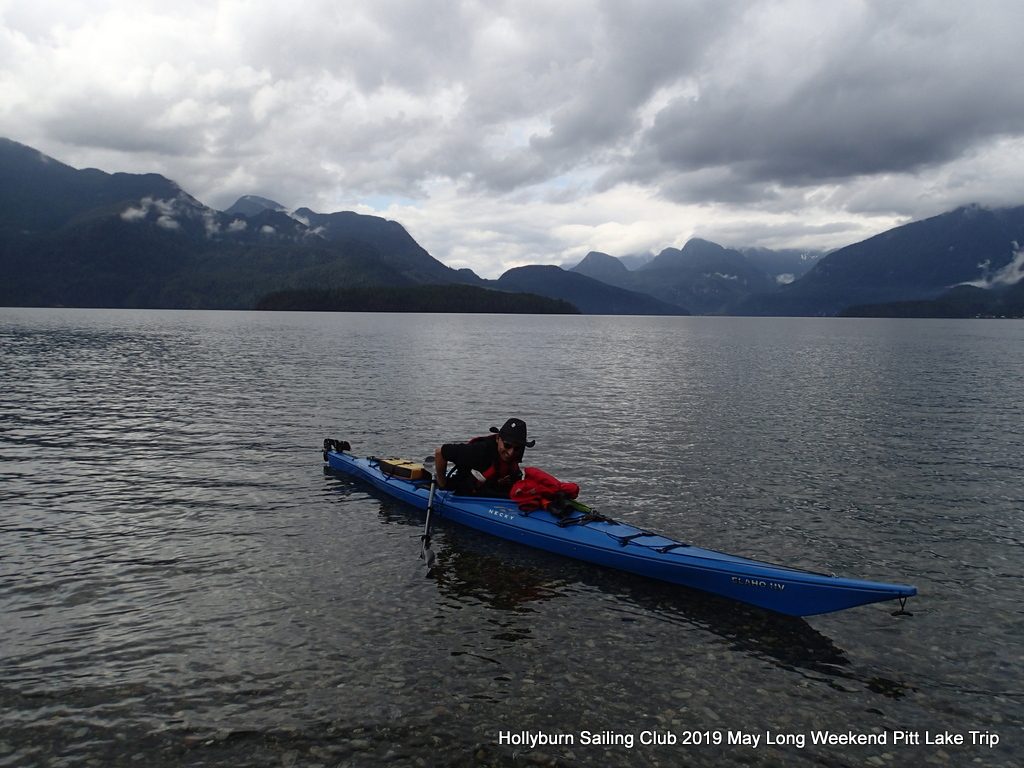
Crwban is flying the Hollyburn Sailing Club burgee and the Vancouver Wooden Boat Society burgee. She has a Port (red) and Starboard (green) clip-on bag for stuff. Her 1/4″ bow painter runs through a painter hole in the bow transom.

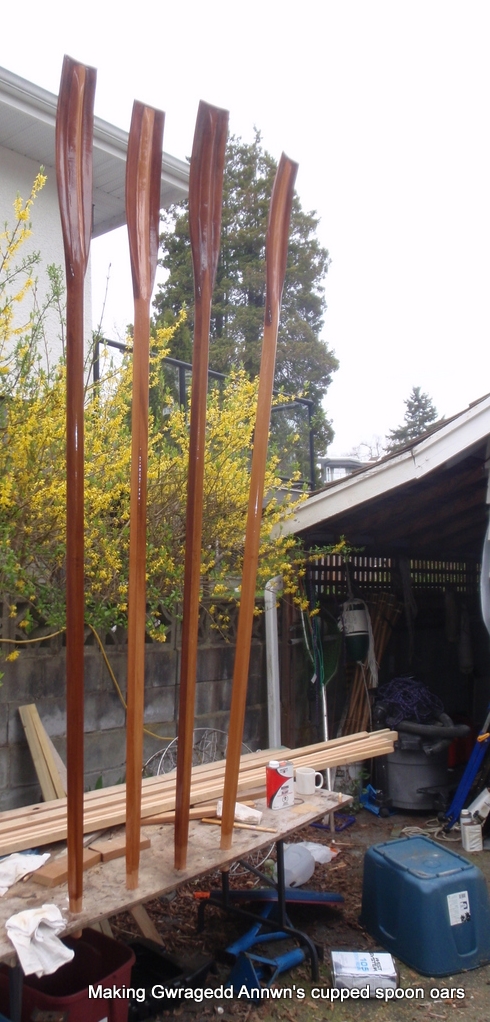
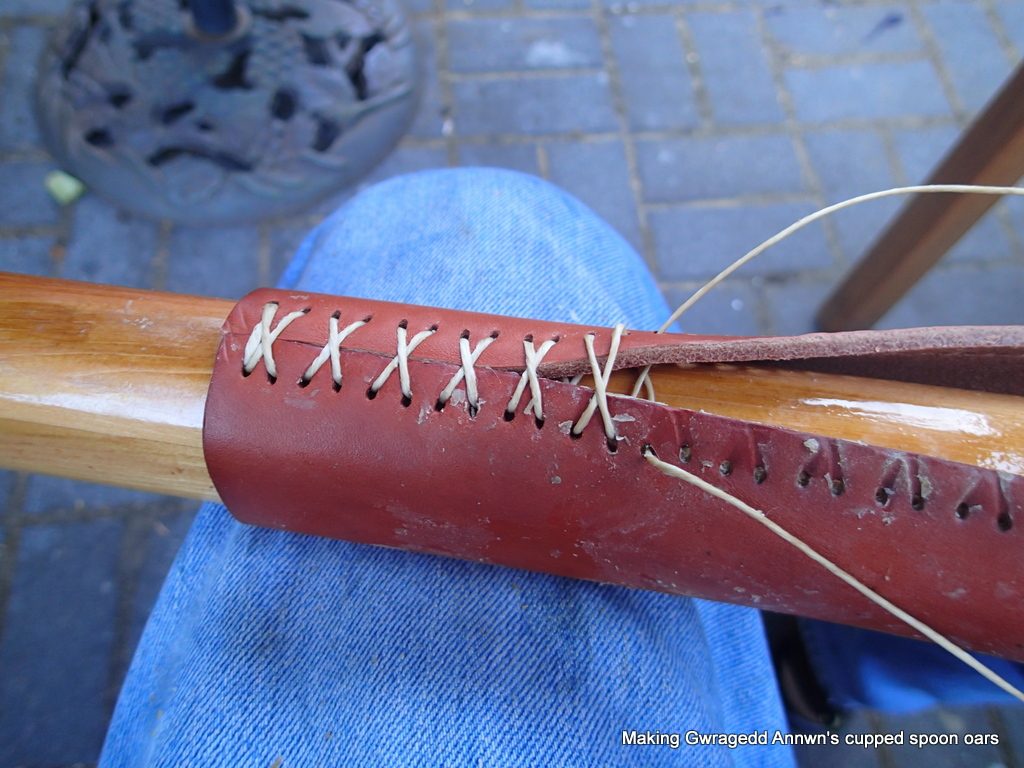
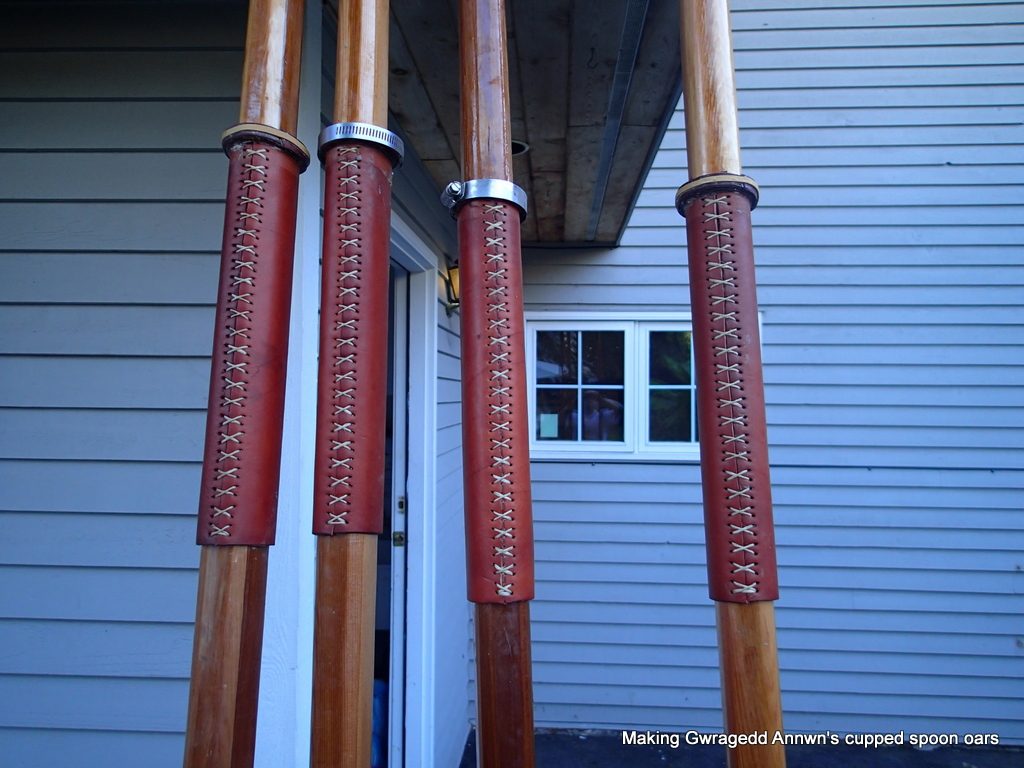
Bare hull weight: 90lbs. Rowing weight: 105lbs (floor boards, bailer, bowline & oars)
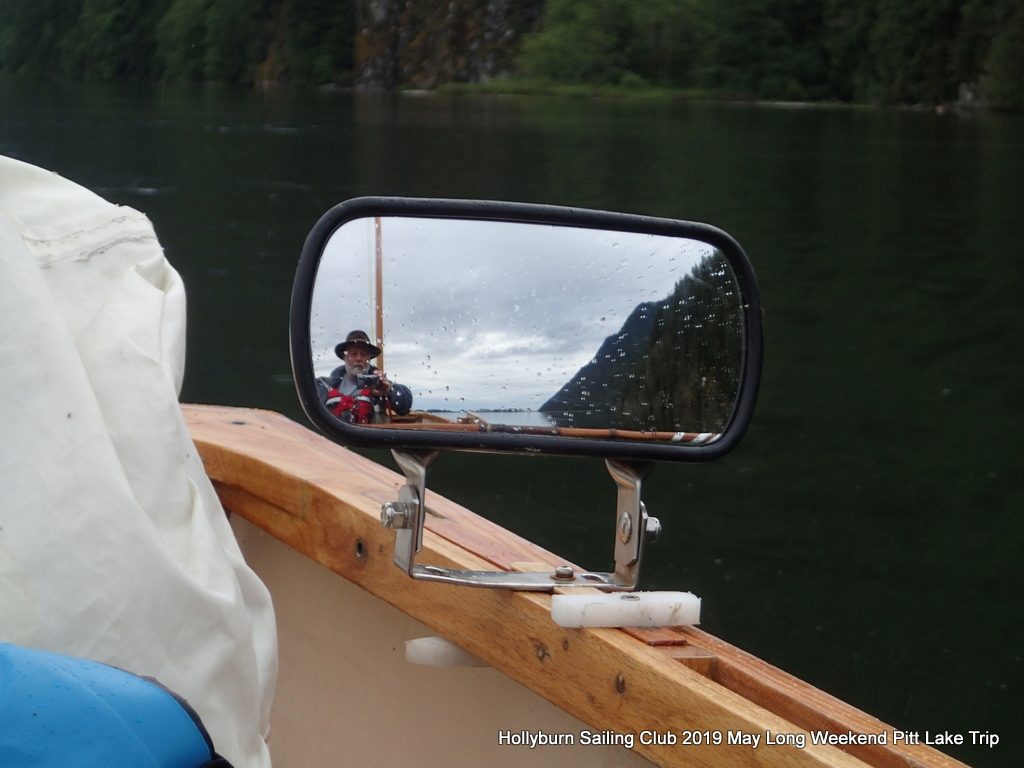
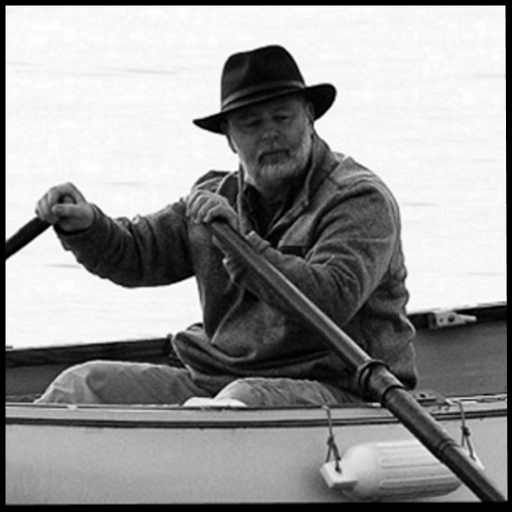
Good rowing to you.

Mike

Posted in Under the Keel.... | Leave a comment

Captive oarlock anti-clunk method.

While refinishing my “Bolgerized” oars, I decided to use Captive Oarlocks. Captive oarlocks go on the oars and are kept on the oarshaft by the button on the oar leathers.

Two “Captive” oarlocks.

I use the Bolgerized oars with my “Trug” skiffs. One pair has Bronze round oarlocks. (like the picture above)

Scotty Strongbacks

One set has a pair of Scotty Strong-backs oarlocks.

What I do not like about captive oarlocks is that when the oar is out of the boat and being carried, the oarlock inevitably slides down the oarshaft and clunks against the shoulder of the oar blade. CLUNK! I also do not like the mark the oarlocks make in the varnish at the oar blade shoulder.

So I thought to myself, if a button can keep the oarlock from coming off of the oar, another one can keep the oarlock from sliding down the shaft and hitting the shoulder of the oar.

Cork strip

I do not have any leather and with the Covid-19 “do not travel unless you have to” directive, I will not be going out to some. I do have some cork left over from the Brenne Clamp Build. I will use that.

I cut the cork into 3/4″ wide strips. I will use two strips per oar.

I have the two strips of cork glued onto the oar leather. I could have placed the cork strips onto the shaft of the oar as well. A hose clamp applies the necessary clamping pressure.

I do not know how “tough” the cork will be, so, I decide to wrap the cork with sailing twine to keep it from coming undone.

Whipping the cork with sailing twine.
Trim the ends and I will be ready for varnishing.
I am refinishing all of my oars. Every morning they get another coat.

Thirteen coats for Gwragedd Annwn’s oars and Twelve for the Bolgerized oars with the captive anti-clunk cork buttons.

…a wee bit of oar maintenance keeps the oarsman rowing…

Mike

Posted in Under the Keel.... | Leave a comment

Bolgerizing Oars

In his book, “Small Boats”, Phil Bolger, in his essay on rowing, describes how to modify an ordinary mass production oar to make it more pleasant to use.

Modifying mass production oars in the Bolger method

With the current Covid-19 situation, maintaining one’s equipment may be the best way to self-isolate.

Twenty-five years or so ago, I built a glued-lap Defender design from Phil Bolger’s “Small Boats” book. My good friend, Chris, bought the oars for the boat. i still have them, even though the boat is long gone. (retired to Half Moon Bay, Sunshine Coast, oarless!)

The oar blades:

Blade shape of the mass-produced oar.
Edge view of the oar blade.
Another look at the blade shape.

What I am going to do is to flatten the “power” side of the blade using my grinder and a sanding disk.

Grinder and sanding disk.

The sanding disk will slightly cup the power face of the oar.

Using the sanding disk, I start running the disk down the spine of the blade.
Right through the Logo!
The sanding disk leaves a slight depression on the power side of the blade.

I continue to remove material using the sanding disk until I have sanded to the edges of the blade.

Just about done…I will use a Random Orbit sander to finish the power face.

As I am slightly cupping the blades, I will not remove any material from the passive face of the oar.

When I am happy with the smoothness of the power face, I give the entire oar a light sanding with the Random Orbit sander…It helps keep a slight cup to the power face.
Sanded, ready to have a wash with paint thinner…. vacuum and then wipe with thinner.

This is the passive face of the oar…untouched except for a little sanding.

If I get a little drop or run of varnish, I cut if off with a sharp utility knife.
Varnish lump gone. ..a quick pass with the sandpaper seals the job.
Ad-Hoc varnish drying rack…this is similar to my usual drying method using two sawhorses.

To put the logos on the oar blades, I print them onto Onionskin paper and then varnish them on.

The handles (unvarnished) rest on one of the steps and the leathers (also unvarnished) rest on another. There is actually some sun today.

Many coats of varnish and many coats to go.

The rains have begun…I will put ten or more coats of varnish on the oars, one coat a day. Usually I put on more coats until I run out of varnish. (It always seems to harden up in the can, might as well use it) This time I have bought a big can of varnish, so only ten coats.

When the Pandemic is over I will take the oars out for a spin…may be a while.

My next project is to build the Herreshoff Pram from John Gardner’s book, “Building Classic Small Craft”, pages 18 to 31.

Good Rowing to you and stay safe,

Mike

Posted in Under the Keel.... | 4 Comments

The Urban Oarsman builds Brenne Clamps.

A long, long time ago I built Phil Bolger’s 11′ Defender design in glued lapstrake planking.  I made some long-reach clamps for the build.  They were pretty crude but they did the job.

My old clinker planking clamps. The jaws are basically parallel. Made them from 2 by 4’s. The handscrew tightens the clamp, the threaded rod to the right controls the amount of jaw opening.

I used threaded rod and tried to imitate a Wooden Handscrew Clamp with the adjustable jaws. 

The clamps are pretty rough.
The nut in the lower jaw allows the threaded rod to tighten the clamp. The threaded rod hole in the upper jaw is loose, allowing the upper jaw to flex a little.

I cut up some 2 by 4’s and used some cherry firewood for the handles.  Bolts are set into the jaws. I made up thirteen clamps for the 11′ Defender build.

I was imitating the classic “Jorgensen” handscrew clamp design that has hardwood jaws that can be offset and/or angled to keep parts from shifting.

In the thirty years since the last build, I am now older and wiser, maybe a little more skilled and I am going to again build a glued-lap clinker boat. 

In reading the November 2019 and June 2015 issues of Small Boats Monthly, I found the plans for Brenne Clamps by Christopher Cunningham.  I decided to build some. 

By the way, Small Boats Monthly is a great resource…you should subscribe!

The Brenne clamp was designed by Harald P.  Brenne, a teacher at the boatbuilding section of Saltdal Videregående Skole at Rognan in Northern Norway.  The clamp is referenced in the book Planking and Fastening by Peter H. Spectre, in an article by Bjørn Skauge.

There is also an article by Bjørn Skauge in WoodenBoat magazine, issue 29, page 67.

I had a look at Christopher’s plans and then drew up some of my own.

 My clinker planking will be about ¼” and 1/8” thick, making a total thickness of ½”, 3/8” and ¼” at the lap.  This clamp will work for planking lap thickness of up to maybe 1”.  I decided to have a 10” reach, making the clamp 16” long.  I was fortunate enough to be able to buy a number of recycled ¾” oak-faced plywood shelves from the local Urban Repurpose store for 25¢ each. 

Three dollars worth of ¾” oak-faced plywood and a dollar’s worth of aluminum bar. The piece of polished aluminum bar was 1″ by 1/8″ by 8′ long!

Each shelf gave me enough material for two clamps.  For the Pins, I used some 3” common nails. 

I did not have any luck in making springs work. I could not source compression springs long enough not to pop out of the clamp when fully open. My son suggested using extension springs attached at the cheek end of the clamp…Instead of a springs, I used some surgical tubing at the cheek end to open the clamps, secured by ½” (could go to ¾”) screws & washers.  For the steel strap connecting the cam to the bottom jaw, I used left over scrap metal, some aluminum bar, some left-over half-round from Gwragedd Annwn’s build and some left-over concrete form ties (cut to size) from my garage/boathouse project. 

The tools I used were:  Bandsaw with a 3/8” blade, Shopsmith with the 12’ sanding disk, Drill Press with a 2½” hole saw, and a 5/32” drill bit, Hacksaw, 1” Belt sander with a metal sanding belt, Cordless drill, Hammer, Metal files, Scissors, Varnish brush and a Random-orbit sander. 

Some of the stuff I used in the build…Centre punch, 5/32″ and 1/16″ drill bits, small hole punch, 3″ nail, 1/4″ thick cork, 2 ½” hole saw, surgical tubing, ½” screws and washers.

I suggest that you build one clamp, using screws so you can disassemble the clamp and make it into a pattern…when you know that your interpretation will work for your build, you can then make as many as you want.

Tracing the patterns out on a piece of left-over ¾” oak-faced plywood shelving.

To make the clamps, I traced the patterns onto one of the ¾” oak-faced plywood shelves. 

Tracing complete…two clamps less the cheek pieces.

I cut out the pieces with the bandsaw using a 3/8″ blade. 

Cutting out the cam levers.
Jaws cut out…ready for sanding. I will cut out the half-round after sanding.

I then sanded the pieces to the line using the Shopsmith 12” sanding disk. 

Sanding to the line.

A little extra sanding on the hinge end of the upper jaw insures that the upper jaw will move freely between the cheek pieces when assembled. 

I used the Drill Press, clamping the upper jaw blank and cutting out the cam semi-circle with the 2½” hole saw. 

I line up the hole saw with my drawn line. The upper jaw is clamped in place. Because the centre drill of the hole saw does not cut into the jaw, I can get the hole saw right to the line.

After cutting out the half-rounds, I sand the cam lever pieces. Be careful when sanding the cam lever pieces. I now match the cam lever piece to a particular Upper Jaw piece and sand the cam lever to fit the Upper Jaw piece.

Next, use the drill press with the 5/32” inch drill bit to drill two of the remaining pilot holes…One in the cam, off centre.

Brenne Clamp Build

  The two lower jaw holes are for two bamboo pins that reinforce the fixed joint between the lower jaw and the cheek pieces.  I will drill and pin the Lower Jaw after the glueing the cheek pieces to the Lower Jaw and the glue has dried.  The third lower jaw hole is for the pin that holds the cam to the lower jaw.  It is below and slightly offset to the cam hole when the clamp is assembled.  I dry assemble the clamp and use the cam strap to determine where the third Lower Jaw hole should be.  There is one hole in the upper jaw.  The hole is at the pivot point.  The pivot hole is on the midline of the Upper Jaw and the same distance from the end of the jaw. 

  I drill one hole at the top of the strap.

I use the punch so the drill bit will not skate on the cam strap.

With everything cut, I dry-assemble the clamp in the closed/locked position. 

Dry fitting the pieces. I have drilled the Upper Jaw pivot holes in the cheek pieces. Just like the plans, the Lower Jaw restes on the base, same as the cheek pieces.

There should be about 1½” between the jaws at the cheek pieces.  I usually make sure that the jaws are parallel at the tip. 

Dry fit done. The jaws are parallel at the tip and the tips are even.

This is when I glue the cheek pieces to the lower jaw. If you are making a pattern, you now have one, just use screws instead of glue for the next parts…

Back cheek piece and Lower Jaw glued up.
Upper cheek piece glued up. Time to “straighten” up the clamp.
Might as well glue on the cork faces for the jaws. Cam straps are in the background. I have no idea who the cartoon characters are.

I get the clamp “squared” up and make the jaws parallel when the clamp is closed, then clamp it up.

Clamp “squared” up, cork jaw faces in…Time to clamp it up!
Two “F” clamps hold the cheek pieces and the jaws together.

I ballpark the length of the cam straps, insuring that there is enough length to go from the cam to the middle of the Lower Jaw. 

The top hole drilled in the cam strap. Rounding the top and bottom of the strap and taking off any rough spots.

This is when I cut the cam straps to length…The distance from the middle of the lower jaw up to the cam lever hole. It is personal preference as to which way the cam operates. Mine the cam moves forward to lock. Thought it looked better. 

I mark where the hole is. When I drill the actual hole, I will drill it 1/8″ lower than my mark, to insure that the clamp locks tight.

When the glue dries, mark your two remaining pilot holes.  These are the for the two bamboo reinforcing pins. Glue them in. I usually give all of the pieces a coat of varnish after sanding and before final assembly. I tried using bee’s wax but it did not work.


I take the reassembled clamp over to the disk sander and round off the edges and shape the cheek pieces. Make sure that your Upper Jaw pivots freely.

Time to attach your jaw-opening device to the clamp. I did not have any luck with springs, although, I did order a lot of Pruning Shear or Secateur springs from China…should get her sometime before summer… I will give them a go when I get them, but for now….

Snippering the Surgical tubing to make a jaw-opening device.
Punching a hole in the Surgical tubing…I was unable to drill or screw through the tubing. If your screw tip does not go through the hole and catches on the tubing, you will be unable to screw it into the jaw pieces.
Screw (with washer) all the way through the Surgical tubing.

A small amount of spit makes the screw turn easier in the Surgical tubing.

Pilot hole in both Jaws for the Surgical tubing screws.
Surgical tubing attached.

I usually do not attach the cam and cam straps until after I attach the the Surgical tubing…Having the Upper Jaw able to swing freely makes the job easier.

Reassemble your clamp…ensure that the clamp works to your satisfaction. 

The reassembled clamp. Now to cut off the nails for preening. Only one bamboo reinforcing pin goes into this one.

If the clamp jaws are not meeting tightly enough when the clamp is in the closed/locked position or are too tight in the closed/locked position, you can fix this.  Two ways, re-drilling the hole in your Lower Jaw or replacing the cam straps or re-drilling the pivot hole in the strap.  You could also add another layer of cork or leather to the jaws of you could sand off some of the cork if too tight.. Fill any “unused” holes with bamboo pins glued-in.

Nails preened, clamp ready to clamp.

If the Surgical tubing device will not open your jaws fully, you have several fixes. One: shorten the length of the tubing, Two: double up the tubing, Three: take the Upper Jaw off and sand down the pivot end of the jaw.

The Surgical tubing device open the jaws fully.

If your clamp works to your satisfaction, dissemble and use the pieces as templates to make as many as you need…One for every foot of boat length for each side of the boat..?

I made the jaws wide enough at the front to hang the Brenne clamps from a pipe rack.

All in, I spent less than Ten dollars for the twenty-two clamps I made…Each clamp cost less than 25¢ in materials!!! and I have enough left-over material for another ten!

My take on the Brenne clamp as described in the Long-Reach Clamps article by Christopher Cunningham in the November 2019 issue of Small Boats Monthly. By using string instead of straps for the cam, the clamps are more adjustable. Downside is that the cam can fall off of the Upper Jaw when you are trying to clamp something up. The half-round cut-out in the Upper Jaw is much bigger than needed. I had a spare jamb-cleat…a hardwood one would work just as well.

Hope to see you out on the water in a glued-lap clinker boat soon,

Mike

Posted in Under the Keel.... | 2 Comments

The Urban Oarsman rows (and sails!) to the top of Pitt Lake with the Hollyburn Sailing Club 2019 May Long Weekend Paddle.

The Urban Oarsman rows (and sails!) to the top of Pitt Lake with the Hollyburn Sailing Club 2019 May Long Weekend Paddle.Pitt Lake Trip, May long weekend 2019

The Urban Oarsman, and three paddlers leave the rain of Vancouver and paddle & row into the sunshine of Pitt Lake

Leaving the rain behind.

Heather and I arrive at the Grant Narrows boat launch. It is $15 for me to launch Gwragedd Annwn and free for car-topped kayaks. Paddlers get all the breaks. I also pay $20 for parking until Monday. The rain is just easing up.

Gwragedd Annwn at the dock, ready to depart. I have made a sailing rig for her. The mast is stepped and I am ready for any wind. There is none, so I row.

We will paddle on the East side of the lake for the trip up, West side for the trip down.

Departing the dock.

I am packed and ready to go. After stepping the mast, I row Gwragedd Annwn up river to Pitt Lake. Heather is still packing her Coop Kayak.

As Heather in her Coop Kayak is much faster than I, I head out while she is still packing. She will catch up with me and pass me soon.

The rain has stopped. The clouds are getting lighter to the South. Maciej and Sharron arrive as Heather departs Grant Narrows.

The clouds still look pretty dark up the lake.

Raven Creek campground is about 10km uplake from Grant Narrows.

There are pilings along the South End of the lake. Old log booming grounds.

The South shore of the lake has a number of old log boom pilings. Three of them have been put to good use by Ospreys. Several of the pilings have nesting platforms on top of them.

Osprey on the nest with chicks. Note the landing bar.

The South end of Pitt Lake has the largest negatively accreting delta in the world, and Pitt Lake is the second largest fresh water tidal lake in the world. We will have to make sure to bring the kayaks above the high tide line. There is a dredged channel leading along the South shore and then up into the lake. With the high water and our shallow draft, we can Row & Paddle anywhere.

Cruising along, between the pilings and the dyke, leaving the dark and damp behind.

The rain has stopped completely. There is no wind. Ideal conditions for paddling.

Heather passes another Osprey nest…and me.

Whenever you begin a paddle, things always get better….

Sunshine breaking through.

Good weather is on the way!

The beginning of a sunny long weekend!

Heather and I make it to the Raven Creek campground…Meanwhile…

HSC Kayak Captain Maciej and SKABC member, Sharron paddle along the dyke after leaving from Grant Narrows.

Heather and I do not see Maciej and Sharron. The Raven Creek delta blocks our view of the South shore of the lake.

Maciej and Sharron arrive at Raven Creek. We are happy to see them.

Maciej arrives at Raven Creek.
Sharron arrives at Raven Creek.
Happy to be here.
We do not pull Gwragedd Annwn up the beach, she is anchored at the shore.

We are all secure for the night. The kayaks pulled up and Gwragedd Annwn moored securely.

Supper time on the beach. Maciej is making “dessert”, a mulled wine digestif.
You can see the high tide line behind us.

We make camp and make supper. The sun has dried everything out.

Interesting Polypores (Bracket fungi) at the campsite.

We have a modest campfire on the beach below the high tide line.

When the rising tide puts out the campfire, it is time for happy, tired paddlers to go to sleep.

The tide does rise quite high. The evening tide is the “low” high and the morning tide is the “high” high. We have about 12″ or so to go before our camp floods.

Impromptu bear cache.

The full moon tomorrow night will be the “Blue” moon and the tide will be at its highest then.

Saturday morning launch. We are going to Vickers Creek campground.

The tide is higher in the morning than it was last night.

The plan for Saturday is to paddle to Vickers Creek Campground, another 17km or so uplake (27km from the Grant Narrows launch).

Looks like some pictographs. This may be the pictograph shown on a map by Chris Arnett, Department of Anthropology, UBC, in his work “Rock Art of the Lower Fraser River Region”.
Pictograph of the Giant Black Salamanders of Pitt Lake!?!

For a moment, I think that I see a clue to the Giant Salamander mystery.

A seal checks us out

Perhaps another clue to the Giant Black Salamanders of Pitt Lake mystery…a miss-identified seal sighting.

With the recent rain, the Pitt Lake waterfalls are flowing.

As afternoon arrives, a slight breeze picks up. I decide to try sailing.

This is the idea…too windy to row, Sail. Not enough wind to sail, Row.

Gwragedd Annwn running under sail.

I put my rudder on, drop the leeboards and hoist my 104 square foot balanced lug sail for a downwind run.

Rendezvous.

We meet mid-lake. Heather, Maciej and Sharron are much faster in the kayaks and have checked out the Vickers Creek campsite. They say the beach is too jammed with drift logs for a landing.

Making plans to check out Pitt River delta for a campsite

They have also checked out Ashby Creek and have come to the same conclusion. We decide to check out the north end of Pitt Lake for a campsite.

Sailing to the North end of Pitt Lake, where the Pitt River enters.

The kayakers are so quick that they can check out the sites and have a break and meet me before I arrive at the North end of the lake.

Pitt River delta in the distance.

Even under sail, the kayaks are still faster than Gwragedd Annwn. They will paddle up and scout for a campsite. If they do not find anything, they will return and we will try Vickers or Ashby…..

Going up Pitt River, looking for a campsite.

In his book “The Vancouver Paddler”, Glen Stedham says that there are sandy beaches near the mouth of Red Slough, on the Eastern shore suitable for camping. With Pitt Lake water level so high, will the beaches are under water?

The kayakers arrive at a gravel bar upriver.

Maciej decides to explore the Pitt River delta area for a campsite.

This is as far up as I can get…The current is too strong and the water too shallow to row up any further. I beach Gwragedd Annwn, tie her up and on my way upriver to tell the kayakers, I discover a good, high and sandy campsite on the bank behind the willows.

The camp is sandy, with willows sprouting. The tops of the willows have been eaten by Moose…In the sand, we see their hoof prints and their scat.

Maciej at the Pitt River camp. Even he is tired from paddling against the river current.

We hope that we do not get stepped on by browsing moose in the night.

Suppertime at the Pitt River willow camp.

I am using my wife’s Trangia stove, still going strong after all these years. This methyl alcohol stove burns silently, boils AND simmers well. Great stove. Lightweight…quiet as the wilderness itself.

We have solved the Giant Black Salamanders of Pitt Lake mystery. There are not giant salamanders, but giant toads!

There were hundreds of Western Toad (Bufo boreas) toadlets hopping around at the campsite.

This one seems to be eyeing up Maciej.

Evening falls on our camp.

Tonight is the night of the Blue Moon. Heather wakes up to see it.

Gwragedd Annwn tied up for the night with Golden Ears in the background.

The moon is scenic through the clouds. Sadly, no photos turned out.

In the morning, Heather and Sharron break camp.

We have discussed where to spend our last night. With both Vickers and Ashby Creek campsites being log-jammed, we decide to return to Raven Creek.

Rowing, this time with the current, down Pitt River for Raven Creek campsite.

The kayakers paddle down river too.

Departing the Pitt River Delta for Raven Creek.
Yet, again, the kayakers pass me. Maciej’s picture.

The kayakers will go to Ashby Creek and try to intercept our one night campers. We do not have any cell phone or internet service here to communicate with them.

My picture of Maciej.

Kayakers having a rest stop.

Kayaker rest stop.
Some beaches are very difficult, even for kayaks, to land at.

For Gwragedd Annwn and I, the wind picks up and I try sailing again. With inflow wind speeds of up to and sometimes over 8 kts, I get over 5.5 kts, most of the time in the right direction. I hope the wind holds!!!

I sail right past Ashby Creek and do not see any kayakers.

Coming up to Cozen Point. Note the lack of movement of the smoke on the far shore. (sigh!) Barely a ripple in the water…wind is fading fast.

No wind.

At Cozen Point, the wind drops to no wind and Pitt Lake is a flat as glass. Goose Island is to the right of centre in this photo.

I furl the sail and begin to row. Perfect rowing (or paddling) conditions. However, with no air movement whatsoever, brilliant sunshine, I am cooking. I have about an 8km row to Raven Creek beach. 3+hrs at the thwart?

In this heat, I row for about ten minutes, stop, wipe my forehead and neck with a wet bandanna, have a drink of water and row on…then repeat…and row on…repeat…and row on…and repeat and row on.

Back at Raven Creek campsite.

After three and a quarter hours of rowing and three litres of water later, I am at Raven Creek.

Gwragedd Annwn on the beach, with Goose Island to the left and Little Goose Island to the right. Cozen point just left of centre.

Maciej receives an email sent to him this morning that the two Sunday kayakers have left the Grant Narrows launch…We have missed them. We hope that they will have a good paddle and a good night.

Campfire on the beach again.

In the photo above, you can see the high tide line behind Sharron and Maciej, at the bow of Maciej’s kayak.

Many great stories are told.

Sunday evening sunset. It will be warmer tonight with the cloud cover.

As night falls, the clouds move in. Rain is predicted for Monday…

We are all prepared for a rainy Monday morning….

Early Monday morning…actually TOO early Monday morning…no rain yet. I get going while the going is good!

At 5:30 in the morning there is no rain and no wind. Because Gwragedd Annwn is so slow, I decide to leave earlier than planned. Do not want to row in the rain.

No stowaways allowed!!!

Expecting a wet morning, I prepacked and I am almost ready. I pack up my swag tent and remaining gear and leave. (I do, however, make enough noise, like a boy scout troop apparently, to wake everyone else up!)

No rain, no wind, high clouds…we may be lucky on the paddle home.

Being a true leader without knowing it, I have inspired the kayakers to leave too.

The kayakers pack-up before the rain too.

Hummmm…Seems as if we are paddling back to the rain we left on Friday!

As Maciej passes me, it begins to spit.

The rain eases up and hopefully we will be on the hard, packed up and away before it begins to rain hard.

Almost at Grant Narrows and the rain has stopped.

We all arrive at Grant Narrows and load up the kayaks and I put Gwragedd Annwn on her trailer. We pack-up all of our gear.

We go for breakfast.

A good end to a great trip!!!
My GPS track of the trip on Google Earth. The squiggly bit at the top is where I was sailing.

Distances, with a little sightseeing:

Day one, to Raven Creek campground 9.12km.

Day two, Raven Creek to Pitt River delta, 22.34km.

Day three, Pitt River delta to Raven Creek 21.17km

Day four, Raven Creek campground to Grant Narrows 10.14km.

Total: 62.77km.

There is no water level gauge on Pitt Lake that I know of. The nearest one is the Fenton Gauge.

Water Levels at the Fenton Gauge, May long weekend 2019.
This is the closest gauge to Pitt Lake. The tides going up the river to the lake arrive later, depending on how far up the lake you are.

May 17th, 5am. 1.0568m Low Low

May 18th, 8pm. 1.4628m Low High

May 18th, 3am. 1.36m High Low

May 18th, 8am. 1.75m High High

May 18th, 5pm. 0.94m Low Low

May 18th, 11pm. 1.66m Low High

May 19th, 3am. 1.59m High Low

May 19th, 9am. 1.79m High High

May 19th, 5pm. 0.96m Low Low

May 20th, Midnight. 1.69m Low High

May 20th, 5am. 1.68m High Low

May 20th, 8am. 1.7874m High High

The gauge is located on the river near Sheridan Hill, South of Addington Point.


We sighted Ospreys, Canada Geese, Eagles, Mergansers, Humming Birds, Ducks, Seals, Beavers, Western Spotted Toads, Loons, Ravens, Downy Woodpeckers, Crows and saw Moose sign.

Sharron has forgotten her keens at the Pitt River willow camp.

I found a great (well after it is cleaned) camping spoon.

Pitt Lake is a great row…Enjoy!

Good Rowing to you,

Mike

Posted in Under the Keel.... | 1 Comment

Bee’s Wax or Snow Guard on Oar Leathers?

I decided to do a test to see which penetrated my oar leather better…Bee’s Wax or Snow Guard.

Using scrap pieces of leather, I put a dab of Snow Guard is on the Left and a piece of Bee’s Wax is on the right.

Bee’s wax can be pretty expensive…Mountain Equipment Co-Op sells a 60 gram bee’s wax candle for $3.50. I bought a piece of “raw” bee’s wax from a store called Wicks & Wax, in Burnaby, B.C. for about $11.00/lbs.

Melting the Snow Guard.

Using a heat gun, I melt the Snow Guard and it soaks into the leather. Not much heat is required. I keep adding Snow Guard an allowing it to soak into the leather.

Melting the Bee’s Wax.

Melting the Bee’s Wax into the leather. More heat is needed to melt the wax compared to the Snow Guard. I am careful not to scorch the leather.

Both the Snow Guard and the Bee’s Wax must be molten to soak into the leather. The leather must be warm enough to keep them molten.

Liquid Snow Guard soaking into the leather.
Liquid Bee’s Wax soaking into the leather.
I let the two treatments cool.
Both the Snow Guard and the Bee’s Wax have soaked through the leather

I turn the two pieces of leather over and view the results.

I cut a cross-section though the leather to see how the Snow Guard (top piece) and the Bee’s Wax (bottom piece) have penetrated the leather. The Bee’s Wax is the darker layer.

So which is better for treating your Oar Leathers? The Snow Guard is easier to apply, it needs far less heat to penetrate the leather. You can rub the Snow Guard on the leathers and leave them in a warm place or in the sun and the Snow Guard will soak into the leather.

The Bee’s Wax seems to fill the leather more fully but needs a lot more heat to melt and soak into the leather.

I have treated a new set of oars with Bee’s Wax and will try them out and see how well the Bee’s Wax performs.

Melting the Bee’s Wax to “paint” the wax onto the Oar Leathers.

The first step is to melt the wax. I use a tuna tin, my heat gun and a plant-pot heater to melt the wax.

Bee’s Wax painted onto the Oar Leathers.

Using a paint brush, I coat the Oar Leathers with the wax. It solidifies almost immediately. I paint on several layers.

Using a heat gun to melt the Bee’s Wax into the Oar Leathers.

I use my heat gun to melt the wax into the leather. Experience is showing me that many thin layers are better than a few thick ones.

I keep moving the heat gun to melt the wax.

I get the leather hot enough to melt the Bee’s Wax, and keep applying it until it no longer soaks into the leather.

The Bee’s Wax soaks into the leather evenly. Paint brush applicator in upper right.

When the leather is saturated, I move to the next oar.

All waxed up, letting cool.

When the leather is saturated, I wipe off the excess wax. The wax does not soak into the leather where the glue is.

With the Oar Leathers Bee’s Waxed, I will try them out and see if I like the “feel” while rowing.

….Feeling the stroke…

Mike

Posted in Under the Keel.... | 5 Comments

Leathering Oars.

Gwragedd Annwn’s Oars with their leathers and buttons.

For the Vancouver Wooden Boat Society, I am teaching a how to make Oars workshop at our new site, formerly the Old Coal House building, now the Wooden Boat Centre at 60 East Columbia Street in New Westminster, BC.

This is how to leather the Oars you make (or buy). I first like to get between 3 to 6 coats of varnish on the oars (not the grips). The oar should be varnished under the leathers. I like to get the leathers on while the varnish is dry but still soft. Subsequent coats of varnish will help “lock” the leathers in place.

To leather my oars, I used:

Oar Leathering material and tools.

A piece of Double shoulder special 7/9oz Veg-tanned leather from Tandy Leather, four pieces of 8½” by 11” paper for patterns, a ruler, Scissors, a pencil, leather punch, big sewing needles, scotch tape, waxed twine, a 33 cm. by 38.1 cm. Ziploc bag and Snow Guard.


The Sailmaker’s Twine I used for the leathers. I bought it at Martin Marine (The greatest marine store in the Lower Mainland) in North Vancouver. 604-985-0911.

How thick should your leather be? The guiding factor I use is the max diameter plus double the thickness of your leather is less than the inside diameter of your preferred oarlock. In my case, max inside diameter of my oarlocks is 2  5/16″.  The diameter of the oar at the leather is 1 7/8″ plus two times the thickness of the  leather (1/8″) is 1/4″.  This gives me a diameter at the leather of 2 1/8″. I will have 3/16″ of “wiggle room” at the oarlock.

Oar Leather plan.

Step One: you measure your oars to determine where your leathers should go. The measurement you begin with is the distance between your oarlocks. There are many oar placement formulas out there. I use the Phil Bolger’s recommended method. Bolger wanted his oars to just clear each other at the boat centreline with the oars horizontal and eight twenty-fifths of the oar length inboard of the oarlock. I usually like to leave a little less so I never smash my thumbs together (I have a bit of a bad habit of locking my thumbs over the end of the handle of the oar while rowing). I want my oars to be at the 8/25th from the grip (or 17/25th mark from the tip of the blade) mark on the oar. This is where I put my button. This means that when I push my oars down to the button, I am at the 17/25 gearing spot. I can bring my oars inboard to reduce gearing, but I cannot put my oars further out to increase gearing…I can only make it easier to row. I am fine with that. I am not very good at holding my oars in the oarlock at the right spot …that is why I put my button where I want my oars to sit.

The Key Factor is to put your buttons wherever you want, as long as the rowing feels good to you. The rowing gods will not send lightning to strike you dead if your buttons are not exactly at 8/25ths of the length of the oar! These are Your Oars, so do what works best and feels best for you.

If you are good enough at rowing to be able to hold your oars where you want them at the oarlocks, you can may not need a button at all and you should centre your leathers on the 8/25th mark, so you can gear up or down as you row.

Now in all honesty, I never change my gearing. My leathers could be only slightly longer that the width of the oarlock “horns” or “arms”. To protect the oar the leathers would only need to be an inch or two long, but, that does not look right. If you are going to change your gearing while rowing, you need a leather that is long enough to do so, so no matter what your gearing is, as long as you are rowing on the leather on your oar. Bolger shows his leathers as being 6″ long (Small Boats, International Marine, 1973, pg 30 & 31) …Some other authors go a long as 14″. As long as your leathers protect your oars from wear at the oarlock, the length is an aesthetic decision you must make. Whatever looks good to you. I am an 11″ leathers man myself.

The longer the leather, the less likely the leather is to slip on the oar.

Oar Leathers

Step Two: I am Using a 8½” by 11” piece of paper for a pattern, so my leathers are 11″ tall by the circumference of the oar. The circumference measurement is dependent on how much your leather shrinks or expands when wet-out. Take a test piece of leather (say 6″ by 6″) let it soak overnight and remeasure it to see how your leather changes when wet-out. If the leather expands when wet, deduct the extra so you end up with a ⅛” to ¼” gap. If the leather shrinks when wet, add to your measurement so that you still get a ⅛” to ¼” gap. On your paper pattern, mark where the button will be. Tape it to the oar with the button mark ½” past the 8/25th mark (where you want your oarlock to be). Mark on your paper pattern where the paper overlaps. Mark where the paper ends on the blade side, so you know where your leathers will go.

Another trick you can try is to use a strip of your leather (say the ½” by 18” strip for the button) to determine the around the oar measurement. This will allow for the thickness of the leather.

Pattern marked where it overlaps.

Remove the paper, draw a line to connect the two marks. Draw another line, ⅛” to ¼” further in from the first line. You want your soaked piece of leather to be ⅛” to ¼” smaller so you will have a gap that you will later pull tight. ( ⅛” to ¼”? how stretchy is your leather when wet?) Cut out the pattern. For my flat blade spoons this is 11″ by 5¼”. My button will be a strip of leather that goes twice around the oar, about 11″ long. A word or two about buttons. I use my button to help hold the oar at the correct (for me) spot at the oarlock. Two wraps of leather is fine for this. If you want your button to keep your oarlocks on your oars, say with Scotty strongbacks or any round oarlock designed to stay on the oars, you must make sure that the button stands proud enough to keep the oarlocks from falling off of the oars at the grip. Your button may have to do two jobs, oar placement and oarlock retention.

Oar leather plan after wetting out test piece to see what happens to the leather I have.

Make a paper pattern for all of the oars you are going to leather. Transfer the pattern to the leather. With my leather, I draw a line 11″ from the bottom of the piece. using the paper patterns, I mark on the leather where to cut.

Transferring the patterns to the leather.

I have four ½” strips at the beginning and four 11″ by the circumference of the oar less ⅛” (I am not going to stretch my leather much).

Cutting out the button strips. It is difficult to cut leather…You may want to try using a X-acto knife.

Using a pair of heavy-duty scissors, I cut the patterns out.

Cutting the four pieces out.

I find that it is too hard to just sew through the leather so I punch holes to sew through.

Collars cut out and marked for the lacing holes.

Step Three: On the rough side of the leather, I draw a line at least a ¼” in from the edge and mark the lacing holes every ¼” . You can use whatever measurement you want, just end up with an odd number of holes. Every 10cm would work just as well. I would not go any closer than ¼” as when wet, the leather is soft…do not want it to tear.

Punching out the lacing holes.

Punch out the holes…obviously, the longer the leather is the more holes to punch. I have never tried drilling them out. If you do not have a punch, I suggest that you buy one when you buy your leather…Talk to the sales clerks, and tell them what project you are working on. They may have some good suggestions for you.

Punching an odd number (43) of holes.

Step Four: Having punched all of the holes, I put the leathers and button strips into a large (33 cm. by 38.1 cm Ziploc bag and add water…

Soaking the leathers.

I will let the leather soak overnight (however, an hour will do). I use room temperature water NOT hot water! Hot or boiling water will make the leather hard and unworkable.

A couple of extra tools may be helpful. A pair of pliers, a corkscrew and two small diameter wooden blocks (I used the cut-off grip ends of my oars from when I cut them to size).

Oar leather soaked, with the holes marked, and cut to size. Time to punch out the holes.

When completely saturated, my leather went from 1/8″ to 3/16″ in thickness!

Another way of cutting your leathers to size is to cut the leathers Oversize, say 11″ by the circumference plus ¼” (bigger than your oar circumference!). Mark the holes ¼” on a line ⅜” from the edge. Do not punch the holes, soak the leather first. When the leather is saturated, remeasure the oar and then cut the leather to fit. If you have to cut the leather on the long edge to fit the circumference with a ⅛” gap, use a sharp knife and a ruler (on a breadboard). Now punch the holes on the ¼” marks, ¼” from the edge. I found wet leather easier to cut and punch than the dry leather.

A thick rubber band at each end of the leather helps keep the leather in the right spot.
First stitch at the Blade end of the leather.

Step Five: With the leathers thoroughly soaked, I begin to sew them on. I have the 8/25th point (where the oarlocks will be on the oar while rowing). I put the leather there and start sewing from the Blade end up to the grip end. This way I will finish at the button end of the leather and the button will cover where I tie the threads together.

Gwragedd Annwn’s 1500+ Nautical Mile Oars. The “stubby” leathers are because the oars were too “loose”. Another leather filled out the oarlock. Chafe against the oarlock has worn the stitching into the leather. All of Gwragedd Annwn’s oar leathers have had the stitching “worn-in” by the oarlock horns. You can really see where the oarlocks sit, the worn area just under the button. No problems so far.

Now the big question! Stitches Up? Down? on the front side? on the back side? I think that this is mainly an aesthetic consideration. Gwragedd Annwn’s spoon oars (with over 1500 nautical miles on them) have the stitching resting against the oarlock. The oarlock “wears” on them with every stroke. No issues so far. I use fairly thick ⅛”+ leather and perhaps the stitches settle deep enough into the leather so the stitching does not wear.

Stitching oar side up. The side at the bottom of the picture will rest against the oarlock during each stroke. Forward is bottom of the picture, Aft is at the top.

For the flat spoons I have made, I am putting the stitching “Up”, where they should wear the least against the oarlock. I will be able to see the stitching with every stroke. I will see how it looks and if I like the look.

Rolling out the leather on the flat spoons with the stitching on the top of the oar.

After I have leathered the oars, I take a rolling pin and roll out the leather. This helps the leather to fit tight to the oar and helps seat the stitching.

Pulling the stitching tight with a corkscrew.

If the stitching is a little loose, I use a corkscrew (on my Swiss Army Knife) to pull it tight.

The rubber band helps keep the edges of the leather together.

For the flat blades, I will put the stitching on the bottom (power face) side of the oars.

Saving your hands by using blocks.

If you need to get more tension, wrap the lacing around a block and pull. If you are having trouble with pulling/pushing the needles through the holes, use a pair of pliers to pull the needles with.


Secret message under the oar leather.

Step Six: Buttons, Buttons, where do the buttons go?

Since Gwragedd Annwn is at home, I took my newly leathered oars out and put them into the oarlocks, sat in the boat and made sure that my thumbs had clearance. I marked where the buttons should go. I had measured right.

I took the 18″ by ½” strips of soaked leather and cut bevels in the ends with a sharp knife. I patted them dry with paper towel. I gave them a tug to stretch them. If you are using your button to keep “Captive” oarlocks on the oar, make sure that you have a long enough piece that when wrapped around the oar stops the oarlock from coming off of the oar….Oh, and now is the time to put the oarlock on! If you are using Scotty Strongbacks, make sure that the flat side of the “P” will be on the forward side of the oar. You want to be rowing against the pin. If you are using symmetrical captive oarlocks, any way will do.

Button tools…Thick rubber bands, the widest hose clamps you can find and a nut driver.

I laid the strip next to the oar and spread a line of Titebond II glue down the centre of the strip.

Wrapping the button strip around the oar leather, covering the lacing knot.

I then wrapped the strip around the leather at the end with the end knot.

I twist the button around until the two ends, inside and outside line up.

I secured the wound strip with a thick rubber band. I turned the button until the beginning end and the ending end were opposite each other.

Applying the hose clamp. I left the rubber band on so the hose clamp will not leave marks. This is the time to insure that your button wraps are aligned.

I then took a hose clamp and used it to clamp the button loosely . Make sure that the layers are on top of each other. Tighten. If your button shape distorts, undo the clamp and re-align. The blade side of the button should be the straightest.

I tighten the hose clamp…I find that Titebond II likes a lot of clamping pressure. If your button shape distorts, undo the clamp and re-align.

Step Seven: Wipe off excess glue and put aside and let dry.

Oars set aside to let the glue dry.

If your hose clamps are not wide enough and leave a mark on the button that looks like this (and you do not like the look):

Mark left by hose clamp.

There is a fix for this…it uses a piece of 1″ by 12″ sheet metal flashing. I bought mine at the hardware store. You could also use a piece of cut-up 1 litre pop bottle. You need one strip for every button.

Two 1″ by 12″ strips of flashing.

The method is to use the hose clamp to “clamp” the button, squeezing out all of the excess glue/water then take off the hose clamp, wrap the button with the flashing strip and re-apply the clamp. Tighten.

This image has an empty alt attribute; its file name is Oar-Buttons-15-1024x768.jpg

The end of the flashing strip should be not be curved down into the button.

The Oar Leather Buttons clamped…set aside to dry.

I do the same for all of the oars. The leather will shrink as it dries.


Snow Guard is on the top two oars. Snow Guard does darken the leather.

Step Eight: When the leather is thoroughly dry and warm, I rub Snow Guard into them to seal, waterproof and protect the leather. Put the oars somewhere warm (in the sun) for the Snow Guard to soak into the leather. In cold weather, I have heated the leathers with a Hair-Dryer to melt the Snow Guard into the leather or left them by the fireplace.

More coats of varnish after Leathering.

After the Leathering is done, I put some more (to total at least 12) coats of varnish on the oars. The additional coats will help “glue” the leathers in place.

Varnish right up to the leathers…varnish seeping under the leathers, locking them in place.


Step Nine: Go Rowing!!!

This image has an empty alt attribute; its file name is Old-Man-Bretner-1-999x1024.jpg

Mike

Posted in Under the Keel.... | 1 Comment

Gwragedd Annwn’s Cupped Spoon Oars.

The rowing journey begins

Gwragedd Annwn has “D” section red cedar cupped spoon oars. They are 8’6″ in length and have a blade area of ≈125 square inches. I have two sets, sized for the fore and aft rowing positions. The fore pair weigh 4lbs. 13oz. and 4lbs. 13.6oz.; the after pair weigh 4lbs. 9.10z. and 4lbs. 8.2oz. They all have lead weights in the grips for balance. They have performed very well for me. After several thousand nautical miles of rowing, I have made some modifications to Gwragedd Annwn’s cupped spoon oars.

Oars with spline on the right, spline removed on the left.

I felt that I had overbuilt the oars. I felt that they were heavy in the blade.

The first step is to rip off the splines from the 9′ cedar 2″ by 6″ (my oars will finish at 8′ 6″). The splines are the two opposite edges of the 2″ by 6″. The rounded edges will mean less wood to shave off later. The next step is to set the saw blade to 10° and rip the rest of the 2″ by 6″ into two trapezoid shafts.

The building of Gwragedd Annwn’s oars. The trapezoid shafts and the splines.

The wide base of the trapezoid will rest against the oarlock, i.e., faces forward, the narrow top of the trapezoid (the powerface of the oar blade) faces aft.

I use a blade profile pattern to make the spoon shape.
Spoon profile marked out on a blade blank.

After marking the blade shape profile on the blade blank, I carefully cut the spoon blade out.

A spoon oar blade blank cut out.

After you cut the spoon oar blade blanks, mark the blade shape onto the blank.

Gwragedd Annwn’s Oars

After you mark the spoon oar blade blanks, you cut them in half, down the middle to make two “wings” to fit onto your trapezoid shaft.

Four “wings” to make a pair of oars.

I use the spoon wing blanks to mark out the cutting line on the trapezoid shafts.
Do not bother to glue on the blade tip protectors as I did here…when you cut the blanks into two, you have to redo the blade tips to cover the shaft tip as well!
Cutting the shafts for the spoon “wings”. The jig saw is set to:
Jigsaw “eyeballed” to the correct angle for the blade “keel”, the ridge that will be down the power face of the blade.
One side of the Trapezoid shaft cut for the “wings”. The powerface of the blade faces down in this picture.
The trapezoid shaft cut for both of the “wings”. The powerface of the blade faces down in this picture.
I am using epoxy thickened with cedar sawdust to glue the “wings” on. Epoxy does not require clamping pressure. If I had to use clamps, the “wings” might drift under the pressure.
End view showing the dihedral angle of the “wings”.
Yes, those are just thick rubber bands from the stationary store.

I have not cut the blade shapes yet. I will use my jigsaw to cut them out later.

OOPS!!! cut out the blade shapes and did not take pictures of the process. Powerface is up in this picture, showing the “keel” structure running down the centre of the blade.
dryfit of the splines.
Glueing on the tip protectors and the “spline”. There are two sets of oars in this photo, one with the blades out and one with the blades in. The Oak tip protectors are “clamped” on with packing tape.
Everything glued up and ready for final shaping.

I used a ¼” round-over bit in my router to shape the narrow top of the trapezoid and a ¾” round-over bit for the wide base of the trapezoid shaft.

I set up the router in a router table and carefully ran all of the edges through it. I finished off the rounding-over with a 5″ random orbit hand sander. I then sanded with the grain to remove the sanding marks. Sadly no photos of the sanding process.

Full varnish mode….This is the set-up I used to varnish the oars. Ten coats in one week!

Now I know that I am some sort of varnish heathen…but let me explain. I have a cedar deck railing on my house that is varnished. I have refinished it twice in 30 years, most recently two years ago. For the railing, in the heat of the summer, I take a can of varnish and keep applying it until the can is empty. Coat after coat, as soon as the previous coat is dry to the touch. I do not worry about insects, dust, pollen etc. The varnish is for protection!
No varnish failure on the deck yet. I am sorry to say that I treat my oars in the same way. Lots of coats. In the winter it takes a long time for the varnish to dry “hard”, in the summer not as long.

My other heathenistic varnishing thing is: I like my varnish to be warm when I apply it. Seems to “flow” easier, go on smoother, cover better, and result in less “drips”. In the winter, I warm it up by putting it onto my “plant-pot” heater. In the summer, not really a problem.

Start from the blade end. I am re-lacing the leathers, as I broke the twine midway and had to start over. The lacing does “settle-in” into the wet leather.

I am leathering the Oars. I determine where 8/25th of the oar is. This is the accepted spot for the oarlocks. I take a piece of leather, about 12″ long and wide enough to go around the oar less ⅛”. ¼” from the edge, I punch holes along the edge every ¼”. I soak the leather in room-temperature water (in a baggie) overnight. Do not use hot water…it will ruin the leather. I use some waxed Sailmaker’s twine and baseball stitch the sides of the leather together. Two needles at the same time. Do not pull the leather together so tightly that you rip the leather…it will be pretty soft. If you are worried about the leather shifting after it has dried, there are a couple of things to try. I put some more coats of varnish on my oars after leathering. Varnishing right up to the leathers allows some varnish to seep under the leathers, glueing them in place when the varnish dries. Two or three coats of varnish will stick the leathers in place. You could also try smearing the oar under the leather with Titebond II glue before you sew them on. When you are happy with where your oars sit on the oar-collar, you can put on the buttons.

Rubber bands and hose clamps until the Titebond II dries.

My leathers are stitched to the oars and I am going to fix the buttons. I like to have my buttons at the maximum gearing that I intend to use. In this set-up, I can always “gear-down”. I cut about a ½” strip of leather, soak it overnight and use Titebond II to glue it onto the leathers. Hose clamps provide the clamping pressure. I do not nail the leathers to the oars.

When the leathers are thoroughly dry, I rub them with “Snow Guard”, a leather waterproofing treatment. (I bought mine at Marks Workwear House) I leave the oars in the sun to warm the leather so the Snow Guard really soaks in. I keep a jar of Snow Guard in the boat and coat the leathers at the beginning of each row so the oars move easily during the stroke.

For a full article on leathering oars, see “Leathering Oars”.

A bit of decoration varnished on.

The decoration is printed on “Onion Skin” tracing paper. I cut the decoration out, and put a coat of varnish onto the oar. While the varnish is still wet, I put the decoration on…and varnish over it.

I cast some lead rod to counter-balance the oars. Melted-up tire weights poured into ½” copper pipe molds set into cold ground.

The procedure for balancing the oars is to get into the boat, dip the oar into the water, use a scale to determine how much weight to put into the grip so the oar just floats with the blade below the surface. This does not have to be done in the field, I did it by putting a big cooler full of water beside Gwragedd Annwn, placing the oar into the oarlock and floating the blade in the cooler. I used fishing weights to determine how much lead rod to put into the oar grips. The weight was similar but different for each oar.

Epoxy plug for the lead rod weight insert.
Gwragedd Annwn’s Oars.

So that is how I made Gwragedd Annwn’s Cupped Spoon Oars. The additional small leather collars towards the blade are to hold them in position when using the transom sculling notch. I also use my oars to determine the water depth. See my post “How deep is the water”

See you out on the water!

Mike

Posted in Under the Keel.... | Leave a comment

Making a birdsmouth hollow mast for Gwragedd Annwn part VI.

The epoxy glueing the Masthead Sheave plug to the Masthead is now cured.

I quickly sand off the excess epoxy from the joint.  I will re-varnish this spot.  It will be covered by reflective tape later.

Excess epoxy sanded off with 80 Grit…I will finish with 350 Grit.

I going to make up a plug for the mast base.  Because I reinforced the exterior of the mast with epoxy & cloth, I do not need as long a reinforcing plug on the inside as I had planned.  I stuff more aluminum foil into the hollow mast.  I leave just enough room for the plug stem.  I use a plug of aluminum foil to make a “dam” to keep the epoxy from flowing down the mast into the “crumpled for radar reflection” aluminum foil.

I was using these for belaying pins.

I start with an oak hand shovel handle I bought from Princess Auto.

Not needed bits.

  It is almost an exact fit.  I sand off the finish so the epoxy will soak into the wood.  I cut off the rounded top and the excess on the bottom.

Making the mast base plug.

I make up an oak disk, just over 2½” in diameter with a 1″ hole in the centre.   I use my Shopsmith disk sander to round down the shaft of the handle.  (I then sand the bottom of the mast to bare wood)  The disk will fit against the bottom of the mast.

Dry fit of the mast plug.  Grain aligned fore and aft to the Masthead Sheave.

I mix up the epoxy…Two hundred stirs.

I coat all the bare wood with epoxy, including the mast base inside.

After I have coated all the bare wood, I mix wood dust with the epoxy and get ready to glue it all together.

I angle the mast so the base is up and pour the thickened epoxy into it.  The Aluminum foil “dam” keeps the epoxy from going into the “crumpled for radar reflection” Aluminum foil while I get the plug glued in. 

I then wrap the joint with the packing tape to keep the epoxy from leaking out.  I stand the mast upright in the garage with the heat lamp on it.

The paper towel is for a bit of insulation from the cold floor and if there are any leaks.

Now all of the epoxy will flow down around the plug for a good glue-up.

The following morning, the epoxy has cured and I remove the packing tape and sand the joint smooth using 80 grit and finish with the wet/dry 350 grit sand paper (using it dry).
First coat of varnish.  I varnish to the end of the epoxy/cloth reinforcing. 

I now turn to the other (Masthead) end.

Masthead end ready for varnish touch-ups

I give the Masthead end a light sanding with the 350 wet/dry sandpaper and touch up the varnish.

A couple of coats of varnish and I will be done!

Final stats:

The mast is 17″1″ long and 16′ 10¼” to the centre of the sheave.  It is 2½” in diameter at the base, tapering to 2¼” at the masthead.   There is 1½ pounds of (radar reflective!!) aluminum foil in the mast.  The mast weight is (using my luggage scale) 14lbs.

The finished mast…just some varnish drying to do…Then a coat of paste wax.

Three photos of the finished mast in Gwragedd Annwn:

Side view of the mast. Note the reflective strip at the joint, top of the mast.
The mast fits quite well. I will have to adjust the mast step and mast partner for a perfect fit.

When the rains stop, I will rig Gwragedd Annwn with her new lugsail. I believe that I will have to move her mast-step and the mast partner to balance her for sailing…a little trial and error is in my future.

Good rowing to you,

Mike

Posted in Under the Keel.... | Leave a comment

Making a birdsmouth hollow mast for Gwragedd Annwn part V

The epoxy has cured on the base of the mast reinforcing.  I used 6oz. cloth, left over from Paul’s Canoe build.

Mast outside ready for wet sanding…again, rain was predicted for today, but no rain.

I get out the wet/dry 350 grit sandpaper & bucket of warm water with a little soap again.  I sand smooth the joint where the cloth meets and where I did a little filling.

Not to get too boring, I sand the mast smooth, dry, take inside of the garage and begin to varnish

The varnishing consists of: a coat of varnish, rotating the mast every 30 minutes for two hours to minimise drips, let dry, repeat.  It is the same method I used to epoxy coat the mast, just more coats of varnish (8!)

Masthead Sheave plug assembly dry fit.

I take the Masthead Sheave plug assembly into the house to fit the sheave, washers and pin.  The pin is 3/16″ brass rod.  I got the brass washers from Roy.  

I take the assembly into the garage to cut the brass pin.
Nothing high-tech here.  Mark the pin, push it out a little.  Cut.

After I cut the pin to size, I file the edges smooth.  Ready to epoxy the plug into place.

I sand off any varnish on the base of the plug, so, the epoxy will soak into the wood.
Same with the mast head.

Both the plug and the masthead are sanded down to bare wood.  I set up the mast stand and then mix-up the epoxy.  Two hundred stirs.

Final dry fit.
Dry fitting the bamboo Masthead sheave plug pin.

All is good.

I coat the Masthead sheave plug shaft and the inside of the mast with the un-thickened epoxy.
I make sure to epoxy the bamboo pin and its hole.

After I have coated all the bare wood with the straight epoxy, I add wood dust to thicken the epoxy.  I put the base of the mast on the floor, angling the mast up towards the top so the epoxy will, if anything, run down into the mast.  I fill the mast head with the thickened epoxy mixture.

I insert the Masthead Sheave plug, the bamboo pin and then wrap the joint  and pin ends with packing tape to prevent the epoxy from leaking out.

It is hard to see from this angle, but the mast does angle down to the right.

To have all of the epoxy settle around the Masthead Sheave plug, I place the mast upside down in the centre of my garage.  Gravity will make the epoxy flow down and around the plug stem.  

Mast upside down, joints sealed with packing tape.
The mast is resting on an old sail in a sail bag so the varnish will not be scratched.  A
Heat lamp is shining on the joint.  I rotate the mast every 30 minutes so the epoxy will settle evenly.  

The distance to the inside peak of my roof is just a little over 17″.  The mast barely fits!!!

Gwragedd Annwn’s mast reaches to the peak. Paul’s Canoe in the background. 

Next step is to make the mast base plug.  I have a piece that I will fit into the base.  Tomorrow’s job….the mast is almost finished!

Another view.  That is the Vancouver Wooden Boat Society’s Douglas rowboat being stored.

Good rowing to you,

Mike

Posted in Under the Keel.... | 1 Comment