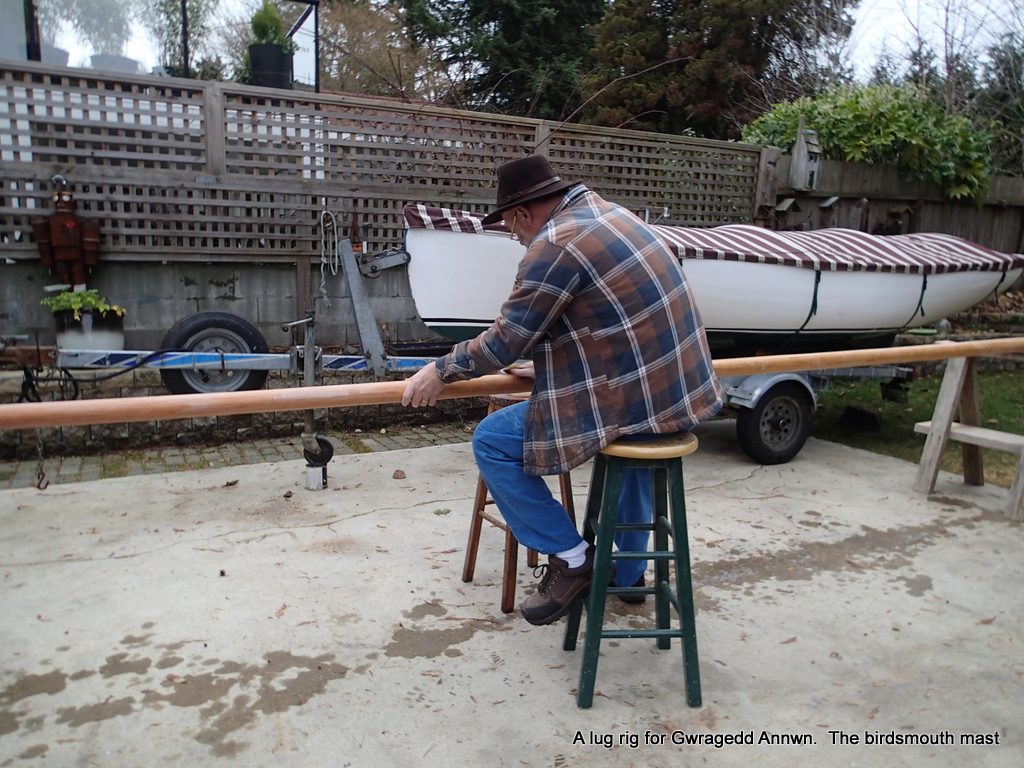
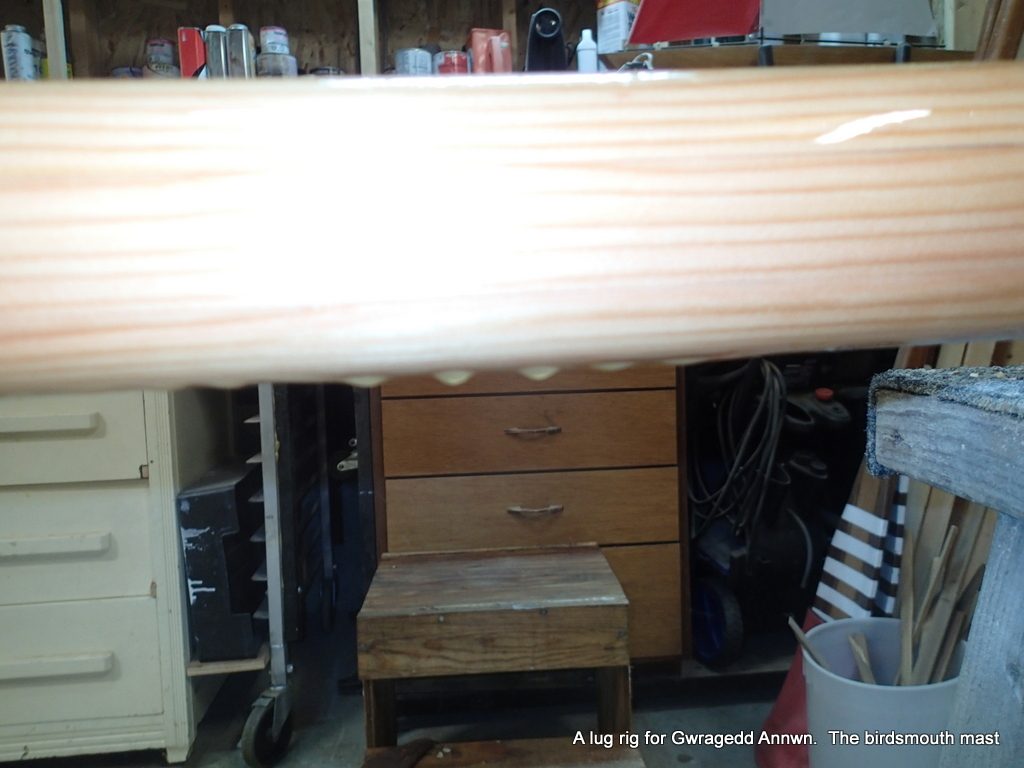
We have had over 20cms (almost 8″) of rain at the house. It has been very rainy and more rain is predicted. I decide to wet sand the mast tomorrow. Well, it is now tomorrow and it is supposed to rain all day today. I was all set up to wet sand the Mast and Masthead plug in the rain. Would you not know it…no rain today, but the temperature is just over 13° C.
Wet sanding the mast in the not raining. I am using 350 grit wet/dry sandpaper.
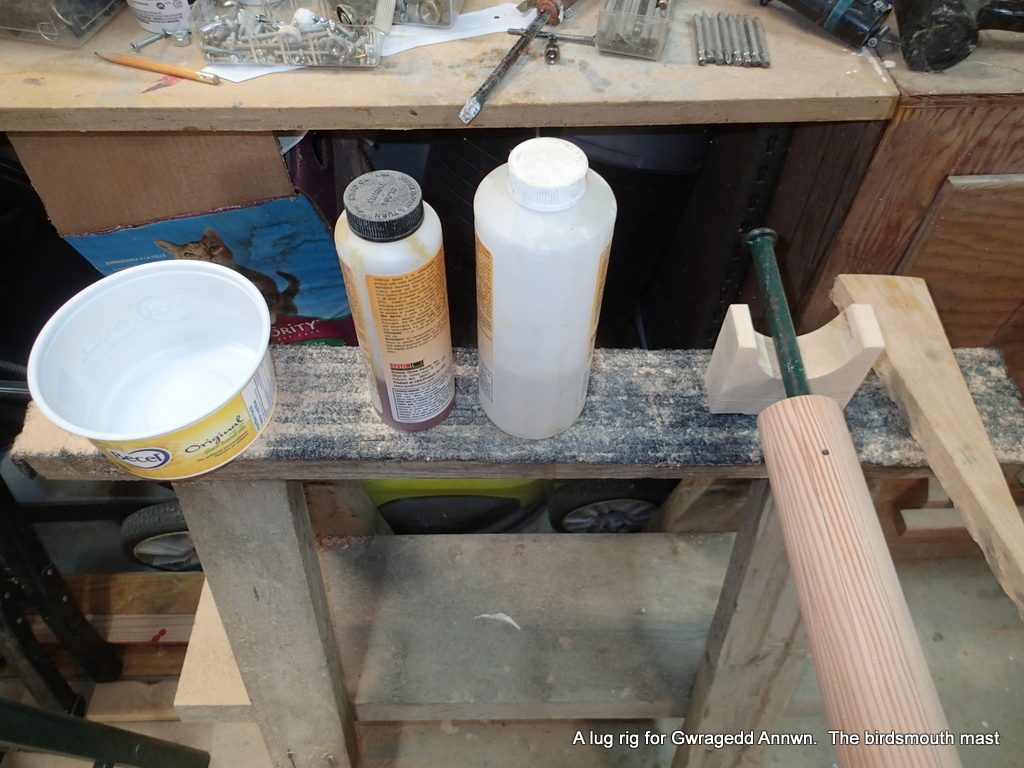
I have a margarine container with some hot water with a little dish soap. I really want the varnish to stick to the mast, so I am making sure that the mast has a good bonding surface…the soap will wash off any “anime Blush” that there may be on the mast.
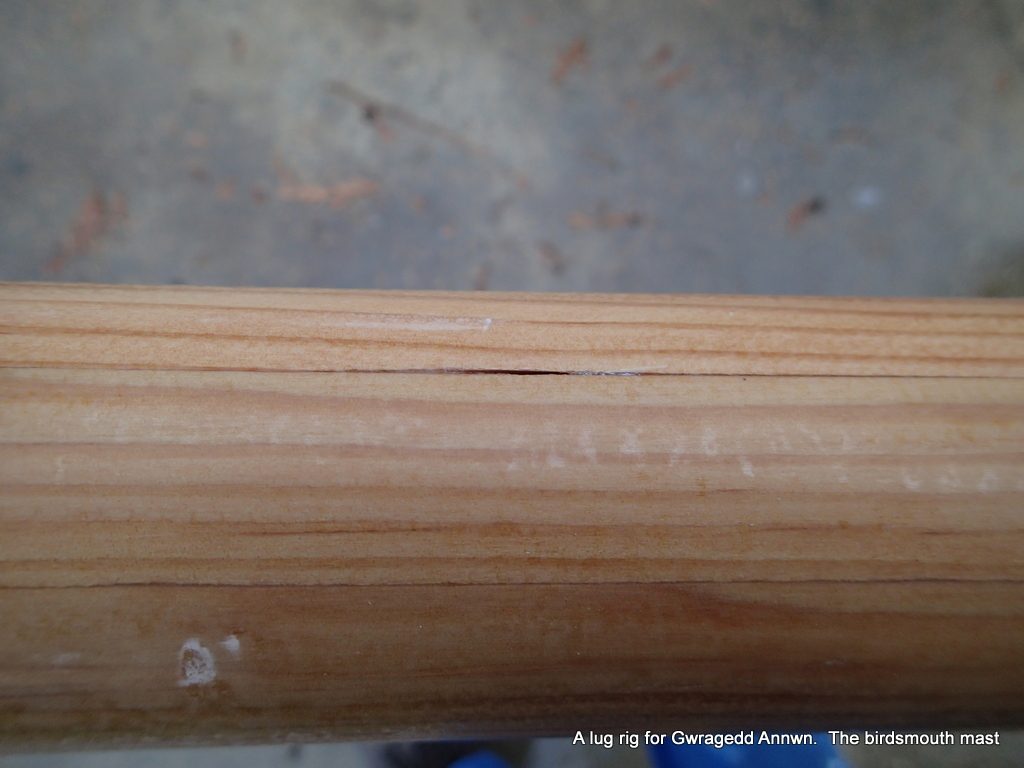
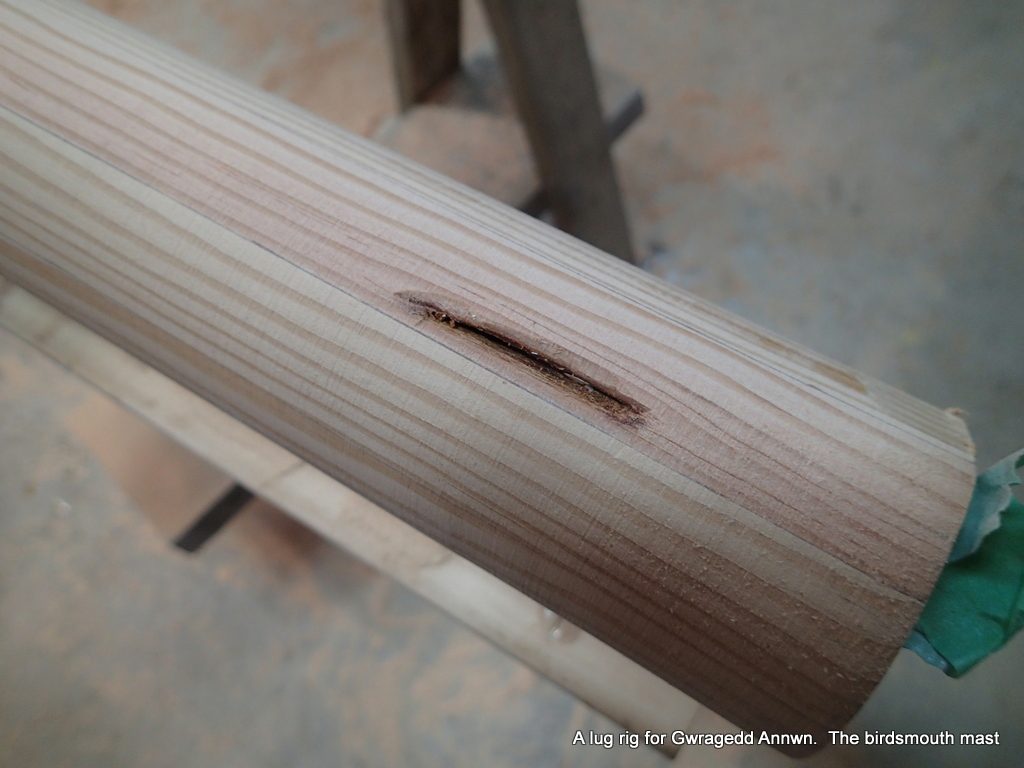
While sanding, I find a seam that still needs to be filled.
Well, there is a change of plans. I am going to fill a few minor flaws that I have found while sanding. I will live to varnish another day.
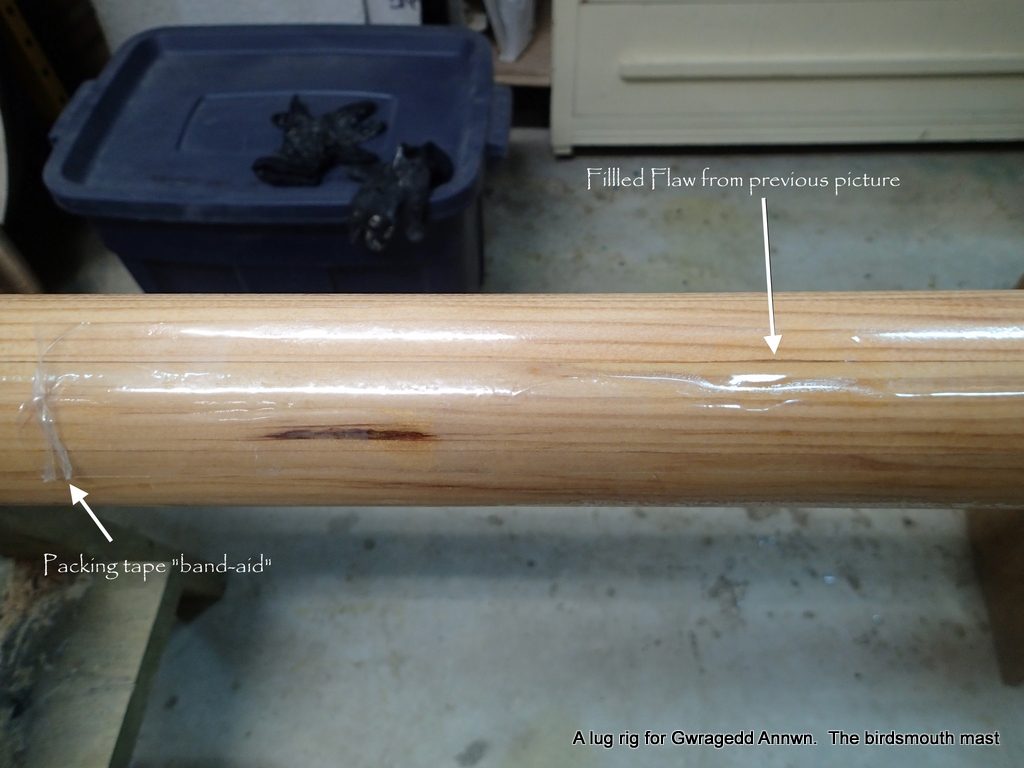
I mix up a small amount of epoxy and a touch of sanding dust and go around the mast, filling the few flaws that I have found. To keep the epoxy in place, I put a piece of packing tape over the epoxy. Sort of like a band-aid.
Fixing a few minor flaws.
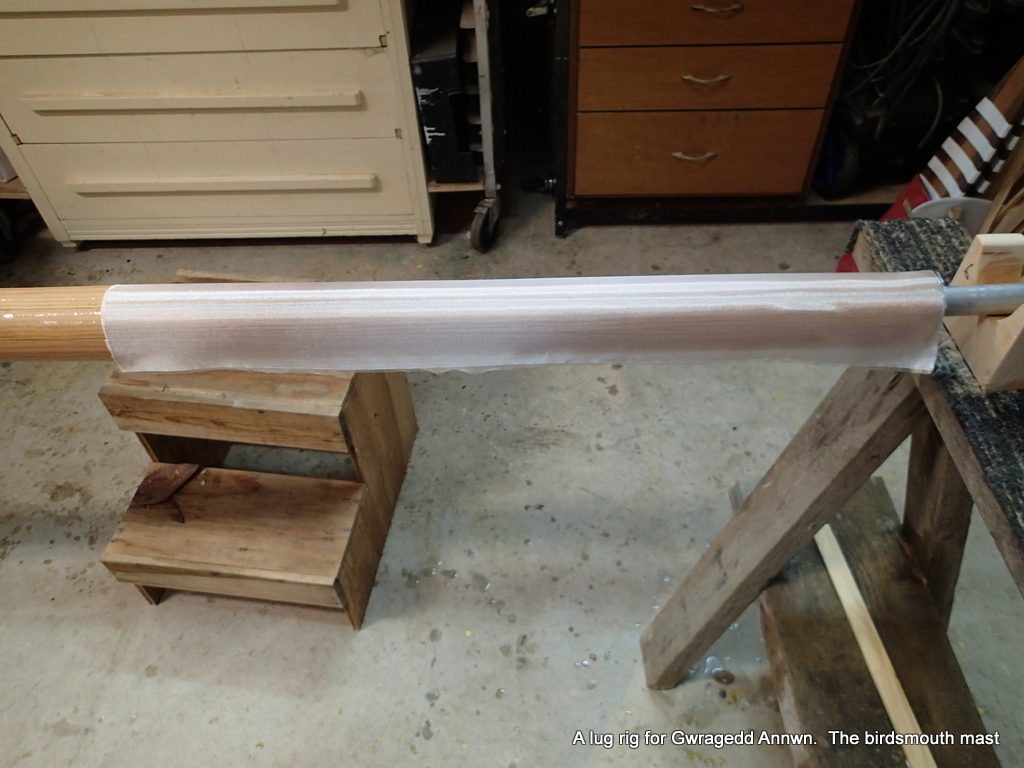
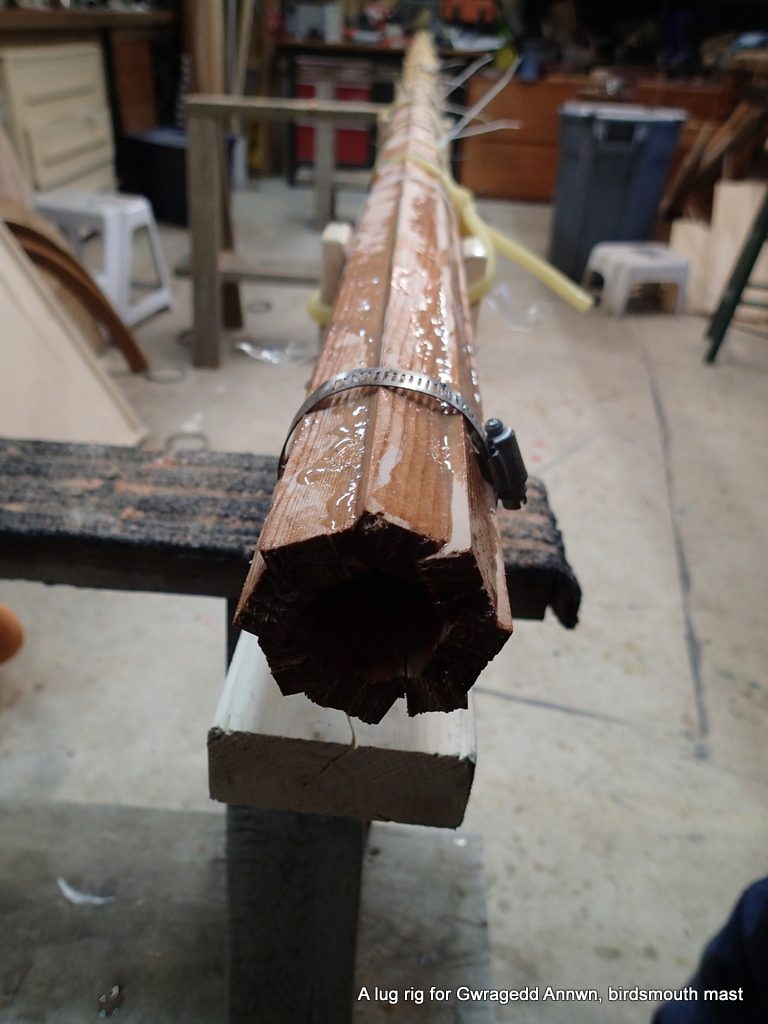
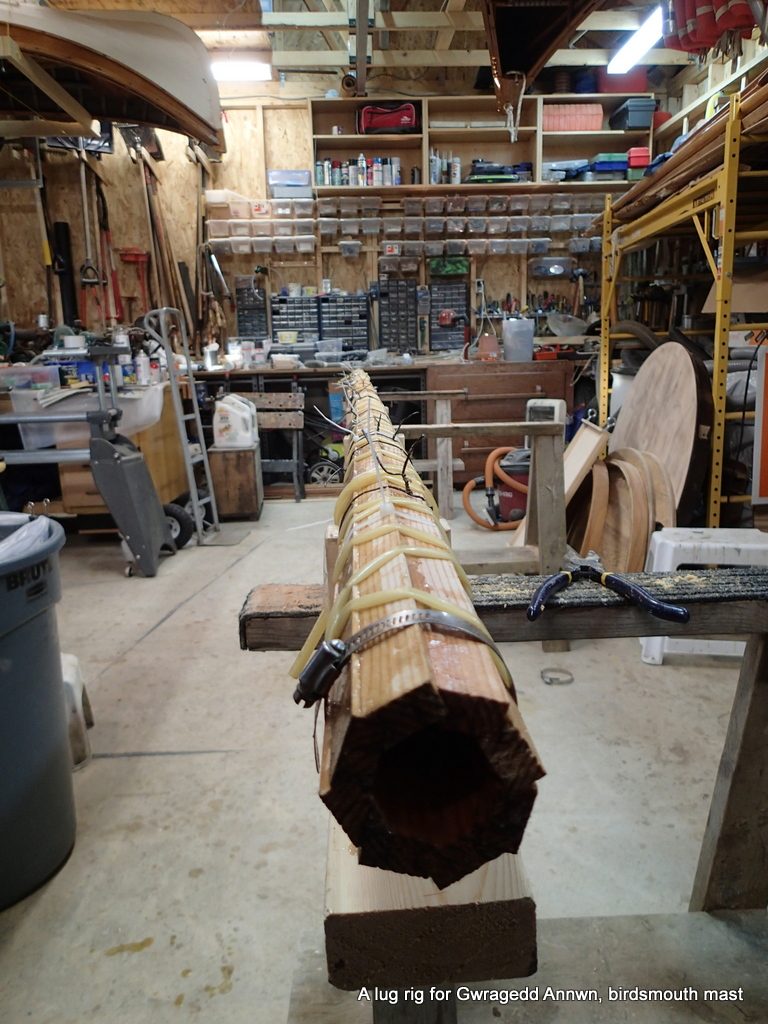
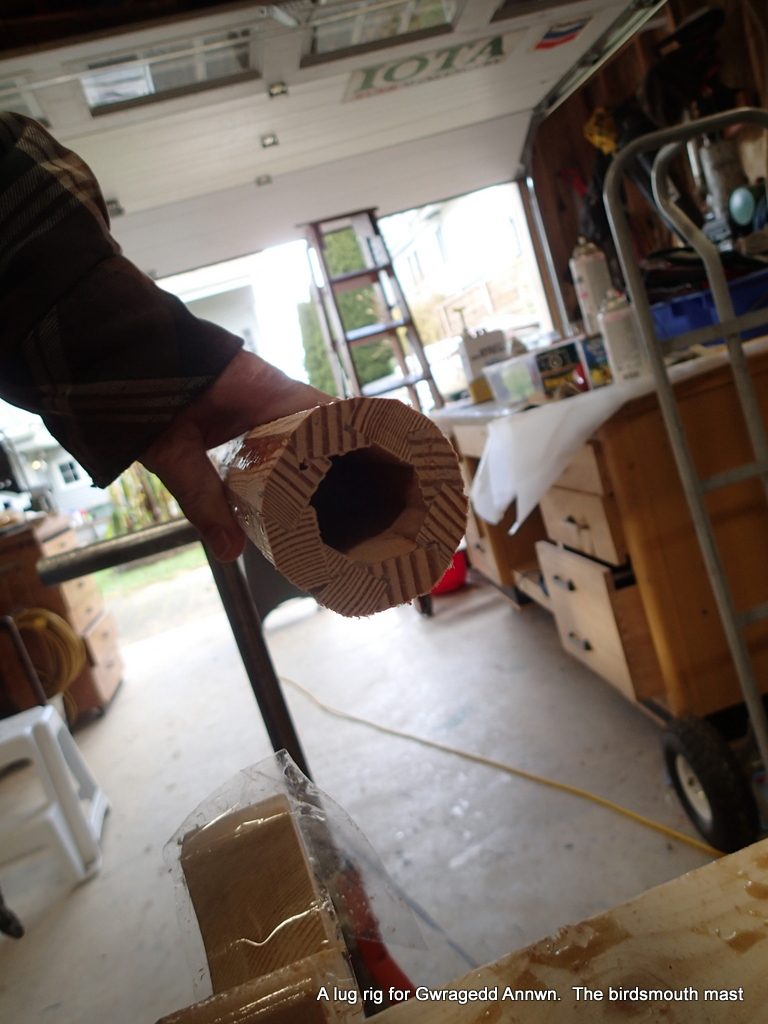
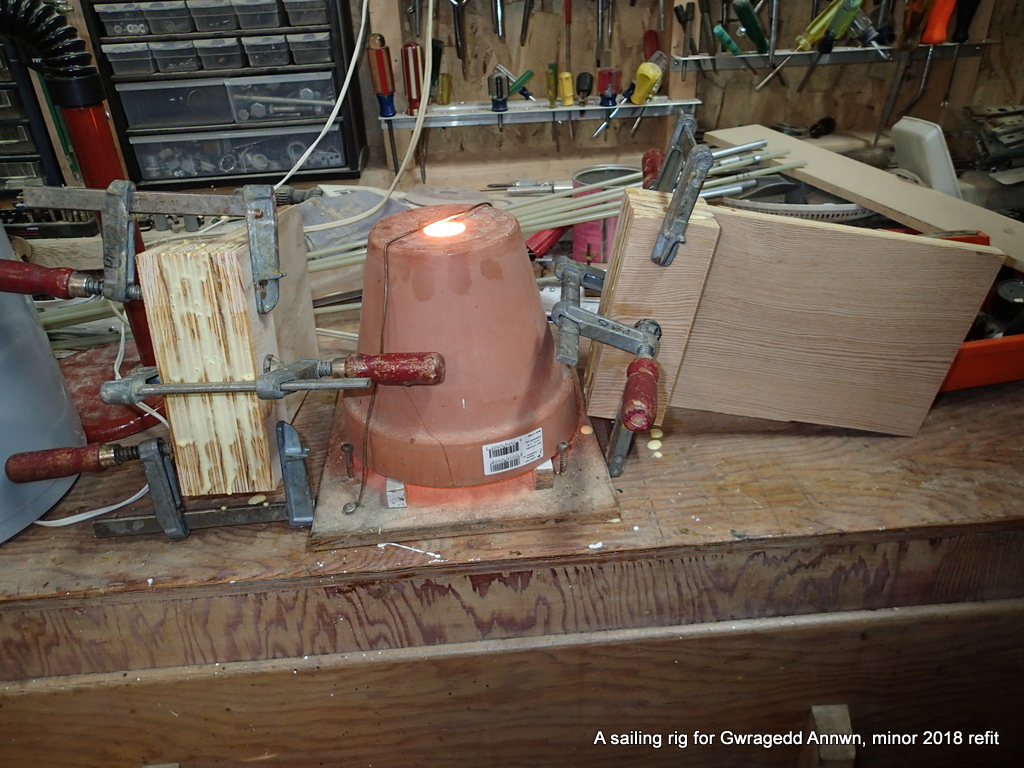
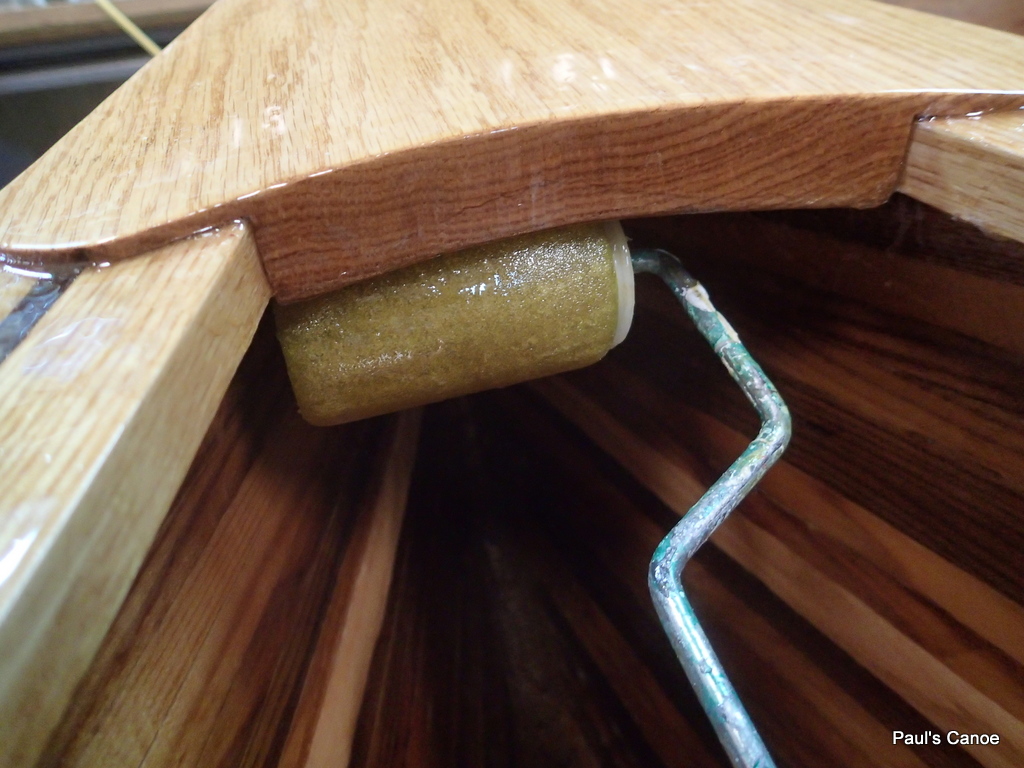
Well, this is a change of plans. I decide that since I cannot varnish the mast until the epoxy cures, I might as well go all the way with my other “idea”. Generally, the base of free-standing masts are reinforced on the inside, as there is a lot of stress placed on the mast base while sailing. I am going to wrap my mast base with epoxy & cloth to reinforce it. This will also keep the mast from being damaged where it goes through the mast partners (the thwart). I will still leather the mast at thwart level. (about 16″ up) to reduce chafing.
A layer of cloth for the base of the mast.
I used 6oz. cloth left over from “Paul’s Canoe build”. I am putting epoxy & cloth from the mast base to about 27″ up.
Cloth epoxy saturated. As before, I am rotating the mast every 30 minutes or so. No epoxy drips yet! I have brought my shop “plant-pot” heater over to keep the epoxy a little warmer to speed curing. Just for fun, I throw a coat of varnish on to the Masthead sheave plug.
I intend to wrap the Mast/Masthead plug joint with silver reflective tape when I am done. Hopefully I can wet sand the mast base, the filled minor flaws and start to varnish tomorrow.
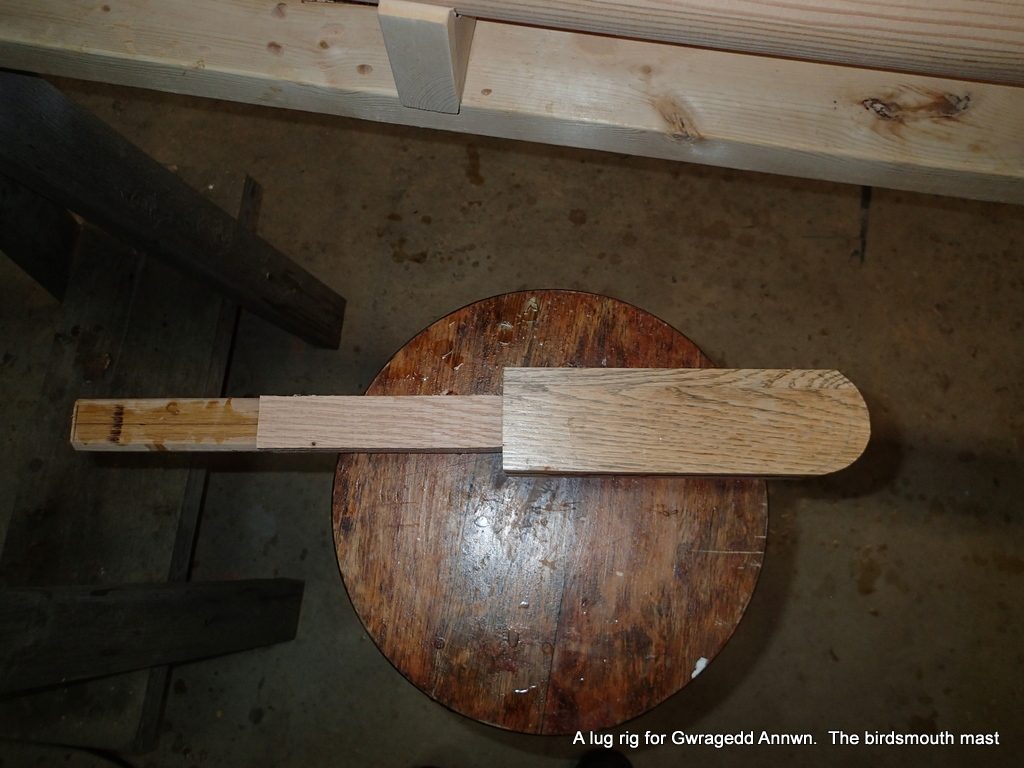
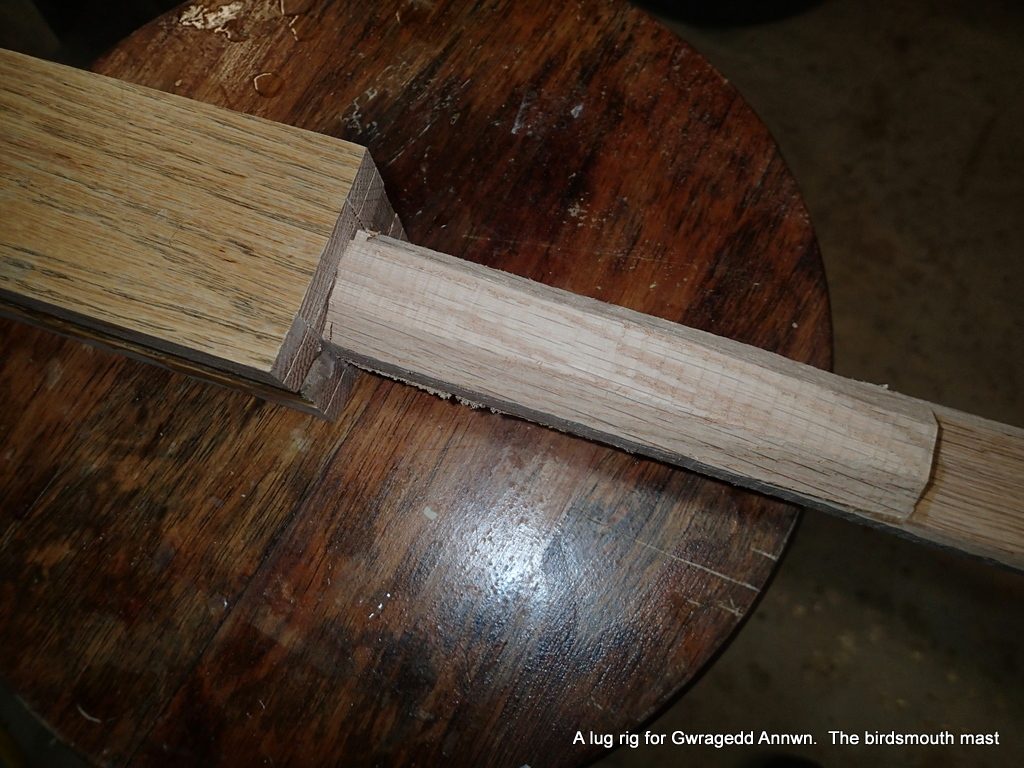
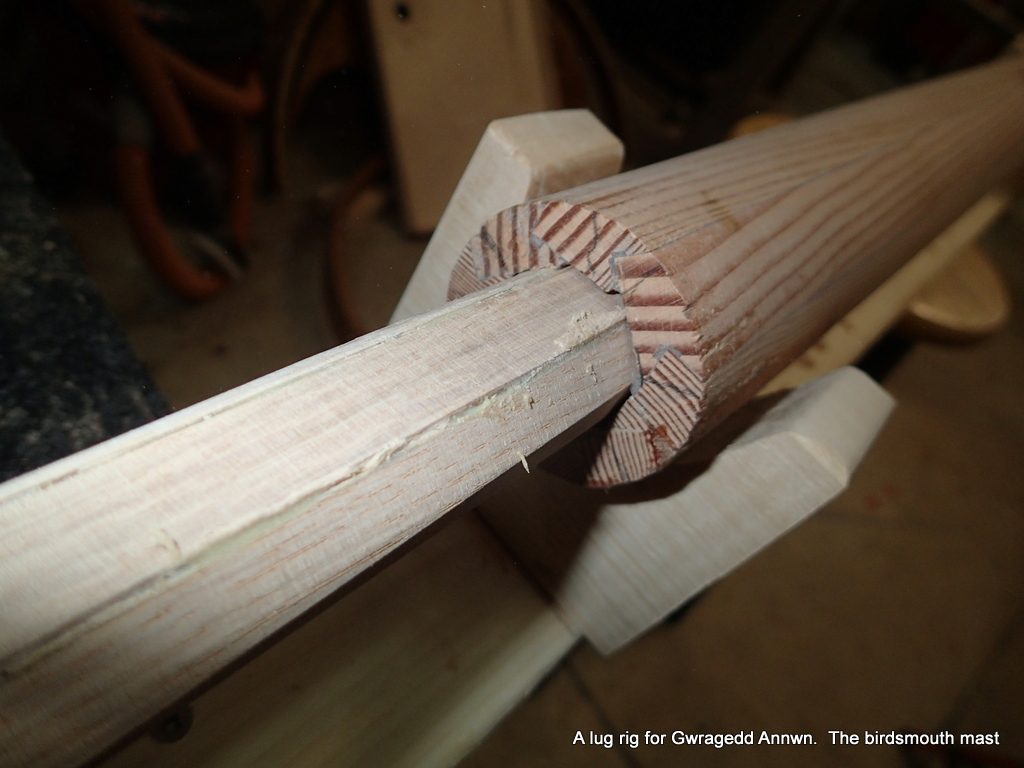
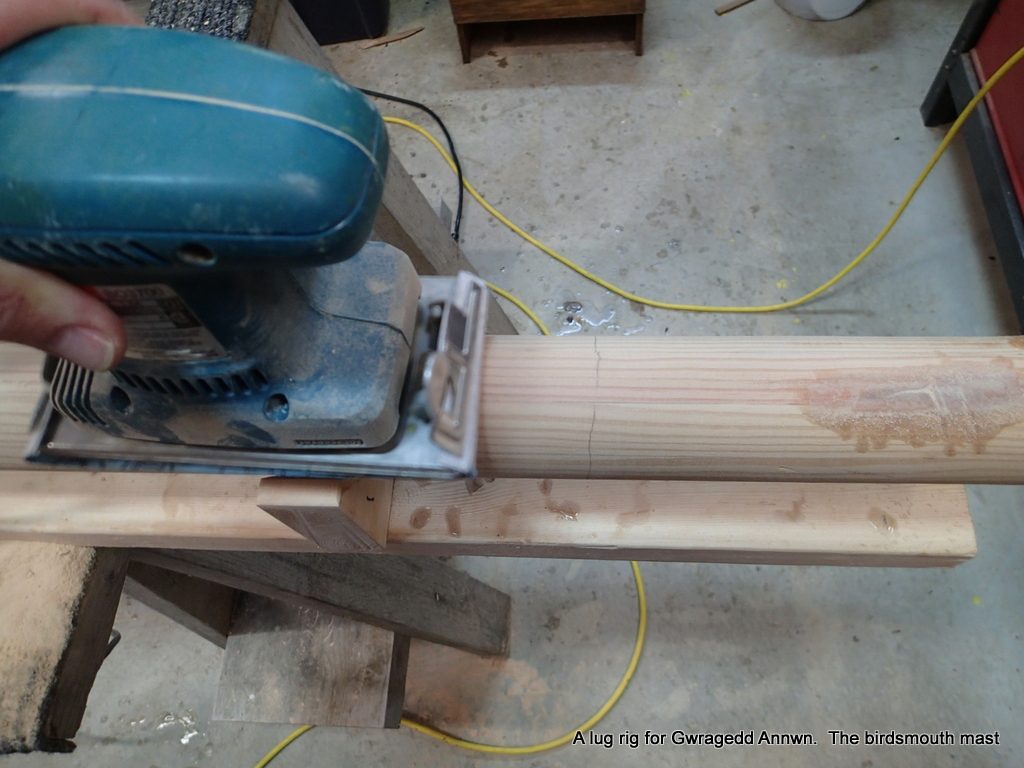
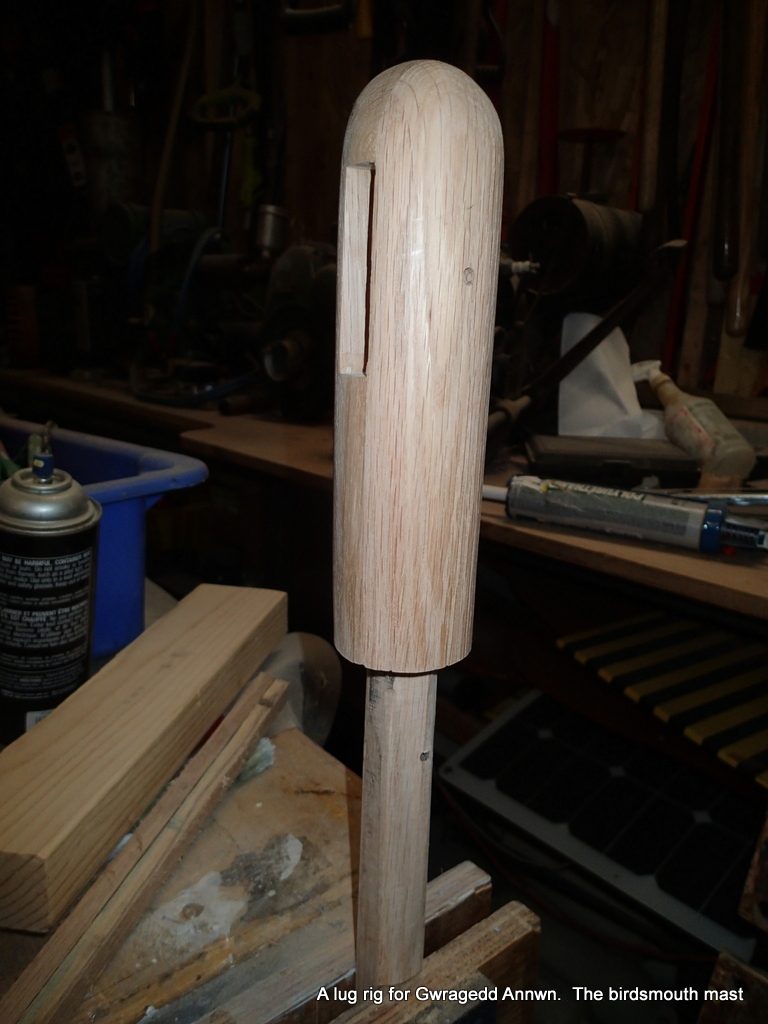
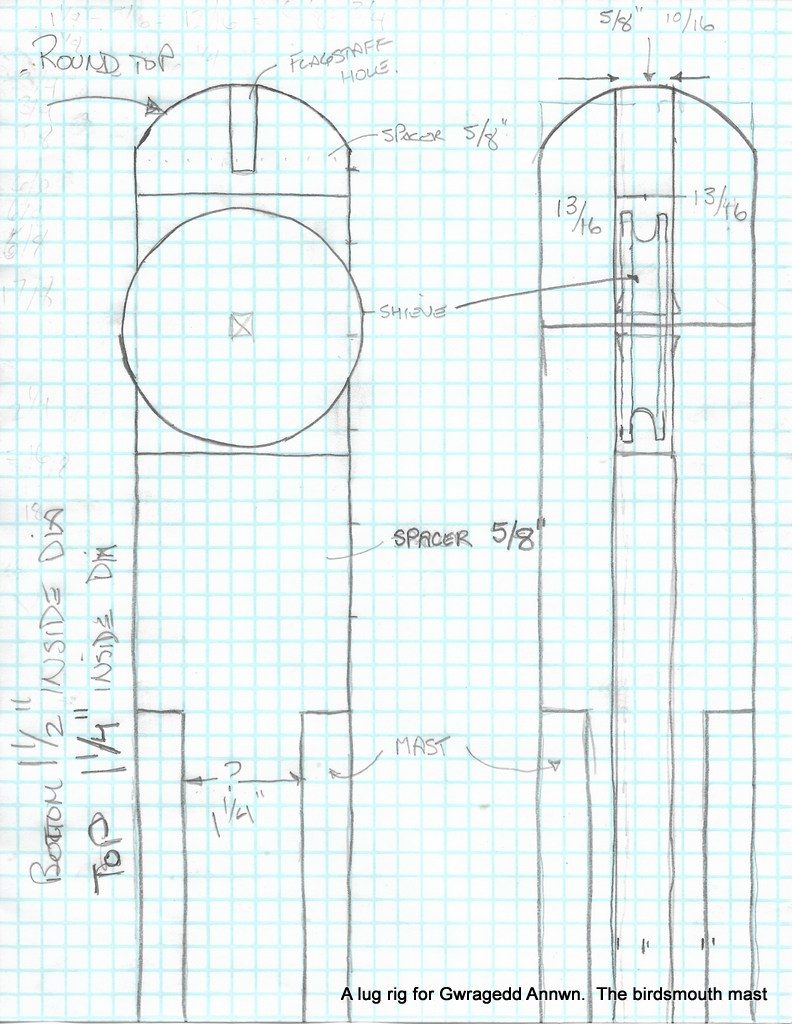
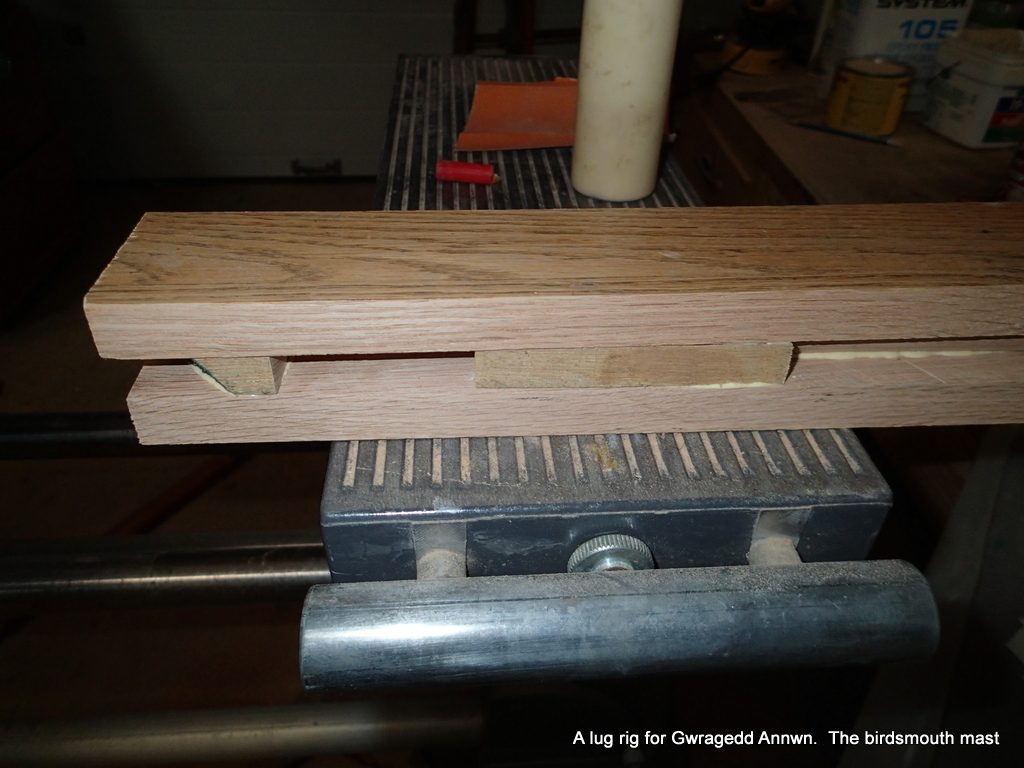
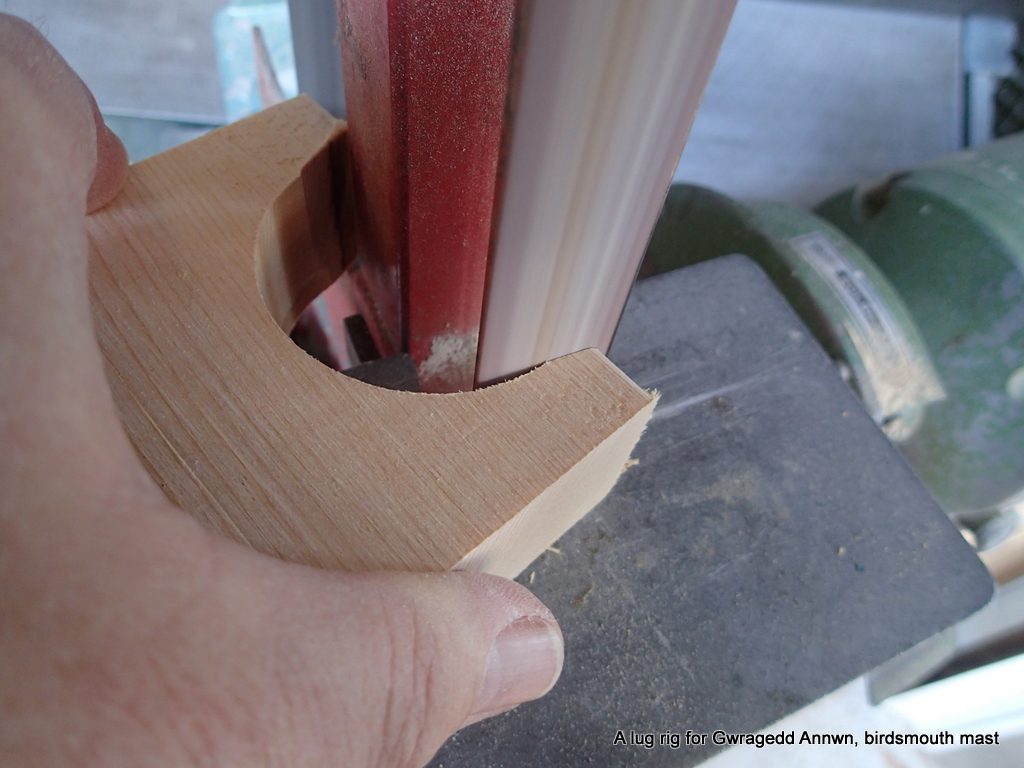
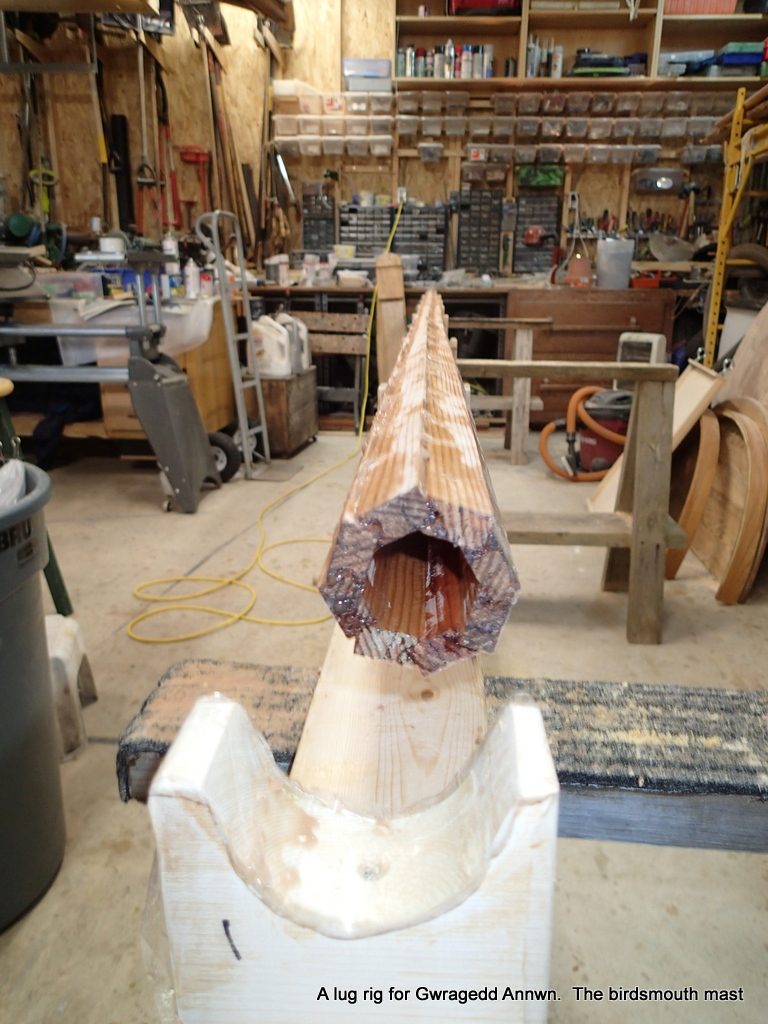
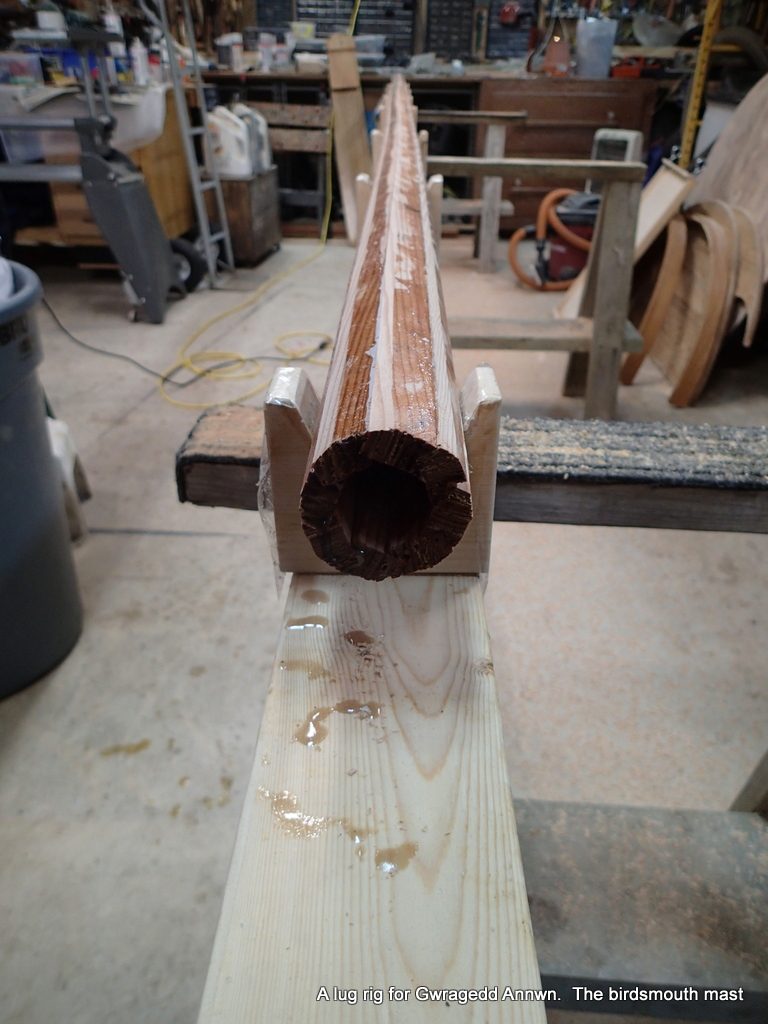
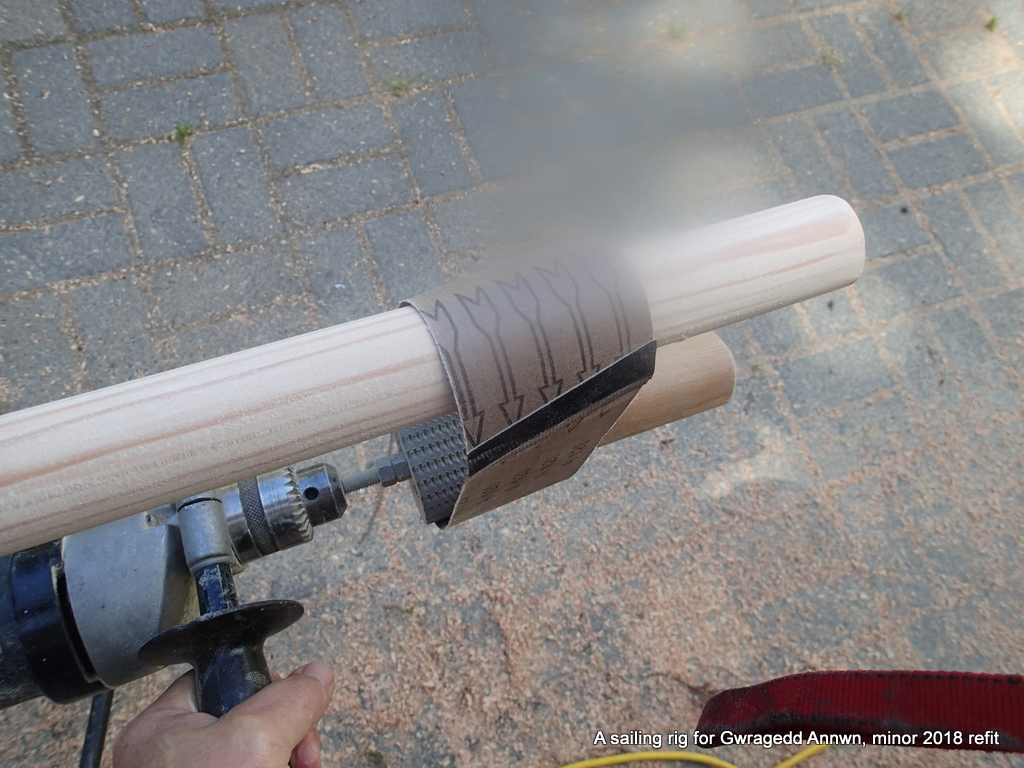
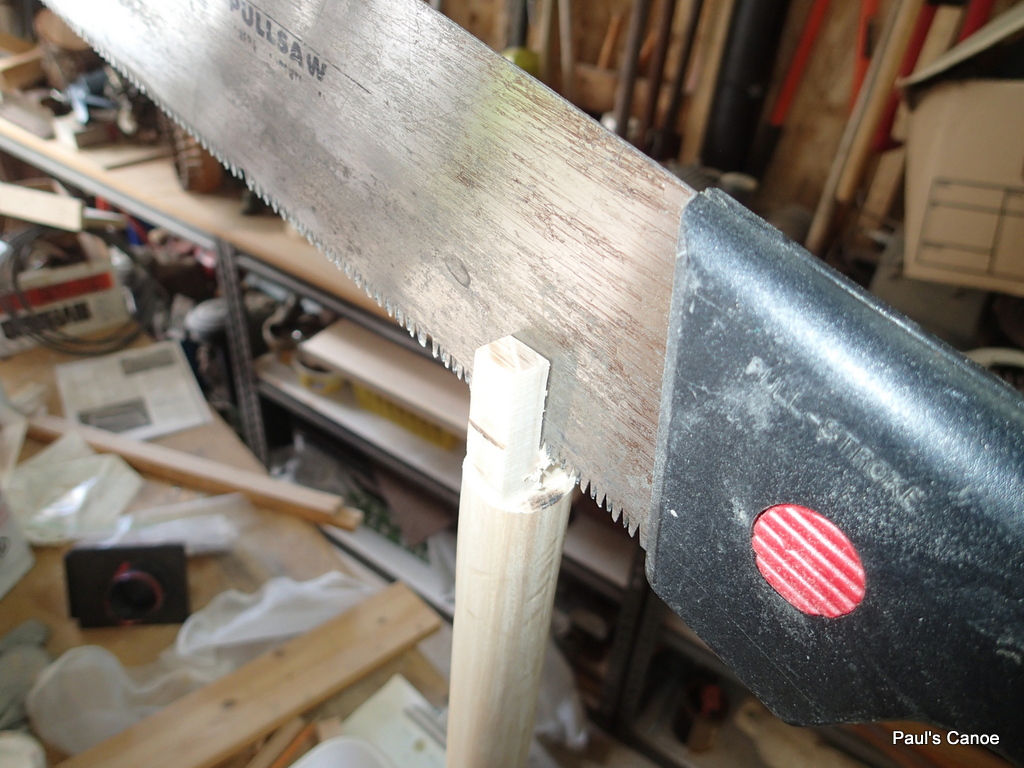
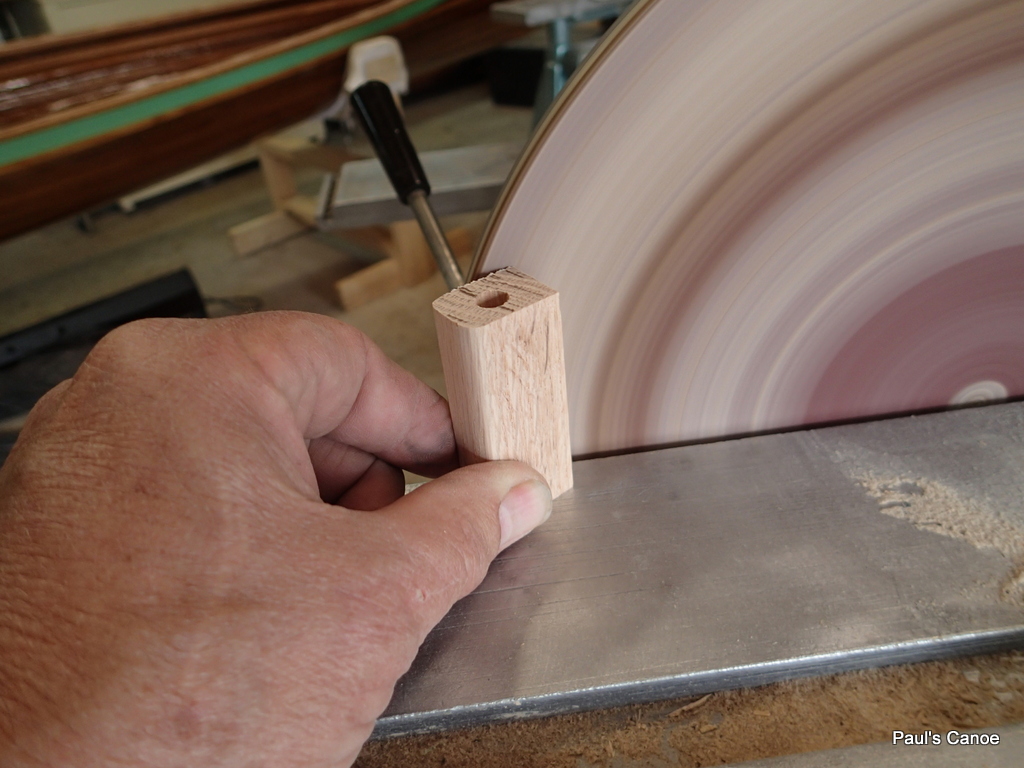
The glue has dried enough for me to work on the masthead sheave plug.Side view, top rounded with the bandsawI rough cut the shaft, giving it eight sides, I fine-tune the fit using my Shopsmith 12″ sanding disk.Back and forth from the mast to the sanding disk until I get a good fit, Part of the problem is that the mast, due to the taper, is actually gets bigger on the inside as you go down.
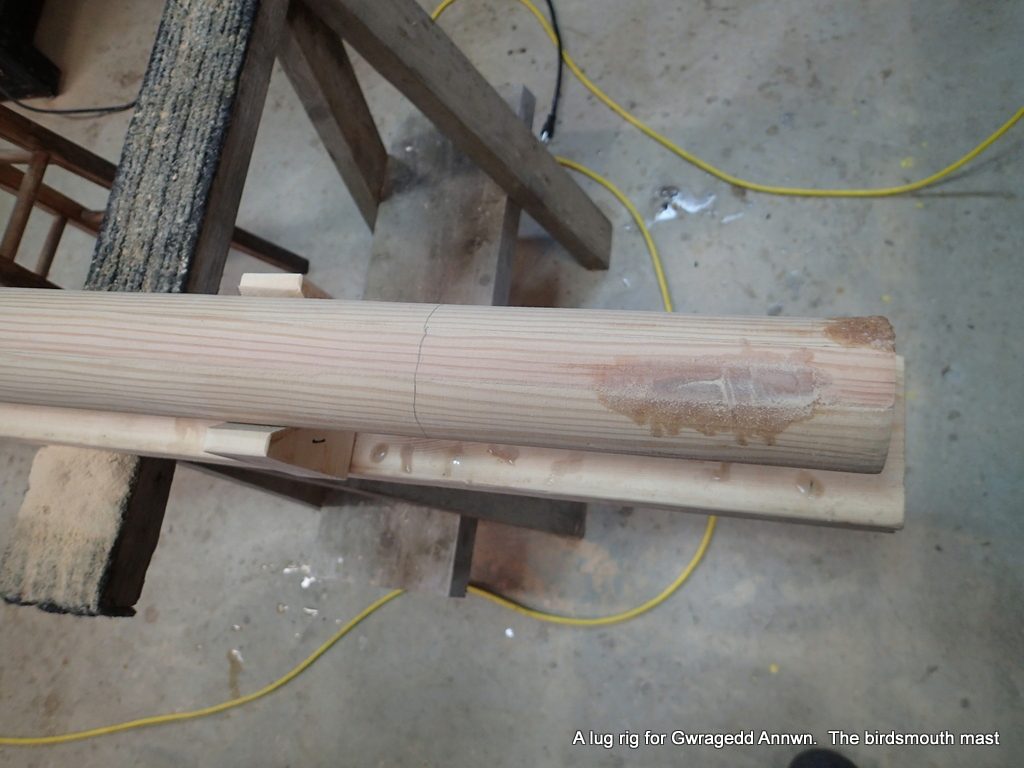
To solve the increasing inside diameter issue, when I epoxy the masthead plug in, I will stand the mast on its head, the epoxy will flow down around the masthead plug shaft, filling any gaps.
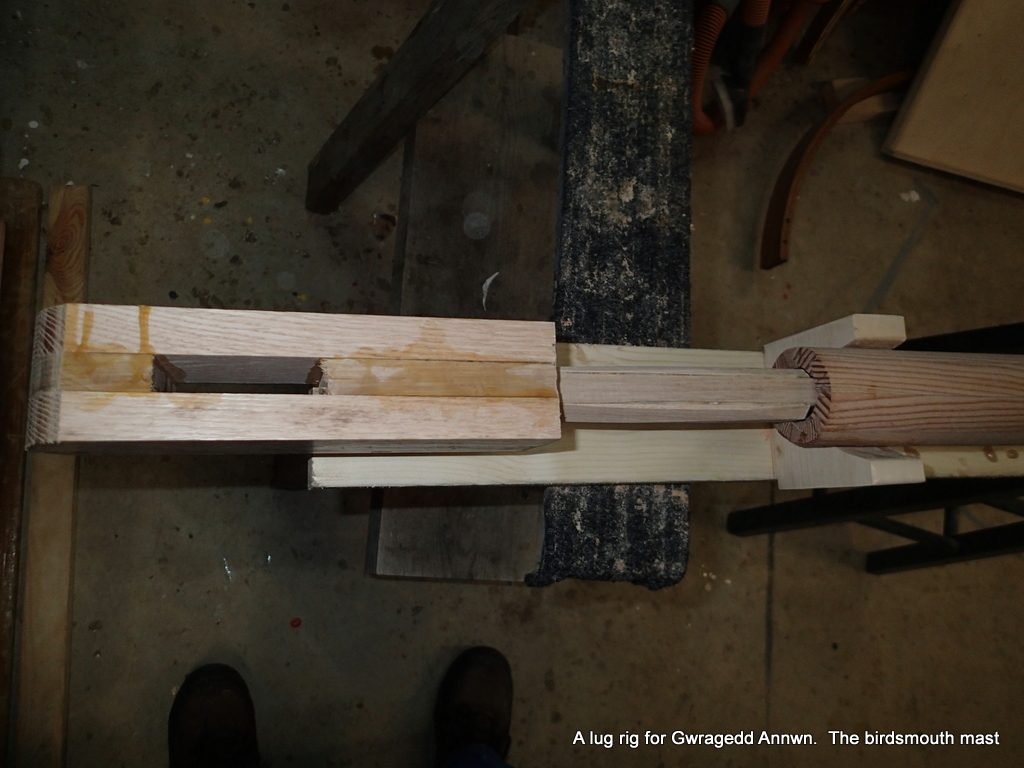
The procedure will be to push an “epoxy plug” into the mast, (remember, the mast is filled with crumpled aluminum foil) pour in epoxy & wood dust mixture, tape around the joint, stand the mast on its head, The epoxy & wood dust will flow down around the masthead plug. I have 17″ of height to the peak of my garage roof, so my mast will just fit.
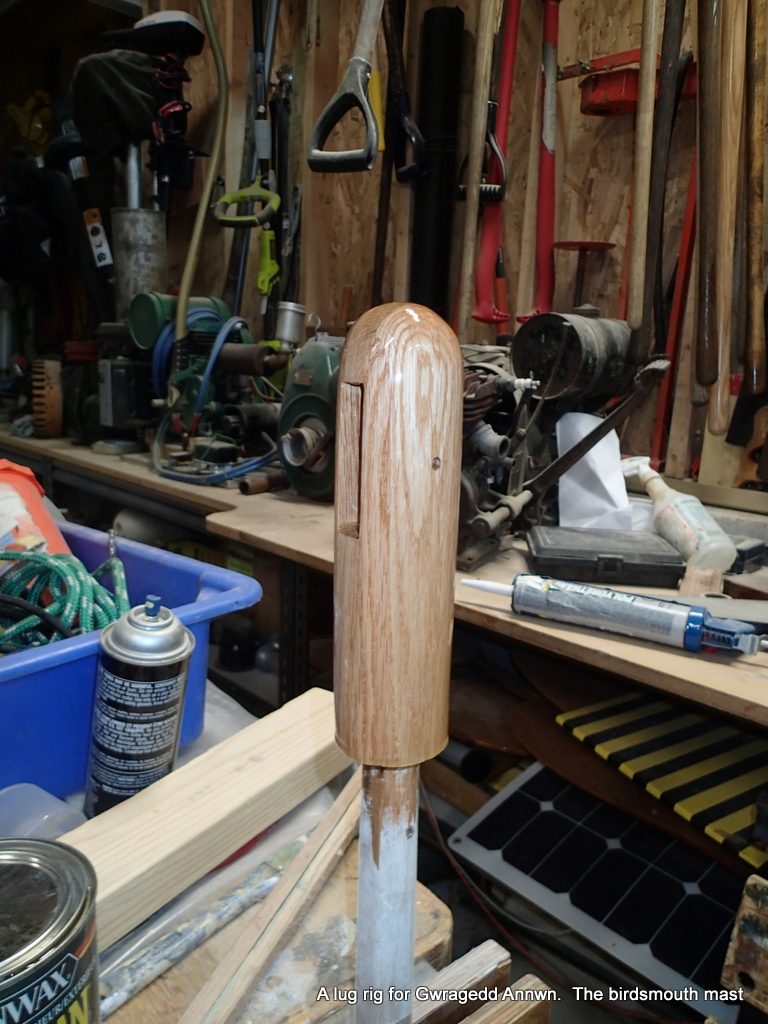
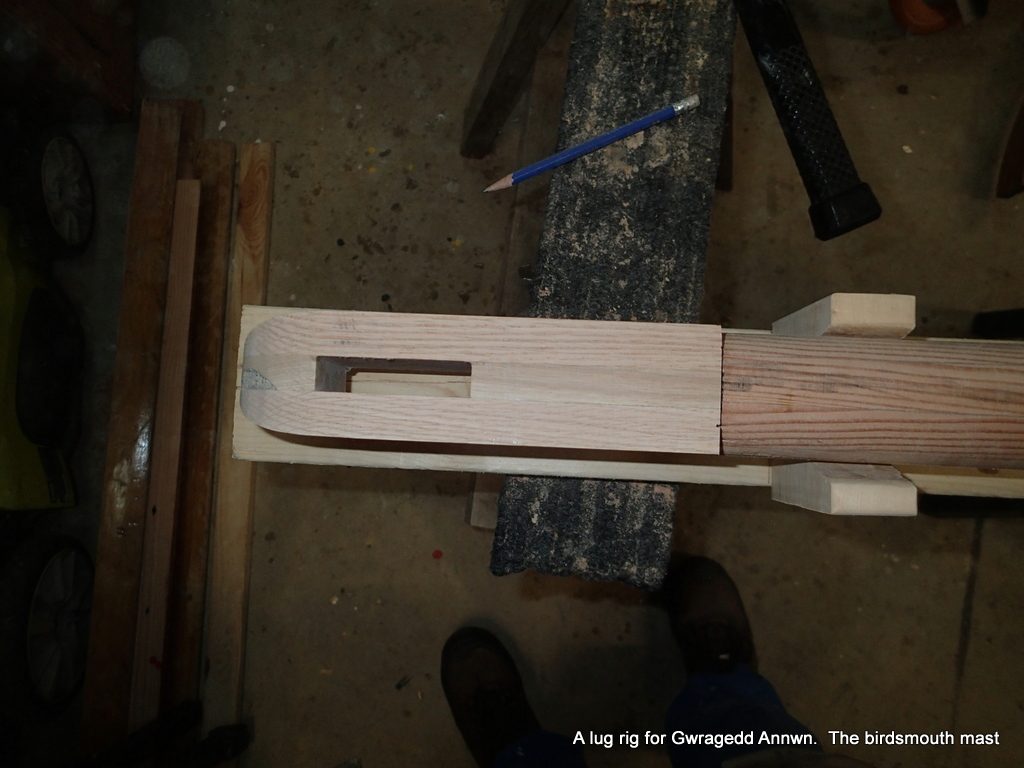
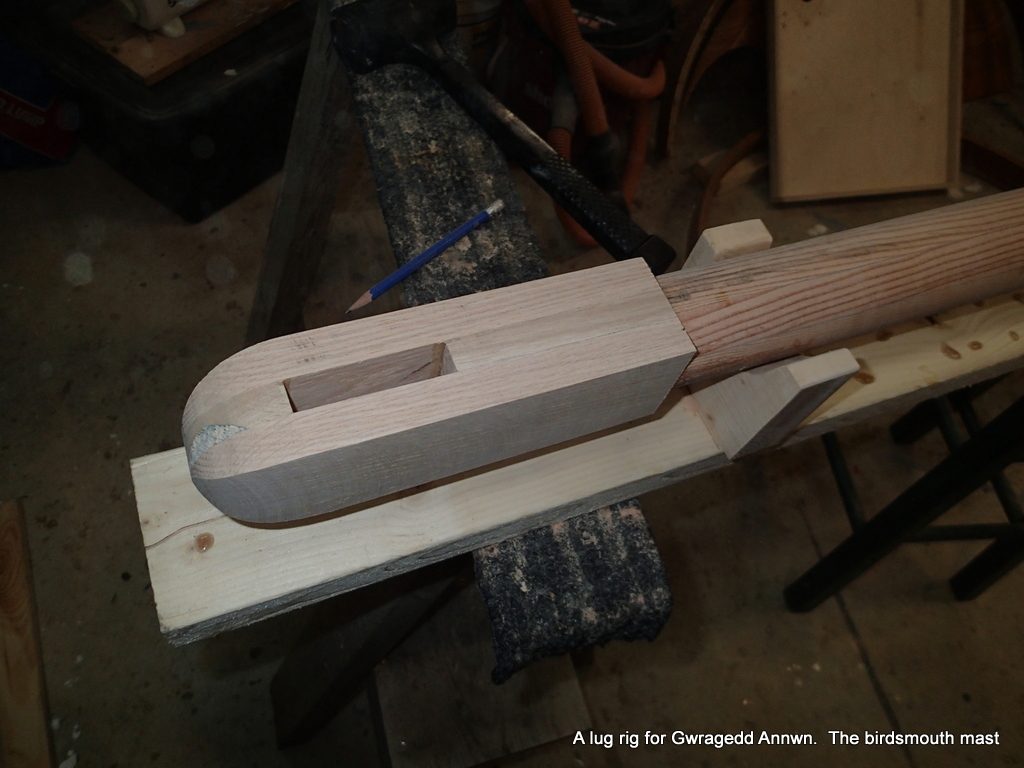
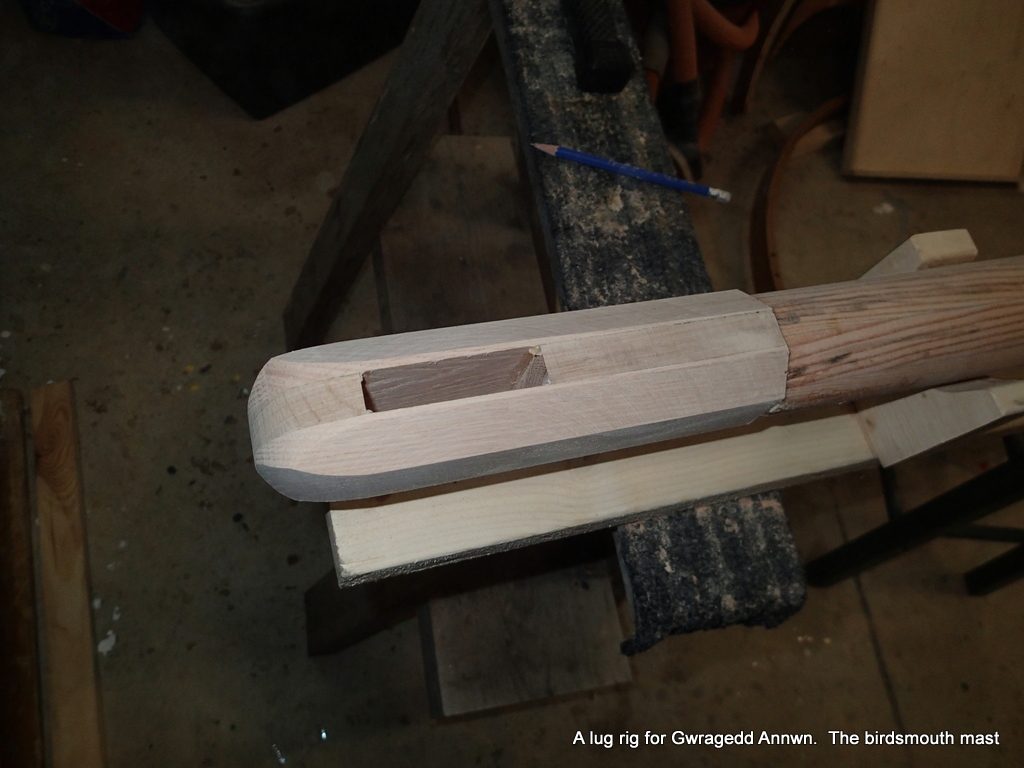
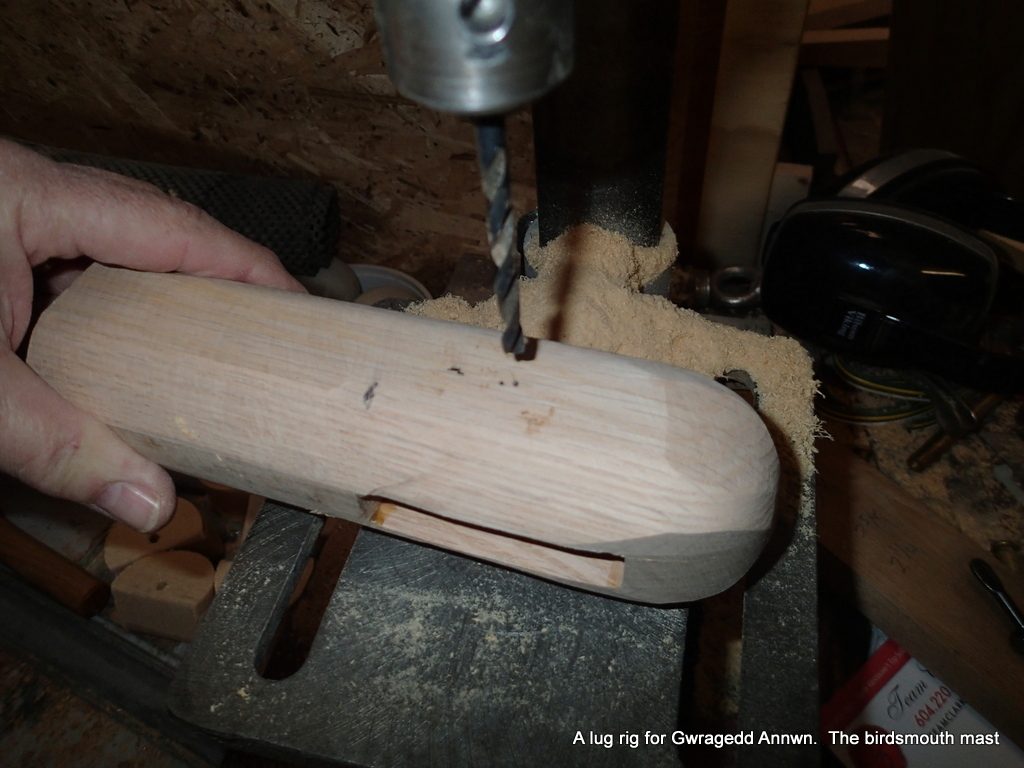
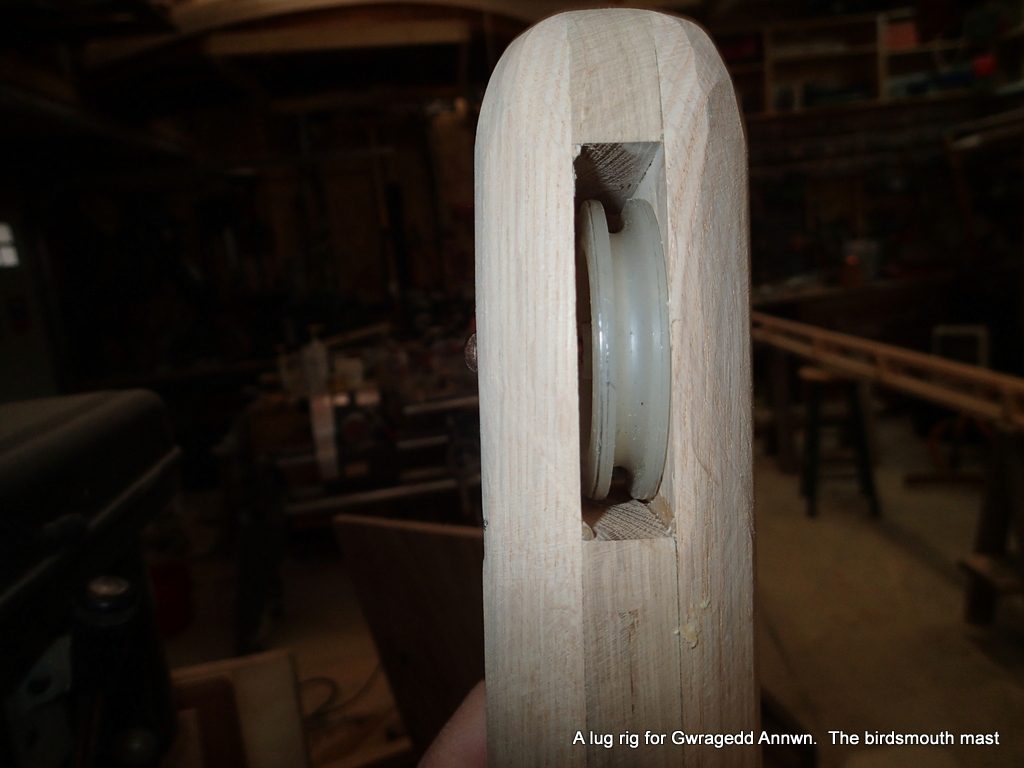
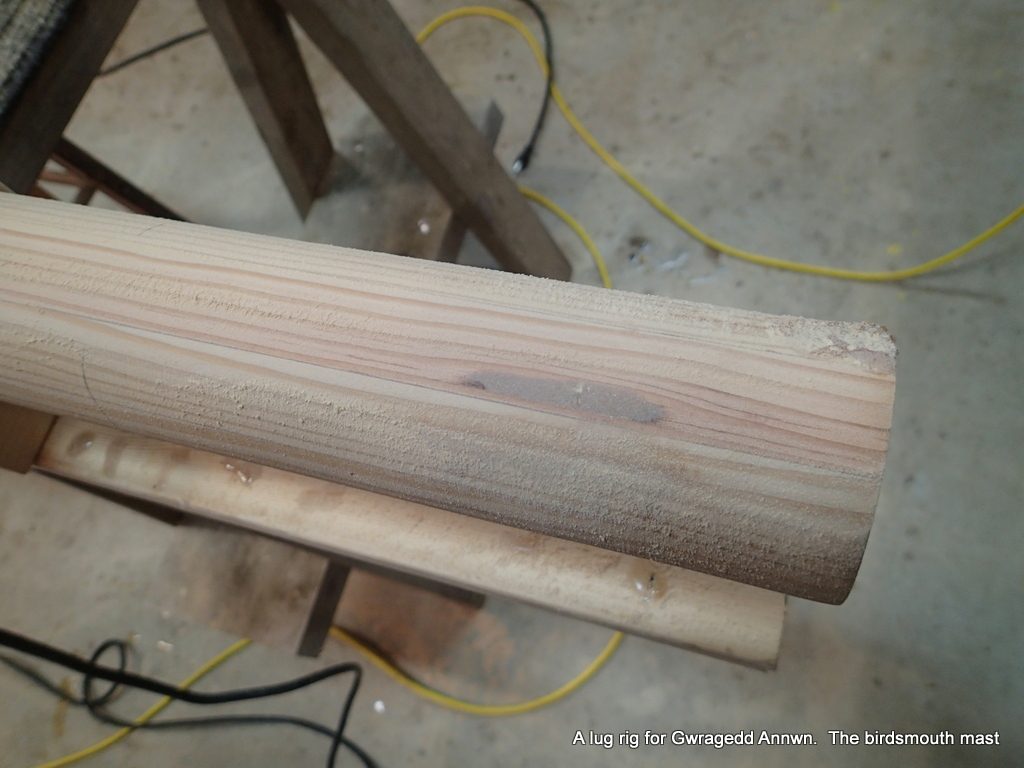
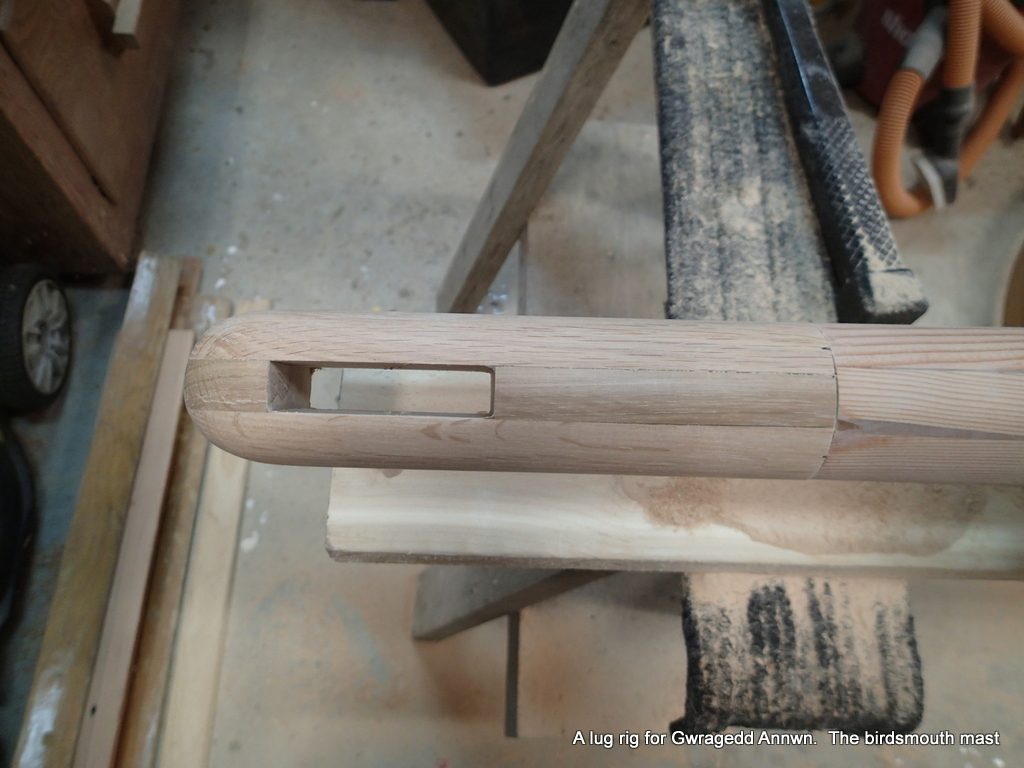
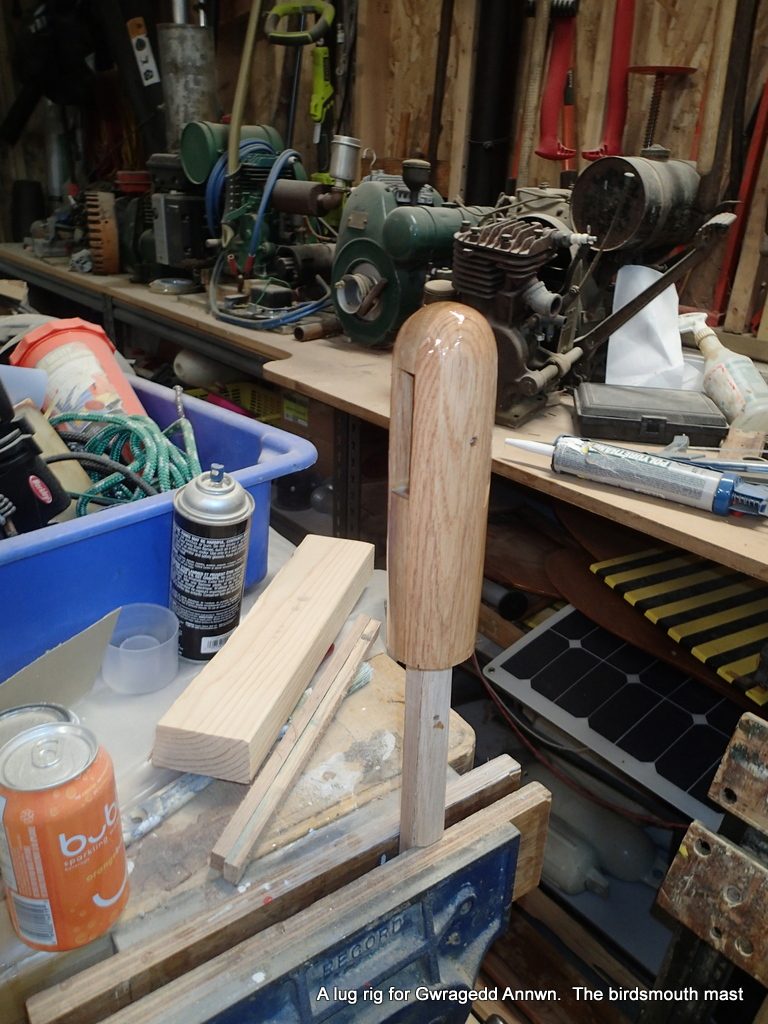
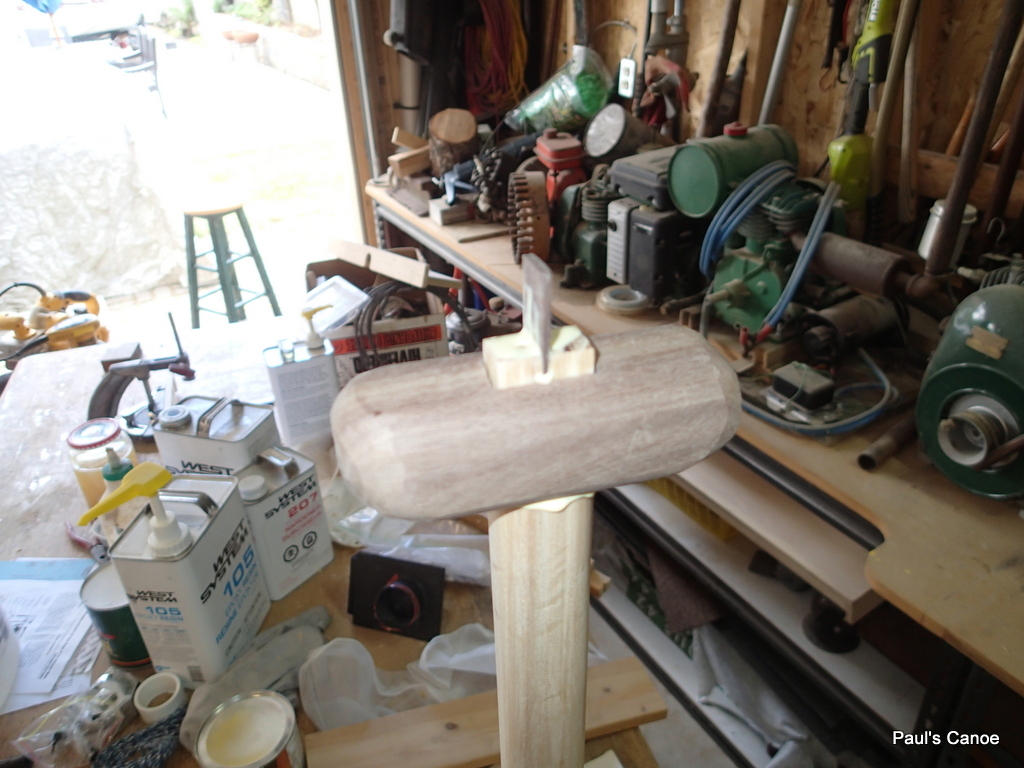
Snug fit for the masthead plug shaft.I start shaping the masthead plugNext I will cut off the corners to make the plug 8 sidedBefore I get too far, I will drill the plug for the masthead sheave…using one of the flat surfaces.The drill bit is the same diameter as the sheave axle hole.Test fitting of the masthead sheave. The final install will have stainless steel (maybe copper) washers to hold the sheave in the middle of the slot.I would like to use a copper rivet to hold the sheave in.Sanding the mast smooth.
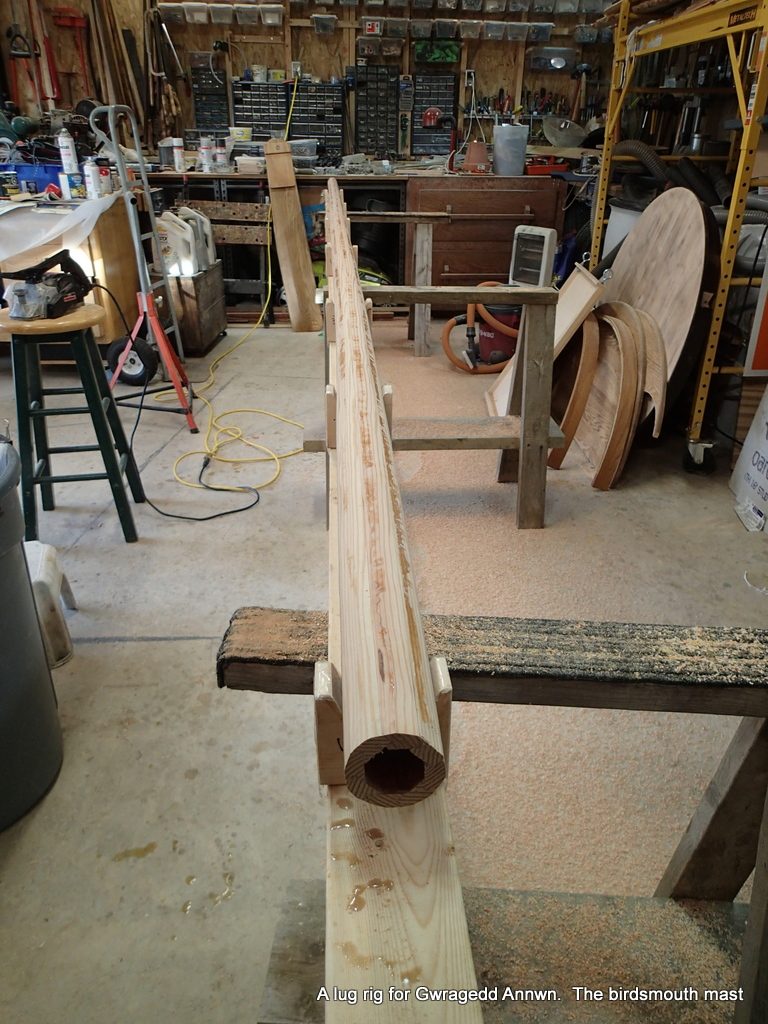
When I made the mast, I used a belt-sanding jig to round the mast. The result was a round mast, but there are lots of cross-grain sanding marks. I am going to now re-sand the mast, with the grain, to end up with a smooth finish.
I mark the mast with a pencil circle…I will sand each stave and the marks will tell me which stave I have sanded
⅓ sheet random orbit sander with 80 grit sandpaper.The lump in the upper right of the above photo after sanding.
This part is where I “sand-off” an afternoon…the procedure is to move up and down the mast, sanding as I go…Each stave takes maybe 10 passes of the sander to sand off the cross-grain marks.
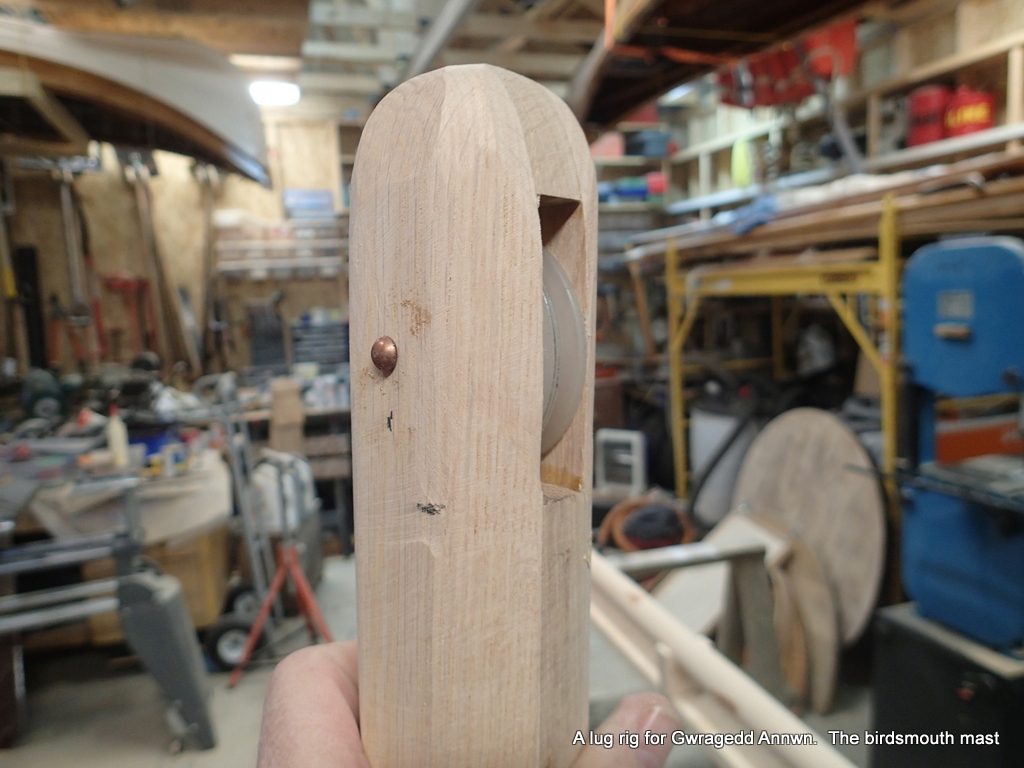
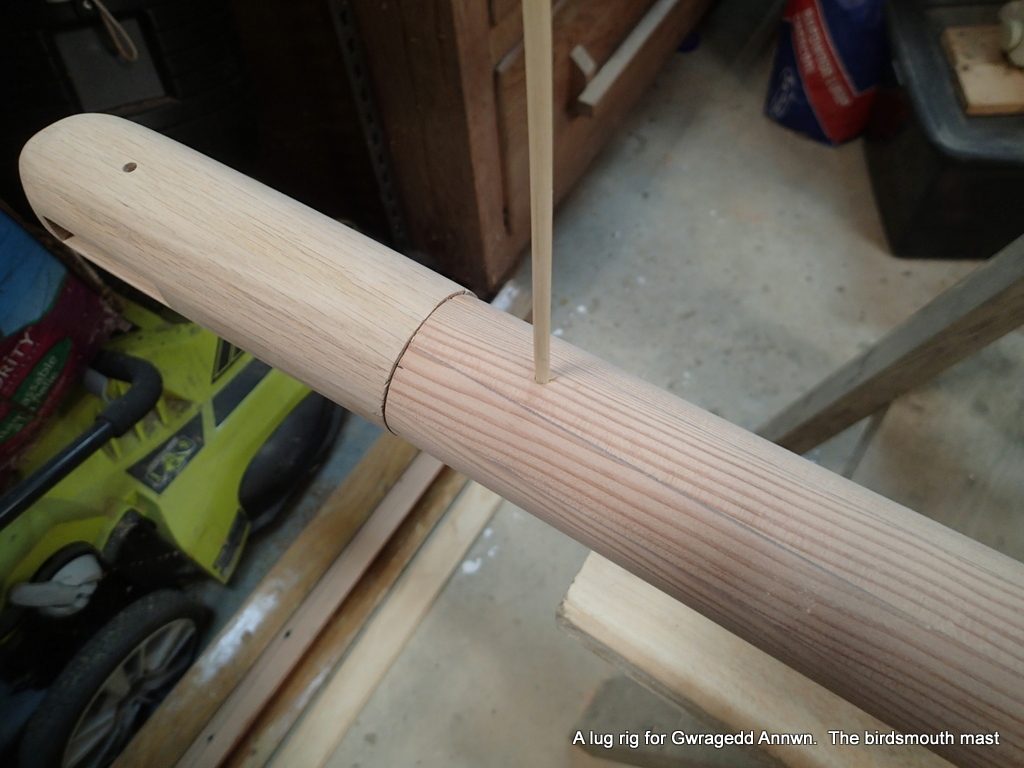
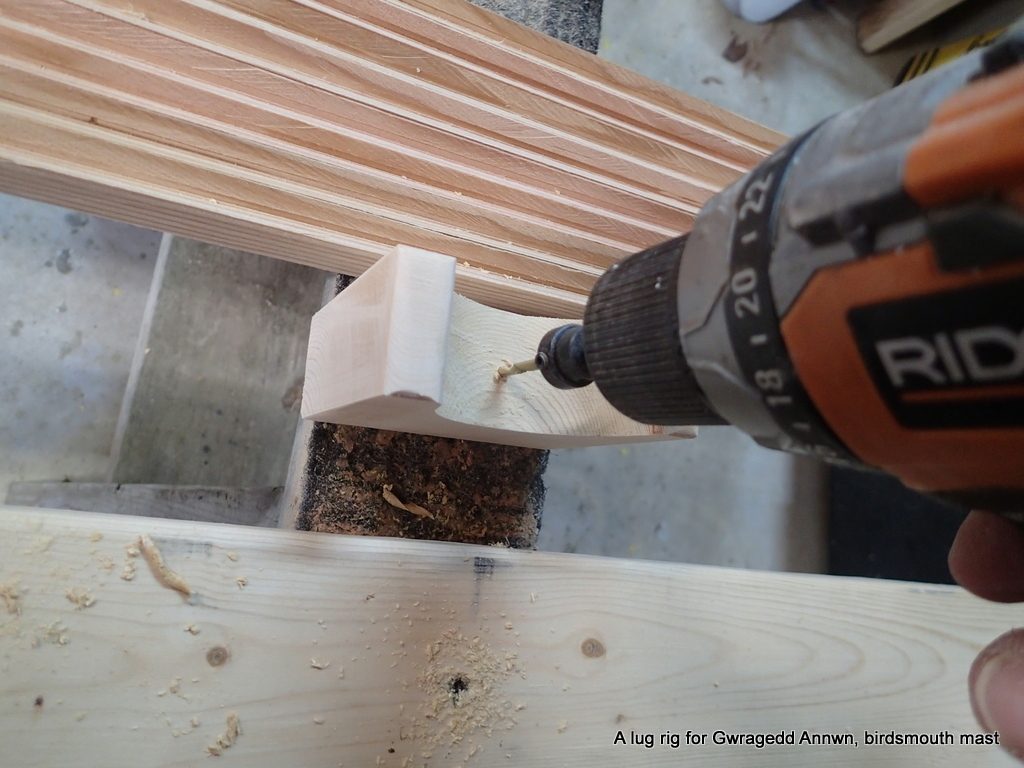
Pinning the Masthead plug.
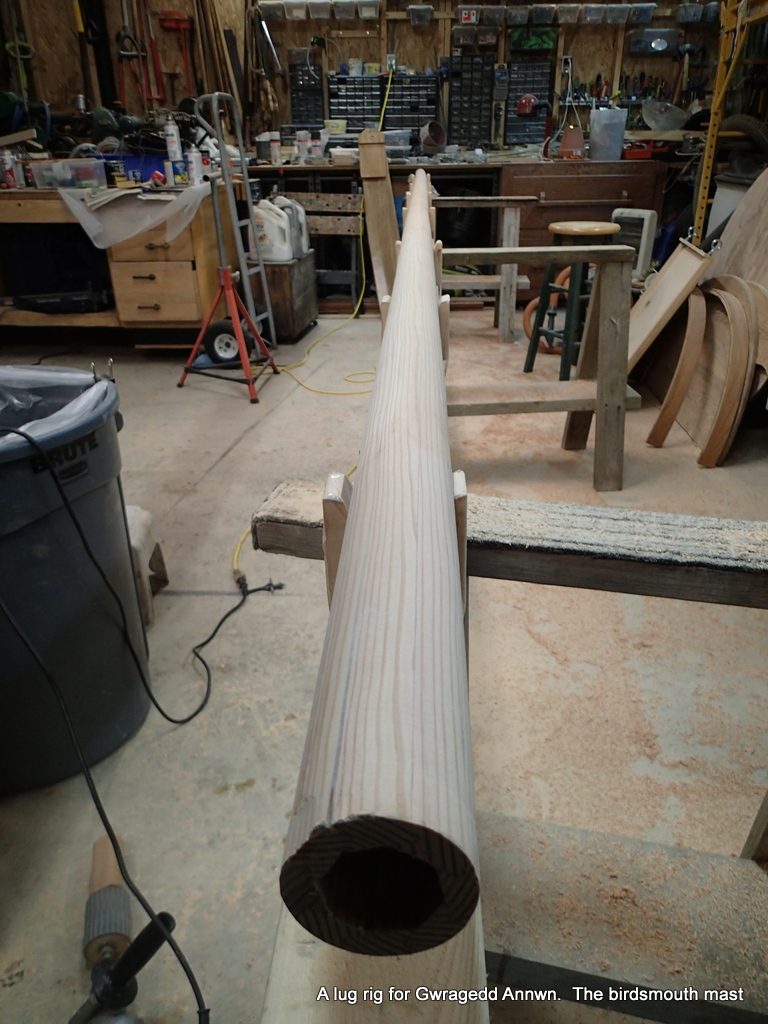
After I have sanded the mast with 80 and then 150 grit, I pin the masthead plug to the top of the mast and sand it flush with the mast.
Masthead plug faired and sanded.
I now brush off the sanding dust and vacuum the mast & masthead plug.
‘poxy time! Cold Cure resin.
I take out the Masthead sheave plug to epoxy separately. I re-arrange my mast supports, one on each end. I use a metal bar, inserted into the top and bottom of the mast to hold the mast in the brackets. This way I can rotate the mast and epoxy all its sides.
Masthead sheave plug readyPlug ‘poxied.
I clamp the Masthead Sheave plug in a vise to give the top part a coating of epoxy. I will not epoxy the shaft and the bottom of the plug. When I epoxy the mast and the plug together, I want the epoxy to soak into the wood on both pieces.
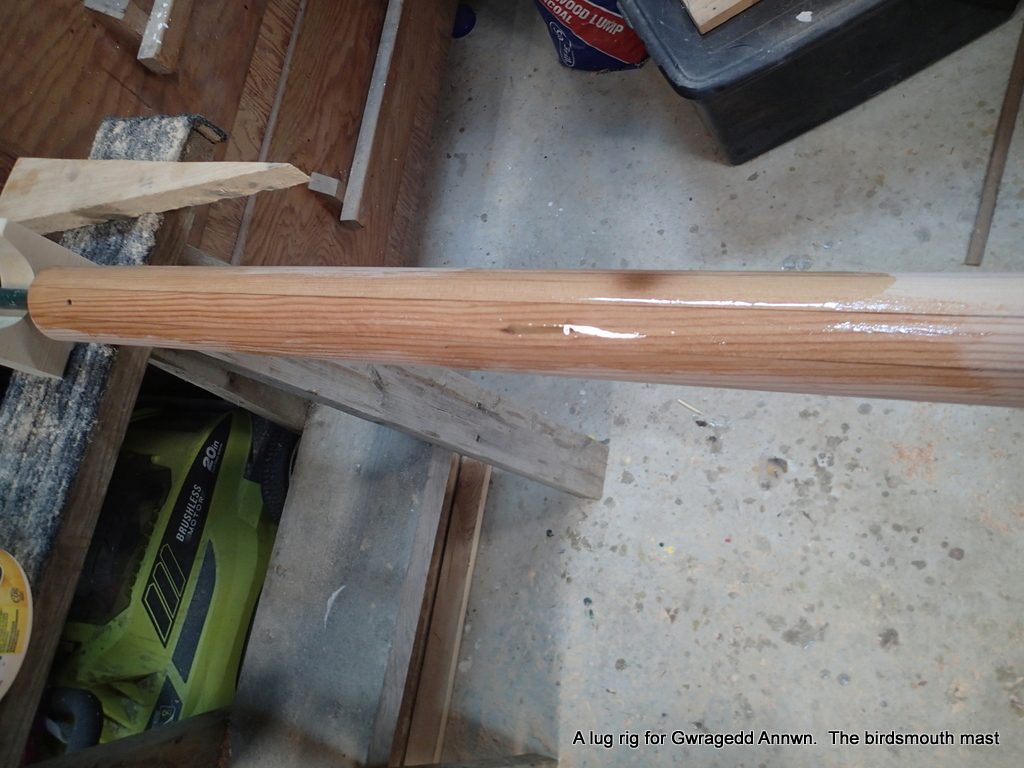
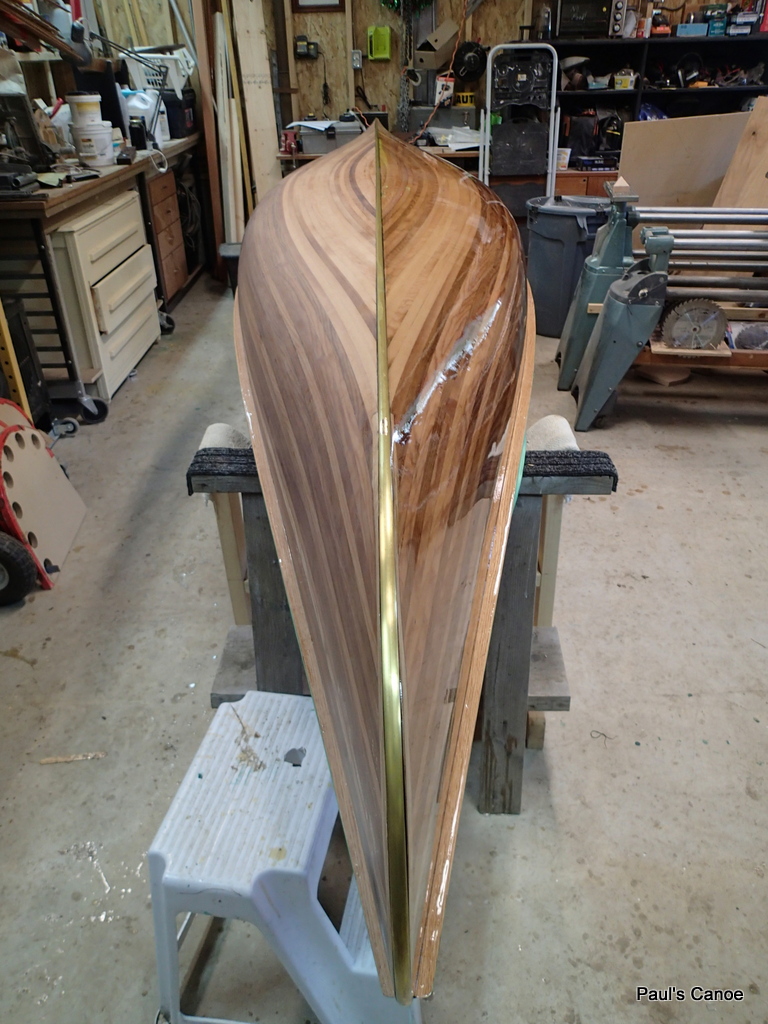
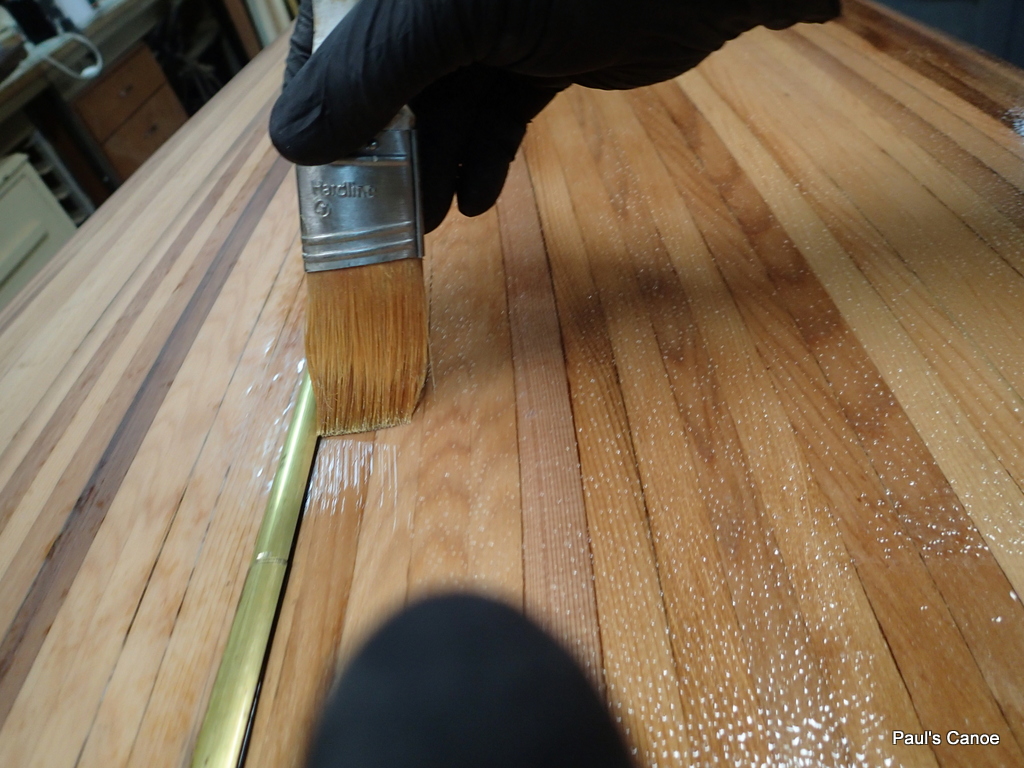
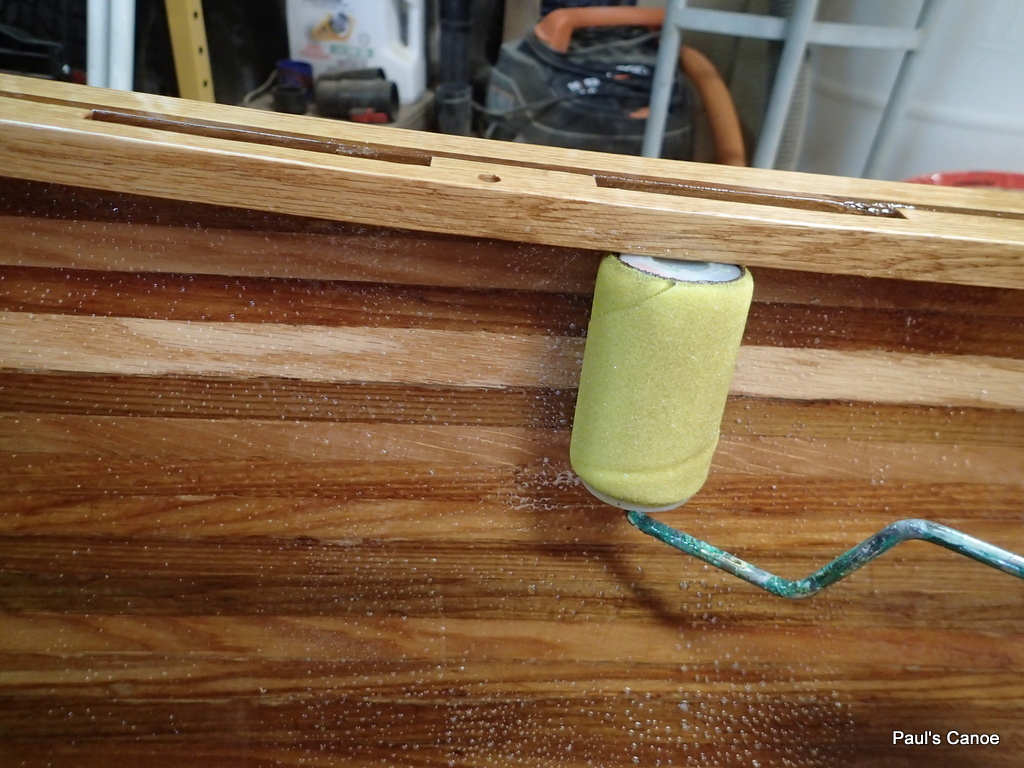
Epoxy coating the mast
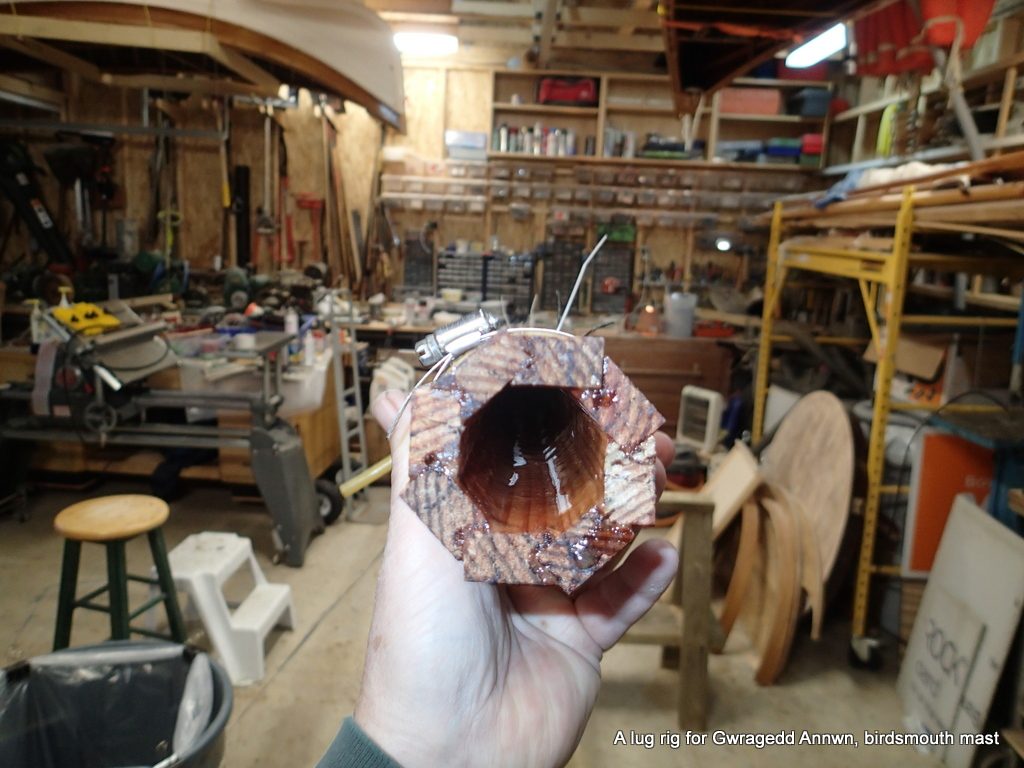
I am epoxy coating the mast for two reasons. One: While sanding the mast I had noticed that some of the joints were not filled…the was sanding dust in the joint. To insure that all of the mast stave joints are epoxy filled, and Two: to seal the wood so no water will be absorbed.
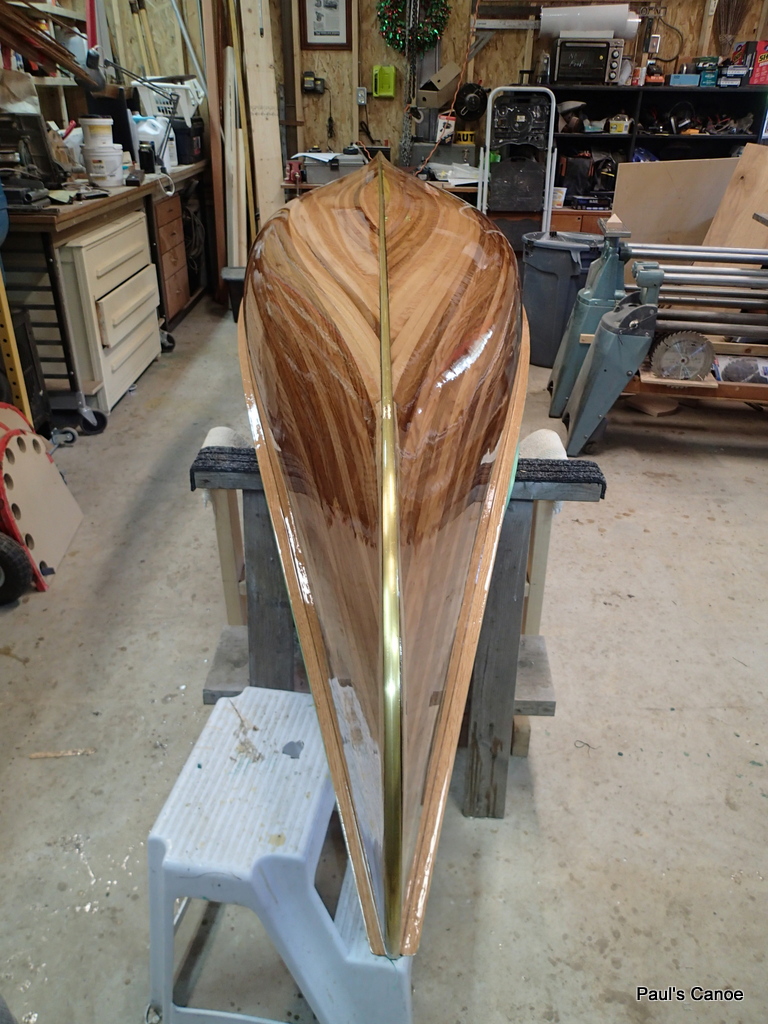
The mast is coated with epoxy resin.
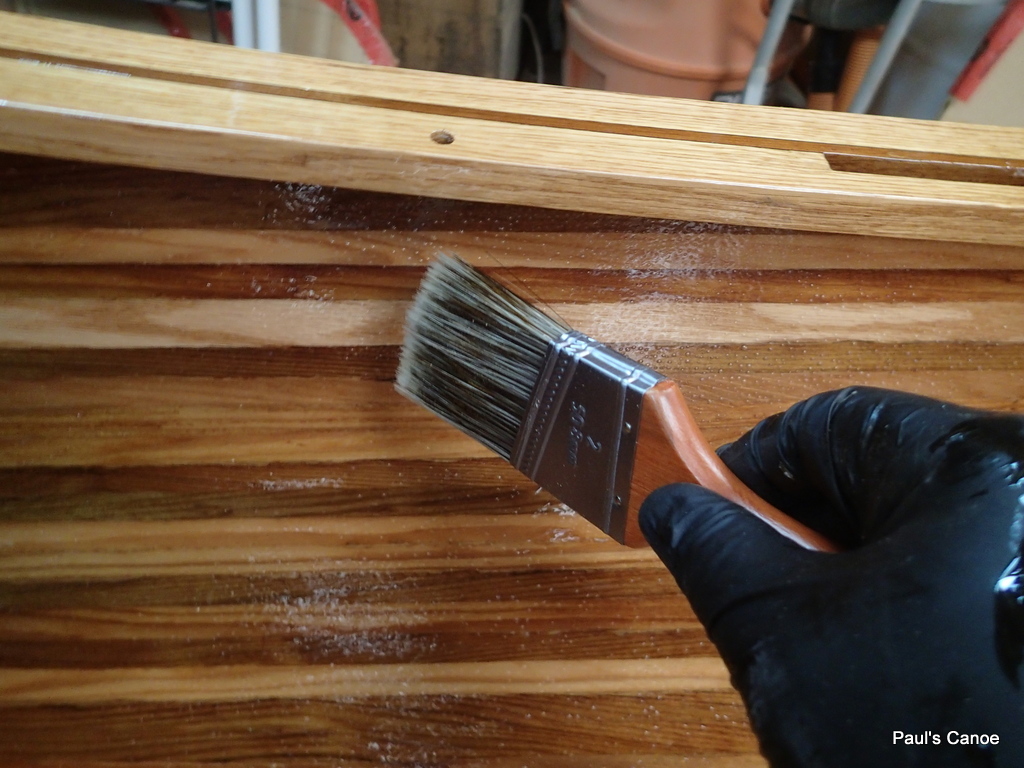
The screwdriver is used to help turn the mast 180°. Why do this? Gravity makes the epoxy flows around the mast and settle on the bottom
Epoxy drips on the bottom of the mast
My solution to drips is to rotate the mast 180° and then brush the drips out. I rotate the mast every 30 minutes until the epoxy is too set for the drips to form.
I also brush off the drips that have formed on the Masthead sheave plug.
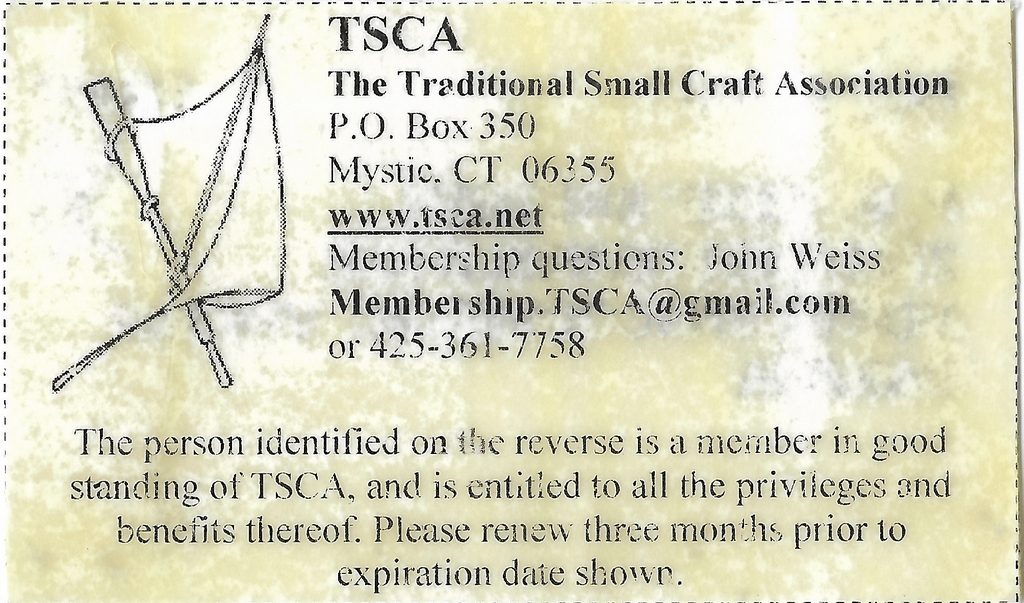
A Note: after turning my mast a few times, I decide to epoxy coat my Traditional Small Craft Association membership card…I just got it in the mail today. The epoxy is now a little stiff, and does not flow over the card evenly, but now the card will last forever.
TSCA is a great association, you should join too.
After the epoxy cures, the next step is to give the mast and masthead plug a light sanding, then varnish them. It will be easier to varnish the plug and the mast in the rotating rig separately. I will glue them together after a few (too many) coats of varnish have been applied…probably one a day for a week or so.
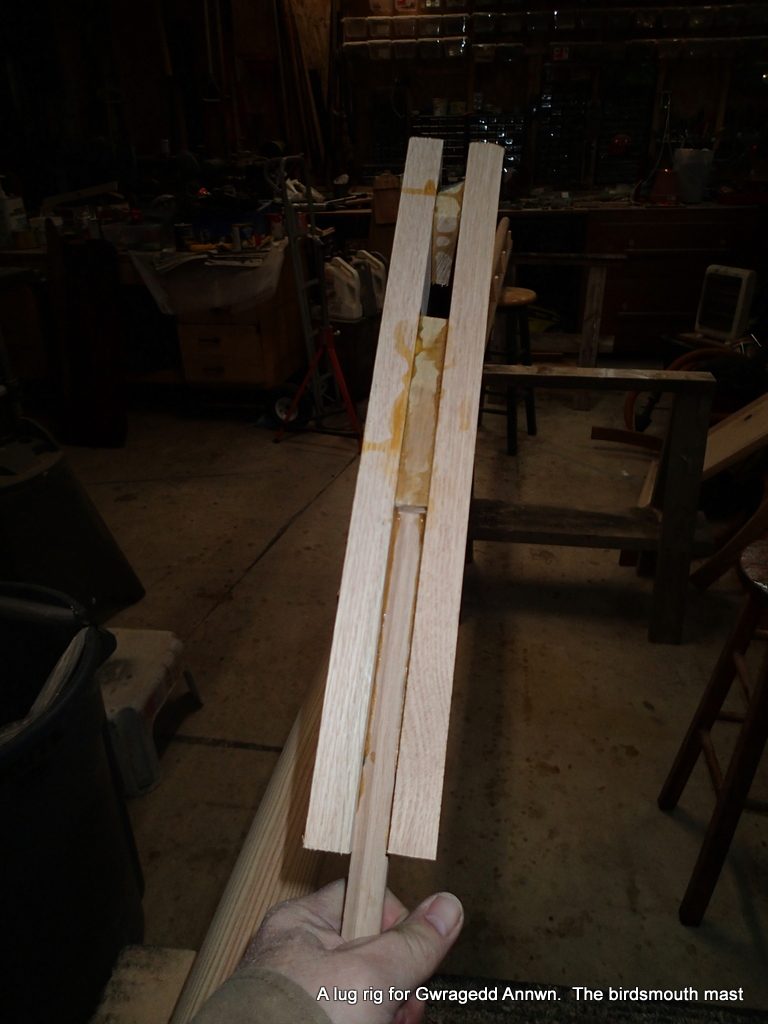
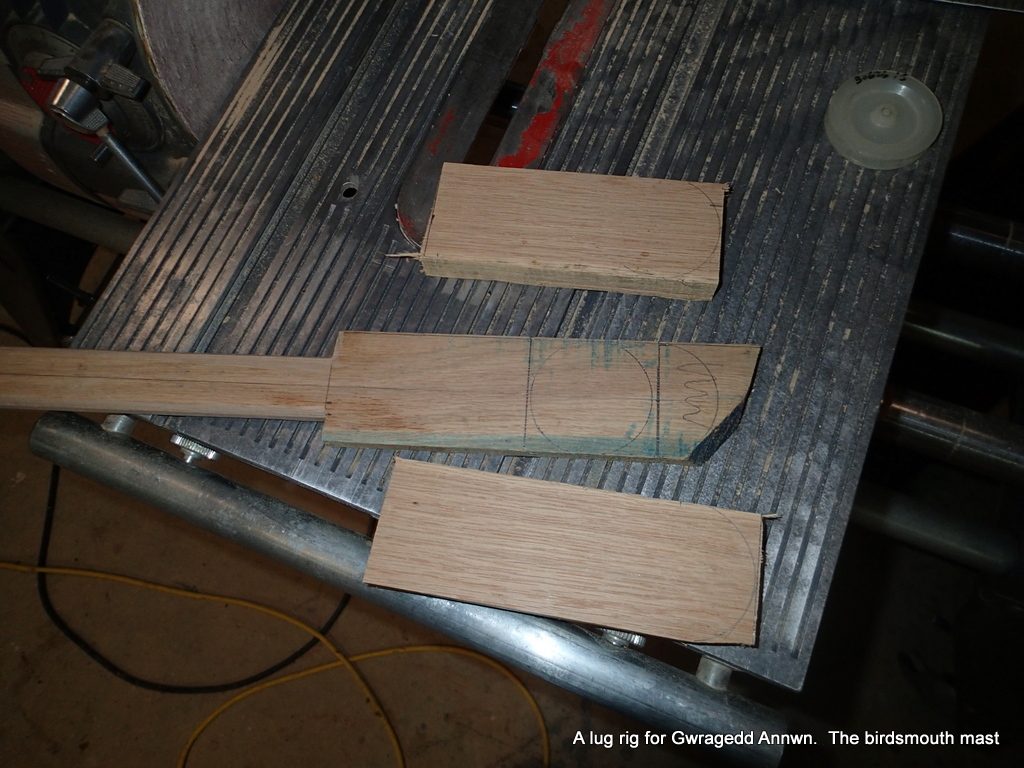
Yesterday I filled in the small flaws in the birdsmouth mast. Today the epoxy is still too soft to sand. Today I am going to start work on the Masthead plug with the sheave.
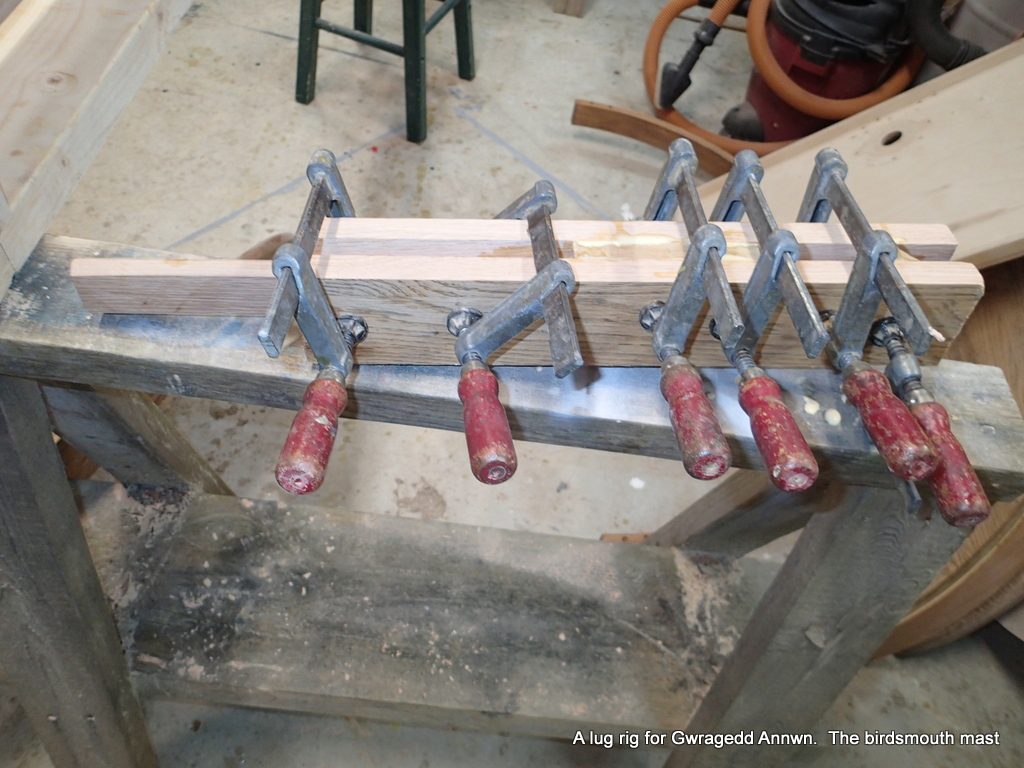
Masthead plan. I am making it out of some white oak I have left over from the leeboards.Three pieces for the masthead plug. The centre blank is ⅝” thick, the two outside pieces are ⅞” thick for a total of 2⅜”. I will work the plug down to the 2½” masthead diameter. The sheave is in the upper right of the photo.I am using Titebond II to glue up the masthead plug.Masthead plug clamped up…I set aside to dry.
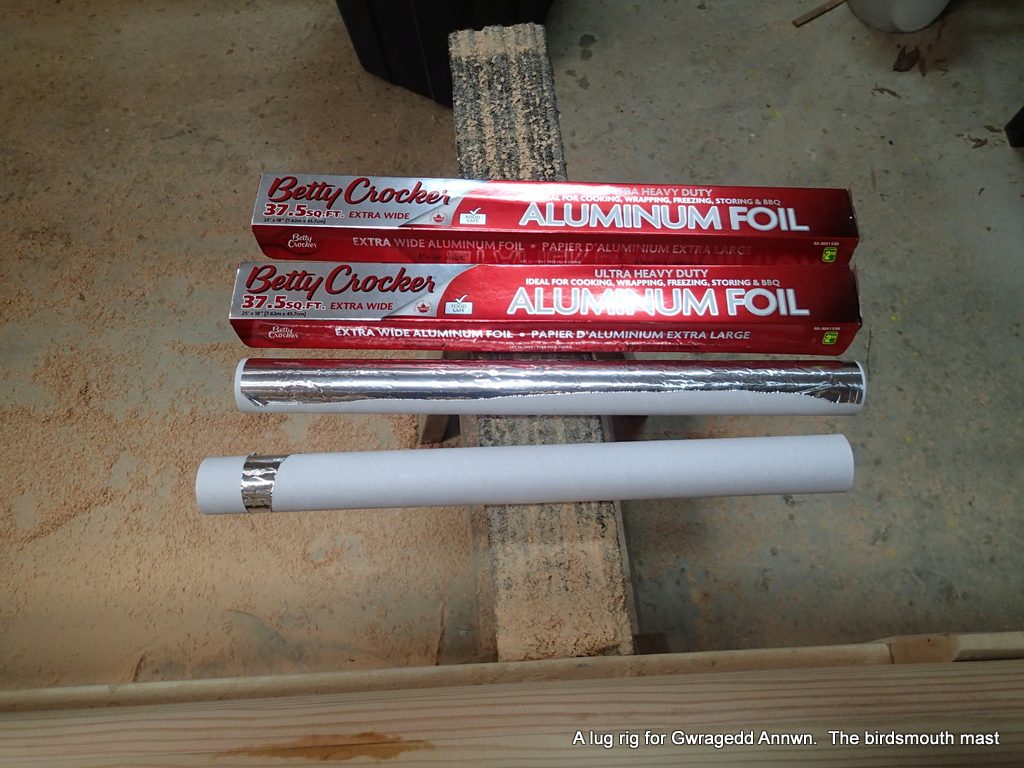
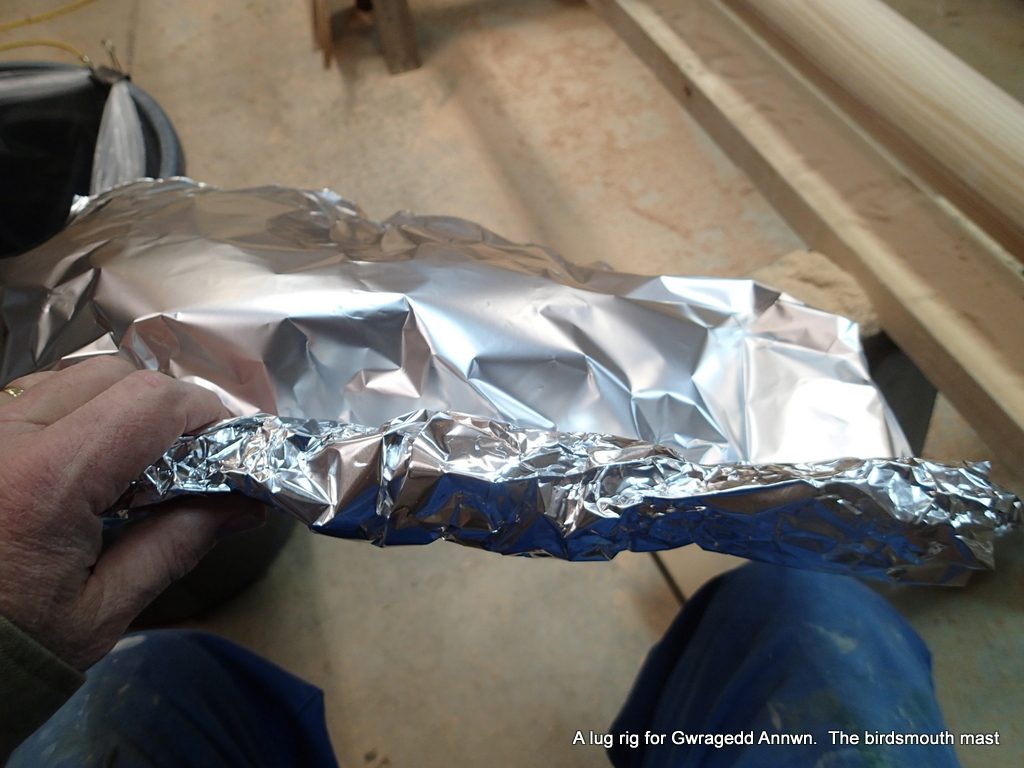
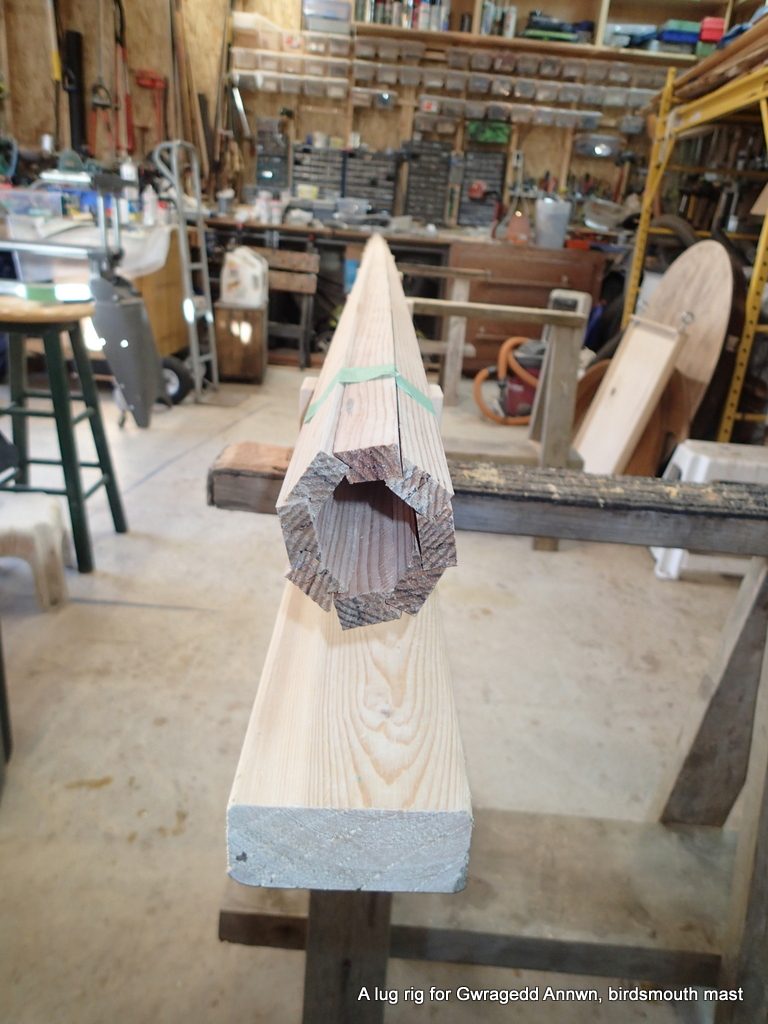
I have read a lot on the internet about stuffing your hollow mast/spars with crumpled aluminum foil so your small boat will show up on radar.
What the heck??, I buy four boxes of heavy-duty aluminum foil at the dollar store.
75 square feet of crumpled foil goes into the mast.
Crumple, crumple, crumple.
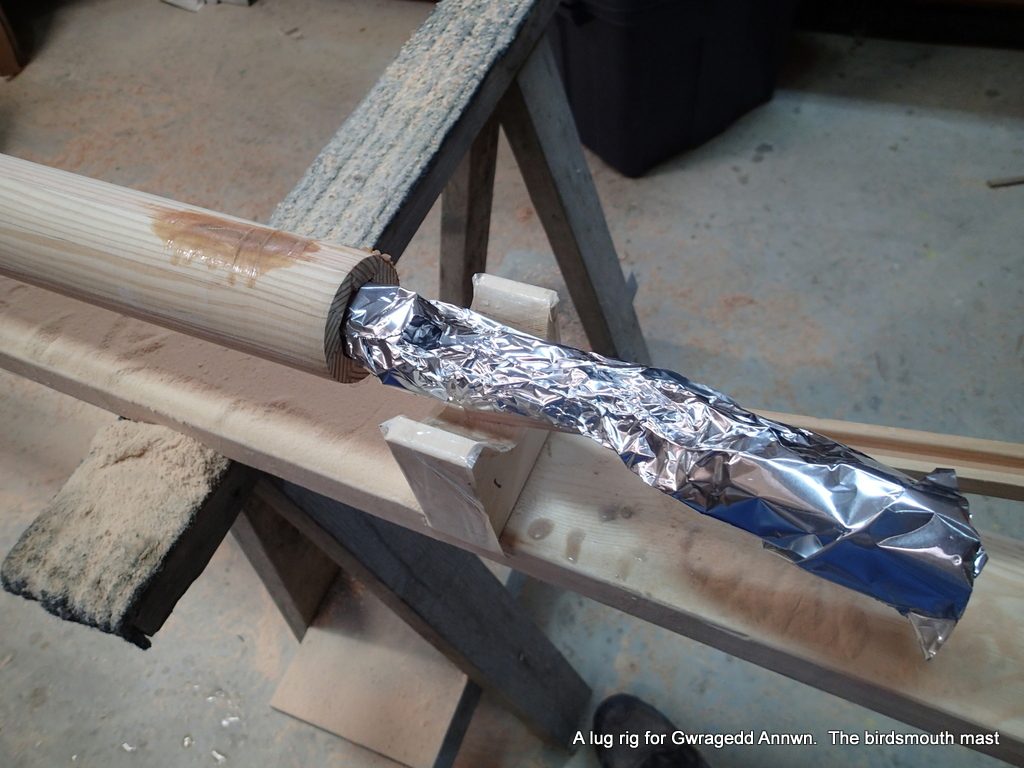
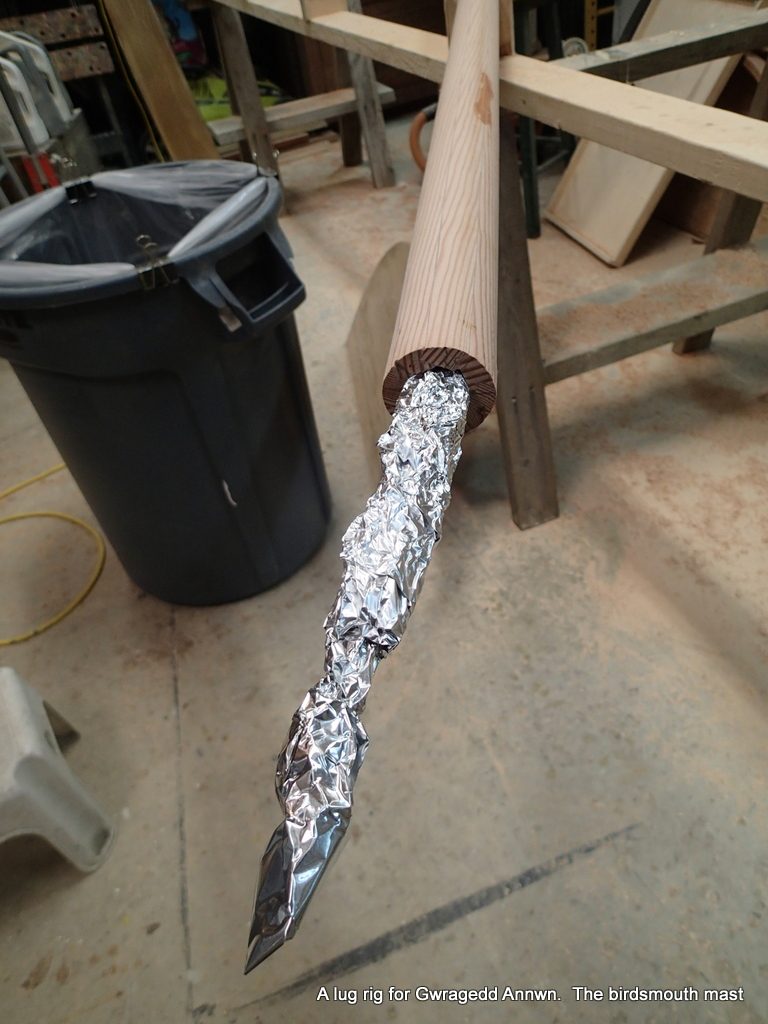
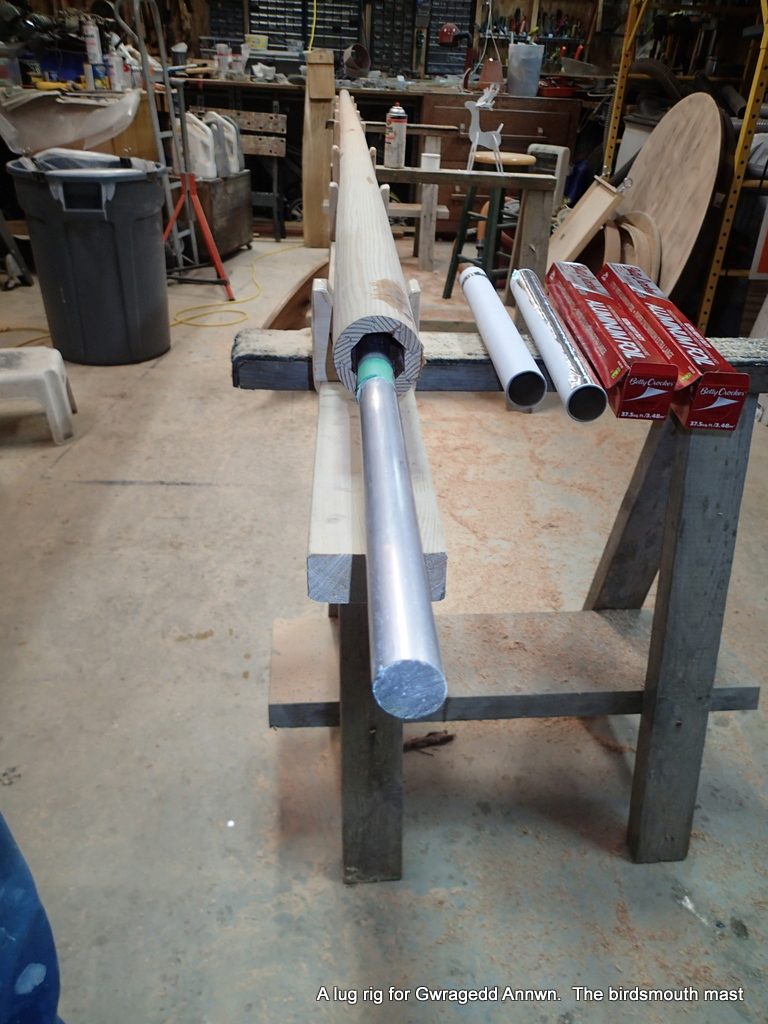
I use a left-over piece of aluminum pipe to stuff the foil into the hollow of the mast. I will need to leave room for the Masthead plug tail and the plug for the bottom of the mast. About 18″ for the masthead, about 24″ for the mast base. I stuff from both ends of the mast. I use a broom handle to gauge how far the foil is stuffed in.
Stuffing the bottom of the mast.Stuffing the masthead end.The painters tape marks the “how far to stuff the aluminum foil in” line.
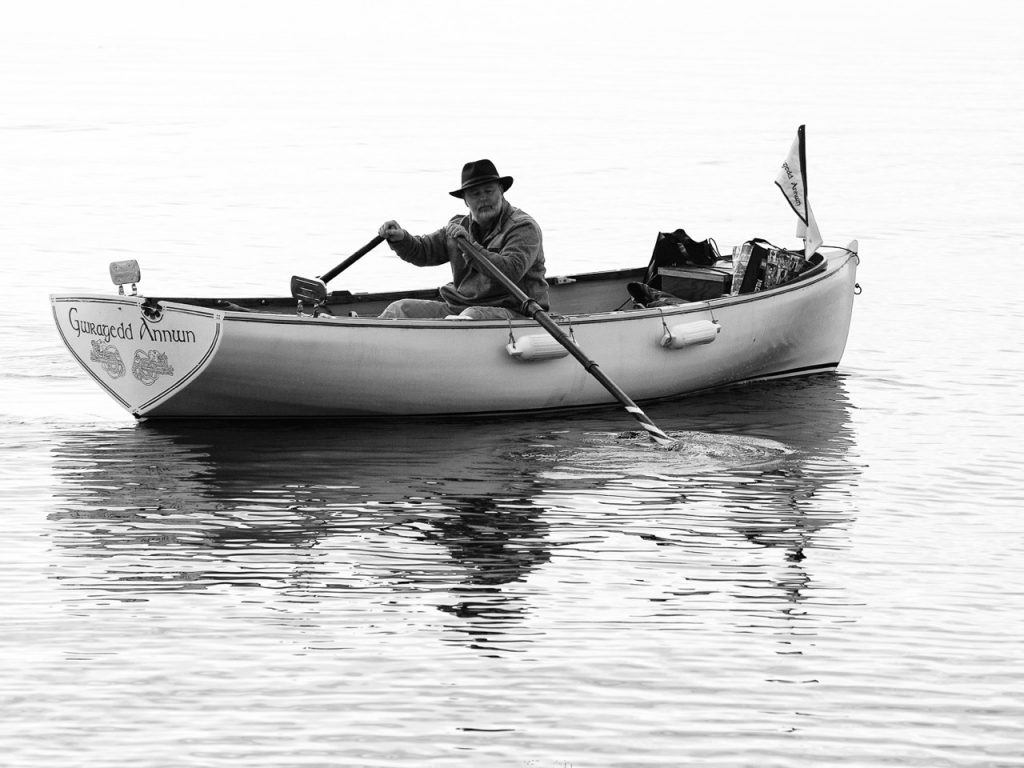
Well, I now have ≈ 75 square feet of crumpled aluminum foil in the centre of my birdsmouth mast. I wonder if it will work, and give Gwragedd Annwn a good radar reflection.
I am so enthused with this idea that I will take my yardarm, hollow out the middle, stuff with aluminum foil and re-glue. Probably I will only be able to get 35 square feet or so of crumpled aluminum foil in the yardarm…but, hey, the more foil the better! Tomorrow’s project.
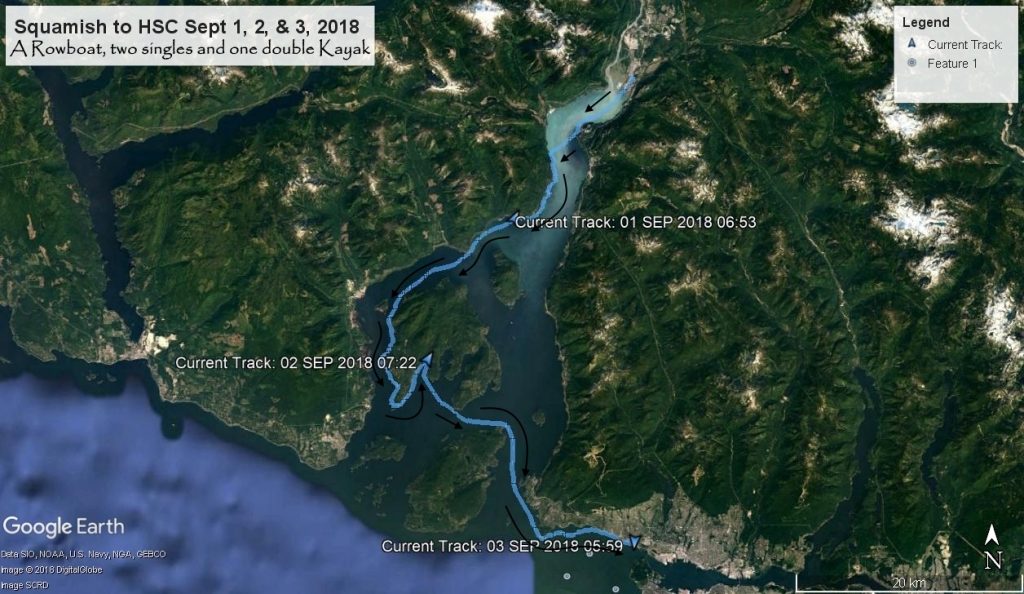
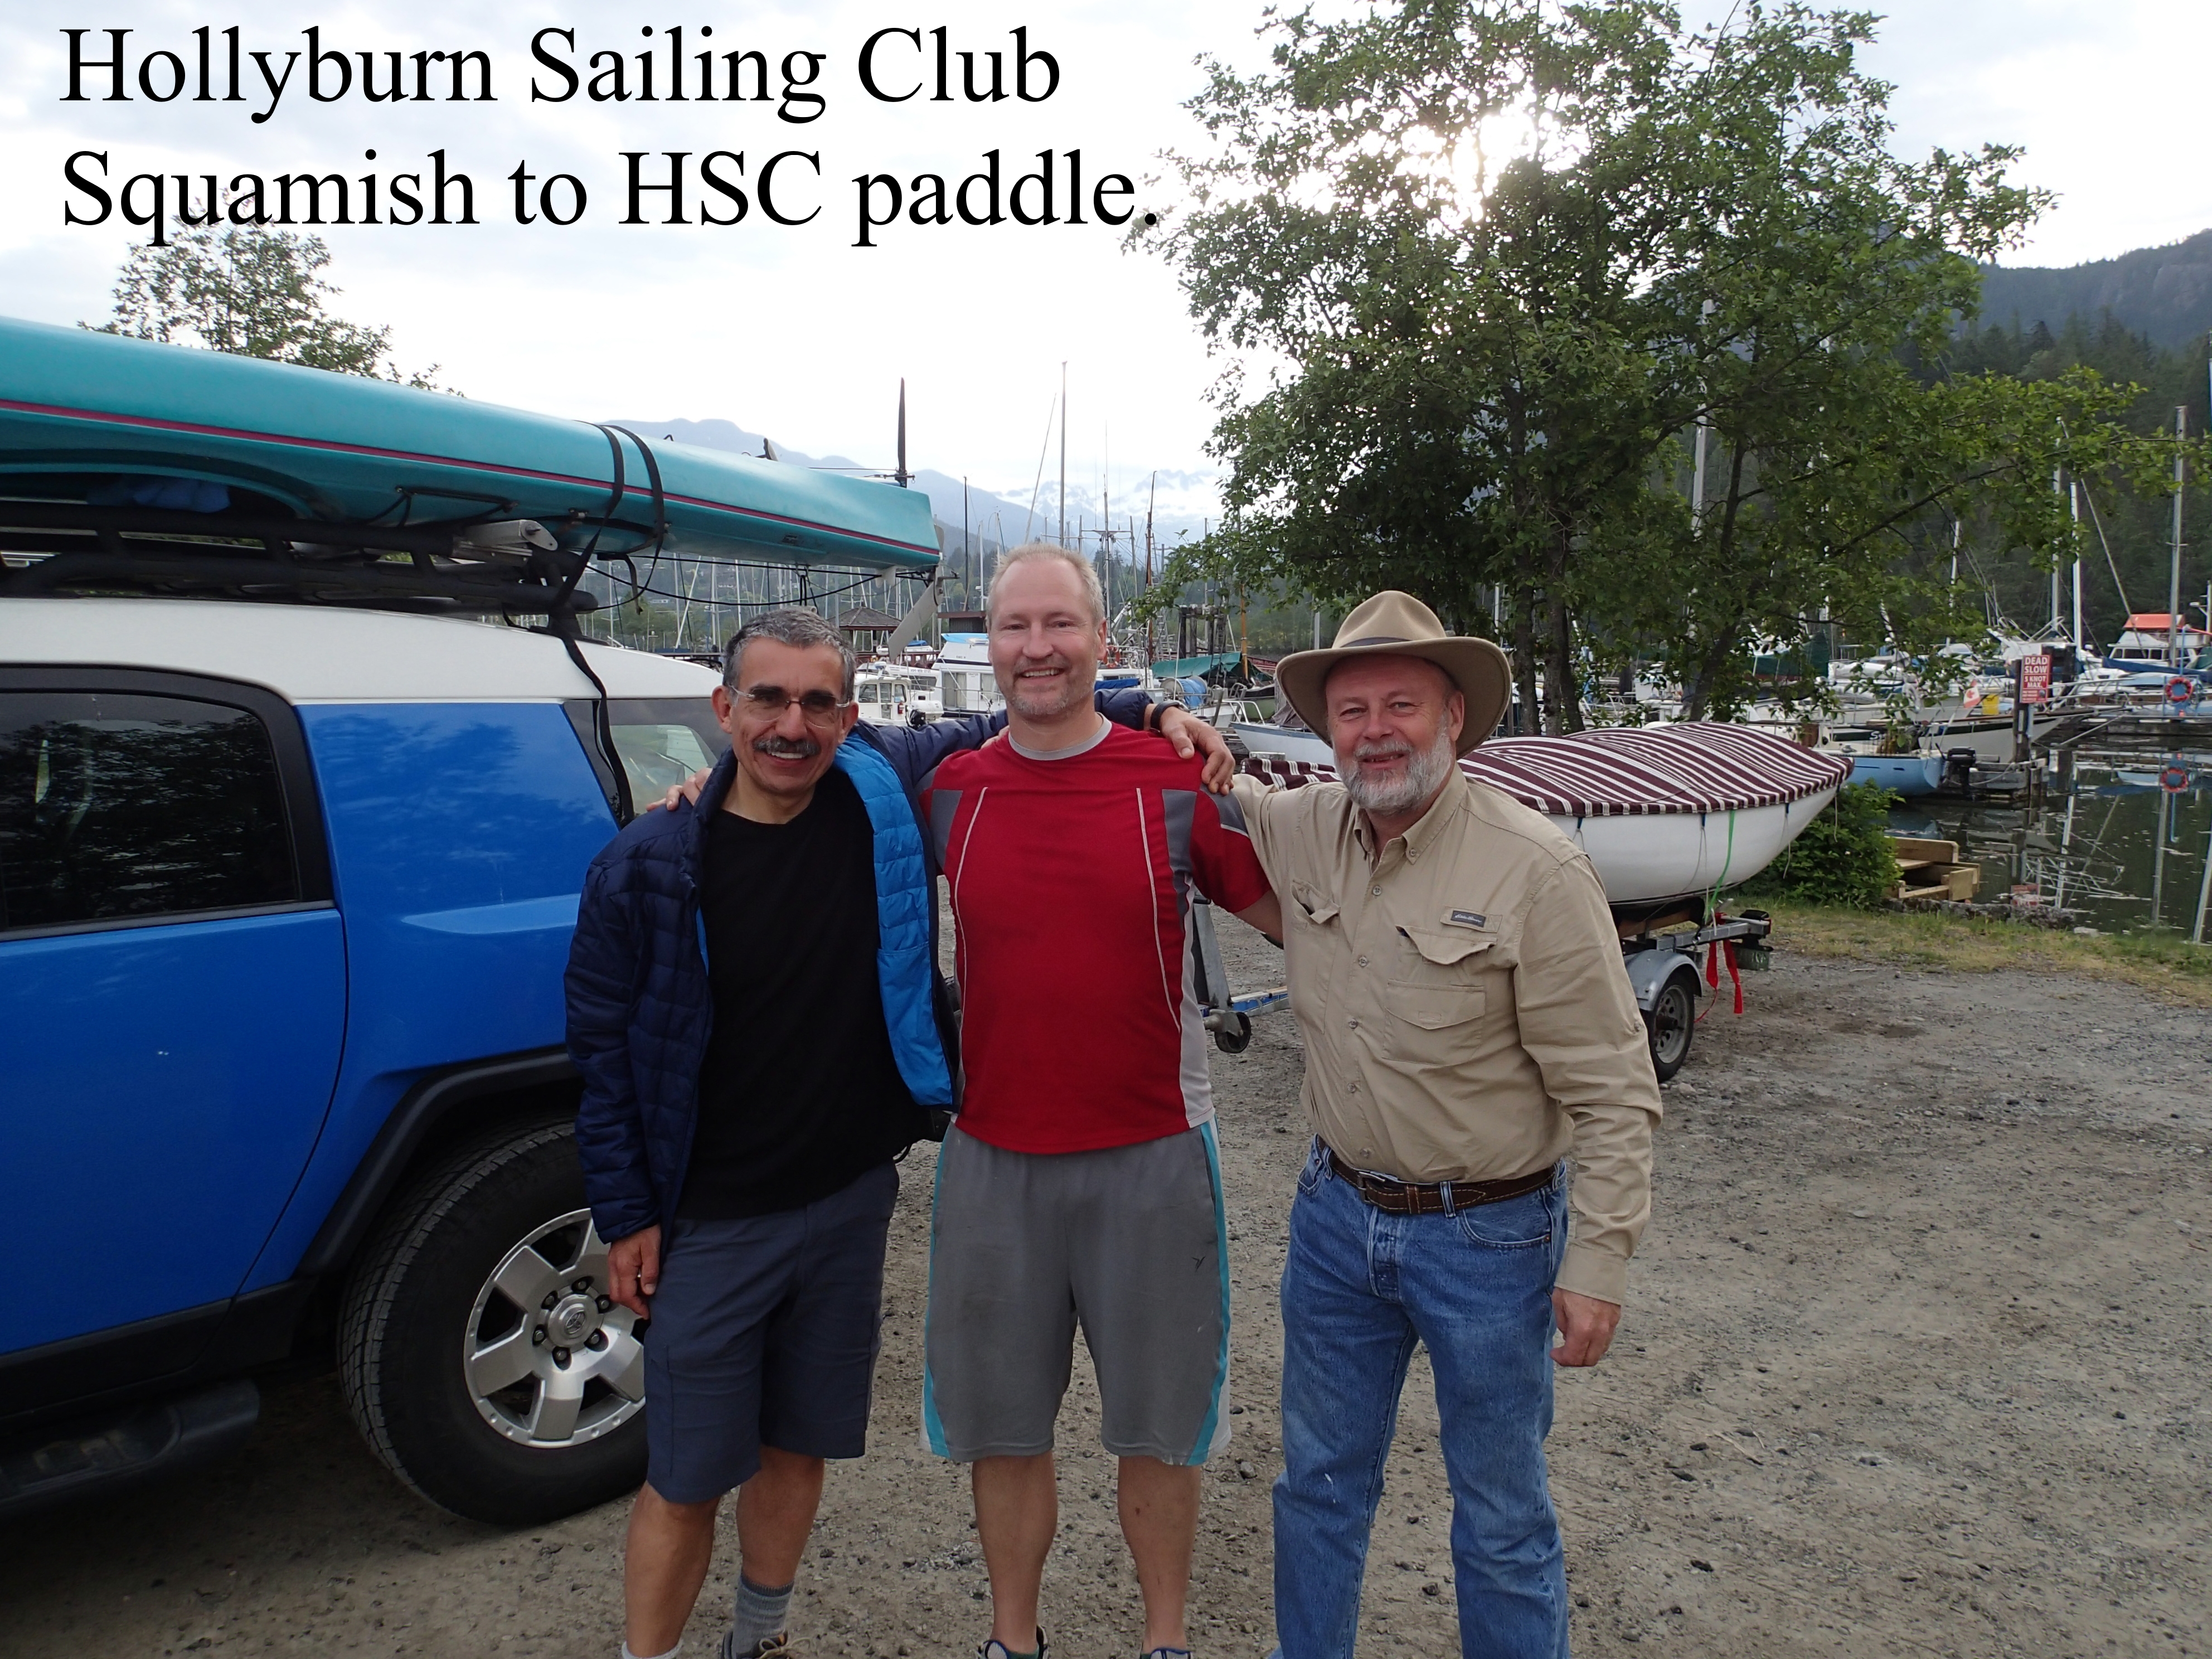
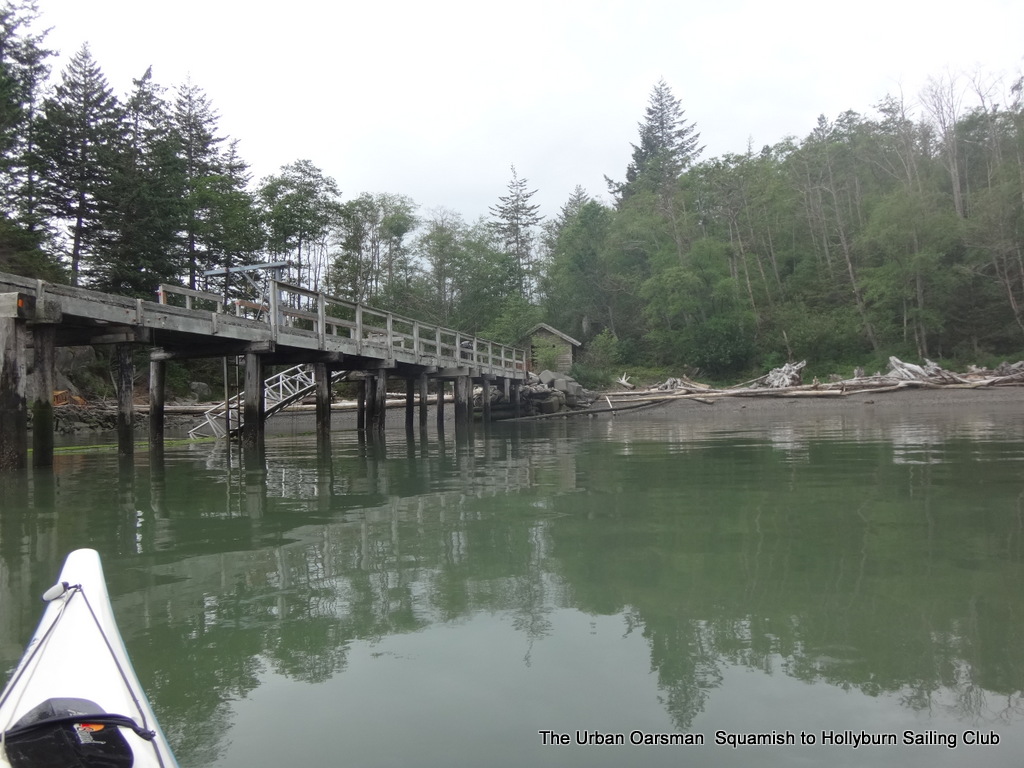
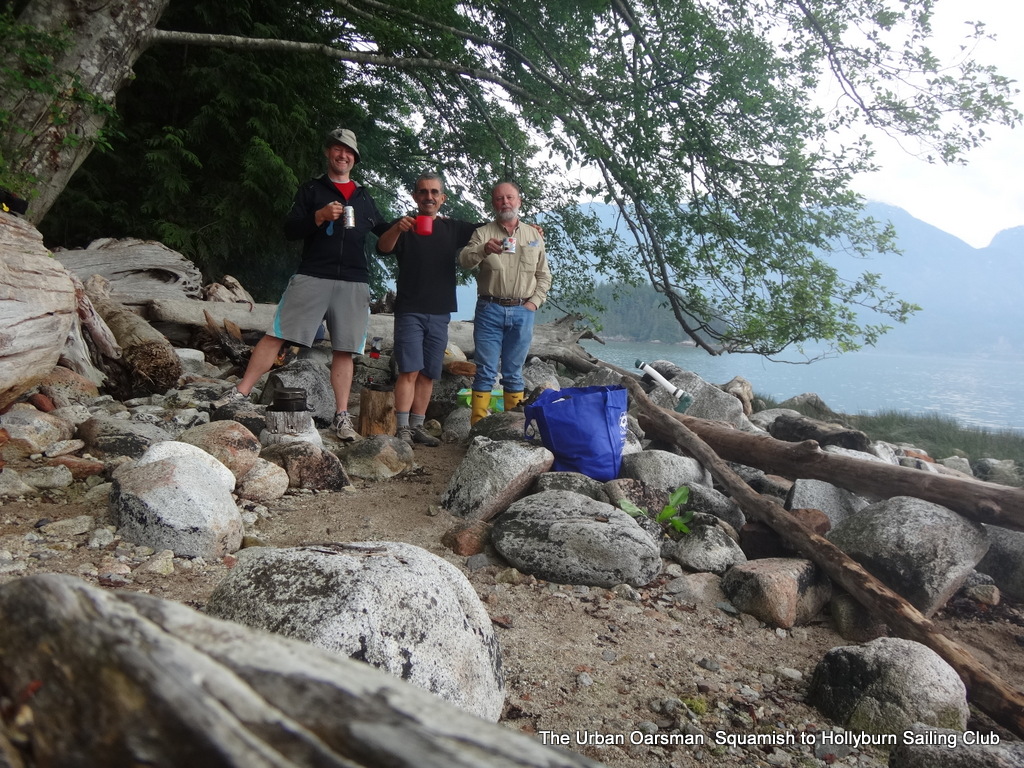
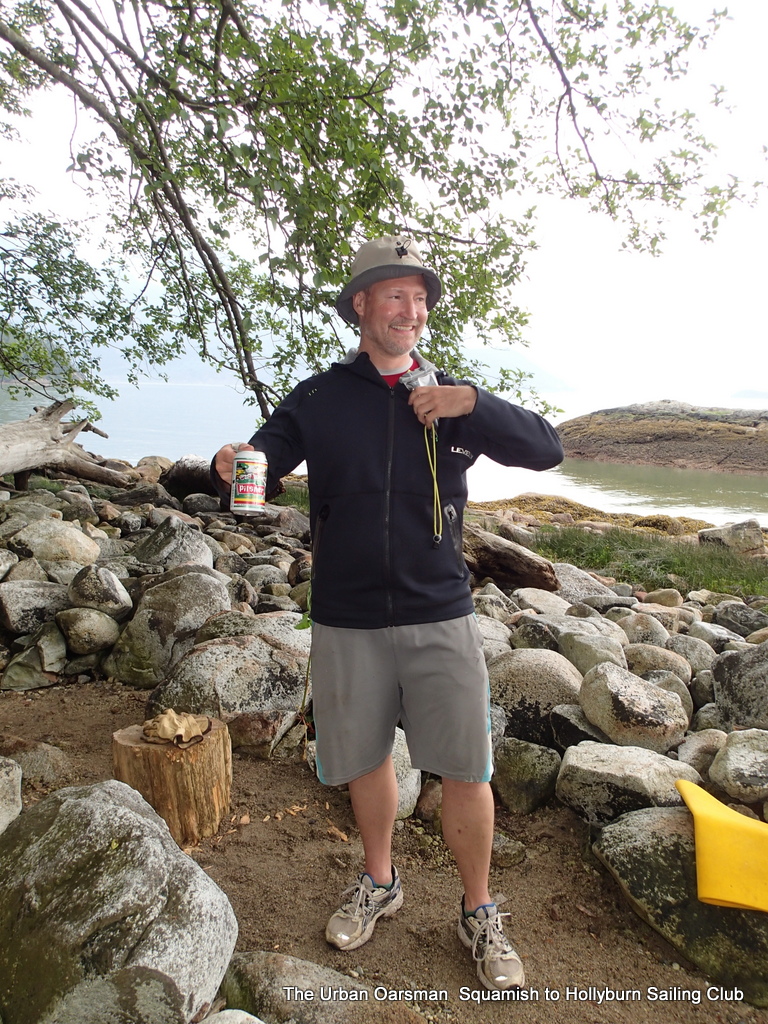
For the second time, the Urban Oarsman rowed from Squamish to the Hollyburn Sailing Club. This time, the write-up for “The Spreader”, the Club newsletter was written by fellow paddler, Ken Parr. This is Ken’s account of the trip. I added a few “additions” in italics.
Squamish to West Vancouver –by
Kayak and Rowboat by Ken Parr
On the Labour Day long weekend, a group of HSC adventure seekers put into action a plan to spend some quality time abusing our bodies over a number of days, on the water of course, from Squamish to HSC world headquarters in West Van. The plan was simple… Leave
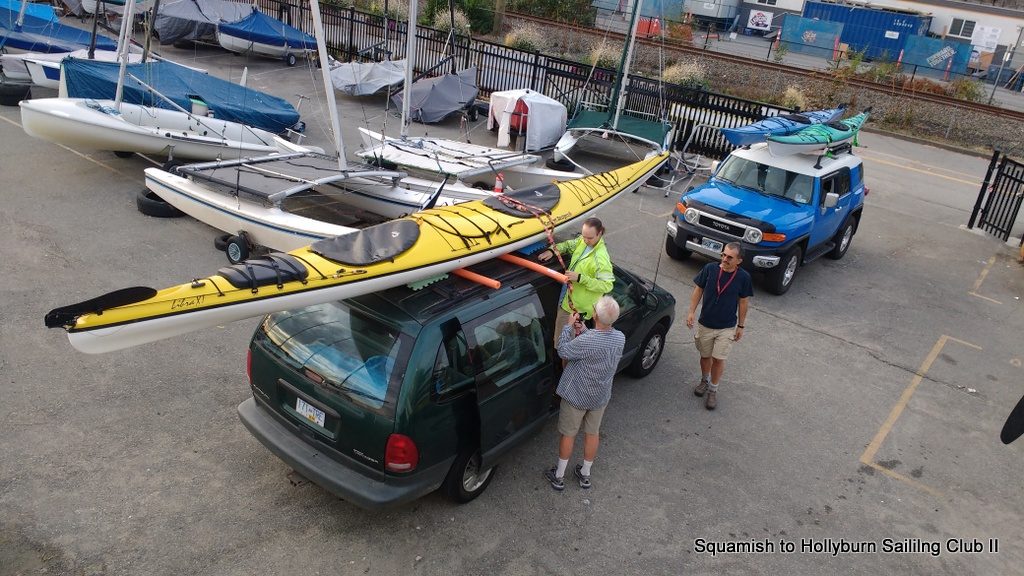
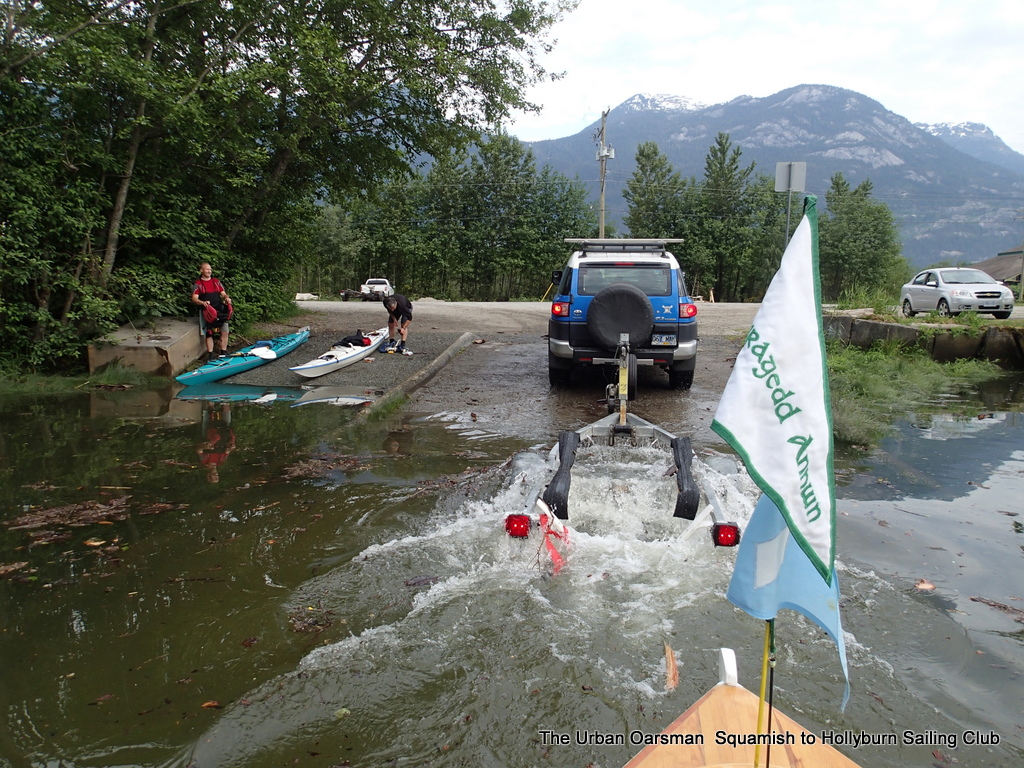
Load up the kayaks Friday night and then pick everyone up Saturday morning. I will tow Gwragedd Annwn to Squamish on her trailer. Steve, Rueben and Maciej loading the double.
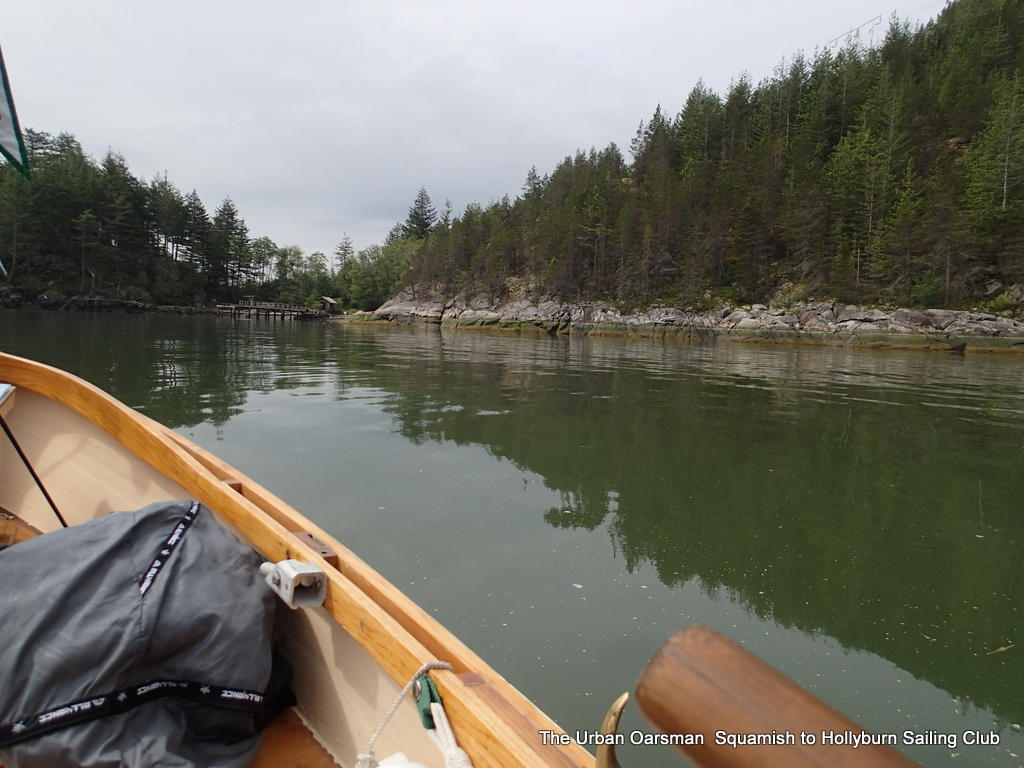
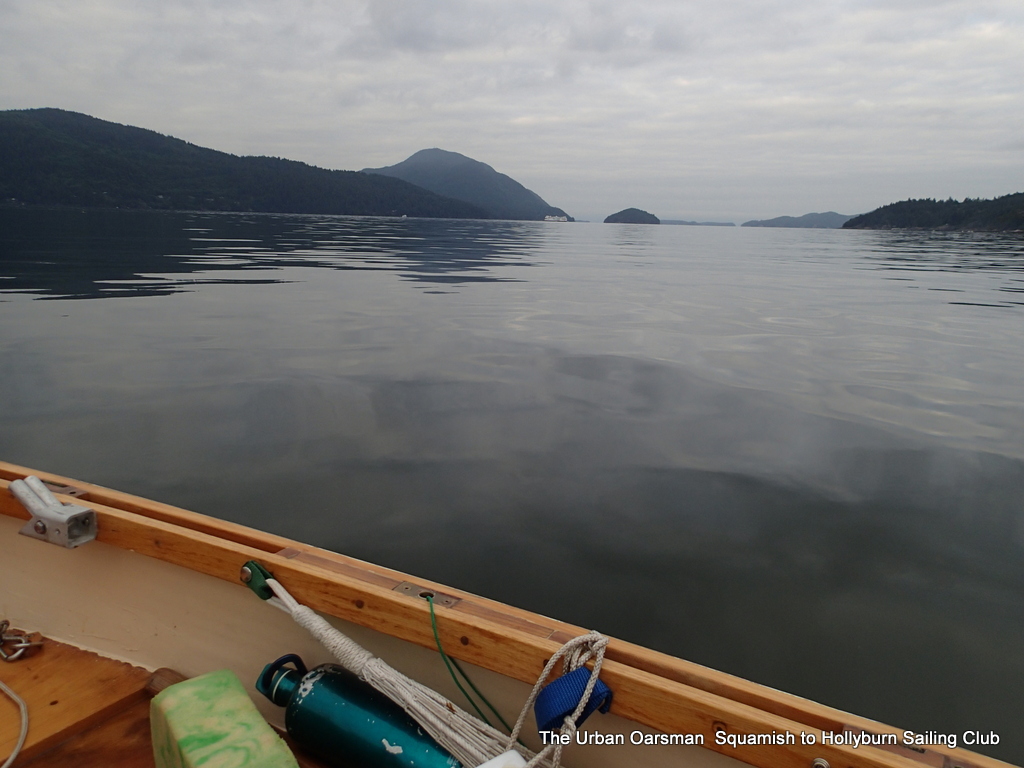
Squamish in the early AM, and paddle hard, with 2 nights of camping along the way. Our route going south was to go West around Gambier Island, and would eventually, over 3 days, be about 82 kilometres.
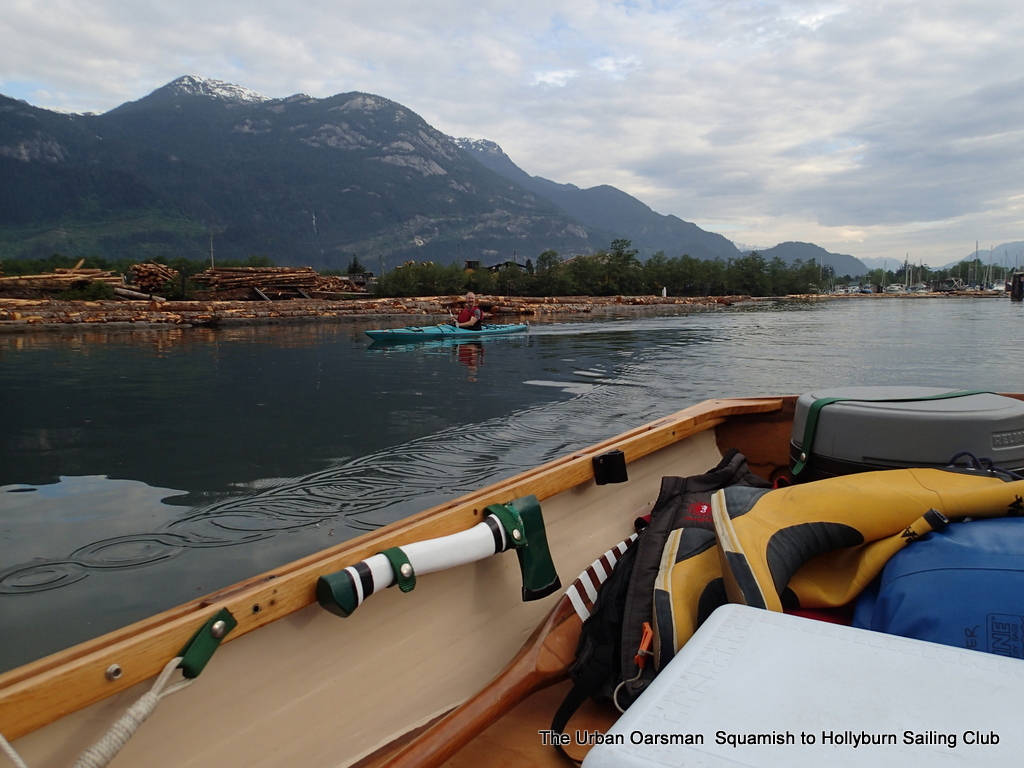
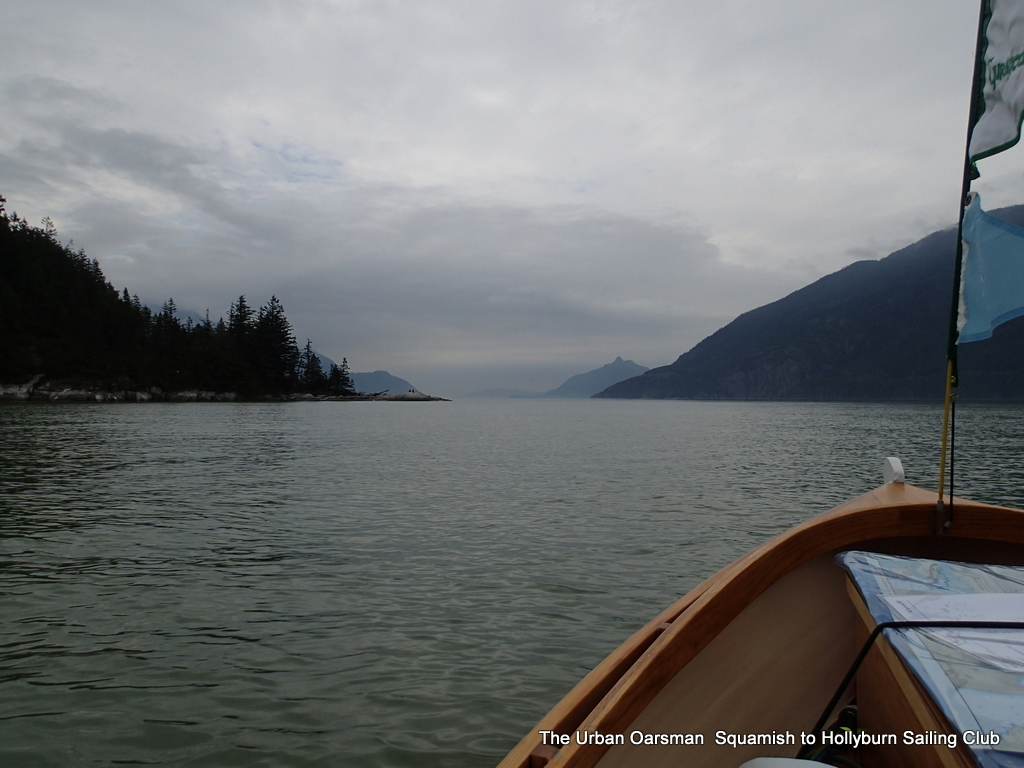
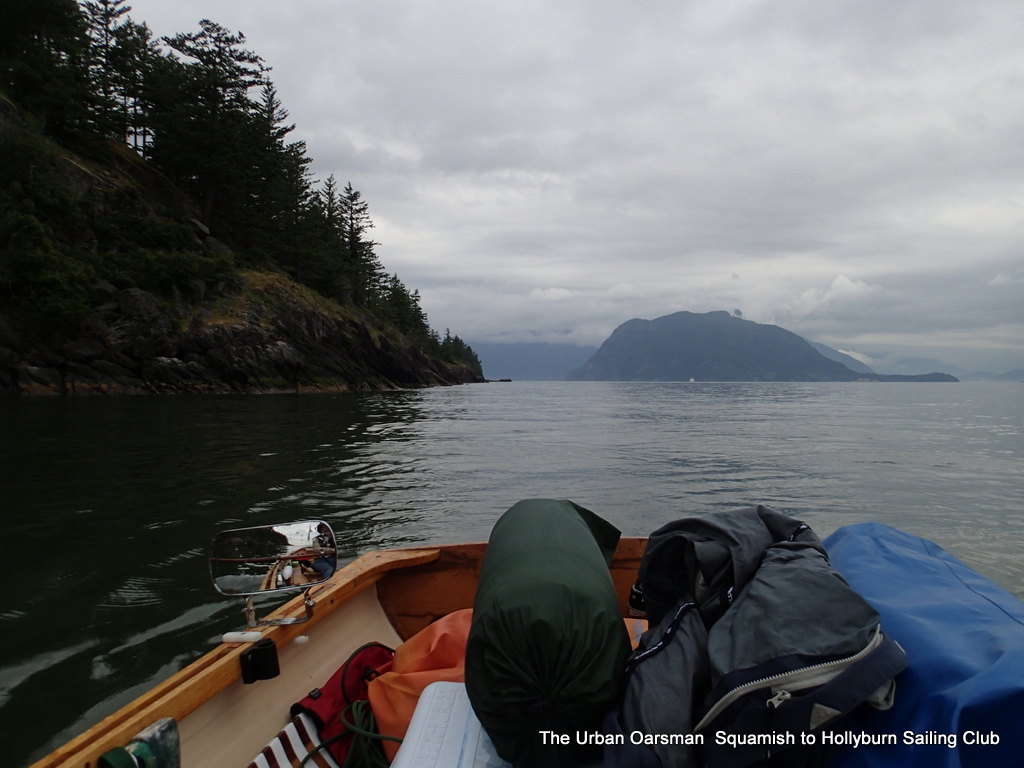
Paddling out the Mamquam Blind Channel at the head of Howe Sound.
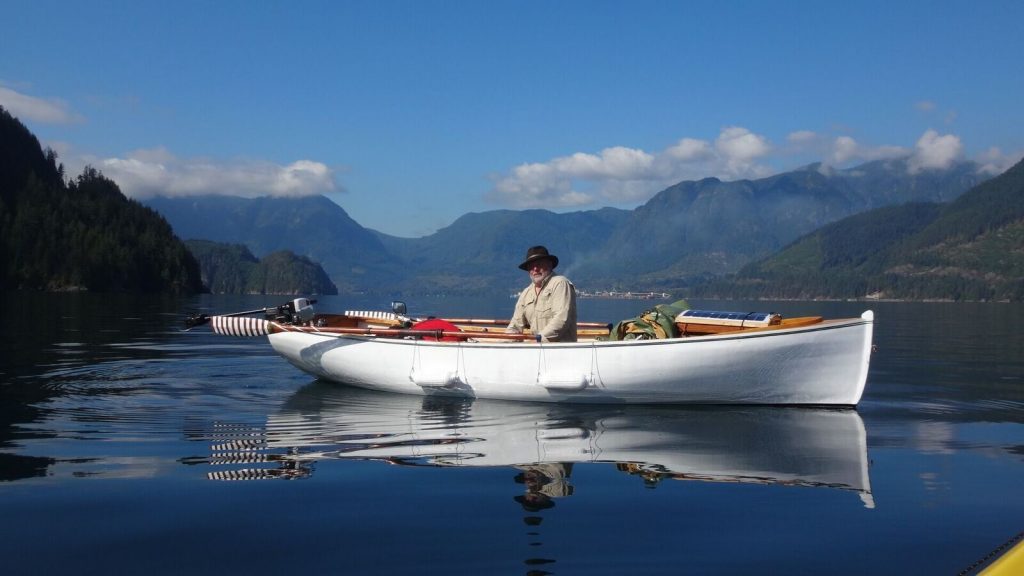
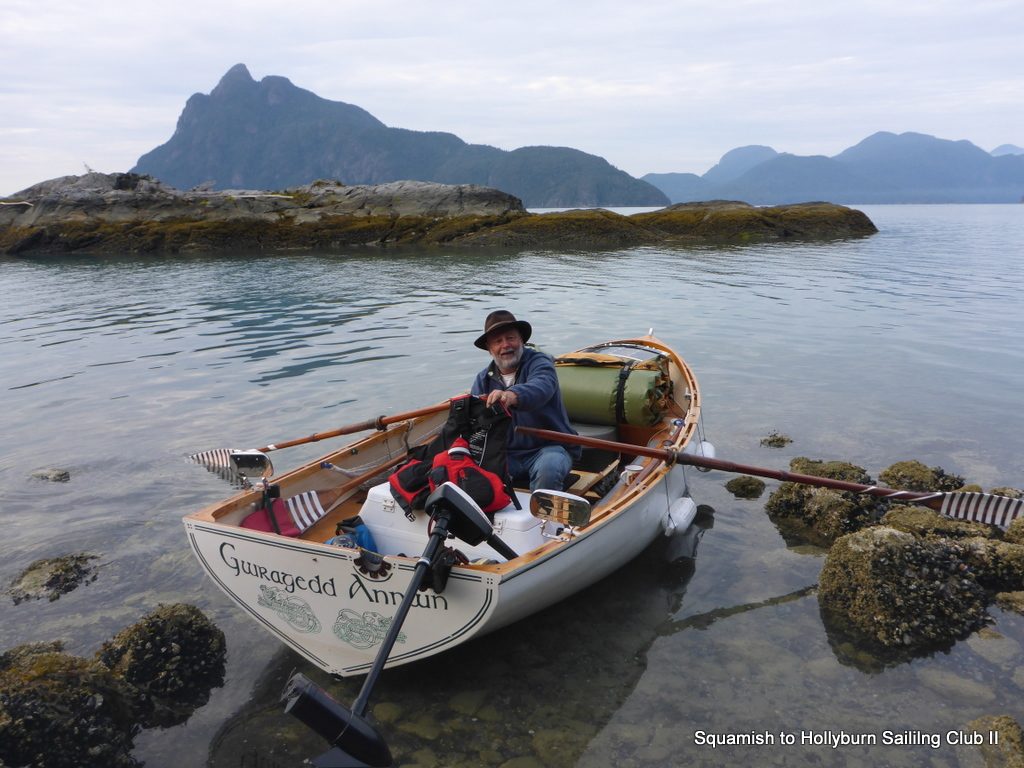
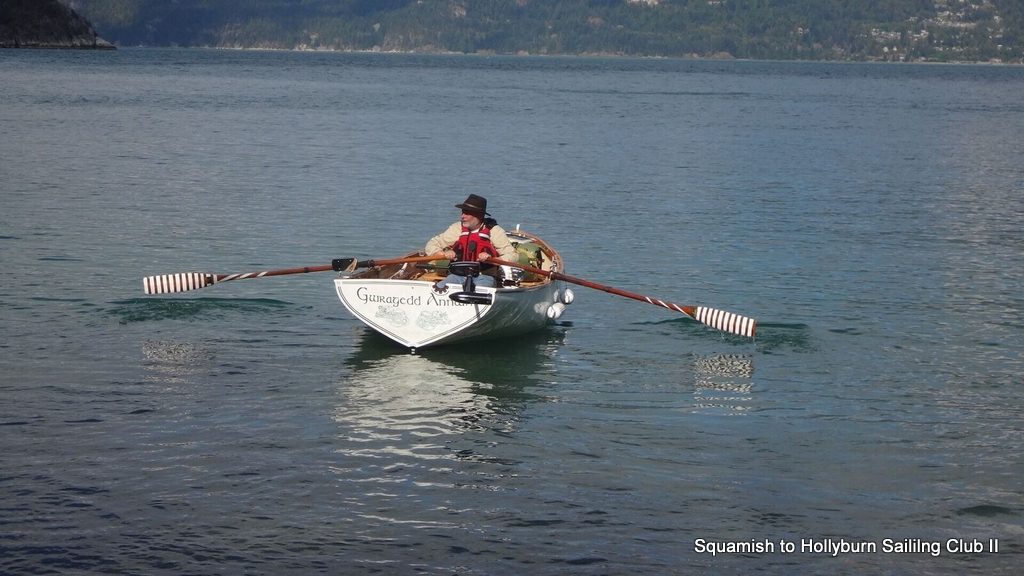
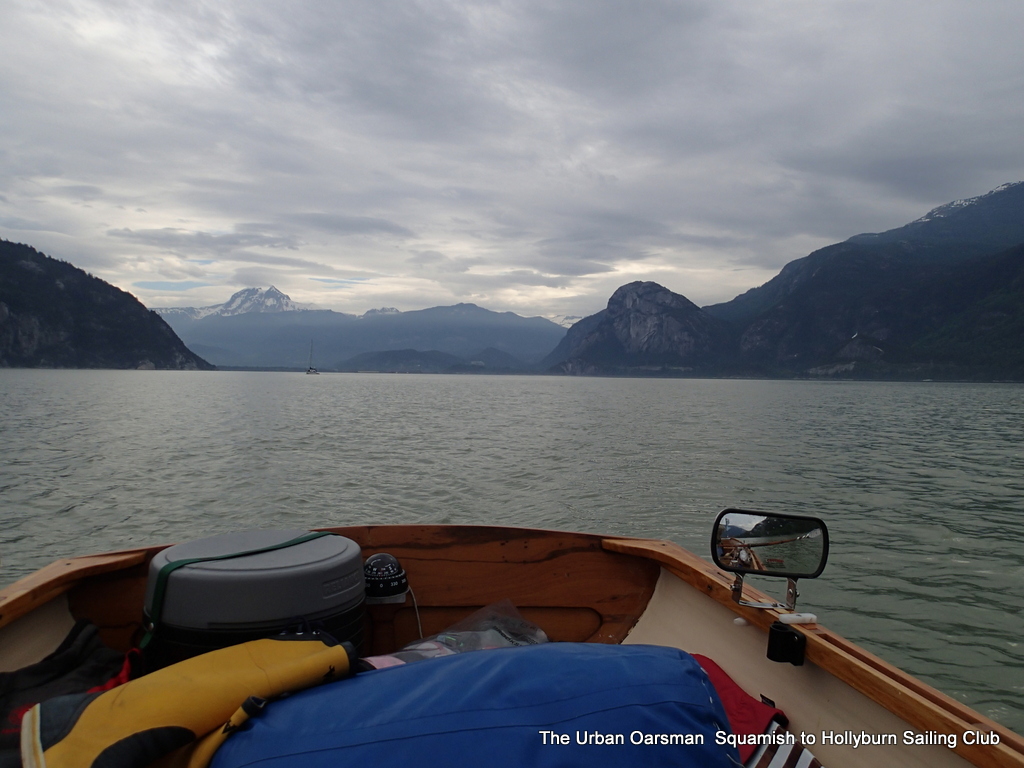
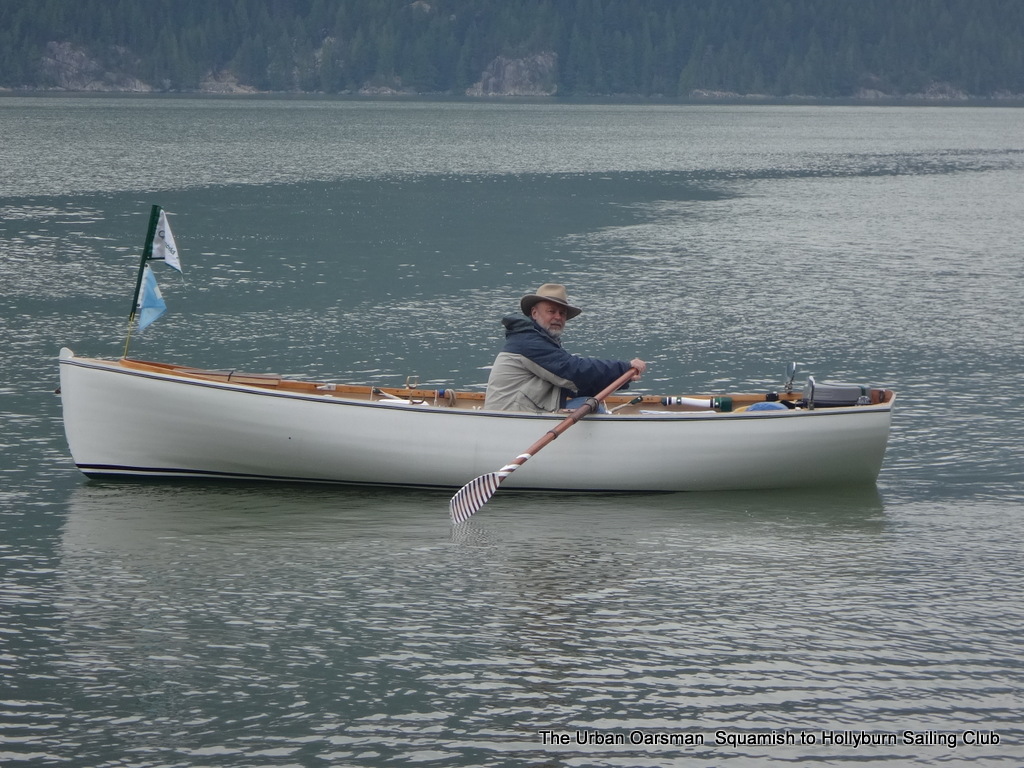
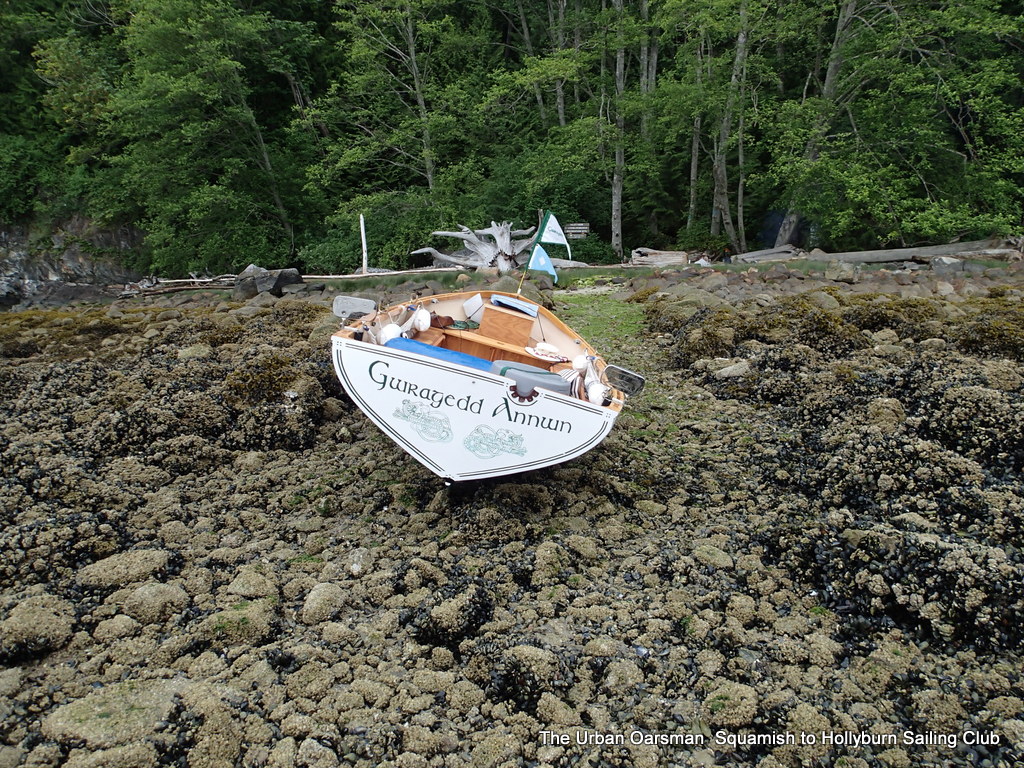
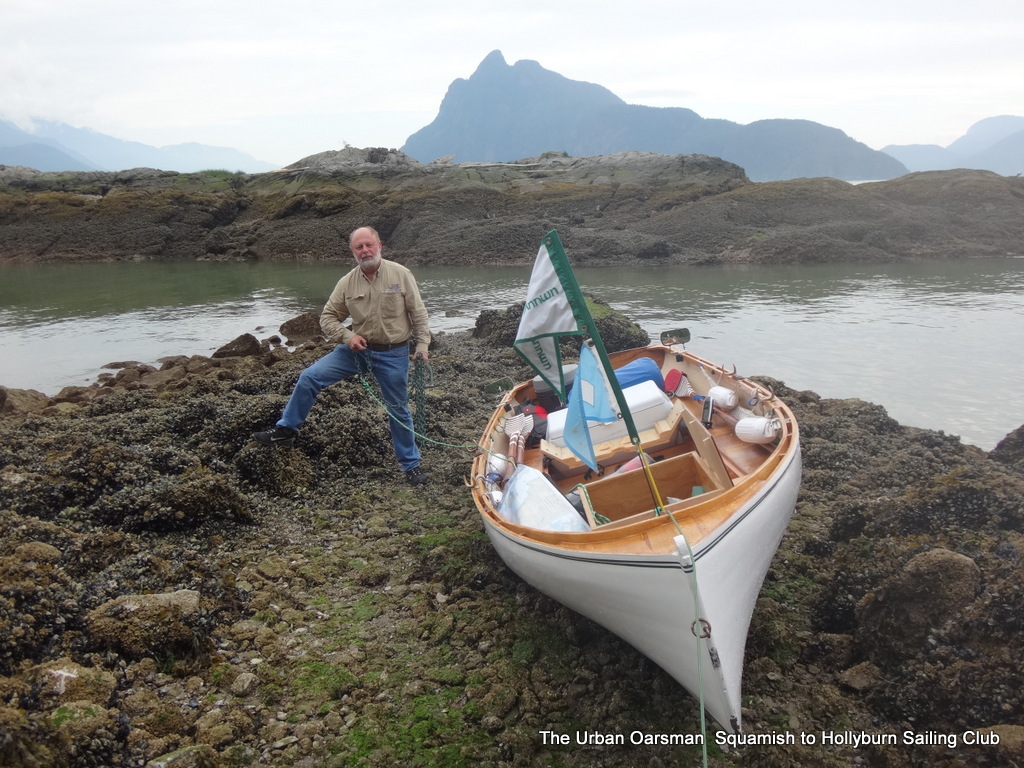
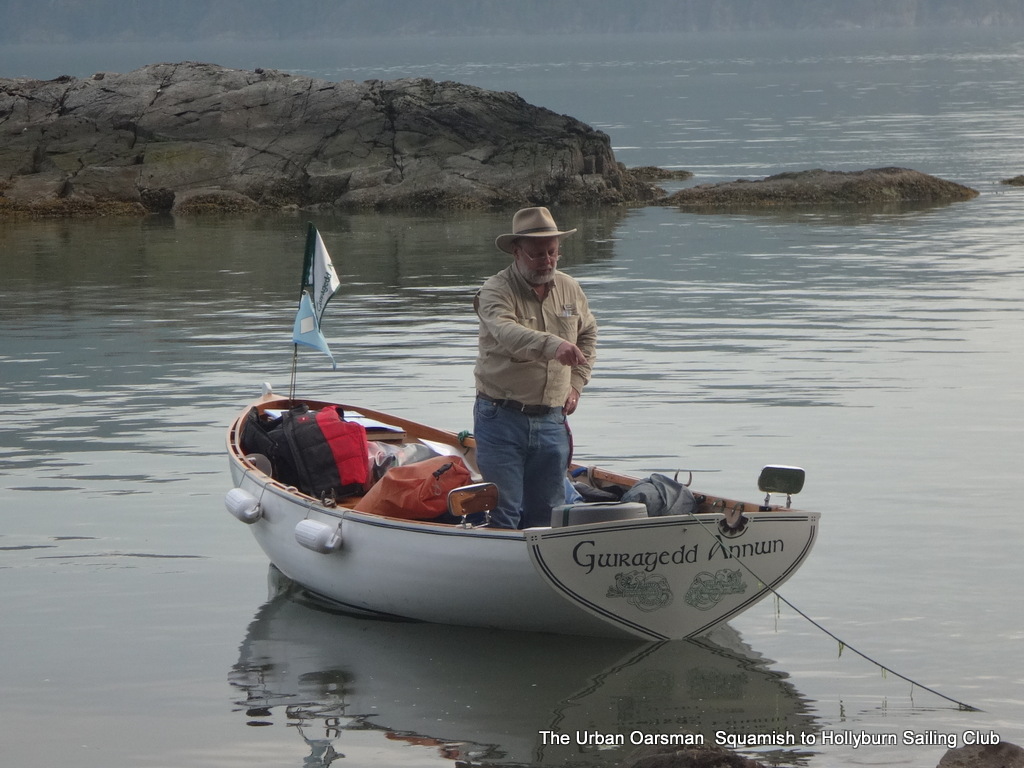
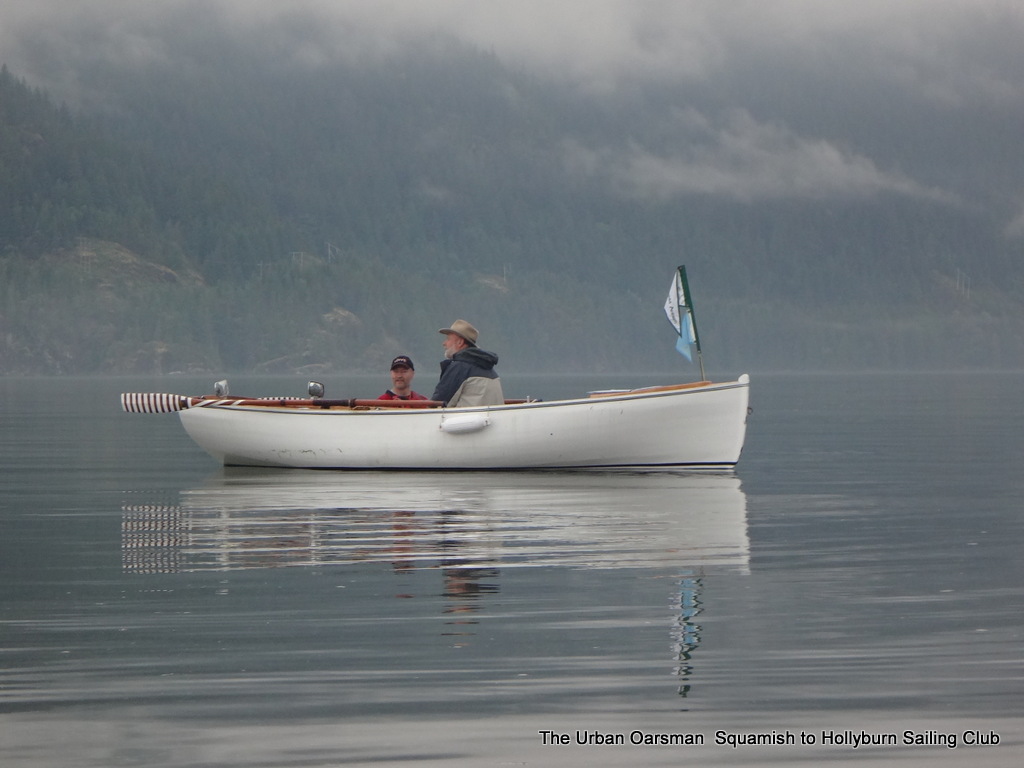
Our equipment for this adventure was safe and robust. We had GPS and ample safety gear, maps and backup systems. Mike of course was Captain of his “battleship”… the tested and sturdy “Gwragedd Annwn”,
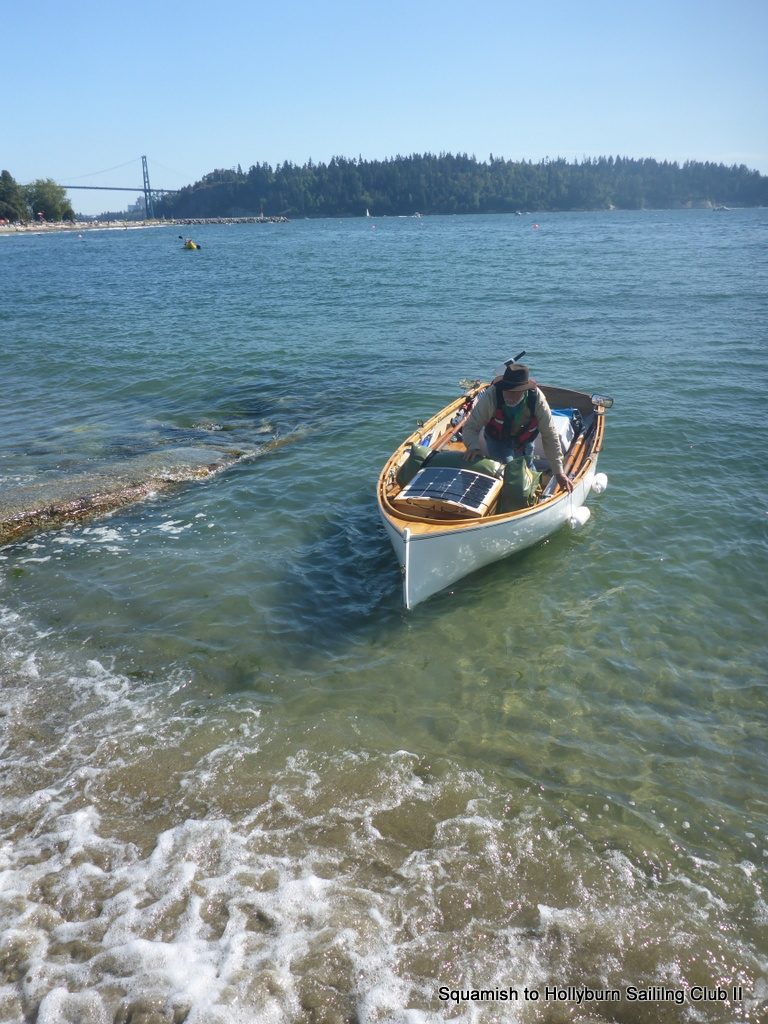
Gwragedd Annwn with her electric trolling motor and bow solar panel.
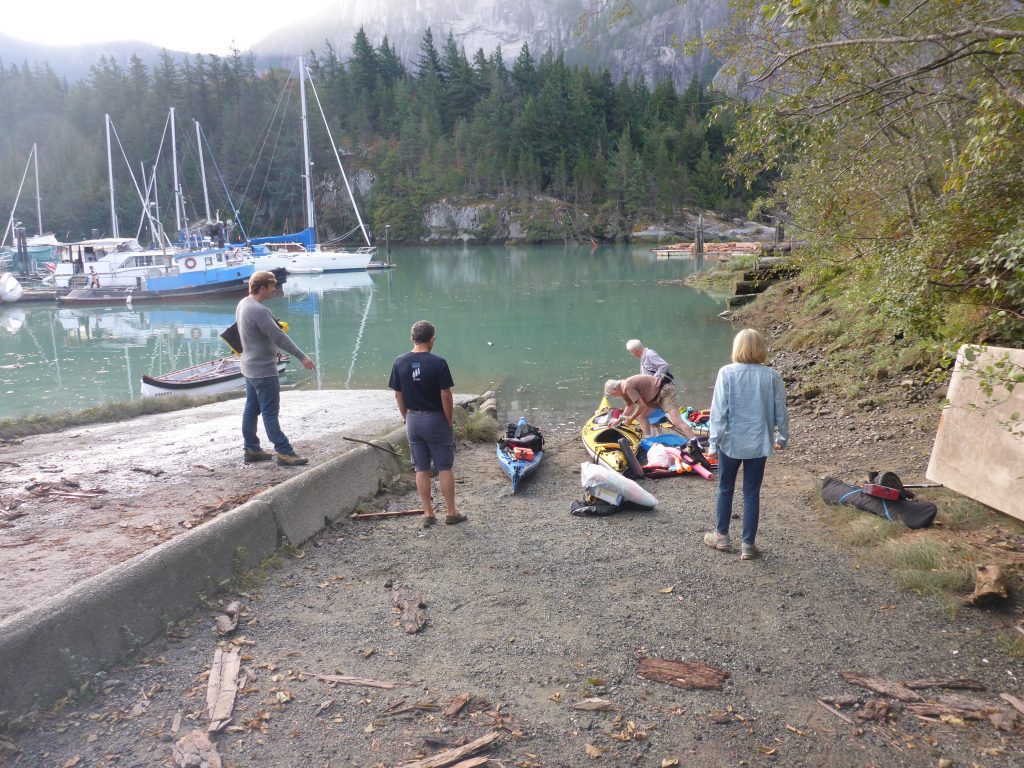
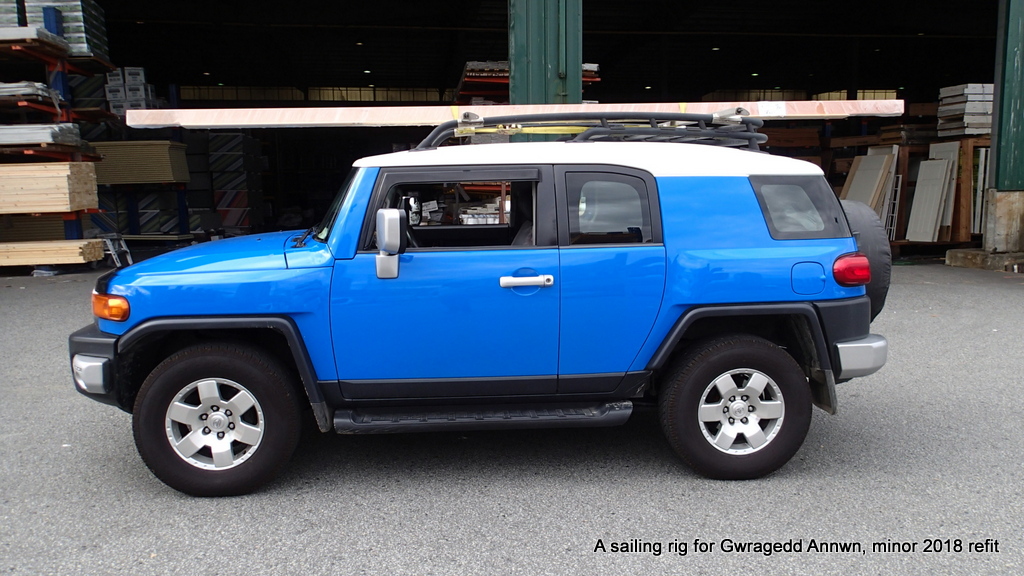
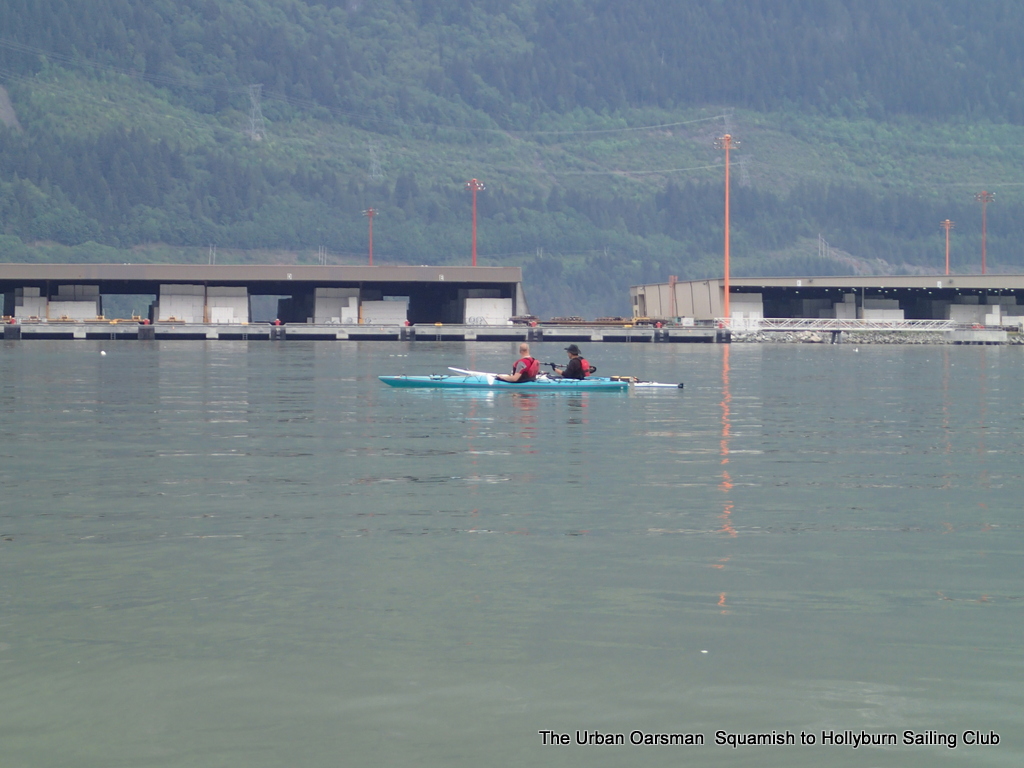
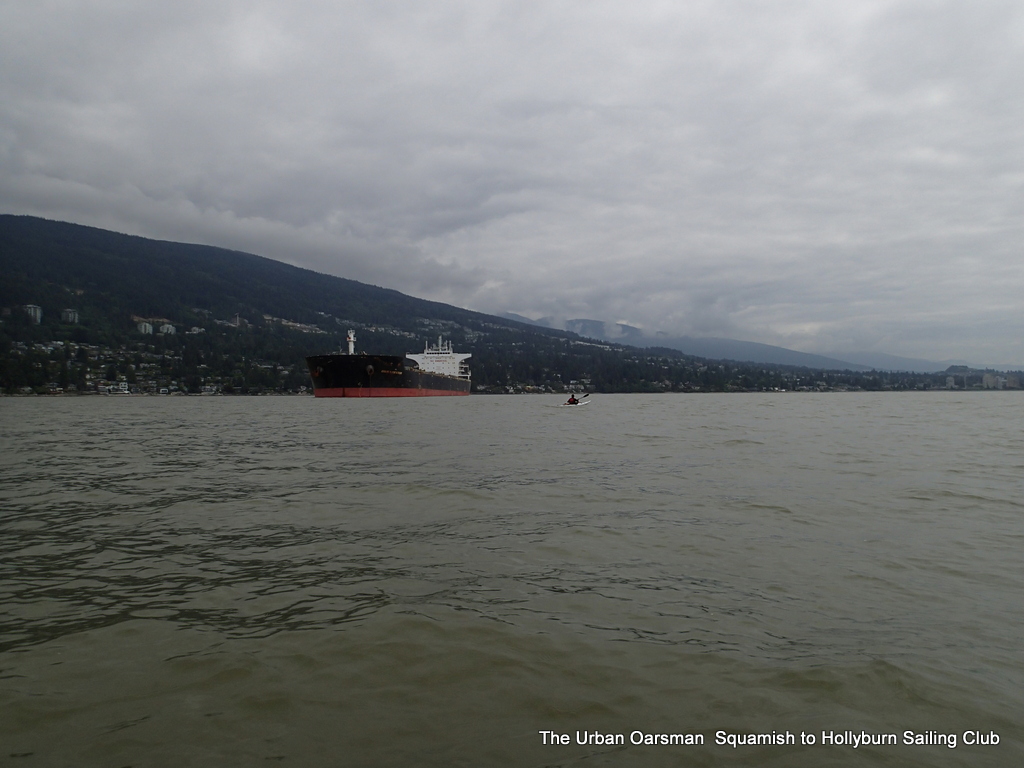
complete with steel (actually bronze) keel to do battle with the barnacles. The rest of the crew had kayaks… plastic and fiberglass. Meals were simple: Maciej and Rueben were great chefs for communal feasts; drink was adequate; comradery was high; laughter and smiles were abundant. The weather was fortunately warm and mostly sunny. There was a Strong Wind Warning for the Northern Howe Sound (for both Saturday and Sunday) and the winds were as expected and predicted. The winds were forecast to build in the late morning until reaching their peak in the afternoon. Mike got hit by the outflow (actually inflow, into Howe Sound between Bowen and Keats Islands) winds on the morning of the third day. At times the waves were sometimes about 4 foot. On Saturday Sept 1st we left Vancouver about 6AM, and drove to Squamish (in two cars, my FJ and Steve’s minivan. I arrived first and offloaded the two single kayaks and launched Gwragedd Annwn at the Squamish boat ramp. Gwragedd Annwn was fully loaded, so, I left right away. The kayaks are twice as fast as I am and they will catch up and pass me shortly) with the help of kind family members, we off loaded our gear at the public boat ramp. After stuffing things away in all the nooks in our boats, Maciej, Rueben, Steve, and Ken set out going South.
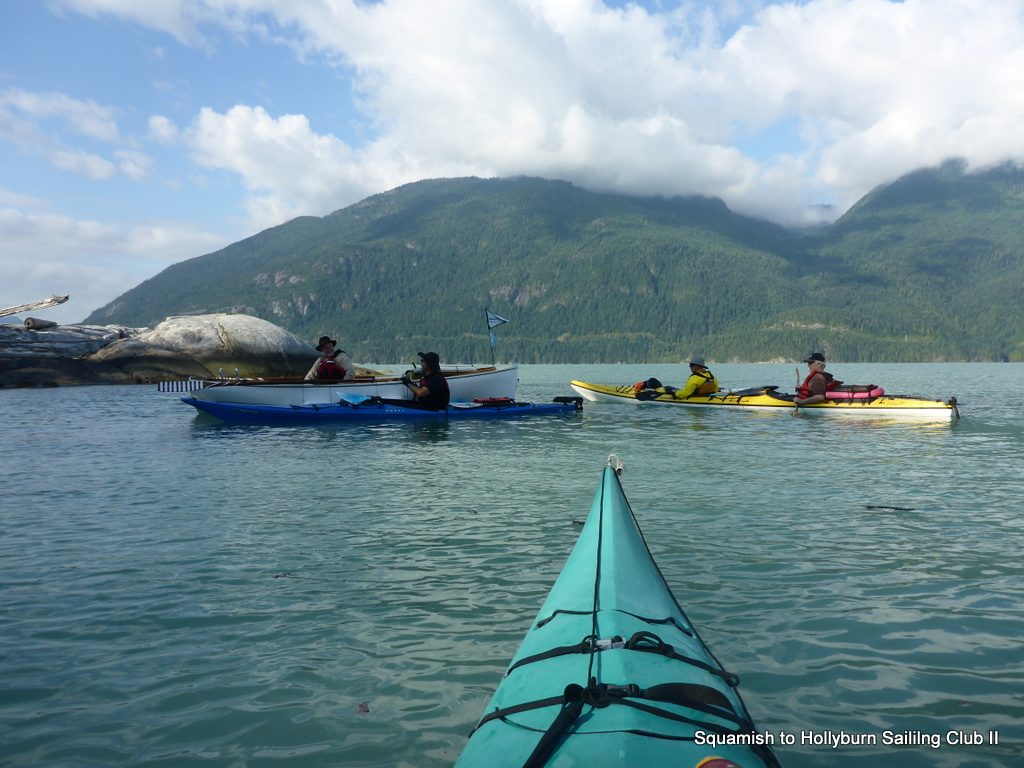
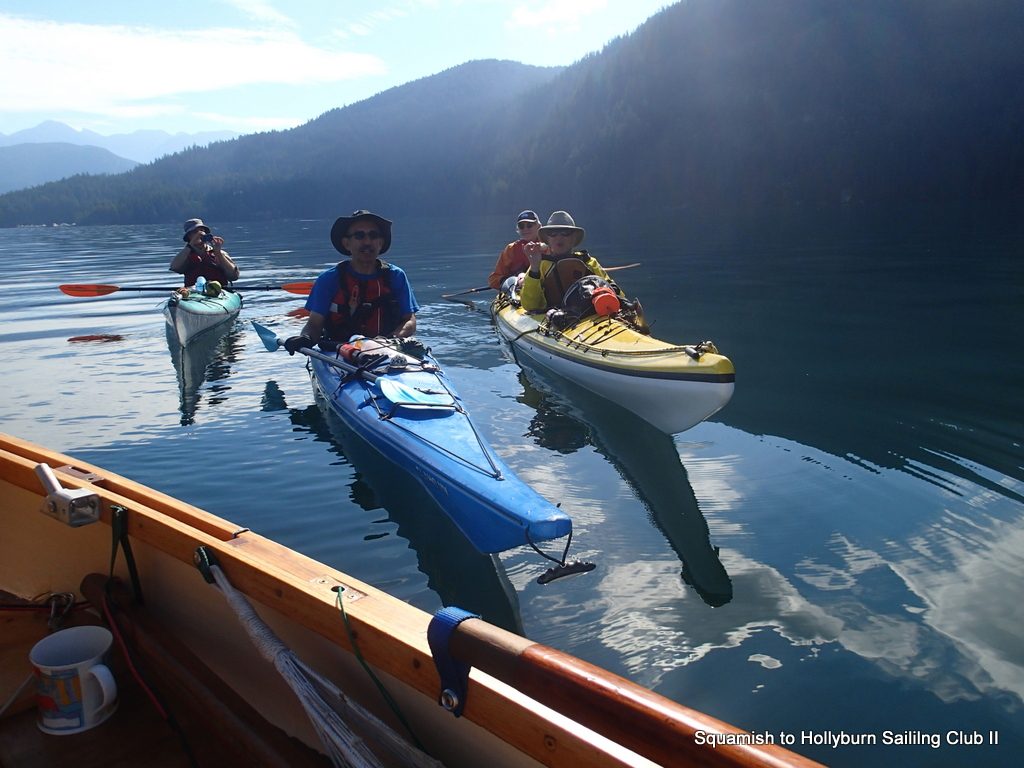
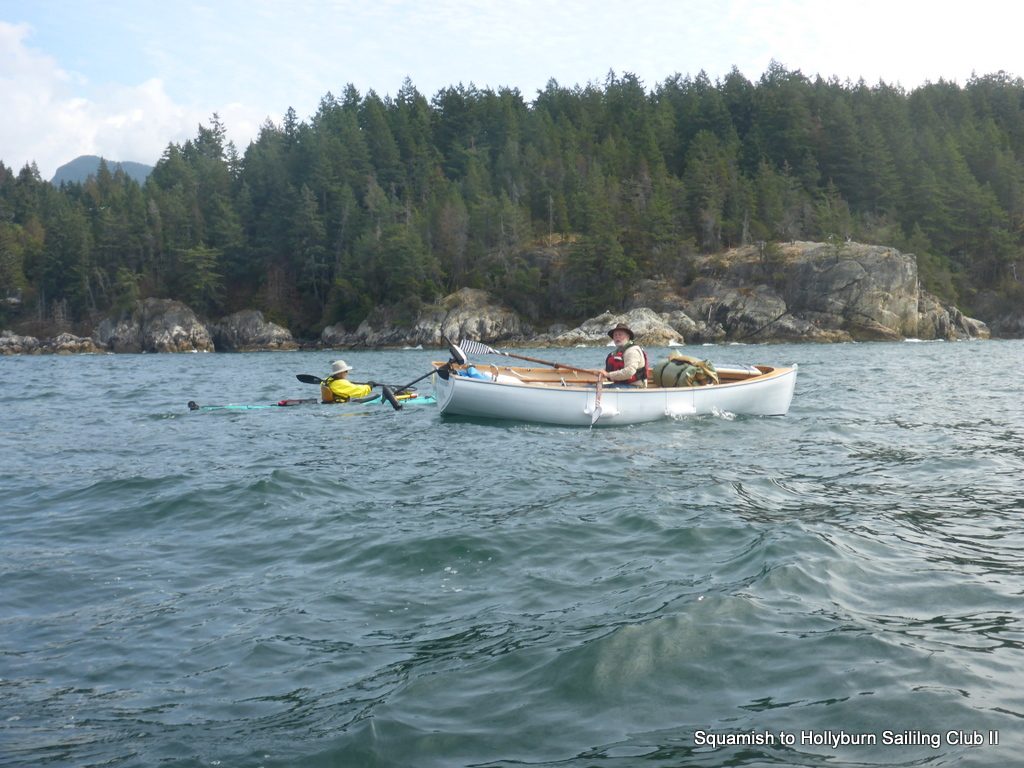
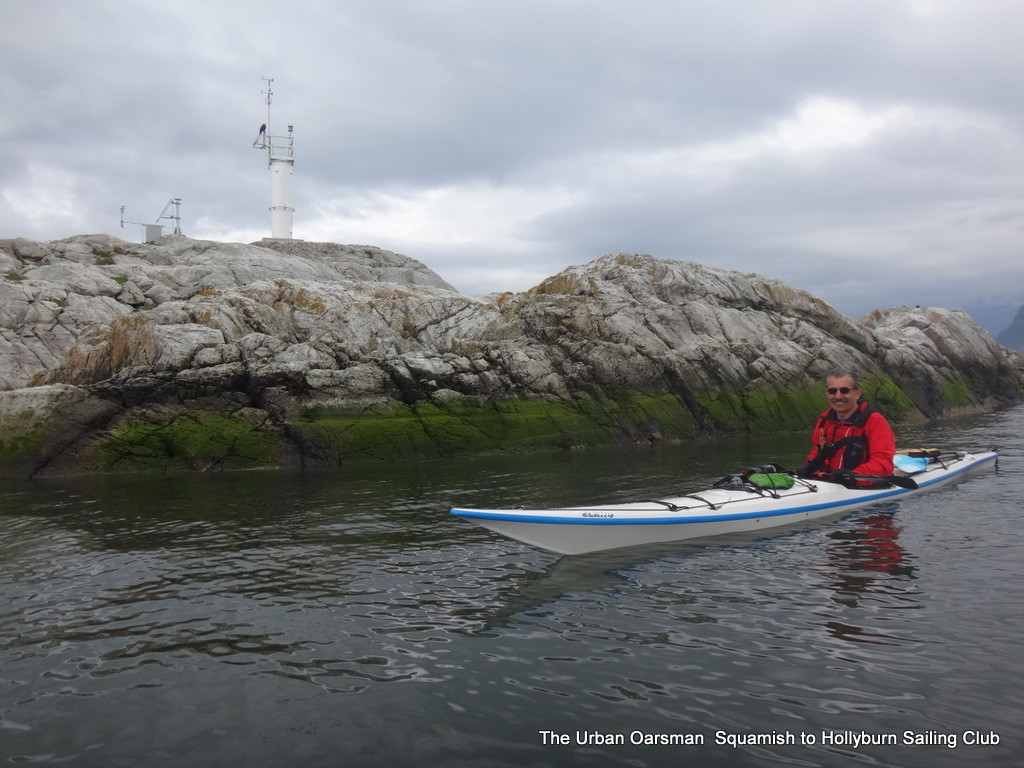
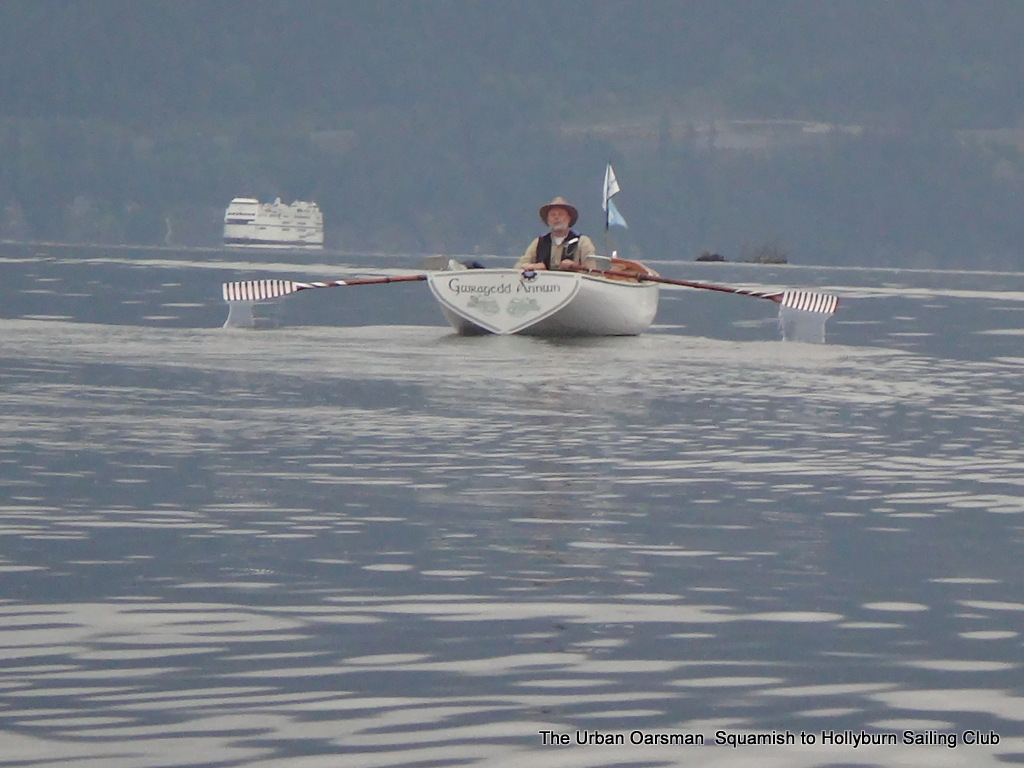
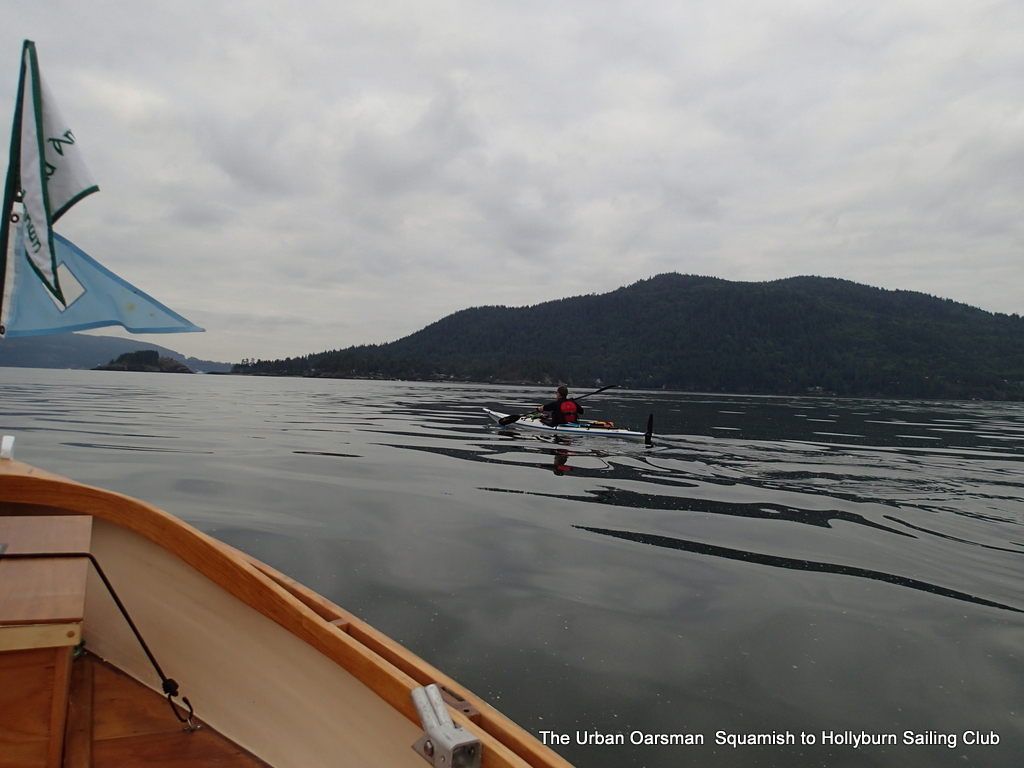
We caught up to Mike in his row boat at Watts Point on the east side of Howe Sound.
Watts Point rendezvous.
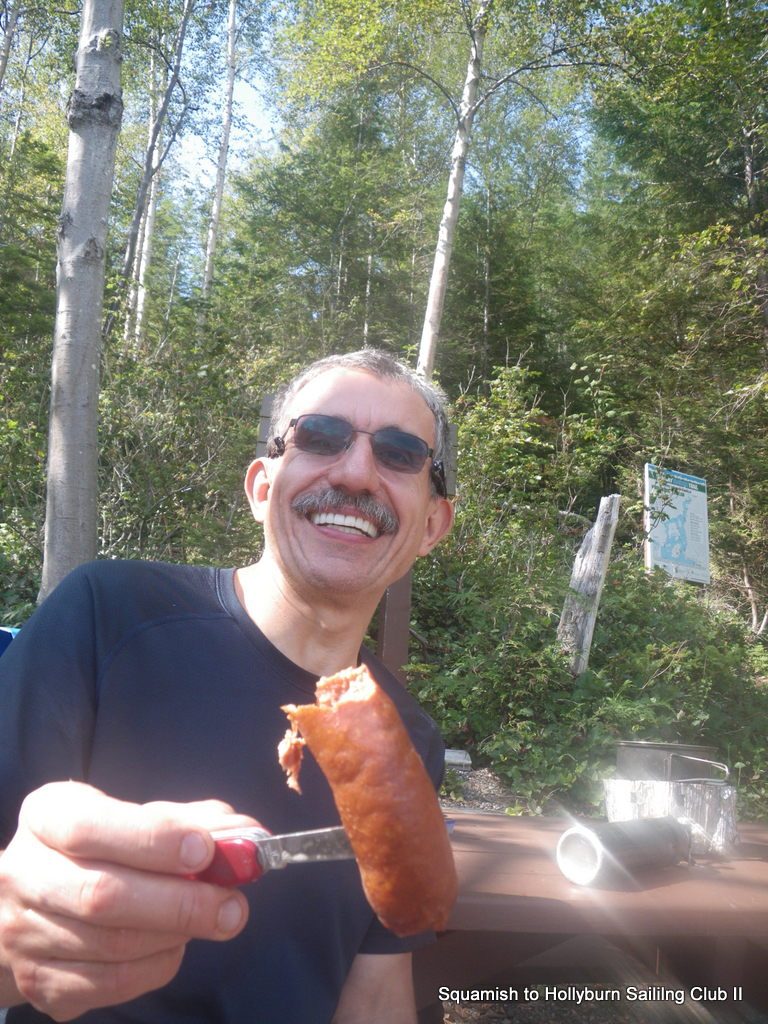
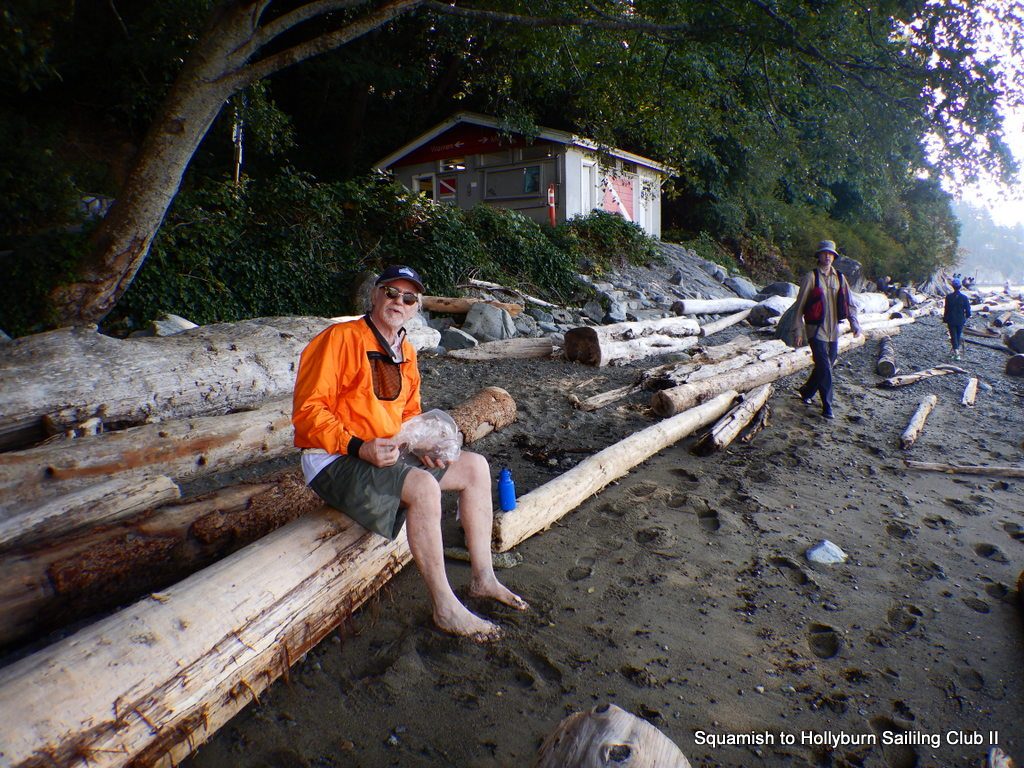
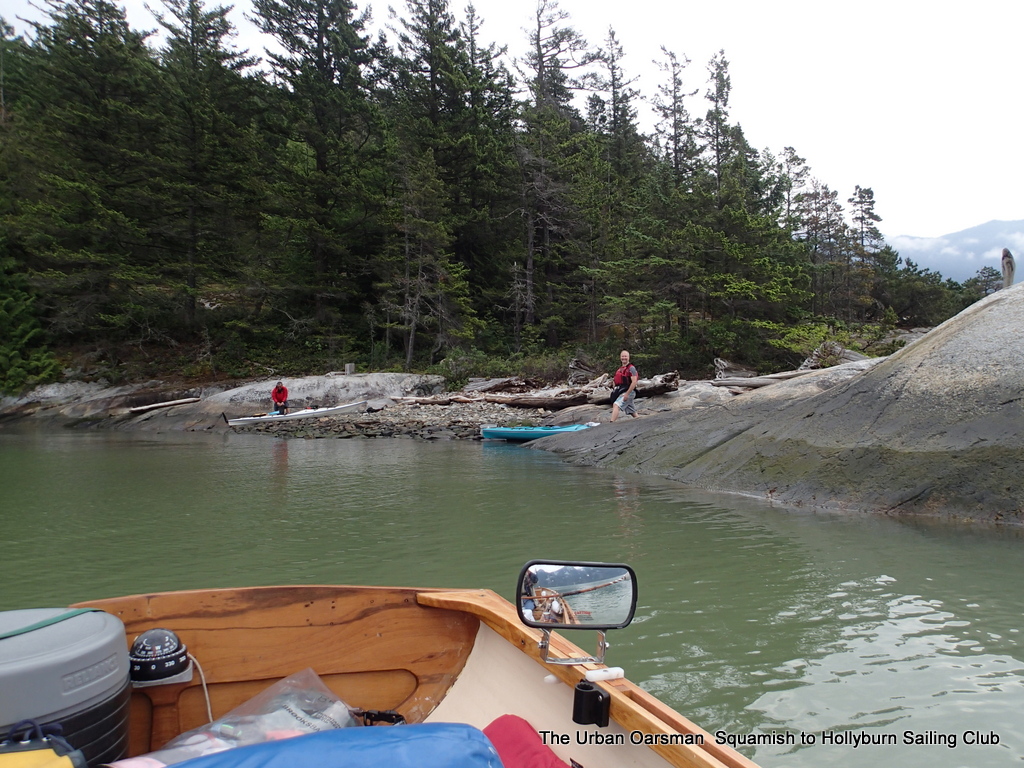
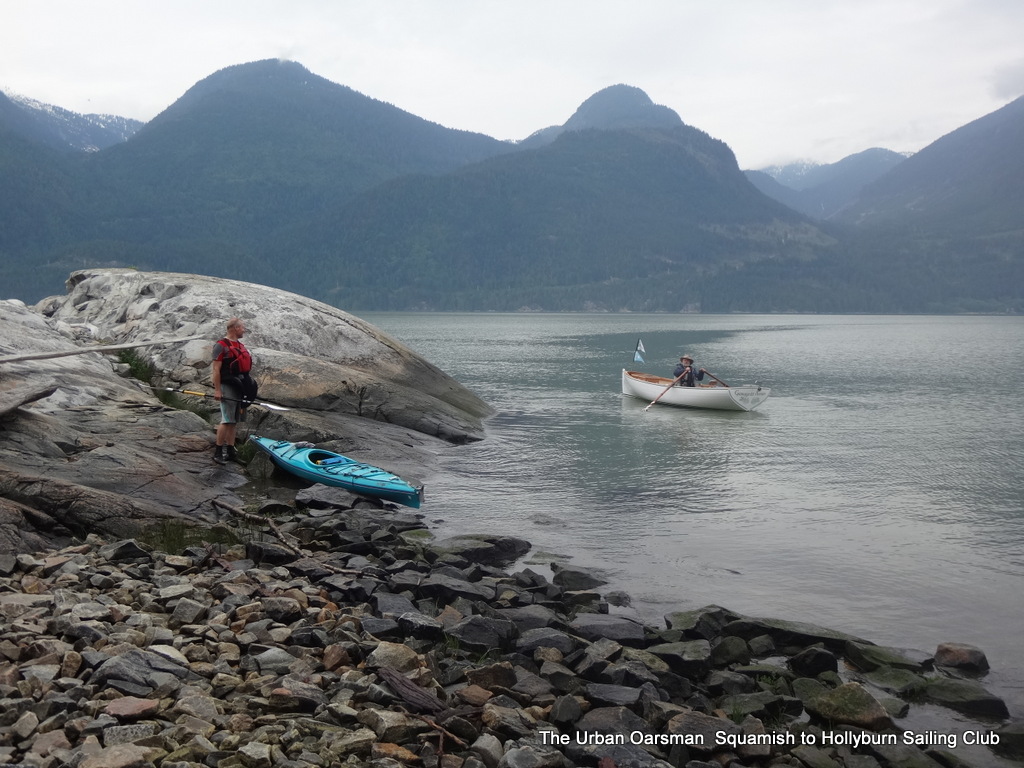
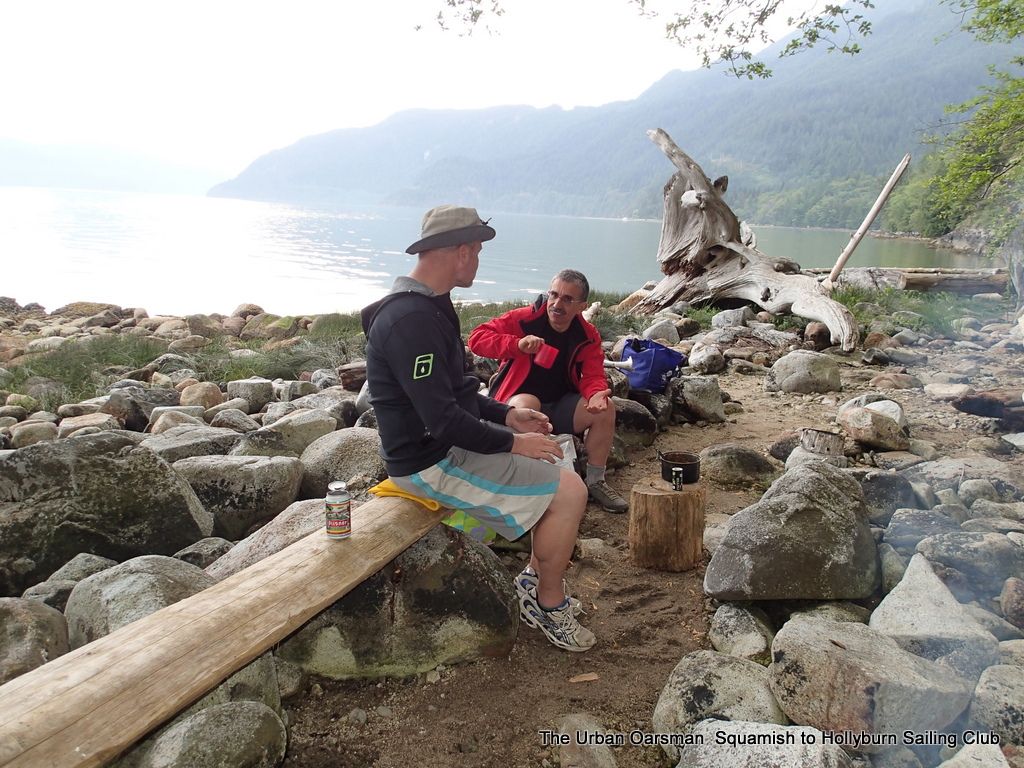
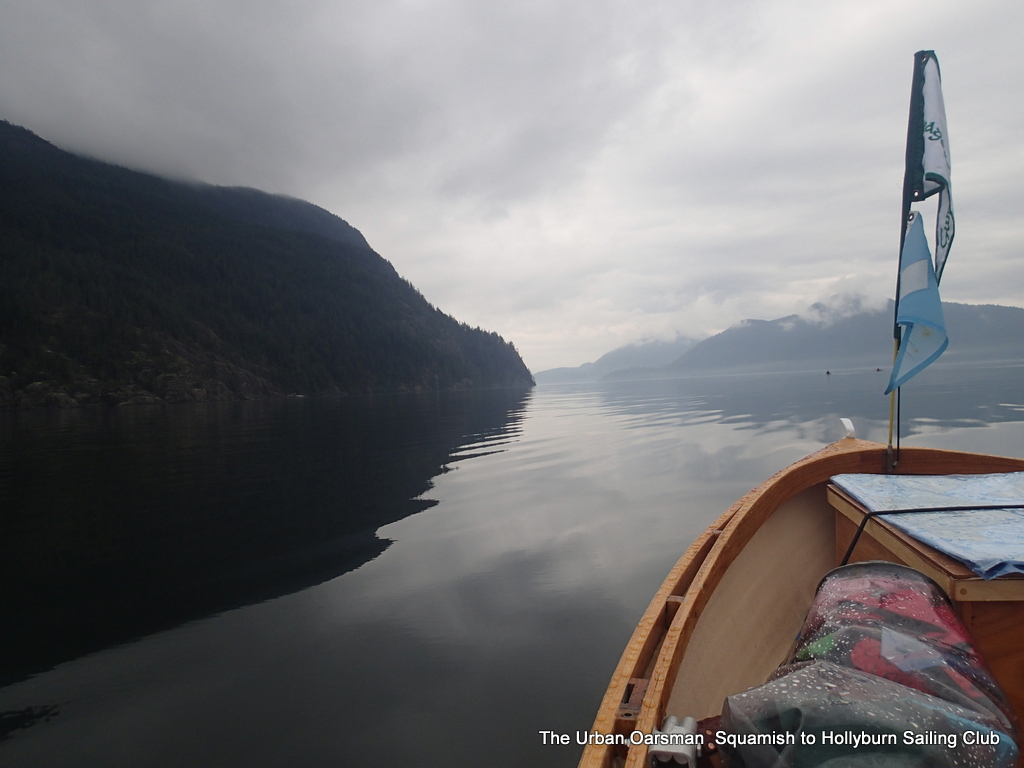
We then paddled to the west side across choppy (and windy, the wind was so strong that I could not make headway against it. I took shelter along the west shore of the sound) seas to Zorro Bay, arriving about lunch time. This proved to be a delightful bay, sheltered, pretty, with a pebble beach, and part of the Sea to Sky Marine Trail. (I arrived much later, using Gwragedd Annwn’s electric trolling motor to make headway against the strong inflow winds) After a relaxing lunch and Maciej’s tasty sausages,
Mike caught up with us after battling against the head winds. We waited a few hours for the wind to die down some before we left on the next leg to Islet View, a small campsite overlooking Anvil Island.
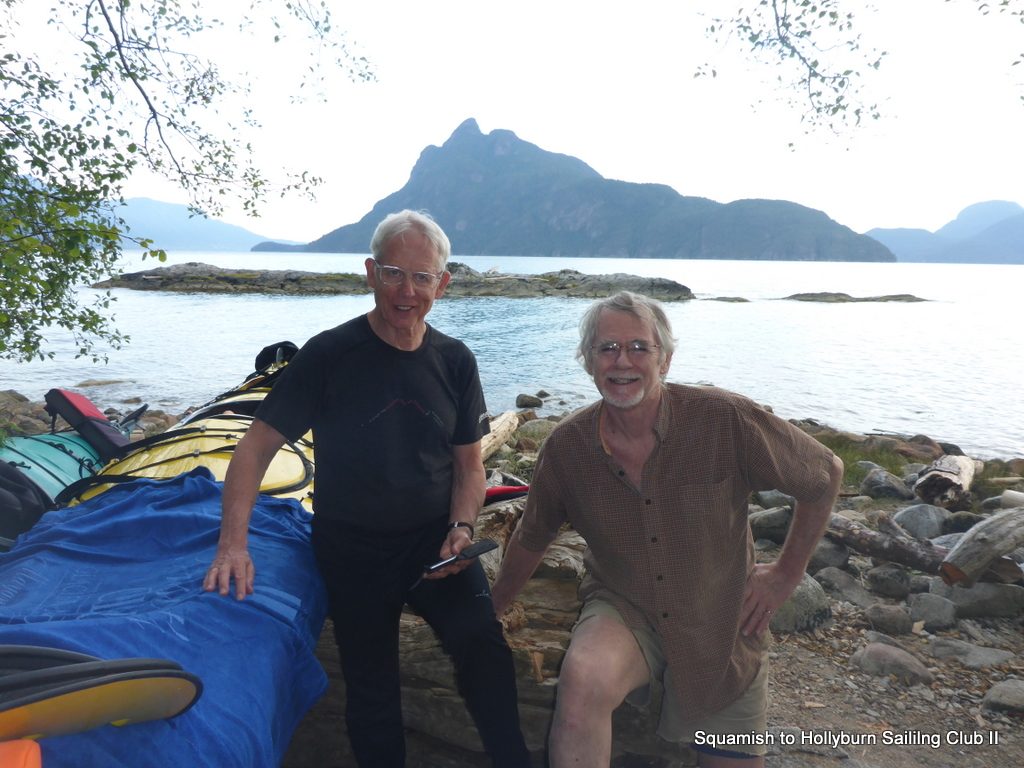
Bernd, the contra explorer, joined us while we were resting at Zorro Bay, en route North, to our delight! He left West Van early on Saturday, and rendezvoused with us, on his way to Squamish, all in one day!
Bernd stops in Zorro Bay on route to Squamish.
After a brief chat and some group photos he continued north and arrived in Squamish at 6pm. Bernd made us feel that our achievement of mastering choppy seas going South was a little more than a warm up for him traveling about 60+ km hugging the coast… all in one day!
Steve and Ken at Islet View campground with “The Islet” in the background
We had paddled about 20 km on Saturday, our shortest leg. We had a lovely pasta dinner made efficiently by Chef Maciej, and nestled into the camping spots for some well-earned sleep.
Ken hits the rocks (hay).
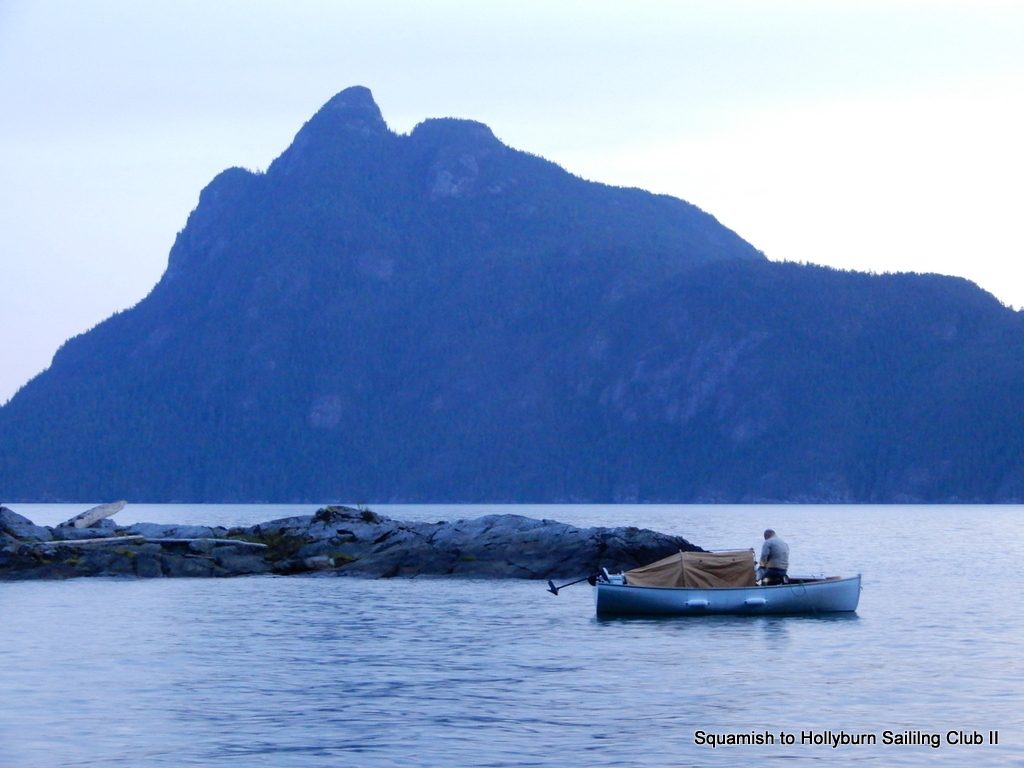
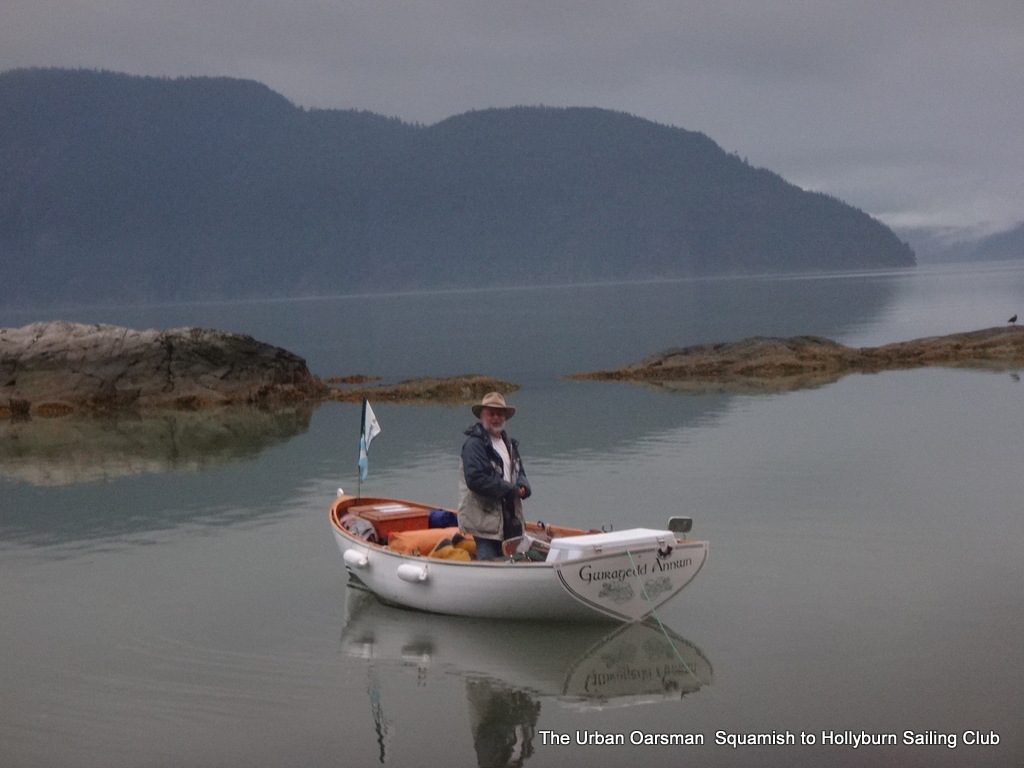
Mike, one of the ‘Ol Men in the Sea’, anchored and slept on the water.
Setting up my “Skydome” tent on Gwragedd Annwn’s deck.
The Otters or seals seemed to want to play in the night, and we occasionally woke up to splashes … or maybe some curses that the bloody anchor had dragged with the tide!
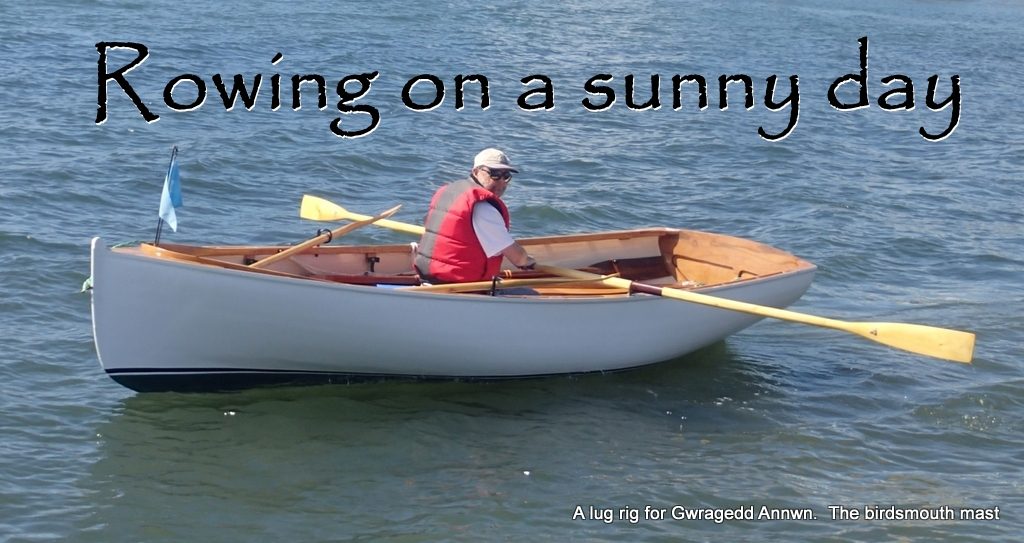
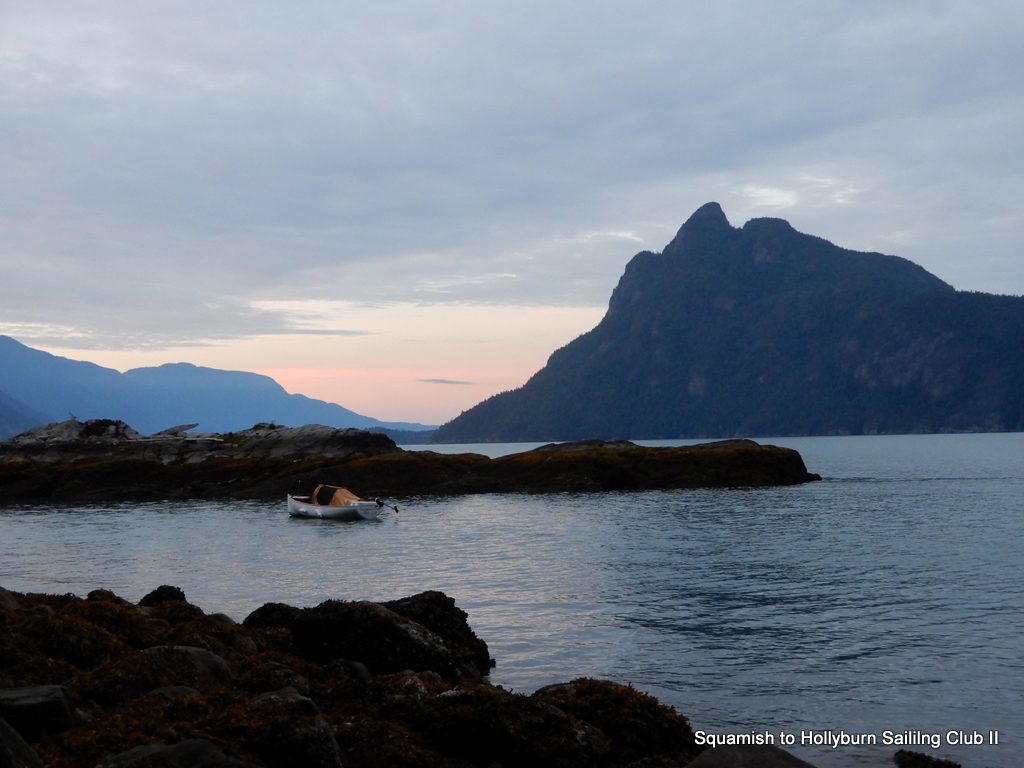
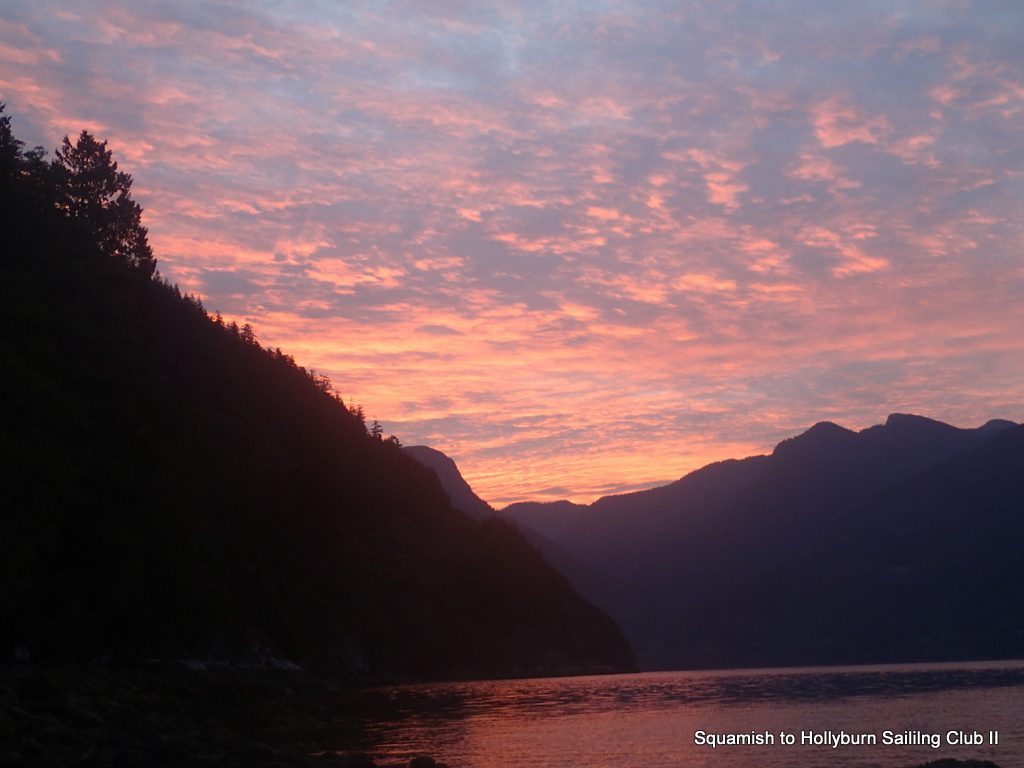
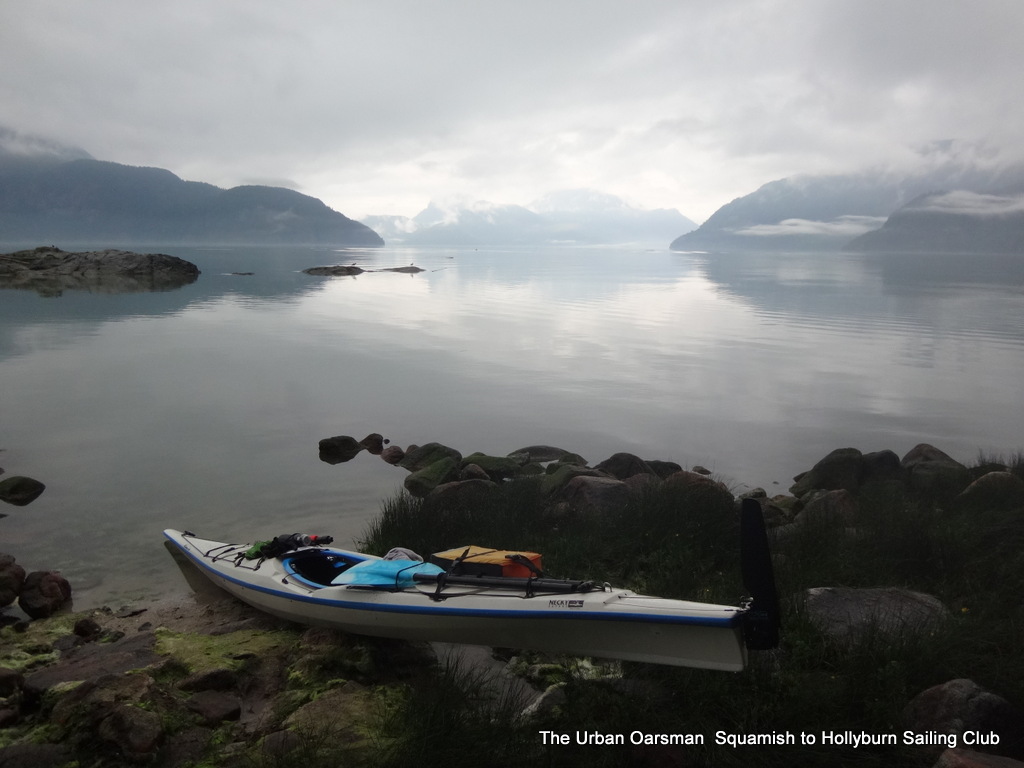
Dawn, day two.Sunday sunrise.I set out at dawn, trying to row during the calm of the morning…I forget my lifejacket on shore and have to row back for it, much to the amusement of the kayakers. They will catch up to and pass me soon…
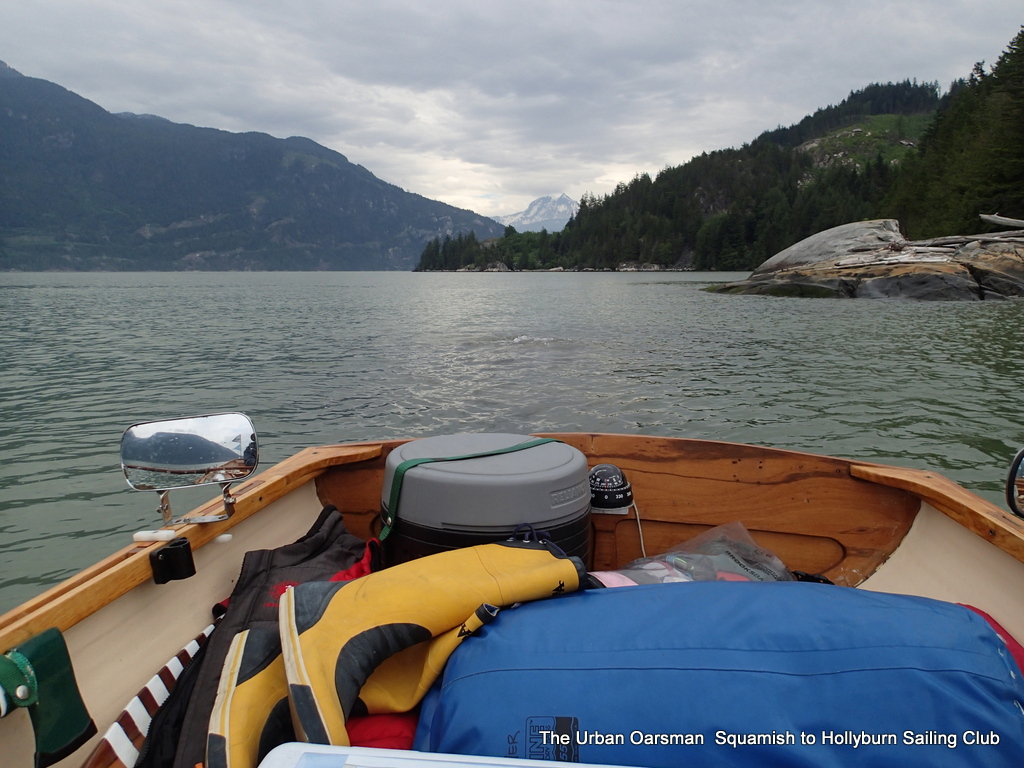
On Sunday (after Mike had rowed away) we had a hearty breakfast, complete with Maciej’s delicious camp coffee, and then set out for Sir Thomas J Lipton park on Gambier Island. Surprisingly, we had very flat seas for the first part of the day. It was like paddling on a lake.
The Kayakers catch up to me and pass me just North of Gambier, Due West of Ekins Point.
The final half of the 31 km leg was through choppy water around the Western side of Gambier. We lunched at a comfortable beach on an island at the South Western tip of Gambier, and then made our way North into the bay where a lumber carrier built in 1919 – named after Sir Thomas J. Lipton of Tea Clipper fame – rested, her remaining hull still poking out of the water to welcome us.
Historical sign at the Sir Thomas Lipton campsite.
The campsite across from the Lipton was spacious and comfortable.
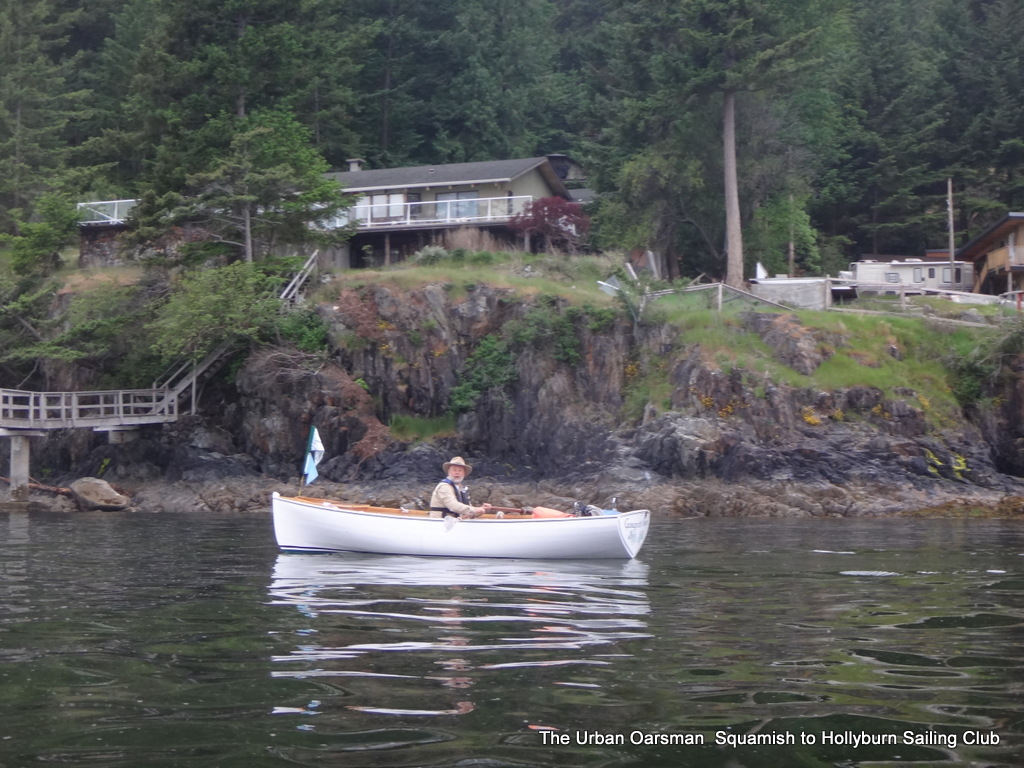
Mike rowing in.
Rueben made a lovely dinner and we finished with lively conversation and bottles of wine and spirits to complete a wonderful day with smiles.
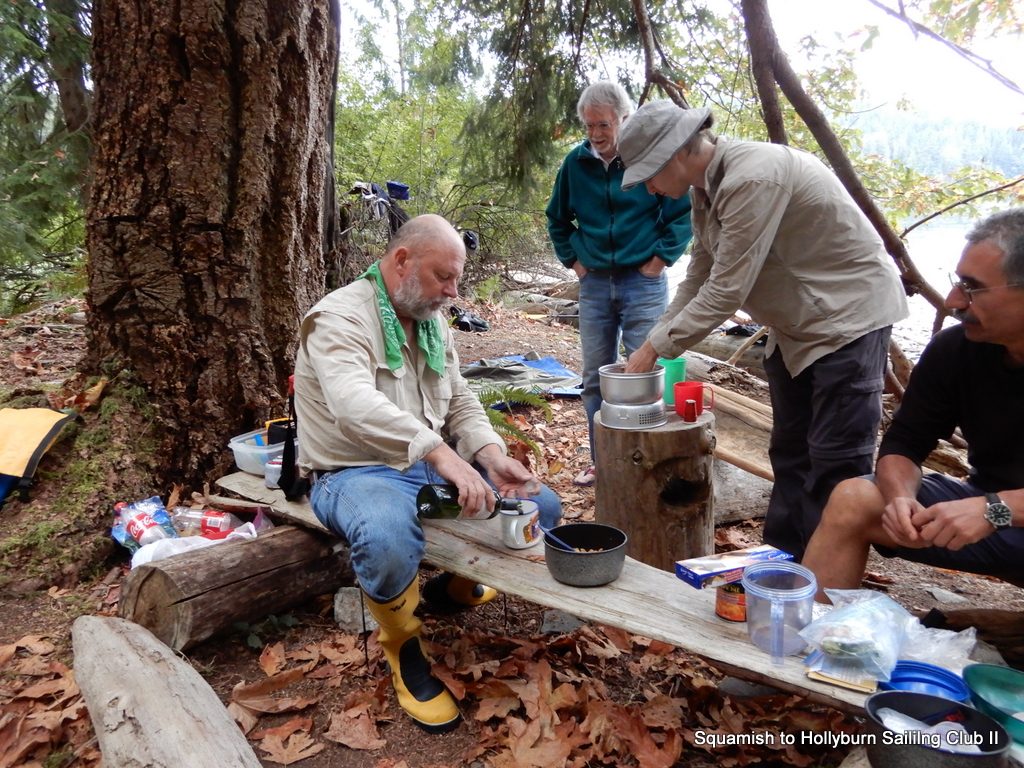
Sir Thomas Lipton campsite supper. Note that Rueben is using a TRANGIA stove, probably the best camping stove ever made. The one I use is over 40 years old and going strong!Going to pack it in for the night. I will anchor Gwragedd Annwn and then pitch the “Skydome” tent.
Monday Sept 3rd was Labour day… and labour we did. Another 31 km was recorded. Maciej left early to get home in time for a pre-planned family event.
Maciej packing up early to make a family event.
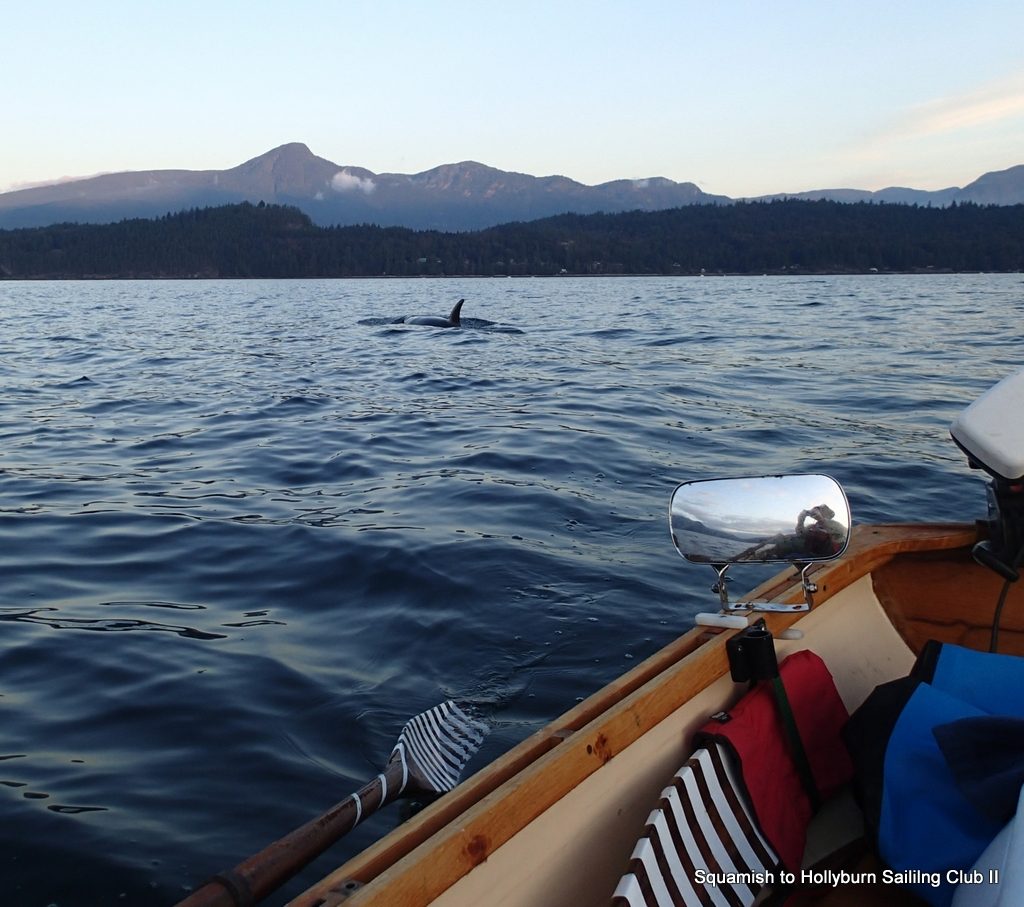
Mike left early to begin his long row home. Both encountered kinda gales at 7 AM – along with an Orca pod sighting leaving Gambier.
A pod of Orcas swam under Gwragedd Annwn. New Brighton Beach is in the background.
The rest of us had a more relaxing start at 8 AM and by then the wind had subsided and paddling was easy.
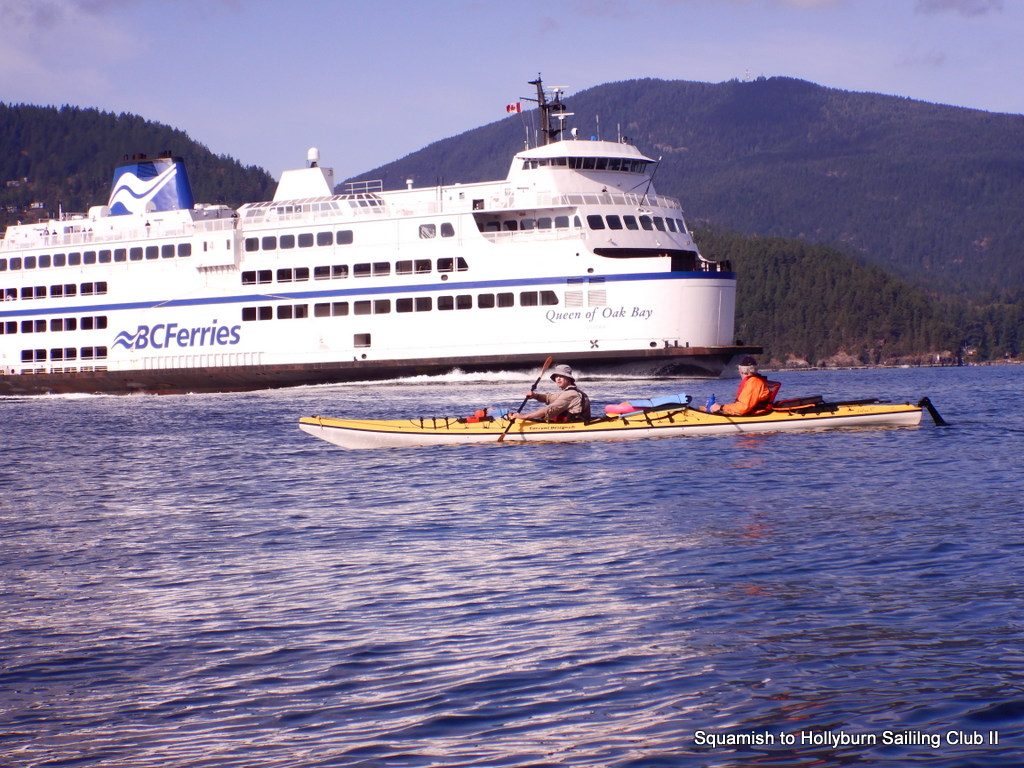
Avoiding BC Ferry
We managed to avoid the Ferries and then stopped off at Whytecliff Park for a light lunch.
Whytecliff park lunchGetting passed by kayakers again!
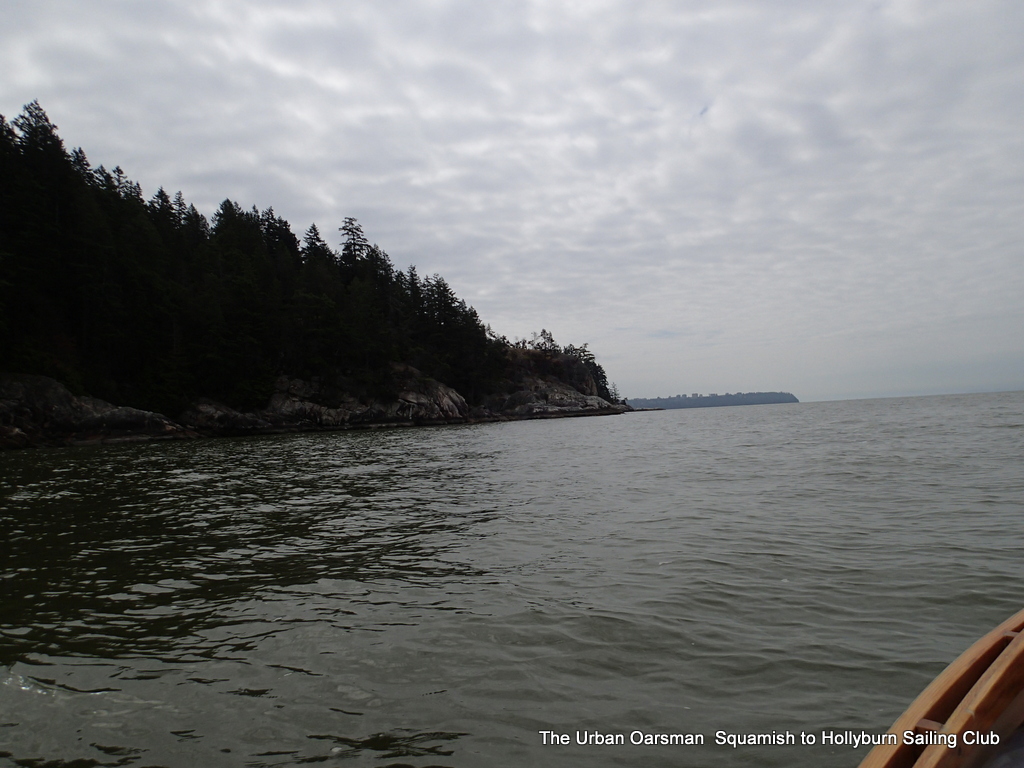
The kayakers caught up with Mike near Lighthouse Park
Kayaks, a “passing” fad.
and shared stories of Mike greeting Orcas earlier swimming a few feet from his boat. Seas then became a little rougher and large 4 foot rolling waves provided some excitement with tired muscles trying to stay above water on the home stretch.
Rough seas near Lighthouse Park (Point Atkinson light)
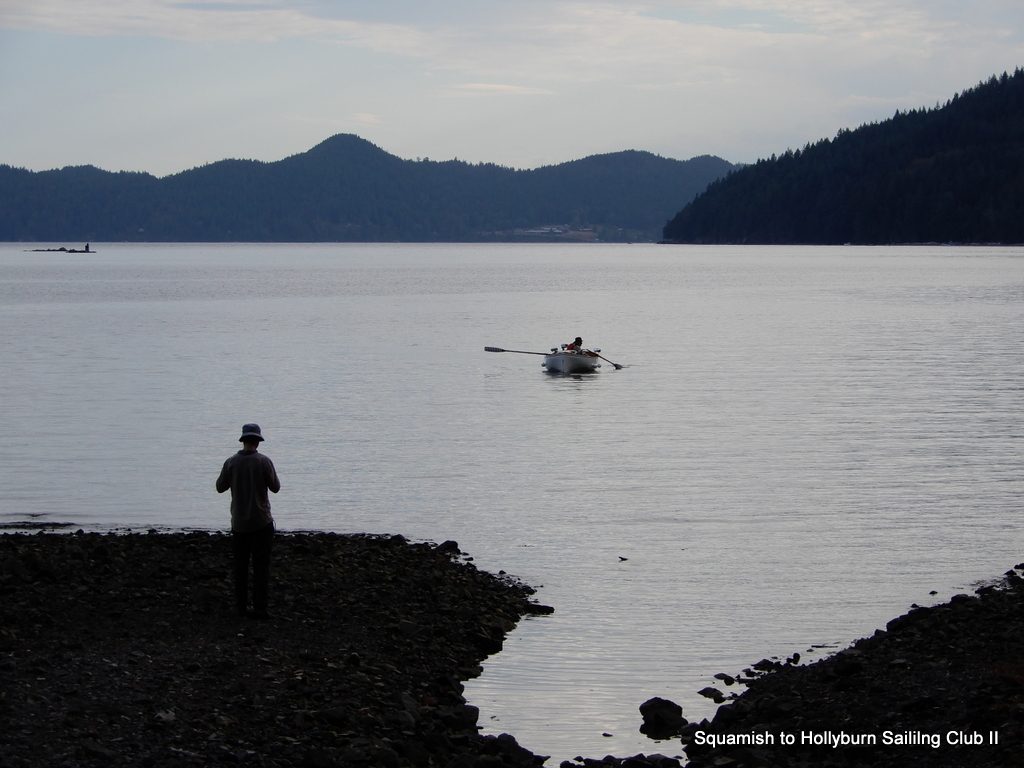
Kayakers arrived by 2 in the afternoon and Mike amazingly was not far behind.
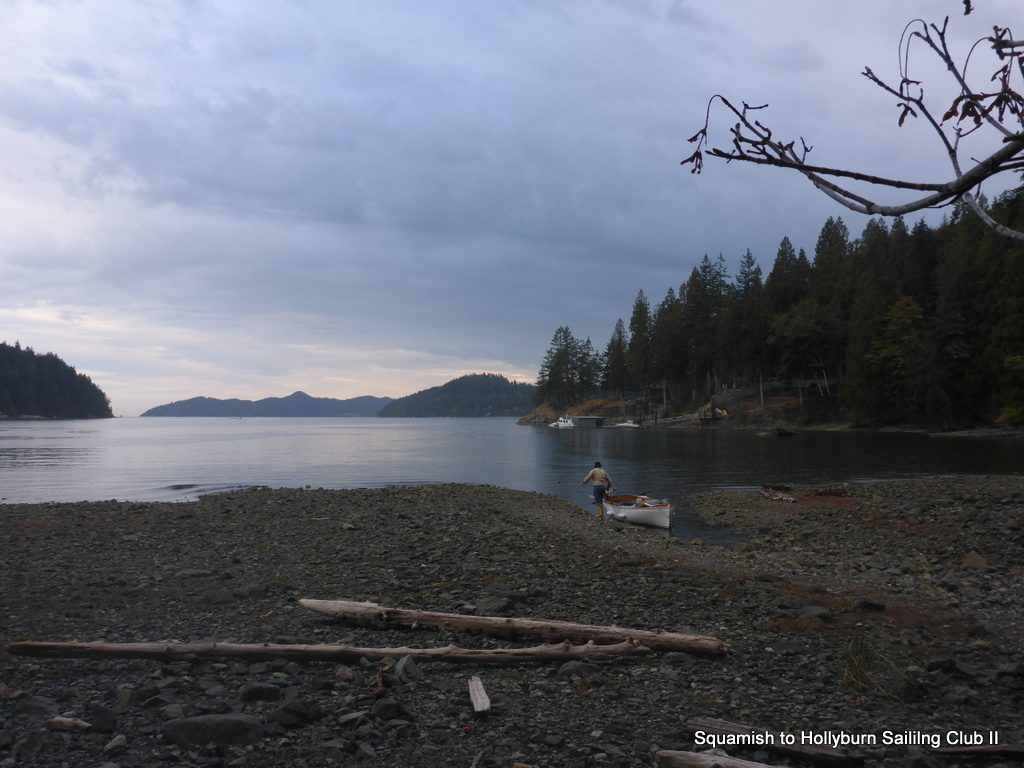
Gwragedd Annwn lands at the public boat launch, it is a little more sheltered than the HSC Dock.
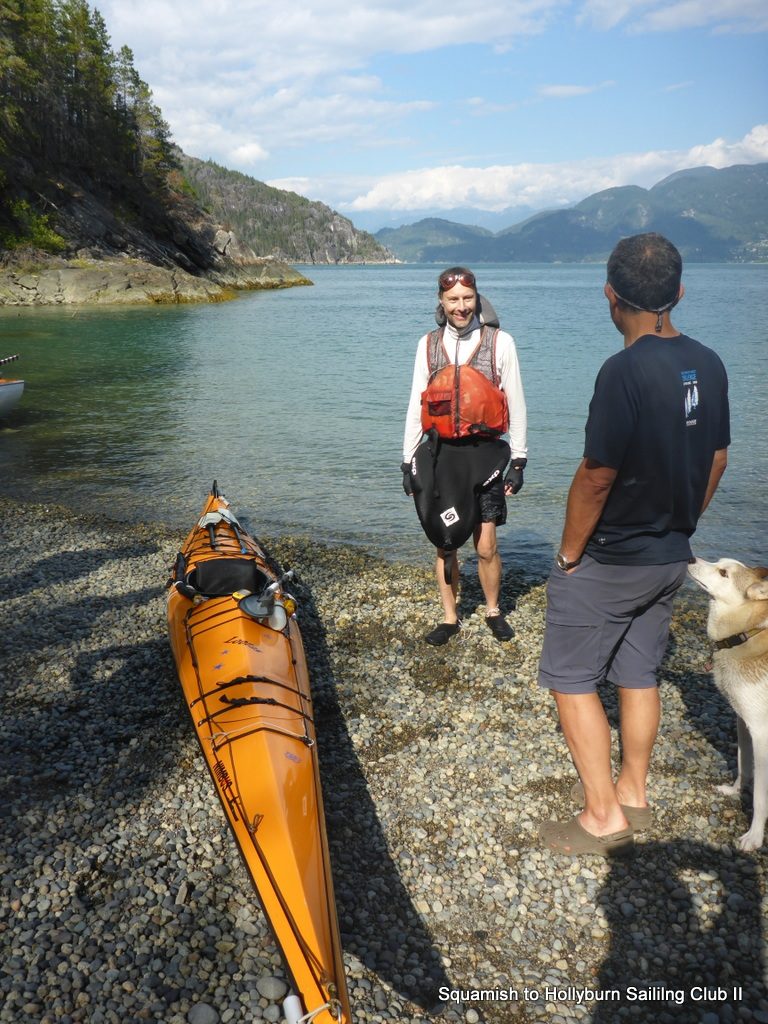
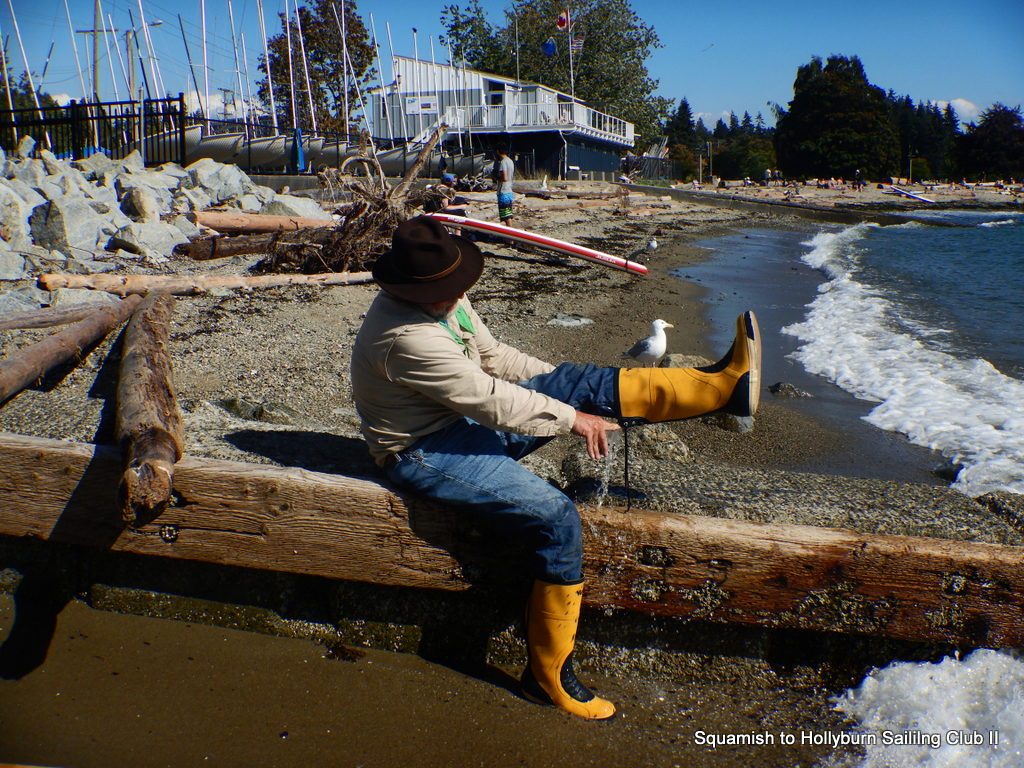
We all had smiles on our faces (and water in our boots)
Wet landing. Emptying the water out of my boots.
that we had indeed succeeded and could then stop the bloody paddling in favor of relaxing to heal our aching arms and blisters on our hands! What a trip! Along the way we saw some great views… beautiful scenery, historic spots, seals, orcas, and lots of other sea life. A big highlight was getting to know each other much better, and to sharing some very magical time.
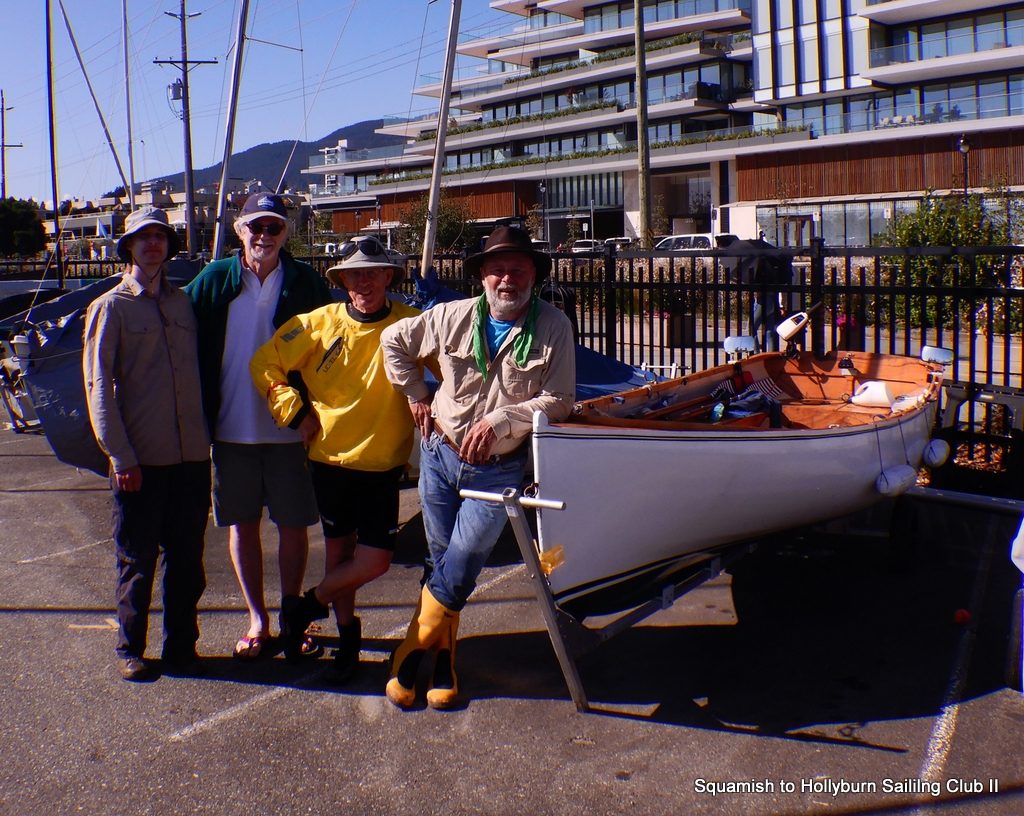
On the hard at the Sailing Club.
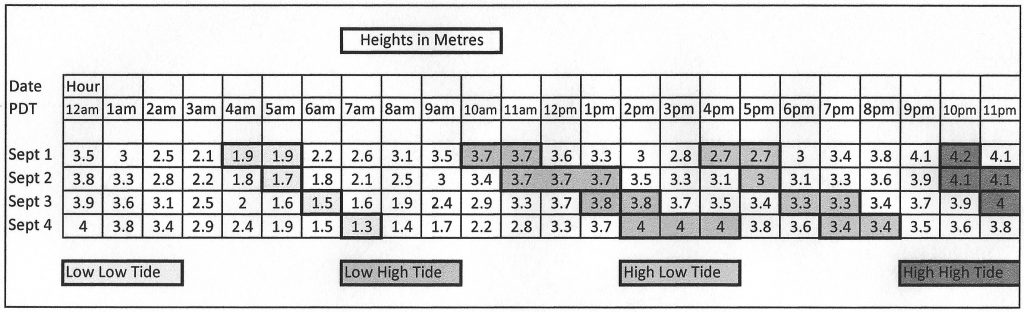
Tide Tables for the Squamish to HSC row:
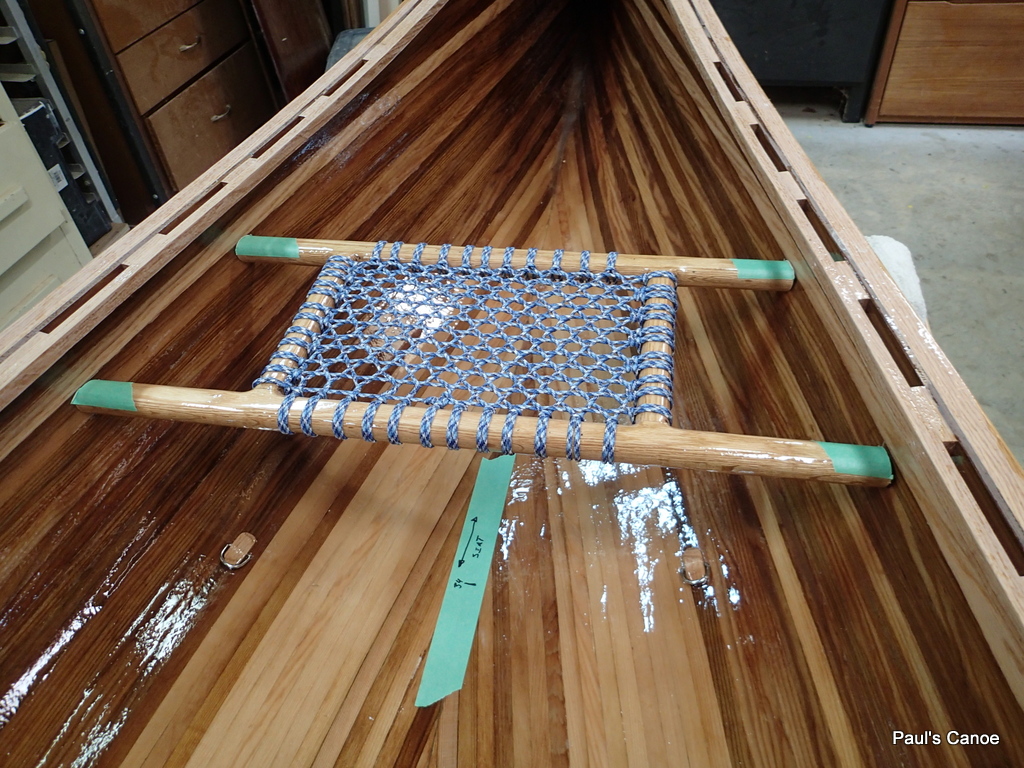
With the tide table, I can figure out the rise or fall of the tide when Gwragedd Annwn is anchored. I can then anchor her in enough water so she will not ground when I sleep. for example, if I go to sleep at 9pm on Sept 1st and sleep for nine hours, the change in depth is a drop of (max) 2.3 meters or about 7’6″. If I anchor in 3 metres or 10′ I will still have almost 2½’ or 70cm of water beneath Gwragedd Annwn’s hull.
A few notes on the wrecks in West Bay, Gambier Island.
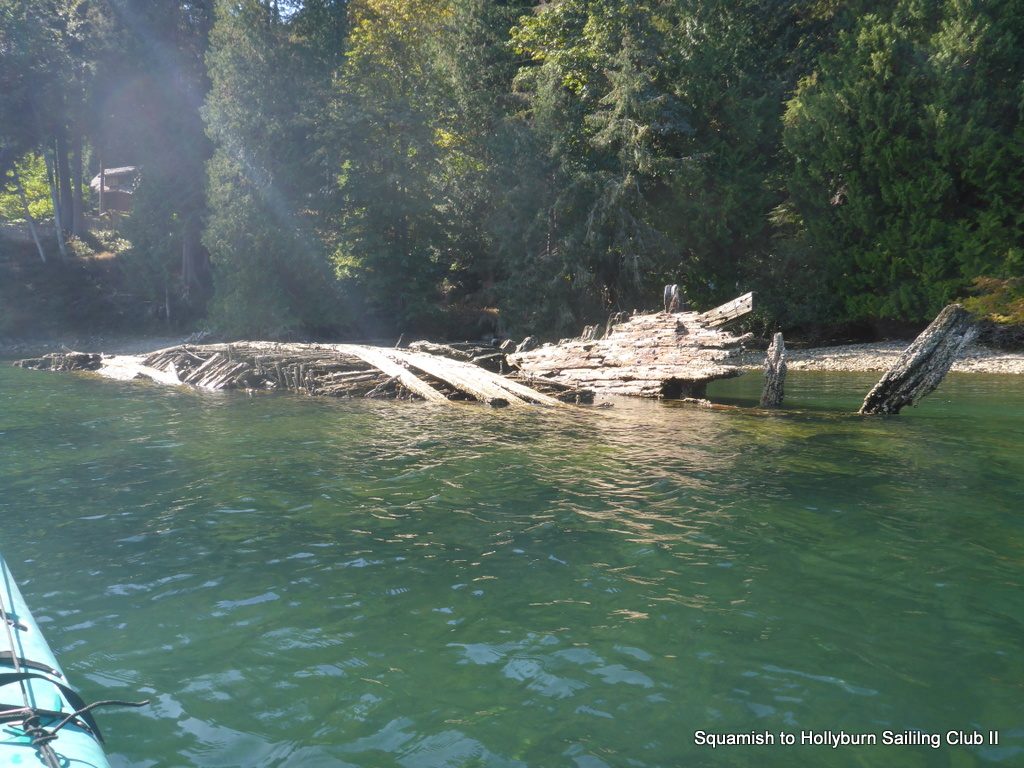
In West Bay is the wreck of the Sir Thomas J Lipton of Tea Clipper fame. The name plate was gone, but there was no mistaking the rotting remnants of this piece of nautical history. If you are interested, look at the very end of West Bay.
Remains of the Sir Thomas J, Lipton
The Sir Thomas J. Lipton was built at Brunswick, Georgia in 1919 as a lumber carrier in anticipation of a post World War I building boon in Europe which failed to materialize. She was 209 feet in length with a breadth of 42 feet and was schooner rigged with four masts. She had a yard for a large Square sail on the foremast.
By 1924 the lumber trade had vanished and she was laid up at Astoria, Oregon where she remained until 1940 when she was acquired by Island Tug and Barge Co. of Victoria. She was then converted to carry hog fuel which was used to heat the boilers in pulp mills. Most of her deck planking was removed and bulkheads at least ten feet high were built all around the opening.
In 1941 or 1942 she was beached in West Bay (Gambier Island) to keep the log booms from going aground on the shallow beach where her remains now lie. Her wreckage can be observed at low tide, with her port side uppermost and her bow pointing North. The words “Island Tug”, which had been painted on the above mentioned bulkheads, could be seen from far out in Howe Sound. (not visible when we camped there)
Another source lists the Sir Thomas J, Lipton, 1358 tons,schooner, 1918, 217405, LPHM. Apex Navigation.
Sir Thomas J. Lipton (schooner)
The 1,588 ton four-masted schooner Sir Thomas J. Lipton built at Brunswick, Georgia in 1919 and transferred to Honolulu in 1921 for the Northwest Lumber trade, was acquired by the Island Tug & Barge Co. of Victoria and transferred to Canadian registry as a barge. The vessel had been laid up at Astoria since 1924. Gordon Newell, Maritime Events of 1940, H.W. McCurdy Marine History of the Pacific Northwest.
Citation: Tacoma Public Library
The big steam tug Lorne, built in 1889, may be located in West Bay, Gambier Island.
There are two historic period sites, both located in West Bay, Gambier Island, containing five heritage wrecks, Site Di Ru-066 is the wreck of the Thomas J.Lipton, a four-masted lumber schooner of about 201ft. (64 m) length, 1205 net tons, built in 1919 in Georgia, Alabama, and converted for use on this coast as a wood chip barge (Stone 2007). The wooden hull was driven ashore and abandoned sometime after 1940, and remains a conspicuous, partially submerged, structure lying along the shore in West Bay. Site Di Ru-069 consists of four unidentified wooden wrecks some of which are exposed at low tide, down to 7 mbsl to the shallowest wreck component. The wrecks are described as two scows, a vessel (62m by 15m) one mistakenly thought to be the Lorne, but now thought to be a deep-sea barge, and a smaller vessel (Stone 2007).
Additional photos courtesy of Steve Britten, Ken Parr, Rueben Schultz and Maciej Sobczyk
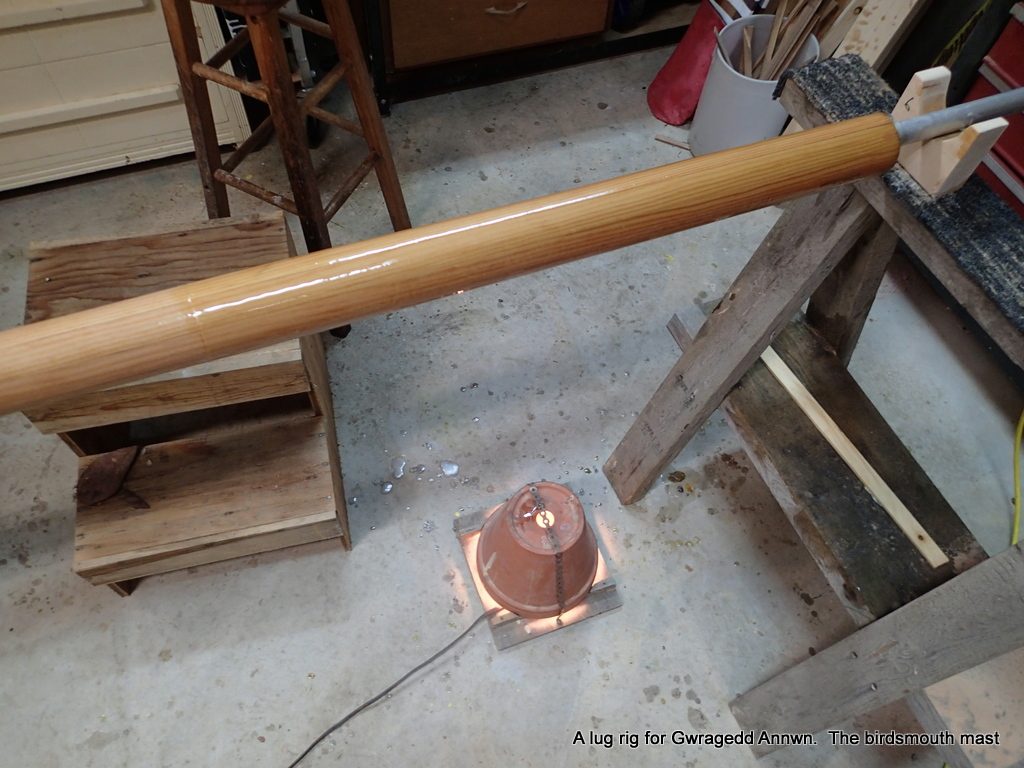
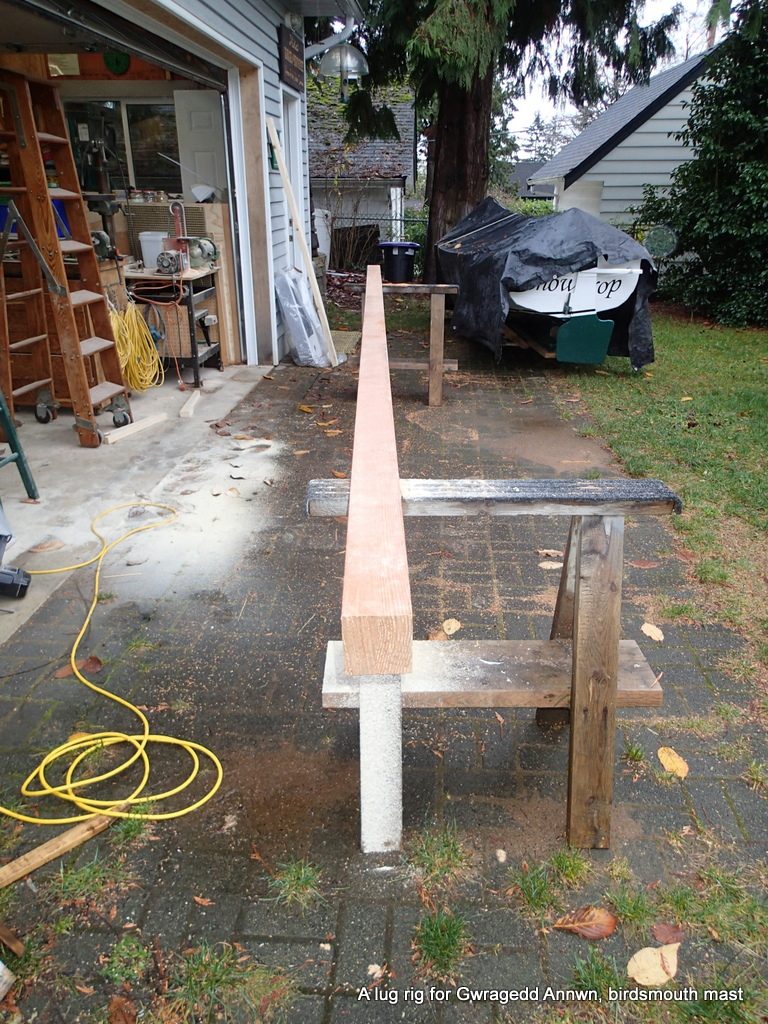
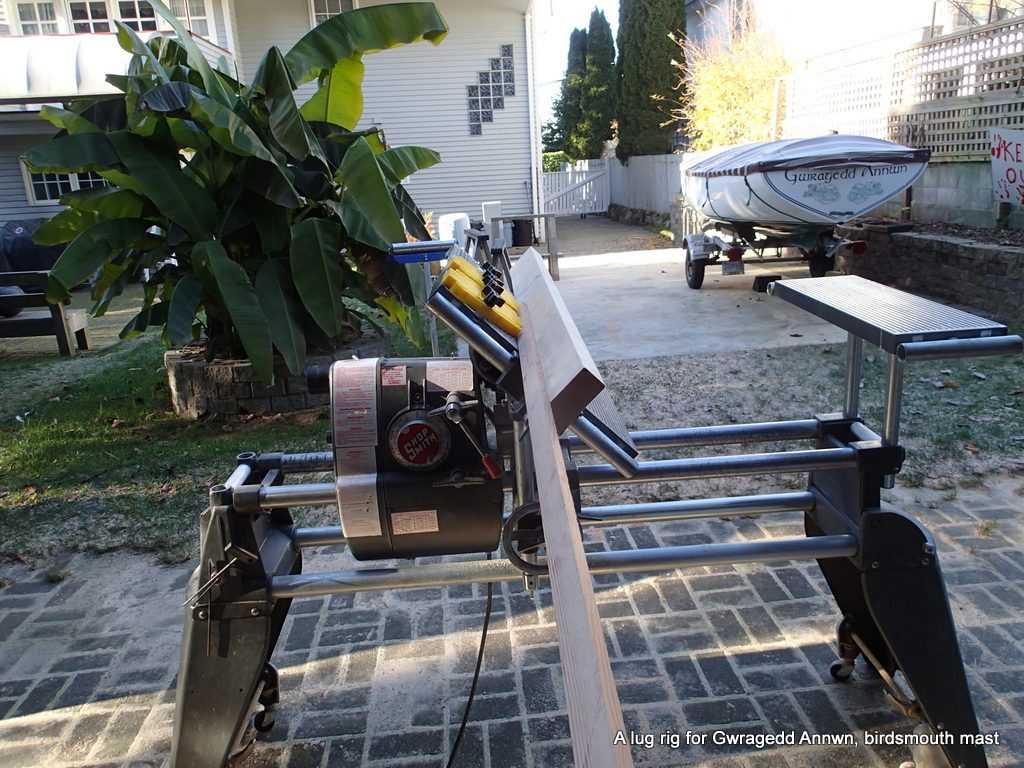
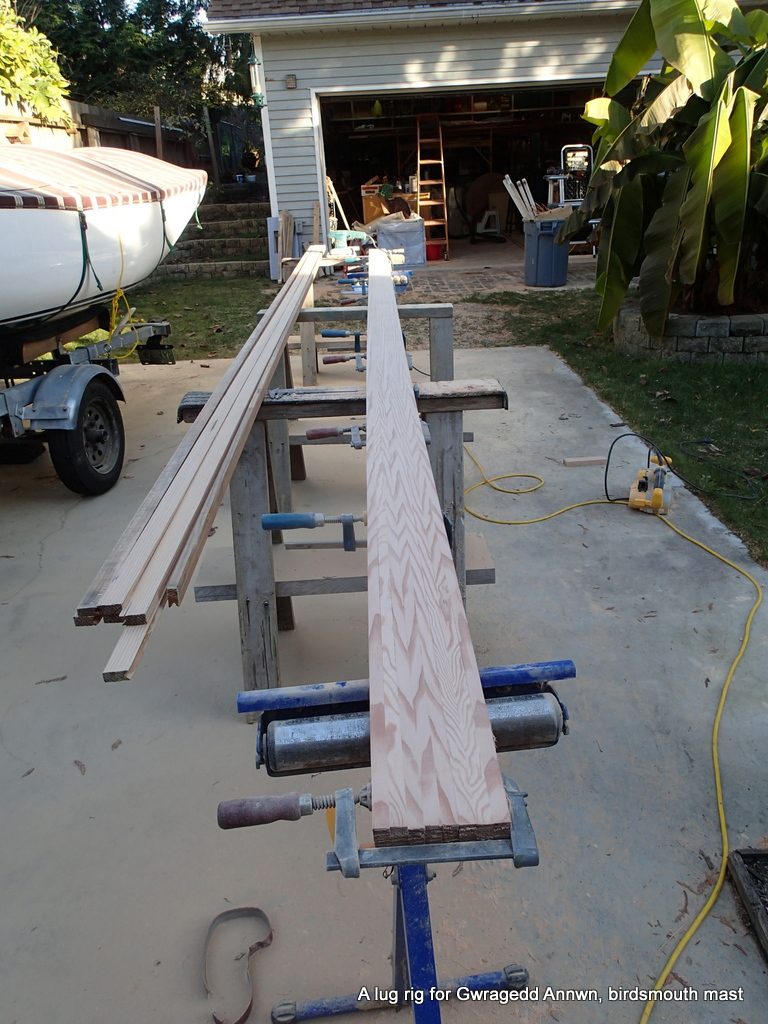
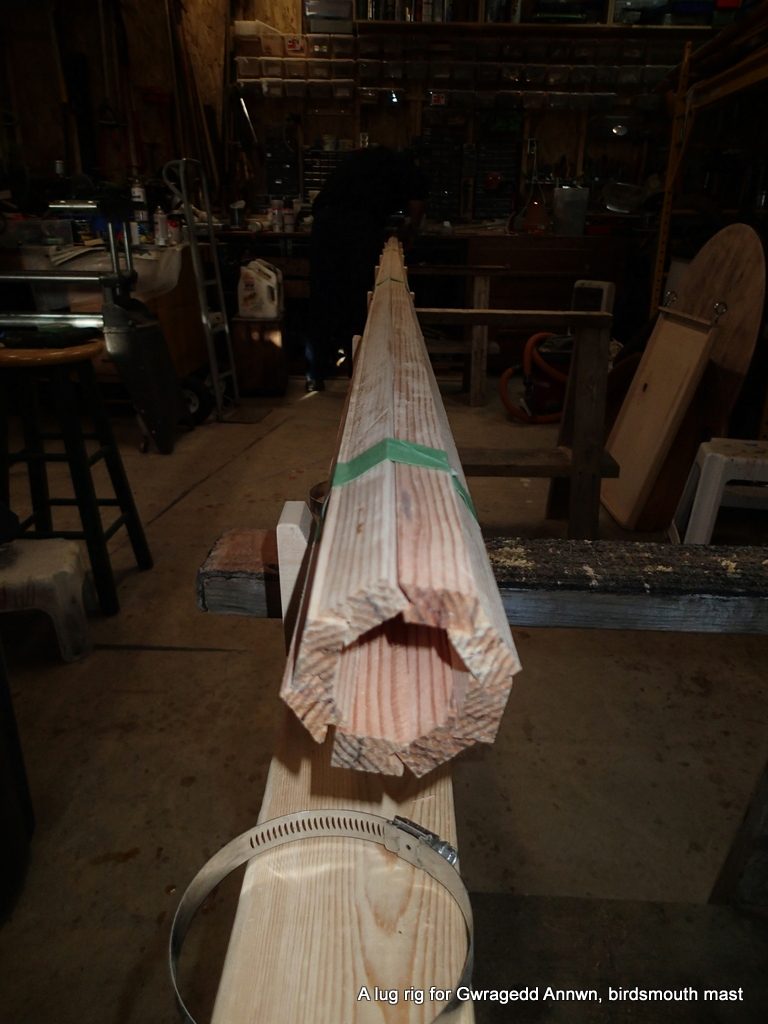
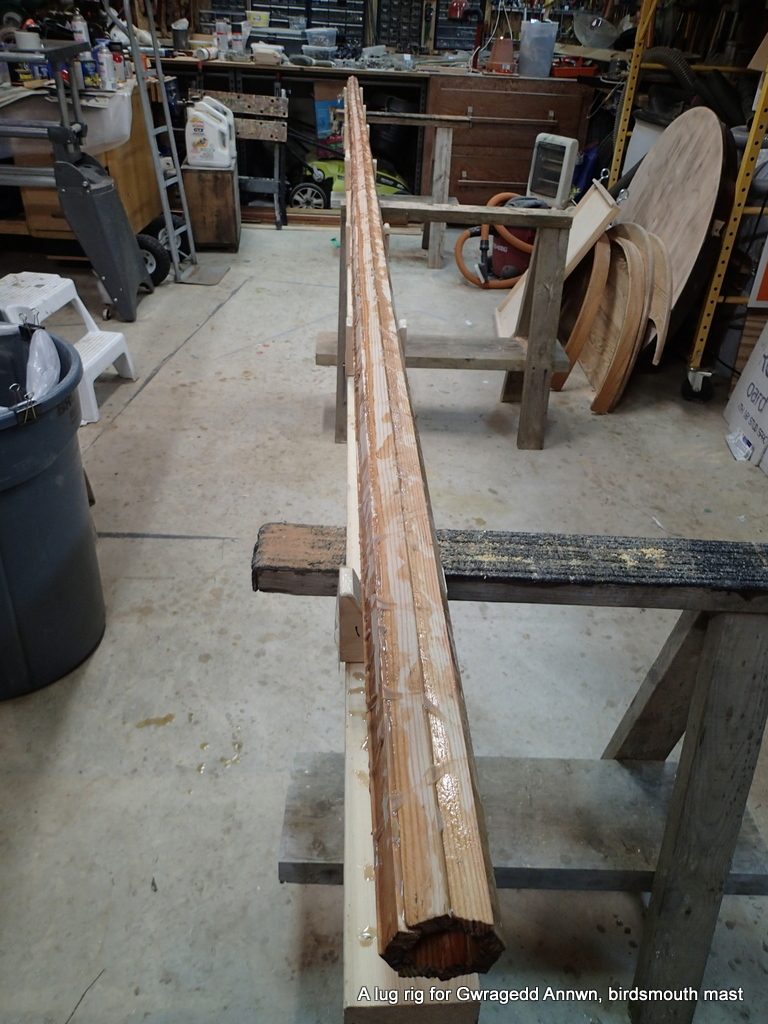
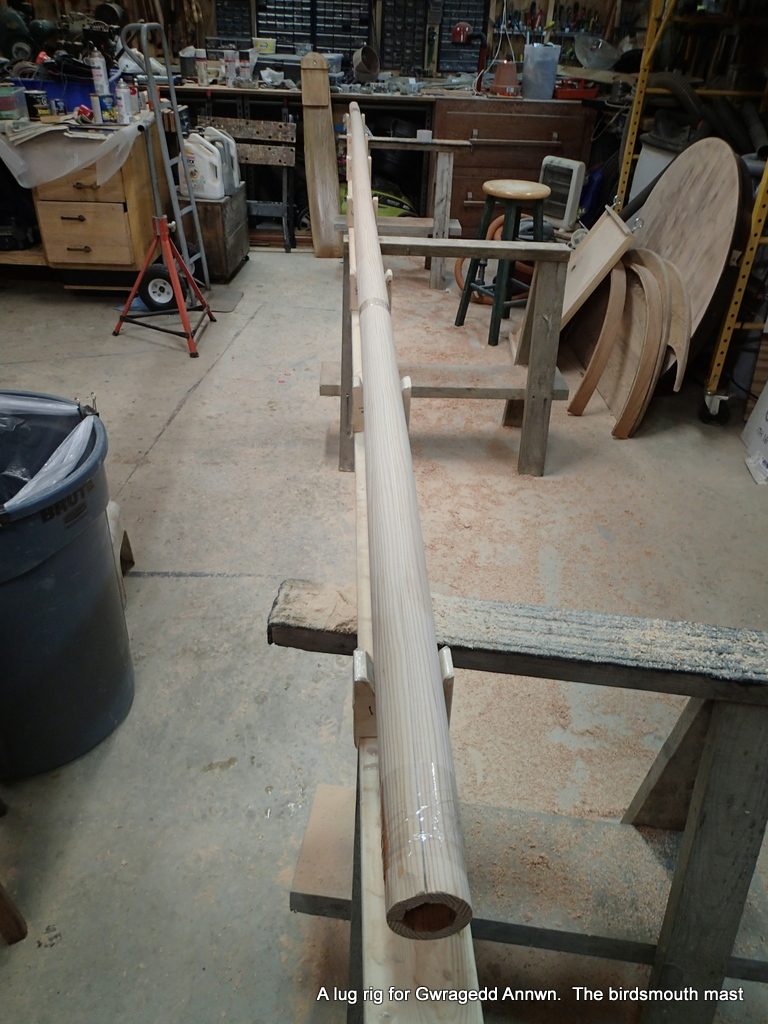
Now that I have done my test sails and found that Gwragedd Annwn is a good sailer, I am going to make a new mast for her…a birdsmouth hollow mast. The old mast is about 2′ too short, the new mast will be over 16’4″ long.
There are a lot of formulas for determining the size of your strips. My mast will be 2½” at the base tapering to about 2″ at the top. I used the one on the Duckworks site. My strips will be a little bigger than ½” by 1⅛”. I will try to get the most out of my Douglas Fir beam. Depending on the test sailing results, I may make a boom for the rig.
The first step is to rip up the strips for the birdsmouth mast.
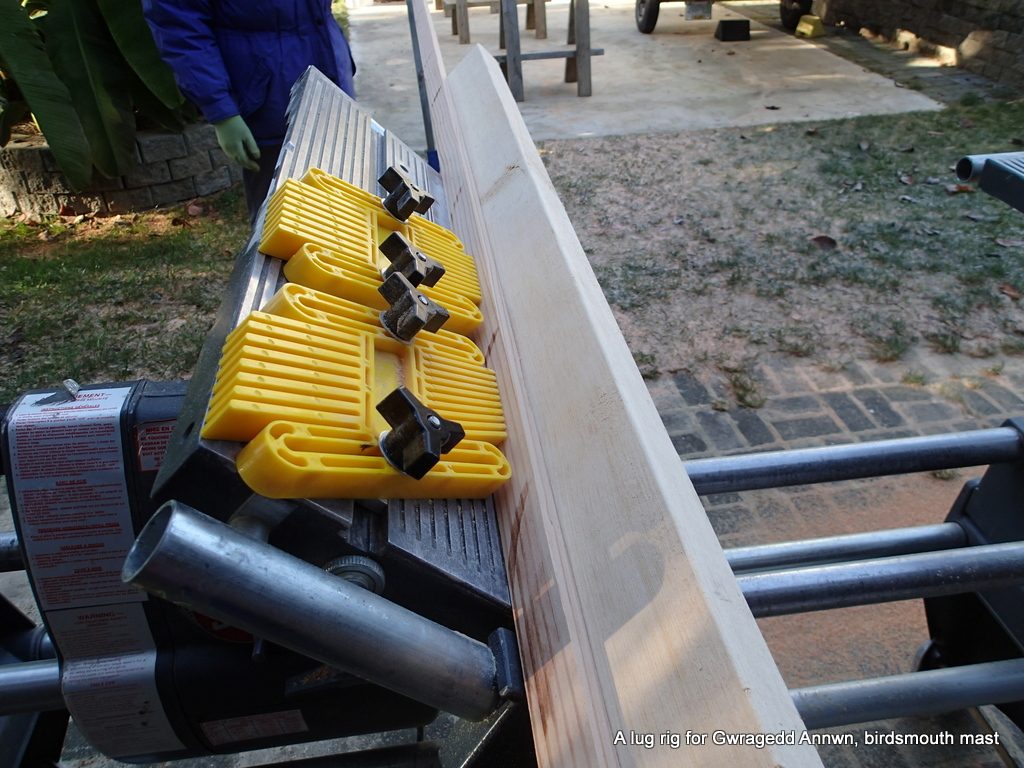
The first step is to rip up my 3½” by 3½” by 16’4″ clear Douglas Fir beam.
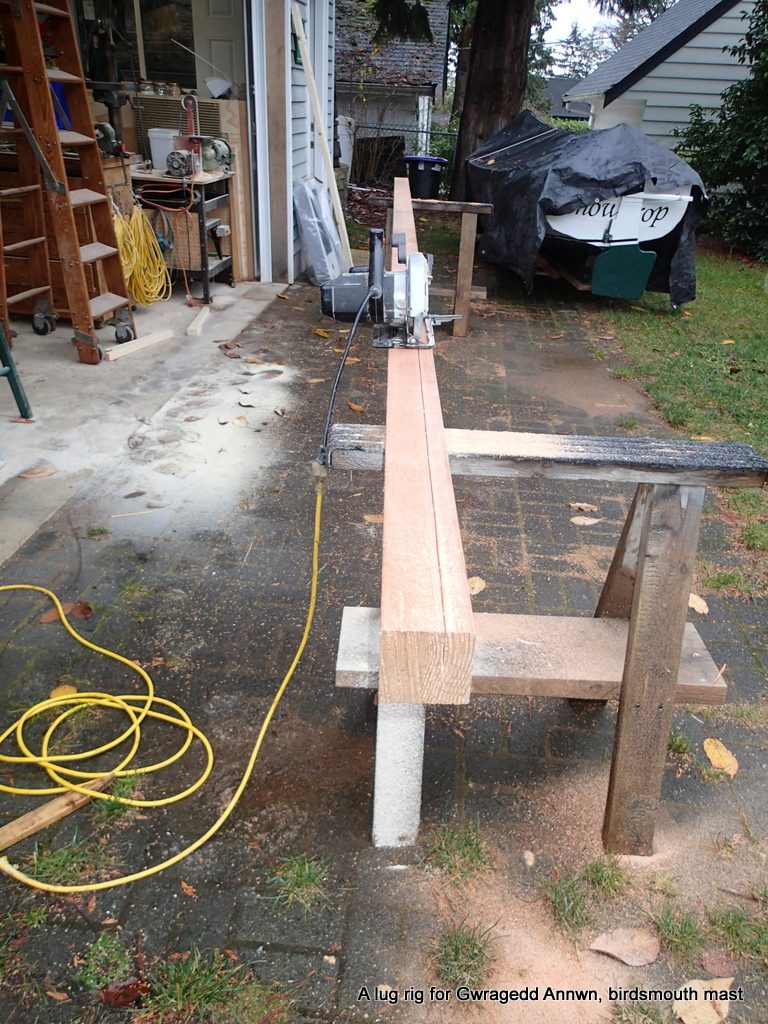
I will first rip it into 3 planks. I want to get 6 strips out of each plank, for a total of 18 strips. I need 8 for the mast and 8 for the boom, if I find that Gwragedd Annwn needs a boom to sail well downwind.
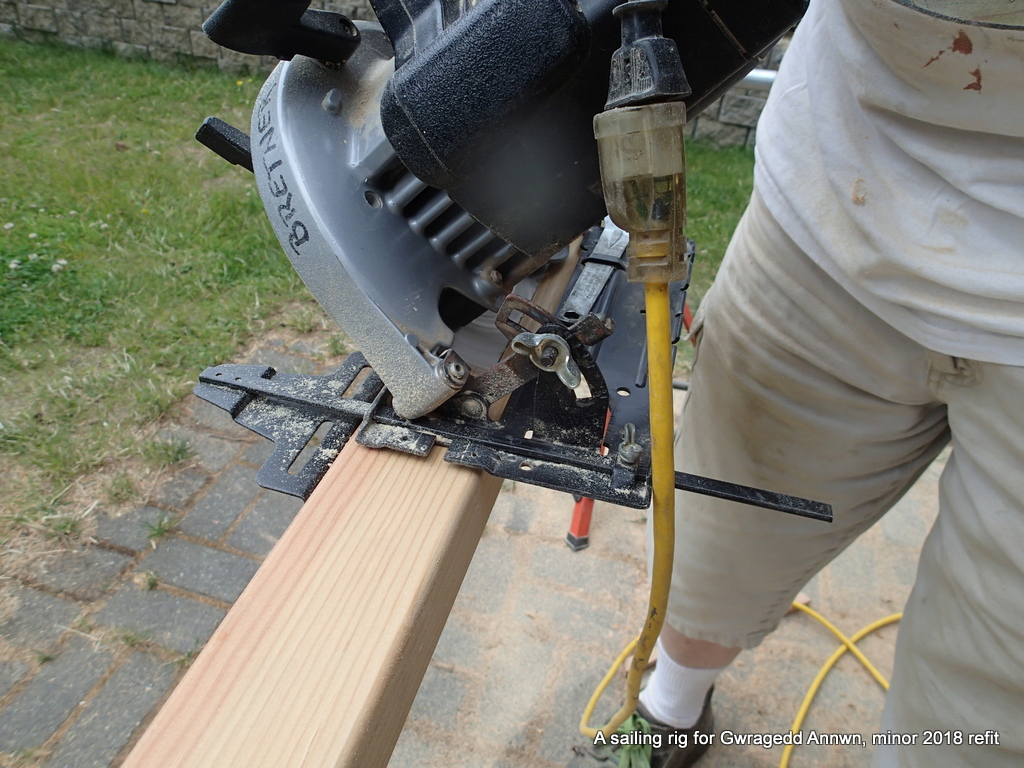
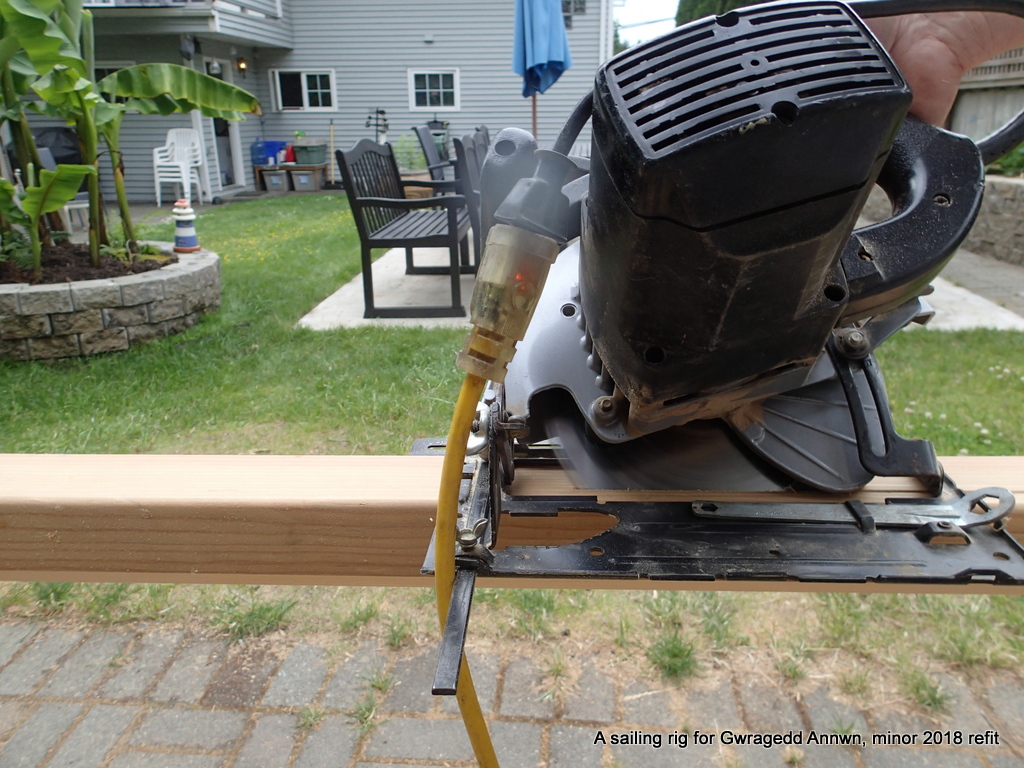
I set my circular saw cutting guide to cut the beam into three equal pieces.
My 10″ Shopsmith table saw will not cut through the beam in one pass and trying to line-up in and out feed tables does not work…I decide to use my circular saw and the edge guide. I spend a lot of time setting up the saw and the guide…the saw adjustments are not very precise, but, I do my best.
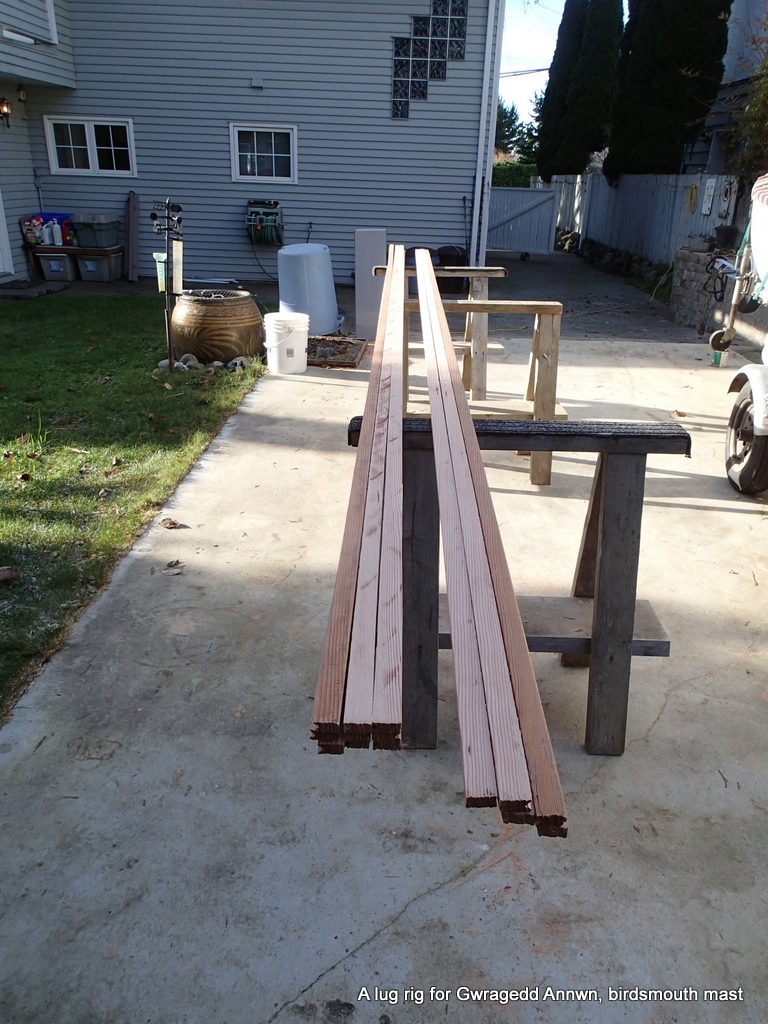
The routine was to make a cut, turn around and make another cut on the opposite side, then roll the beam over and make the two cuts on the (now) bottom side.
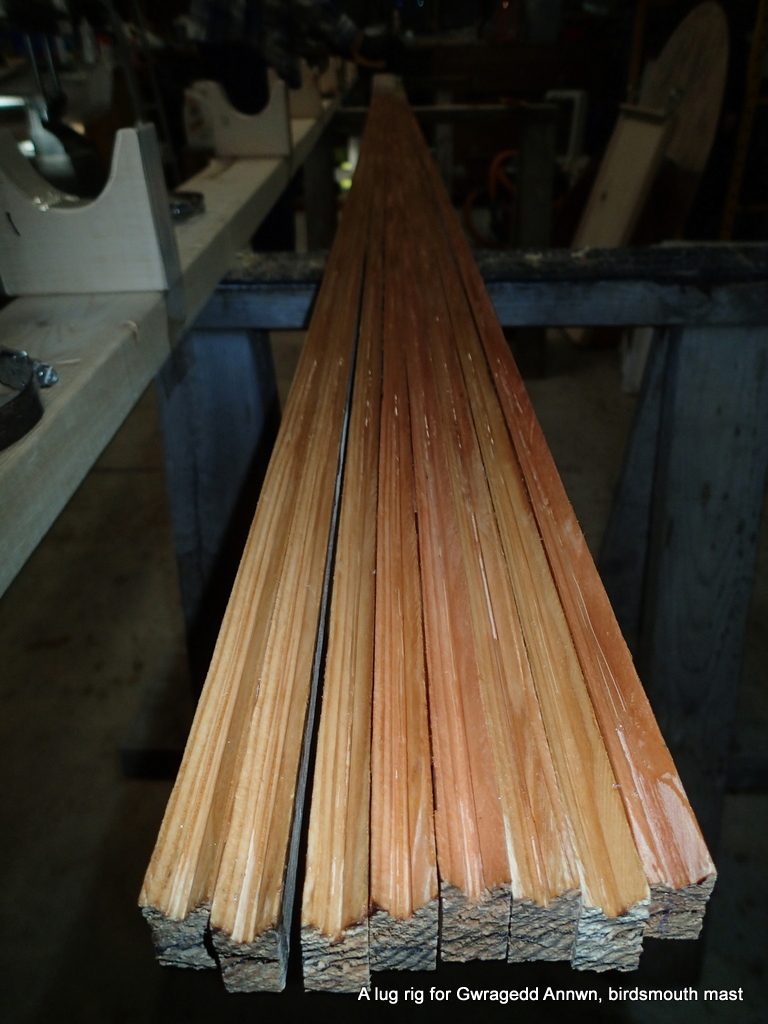
Despite trying my best to set up the saw correctly, the cuts do not quiet line up….I split off the three boards, just over 1⅛” thick.The next step is to rip the boards into 9/16″ strips.
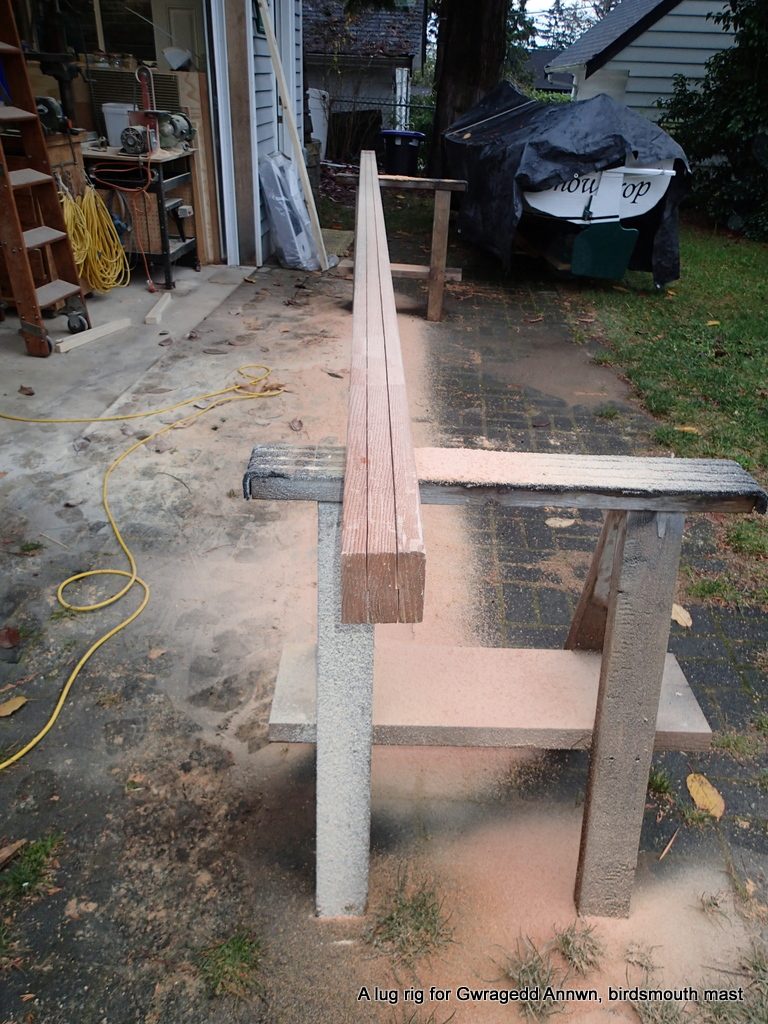
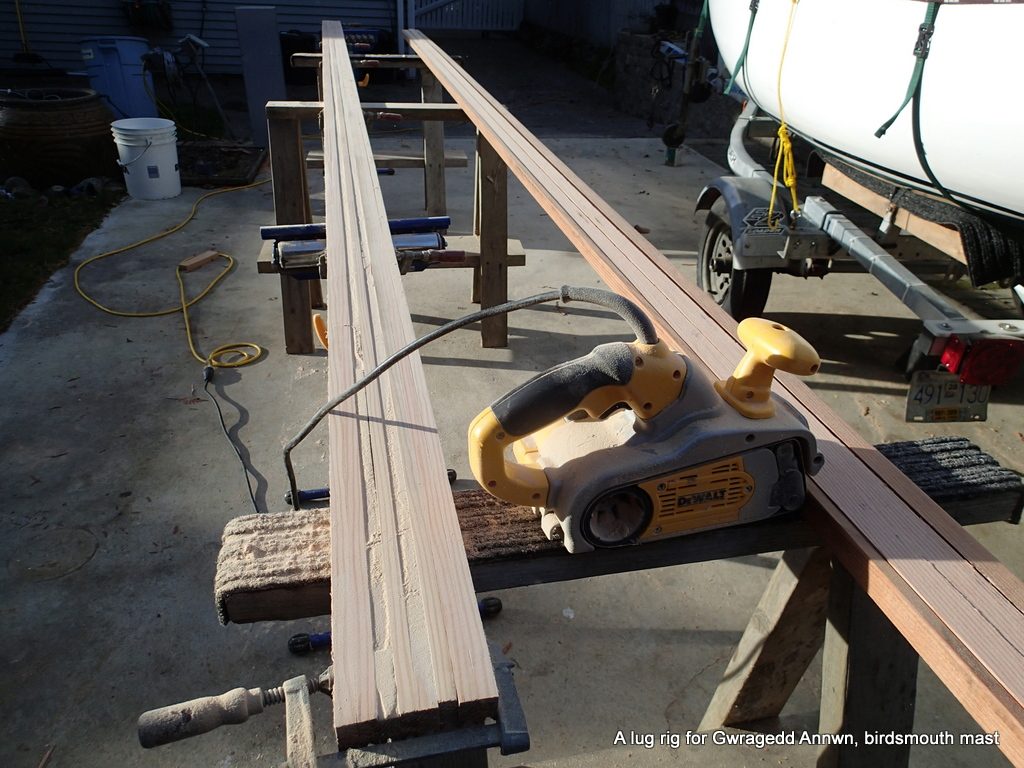
My son, Paul (of Paul’s Canoe) helps me rip the strips. I set up the Shopsmith to rip the boards into equally sized strips.
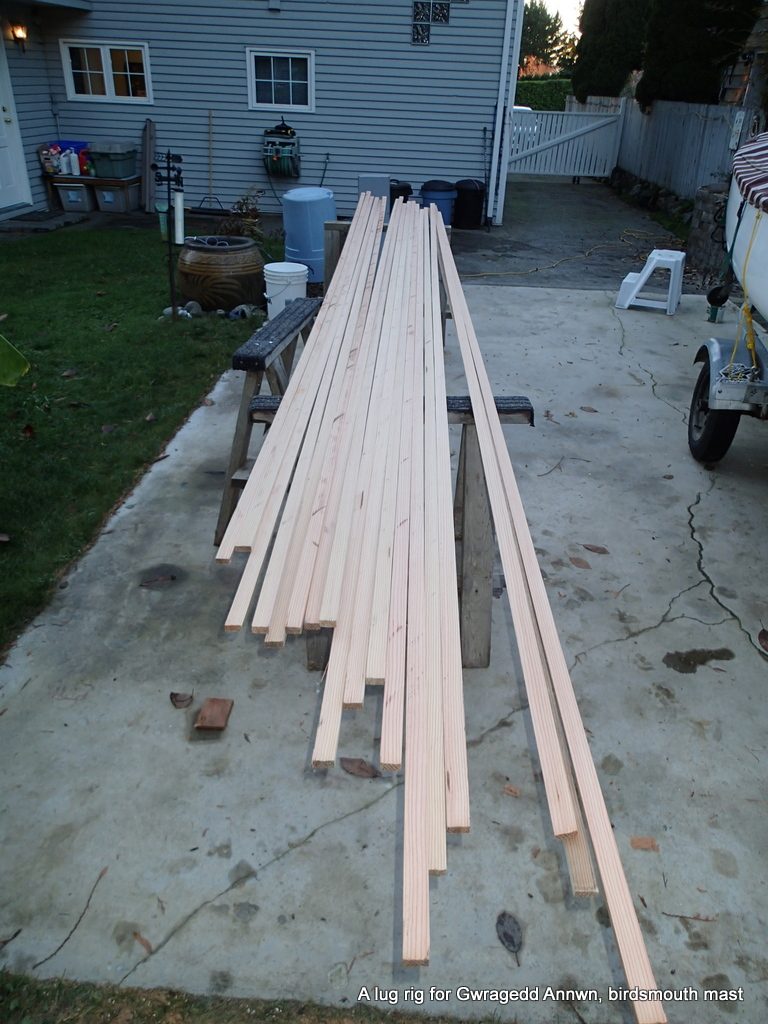
Paul in-feeds the planks and I out-feed the strips. I end up with 15 equally sized strips and 3 that are narrower…a slight mis-measurement.Fifteen good strips and three narrower ones.
Fortunately, I only need 8 strips for the birdsmouth mast.
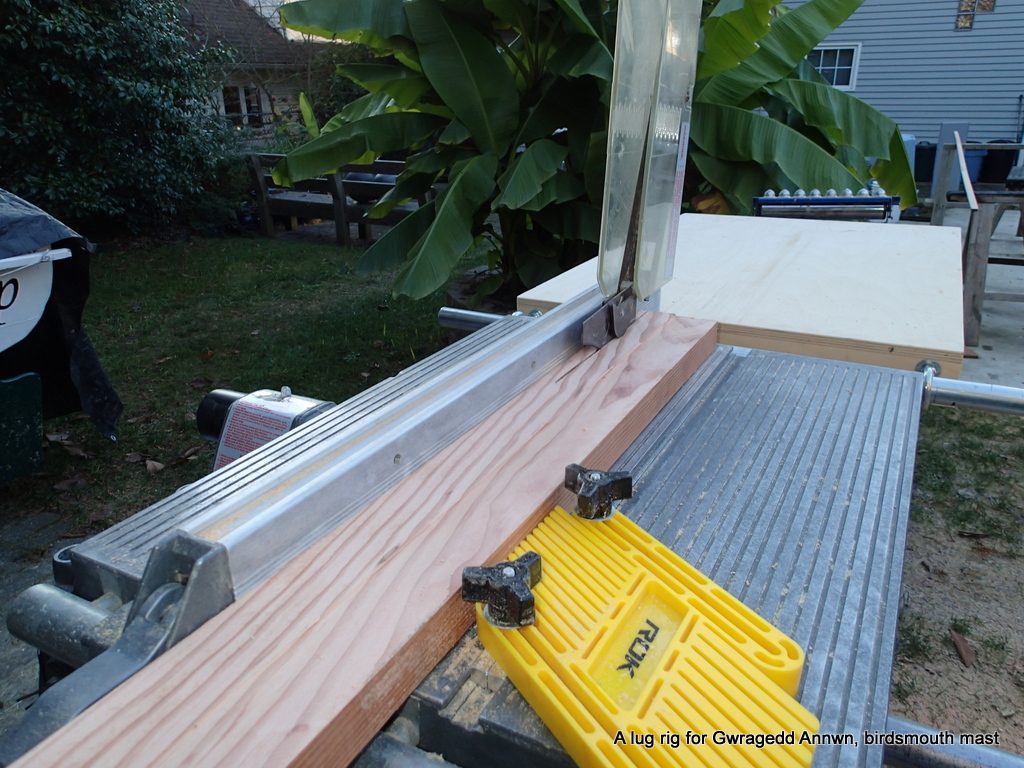
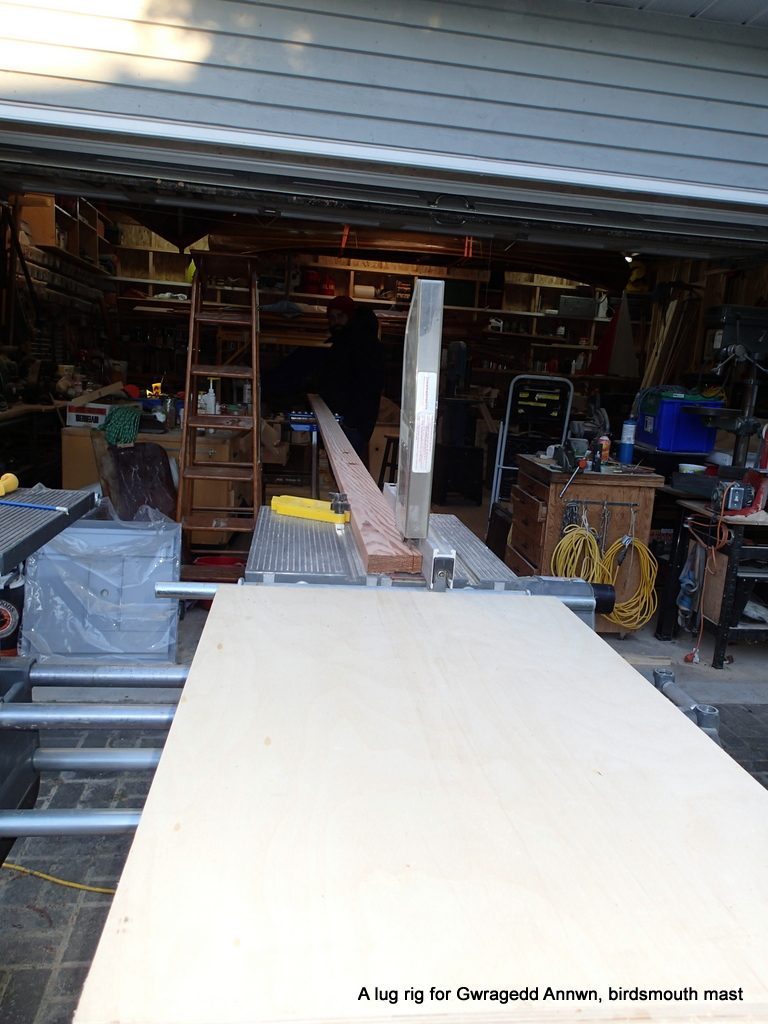
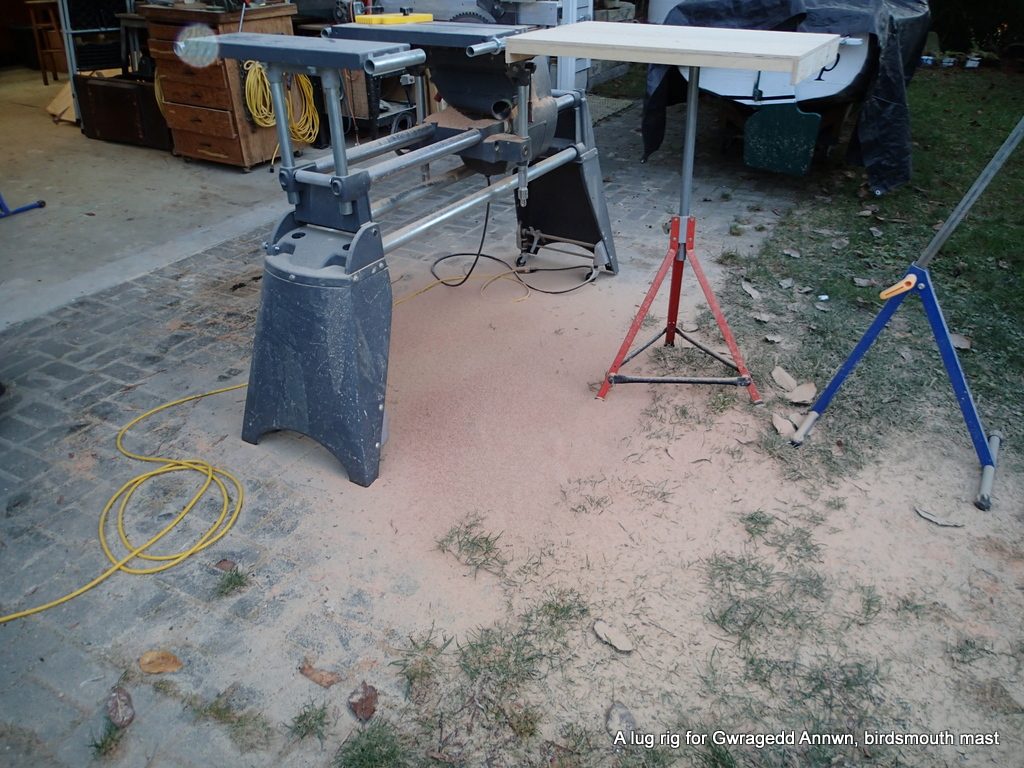
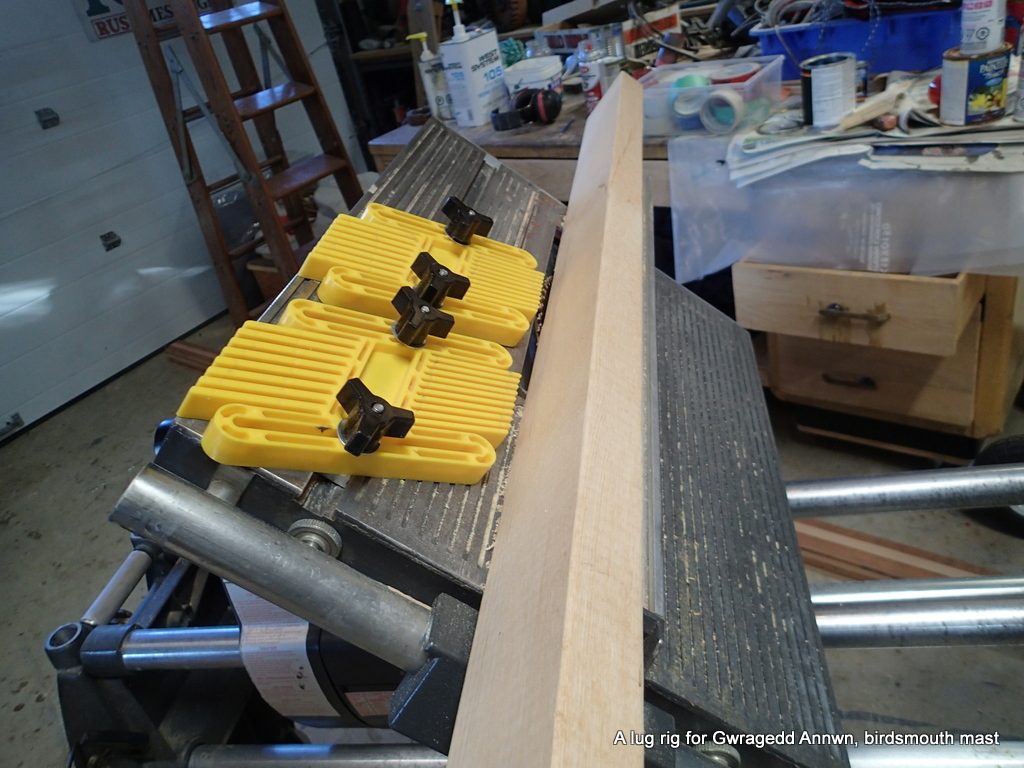
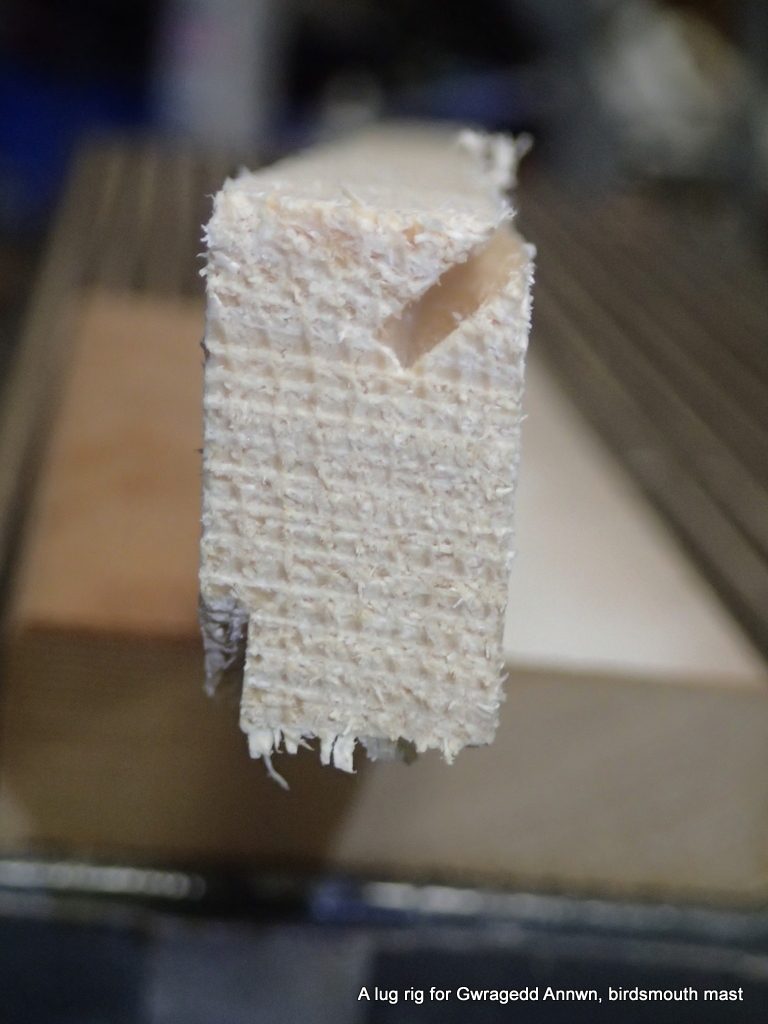
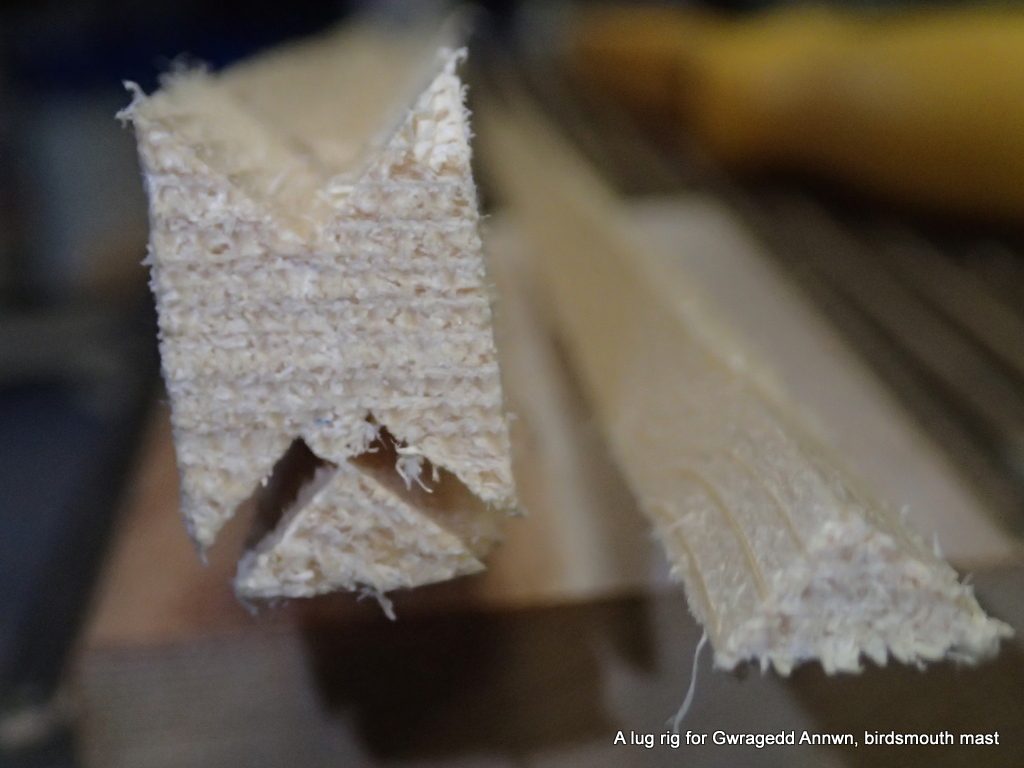
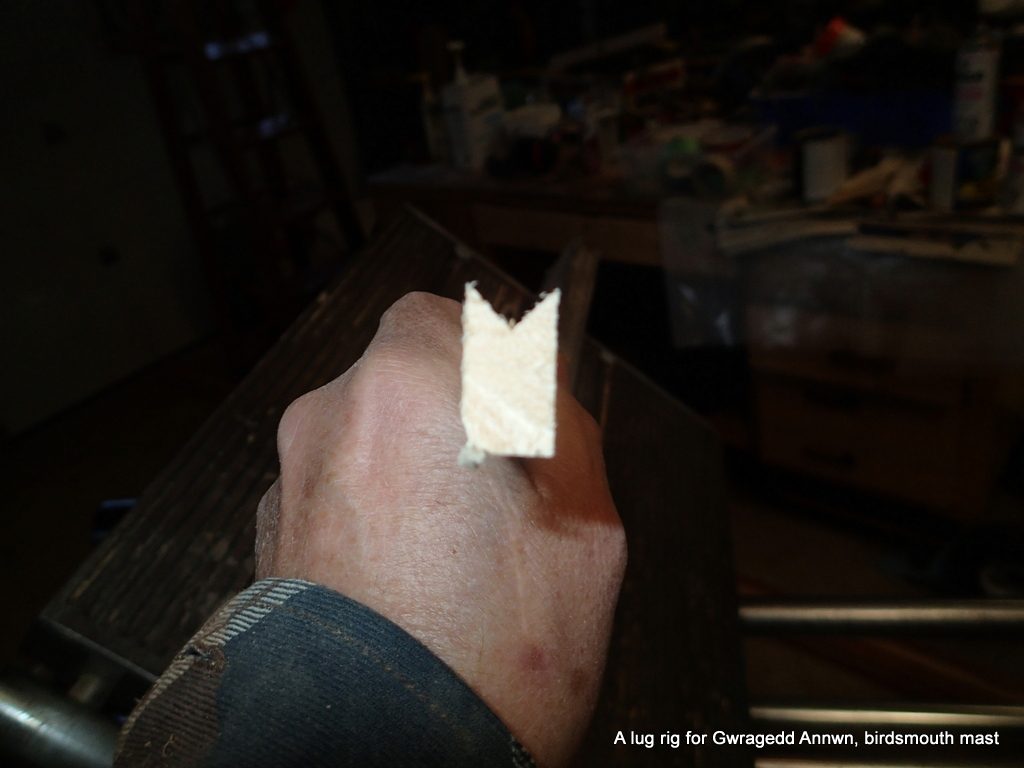
A lot of good, expensive fir turned into sawdust.The next step is to cut the birdsmouths. I set up the Shopsmith to cut a 45° bevel cut. I used a 2 by 4 to lengthen the fence.Test pass. The idea is to have the bevel cut just on the inside of the strip. This one is too far to the side.After a few test runs, I get the correct bevel and the Shopsmith is now set up.The good test cut.The Shopsmith is set up. I have two support stands, an infeed one and an outfeed one. (in the picture, to the left of the finger boards)Picture of a strip before cutting. The finger boards hold the strip to the fence, and gravity helps hold the strip to the table. Infeed support in the background.Ripping a strip. The cut only goes ¼” into the strip. (outfeed assistant in the background)The strips are all cut, the nine best ones are on the left. I pick the best eight for the next step.I camp two sets of strips, birdsmouth side down, together to make the taper. I use a hand-held planer, taking off 1/16″ with each pass. I mark a line at 1′, 2′, 4′, 6′ 8′ 10′ & 12′ from the top of the mast. I then mark 6″, 12″ and 18″ from the bottom. I start at the 1′ mark and plane to the top, then the 2′ mark, then the 4′ etc. and do the same from the bottom. I then resort the strips, clamping the eight strips together and using my belt sander, even out all the strips so they are the same. I just have to keep the sander level.
I end up with a ⅜+” taper, from about 2½” to 2+”.
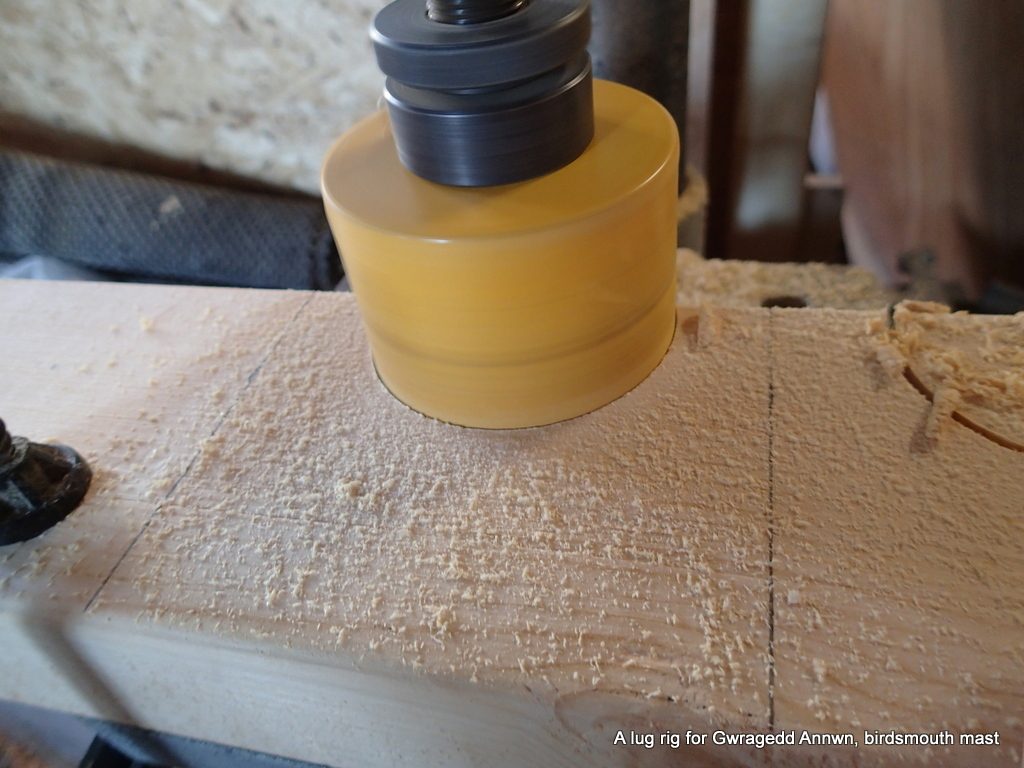
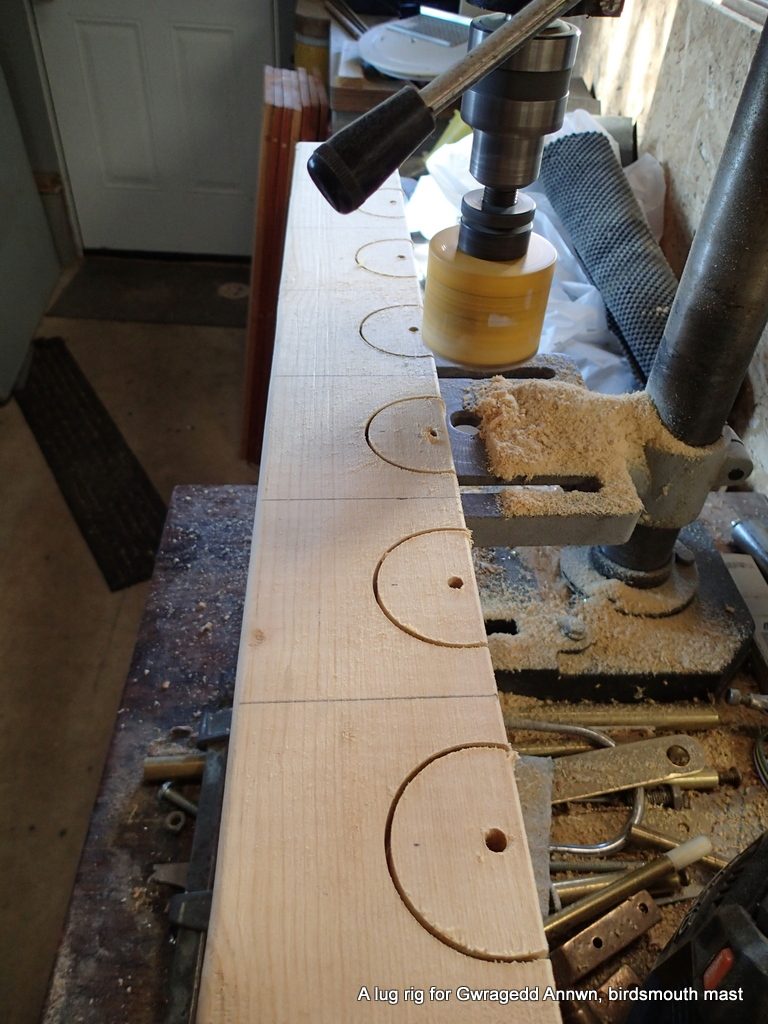
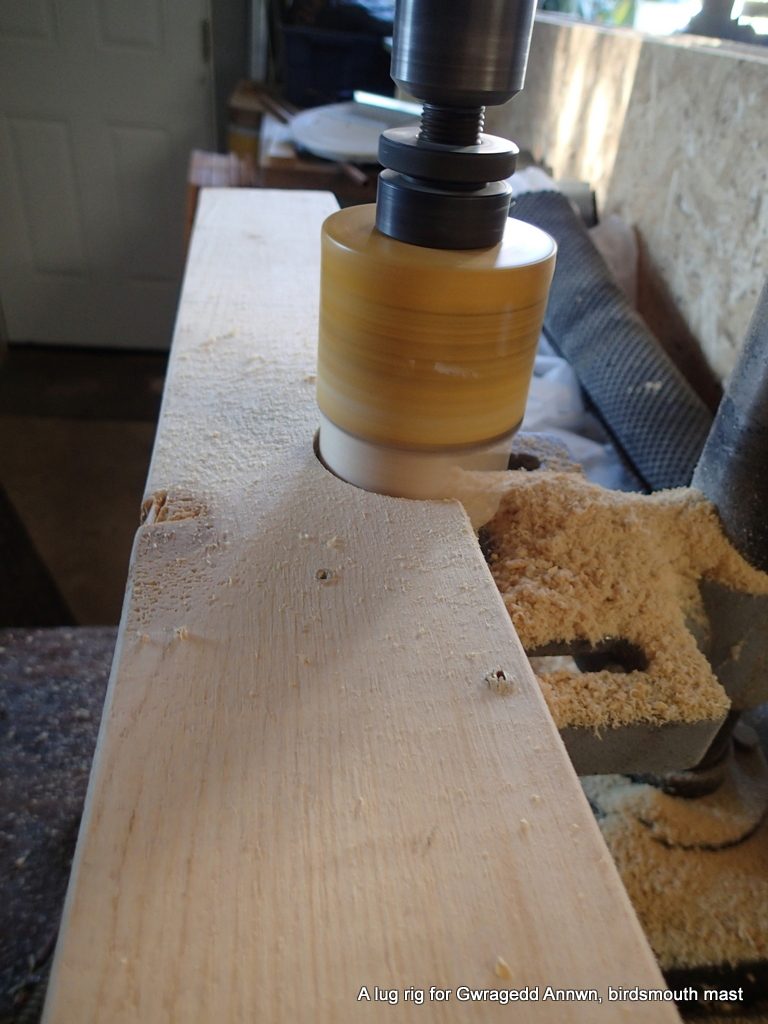
Strips tapered and sanded to be the same.The next step is to make a mast form. I mark out 7 mast mold stations in a 2 by 4 and cut them out using my drill press with a hole saw.Half way there.After I cut out all of the centres I will cut out each formSanding the cutouts in each formMy form is on three sawhorses, it consists of two 2 by 4s.
A little string (not shown) aligns the forms on the 2 by 4s.
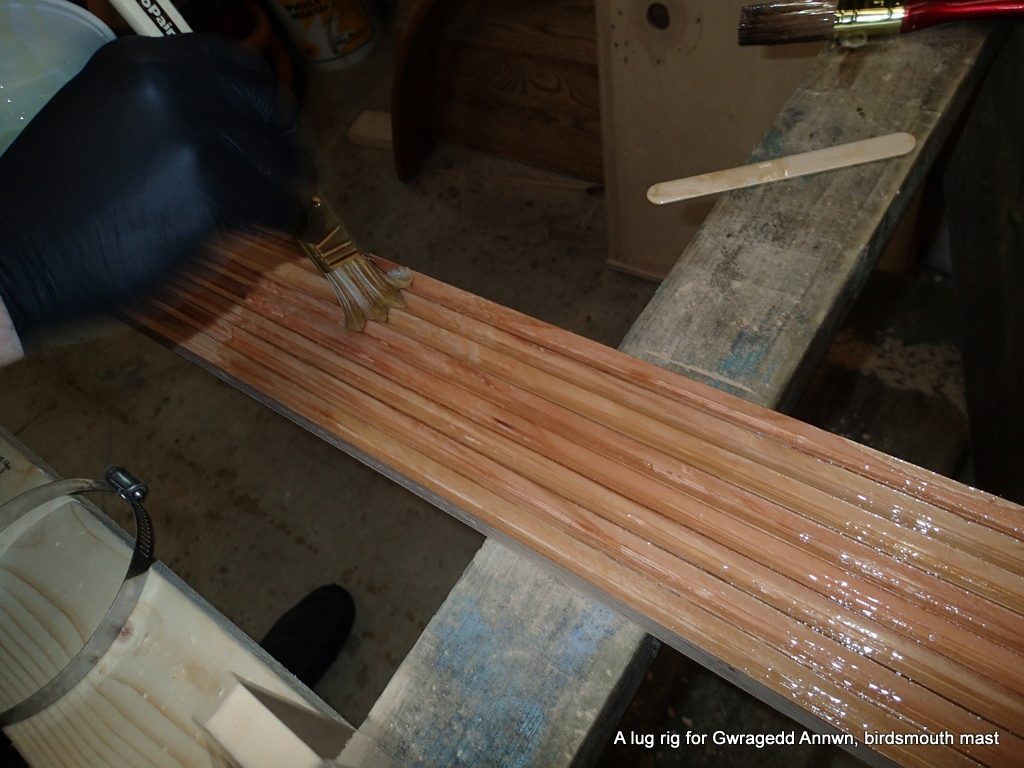
The mast form and the birdsmouth strips. A little packing tape on the forms and it will be ready for glueing.As always, a test fit to make sure that everything works. I can pick the mast up in the middle even though it is only held together by four strips of masking tape.Ready to go, I will use hose clamps to hold the mast strips together. I also have surgical tubing, zap-straps, rebar tying wire and rubber band to clamp the birdsmouth strips together.I mix up the cold-cure epoxy (two hundred stirs) and start brushing it onto the strips.
The shop temperature is about 10° Celsius. That is why I am using Cold-Cure Epoxy. I will have a lot of working time at this temperature.
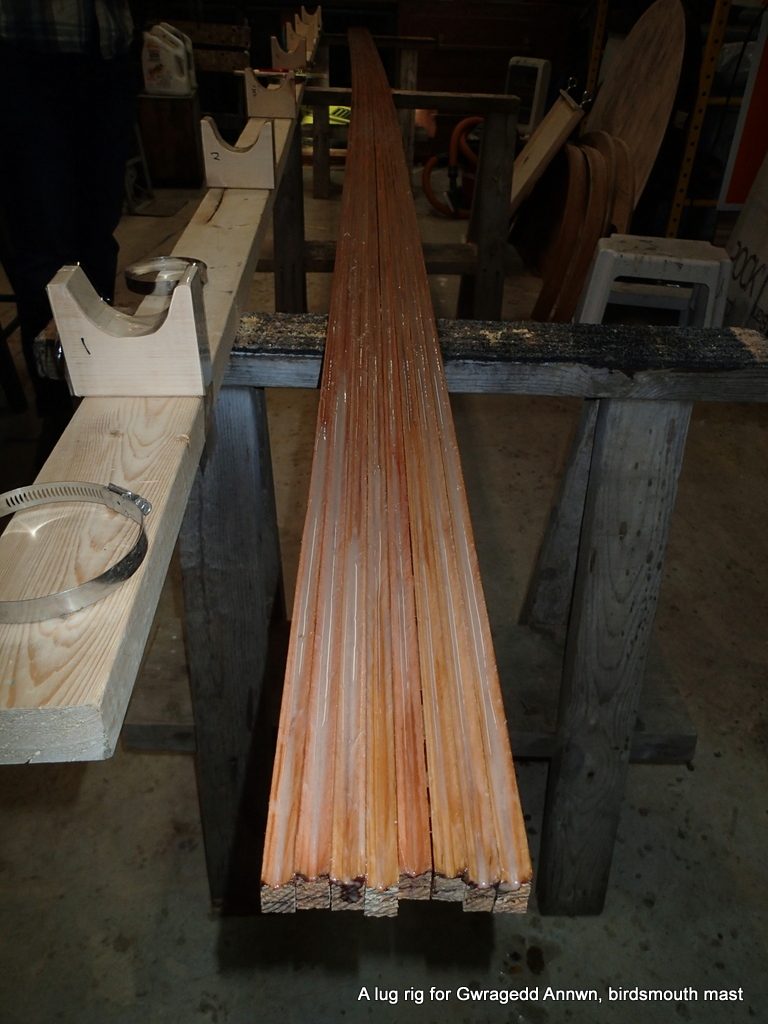
The first coat will be the “soak-in” coat. I will then thicken the next coat to help keep it in the joints and not leak out when the strips are clamped up.The thickened epoxy glue looks greyish in this photo. We used Popsicle sticks to spread the thickened epoxy, insuring that the epoxy would stay in the bottom of the birdsmouth “V”. Still have a little “spreading out” to do here.Hose clamps, surgical tubing and zap straps. The build went very easily. Paul and I put the first strip in the form, then placed the second strip into the glued-up birdsmouth “V” grove. The epoxy held the strip in place…took about 20 seconds to do each strip. the final two strips was the hardest. I used a box-cutter knife along the joint to align the strips and then locked them into place. Paul held the mast together as I put a hose clamp on each end, using a cordless screwdriver with a hex-nut bit to tighten the hose clamps.I then went back along the mast, evenly putting on seven hose clamps. Paul and I aligned the mast, trying to get is to be straight. The best way was to look along the top along a strip line. We adjusted the mast by tapping it with a dead-blow hammer and adjusting the sawhorses. We then wrapped it with surgical tubing, clamped it with zap straps. Where ever there was not good “squeeze-out” I used the rebar tie-wire to pull the strips together.
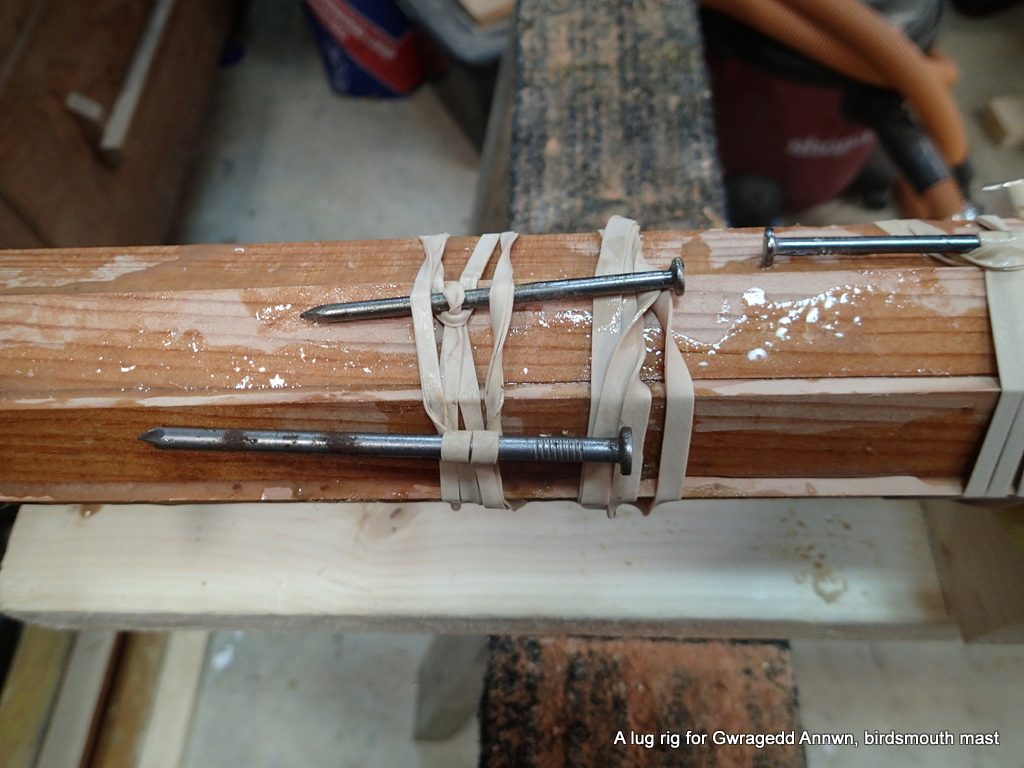
I ended up with some sort of clamp every 4″ or so.
Thick rubber bands and nails make good make-shift clamps too. Good squeeze out on the left, not good enough between the two sets of rubber band clamps. A good place for the tie wire.
I turn on the shop heater and warm up the mast. The overnight temperature is predicted to be -2° Celsius. The shop will stay at about 10°Celsius overnight.
The next morning, the glue is no-longer sticky to the touch but still soft.
The mast looks pretty straight. I should be able to fair the mast to be straight to the eye. I think the glue-up has been a success. The next day I strip off all of the clamps and get the mast ready for final shaping.
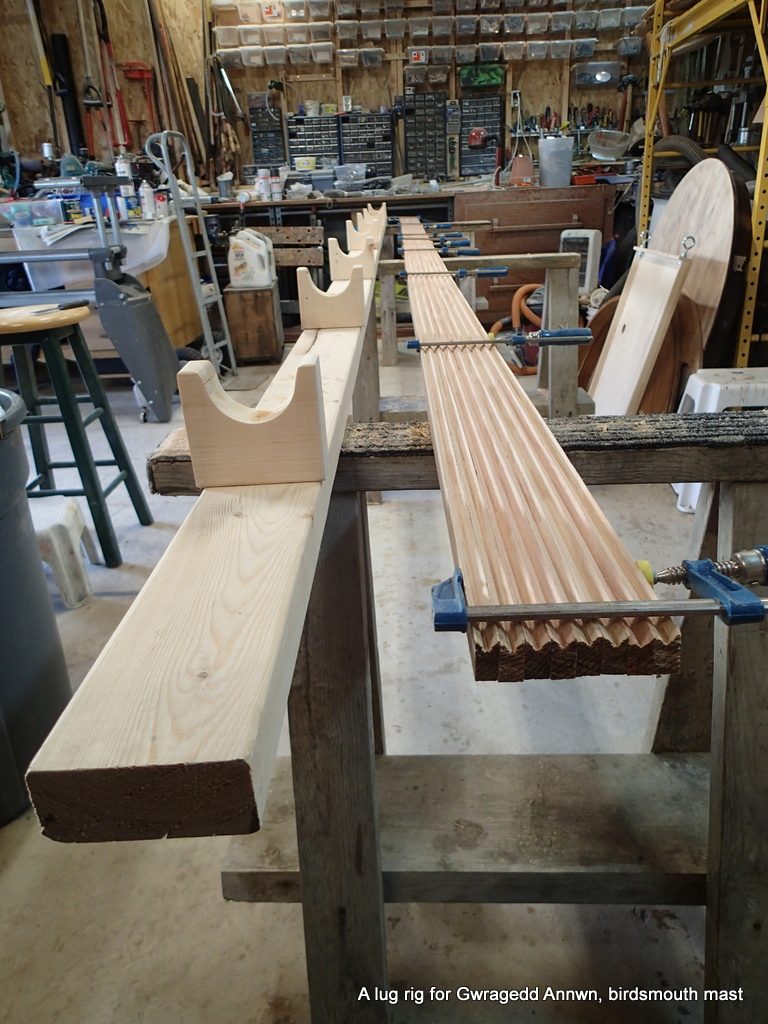
The birdsmouth mast stripped and ready for final finishing…I will let the epoxy cure for another few days.
I use my shop scale to weigh the mast…a little less than 14lbs!
The weather is predicted to warm up. It will get to 8°C today and will stay about that warm overnight. I will continue to work on the mast in a few days.
A few days have passed and the epoxy is cured enough to work with. The first step is to knock off the biggest lumps so I can use my power planer.
Ready for 8 then 16 then 32 then round!!!!
The mast blank seems to have a few “bends” in it. I will see what they look like after I begin to plane off the sharp edges.
I power plane off the sharp edges, I take four or five runs with the power planer, making the blank eight sided. I use the 12″ disk sander on my Shopsmith to sand smooth the top and bottom of the mast blank. I can make registration marks on the ends to control the rounding of the mast blank.I have planed off all the “sharp” corners, this is now a 32 sided blank. The hand power planer is sitting on the stool on the left. Nice grain pattern at the base!I get out my old inside-out belt sander jig. I started out using the cordless drill but I soon ran out of battery power, so I finished up with my old ½” corded one.All of the sanding/shaping is done…there still seems to be a “twist” in the top of the mast. The base is at the bottom of the photo.There are a few small “flaws” in the mast… I will cut them out and fill with epoxy & sanding dust.Flaws filled and covered with packing tape so the epoxy filler does not leak out.
I will again let the epoxy cure for a few days. Next step will be to sand, this time with the grain to get the mast smooth for varnishing. I will then make a plug for the bottom and a masthead insert piece with a sheave in it, glue them in, let the epoxy cure. Then, more sanding.
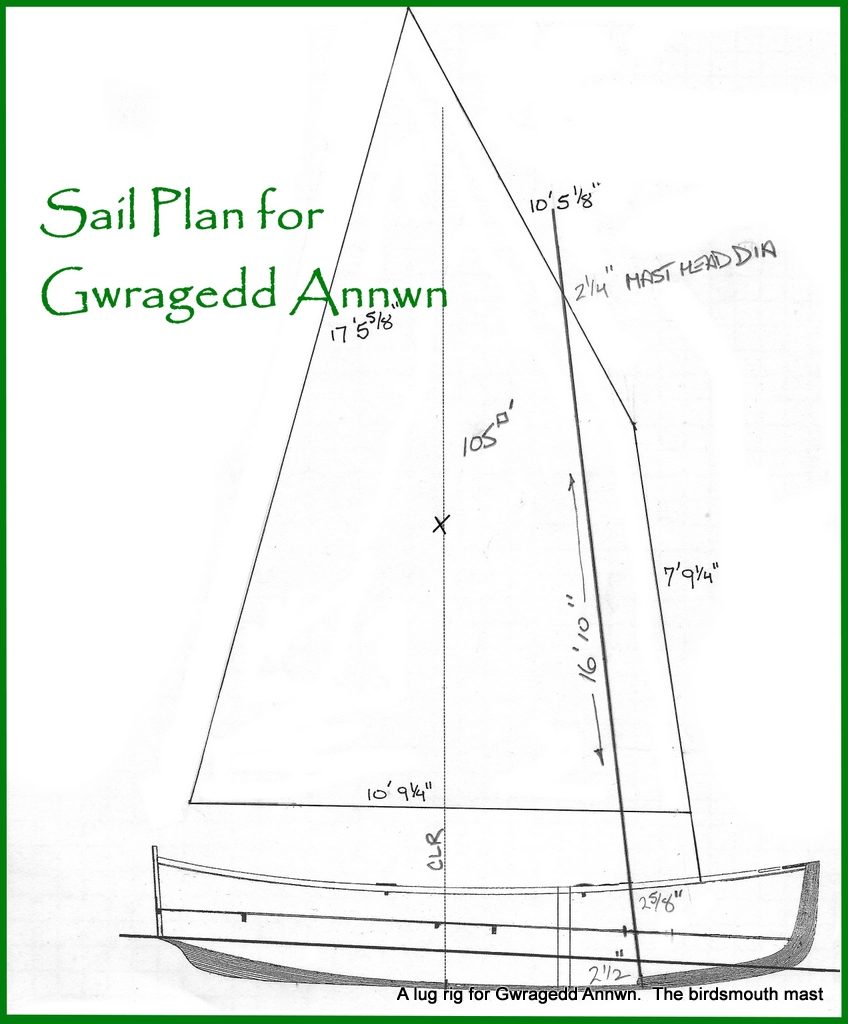
The mast diameters have ended up being 2½” at the base, 2⅝” between 18″ and 24″ from the base and 2¼” at the top of the mast.
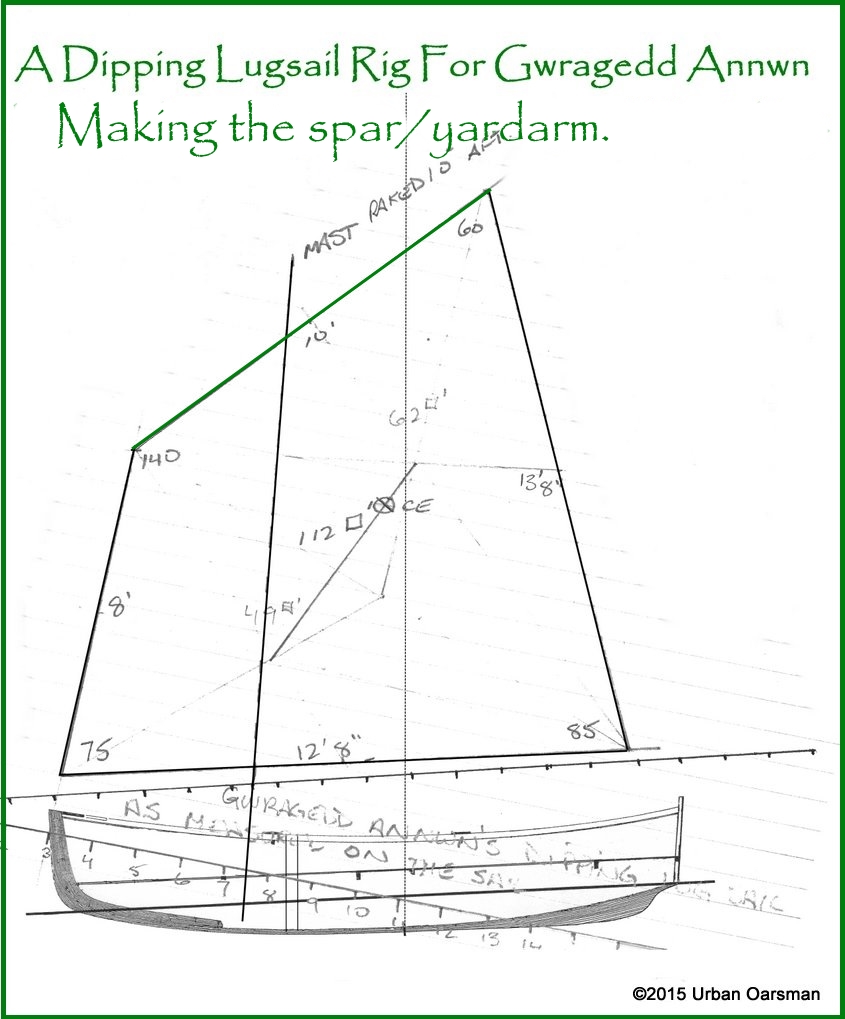
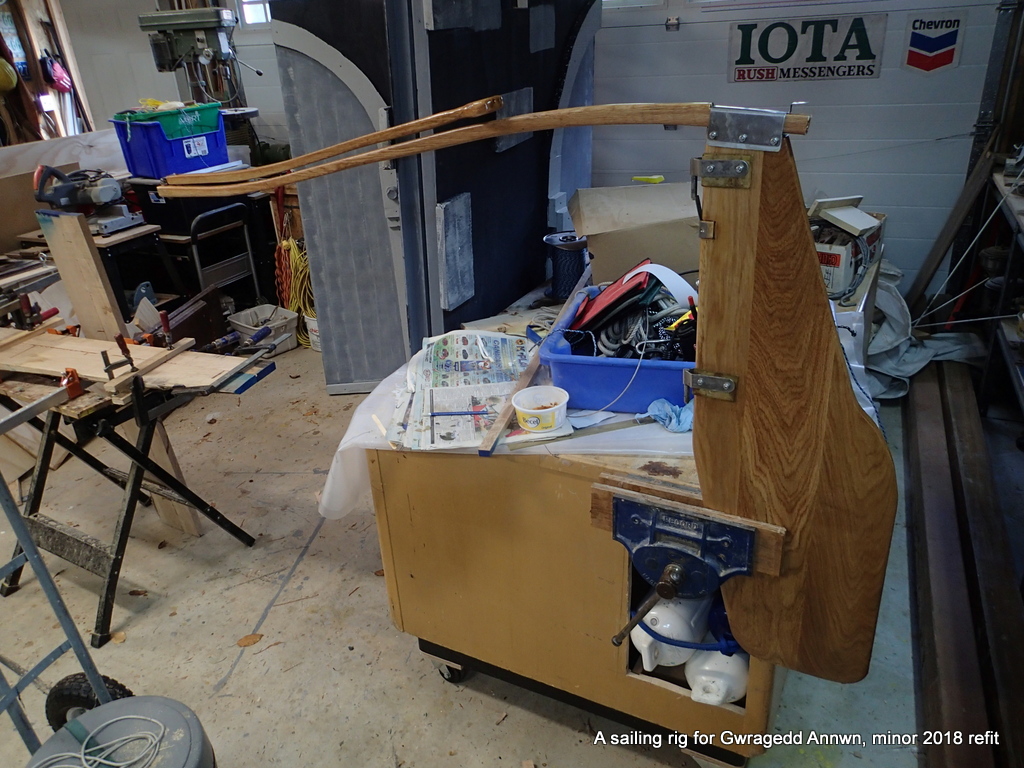
The first step is to buy a clear, straight piece of Douglas fir for the spar.
3½” by 3½” Douglas fir for the spar.
The yardarm needs to be a little over 10′ long…this piece will be long enough.
Step one is to knock off the corners and go to eight sided.
I use the circular saw guide to cut off the corners.
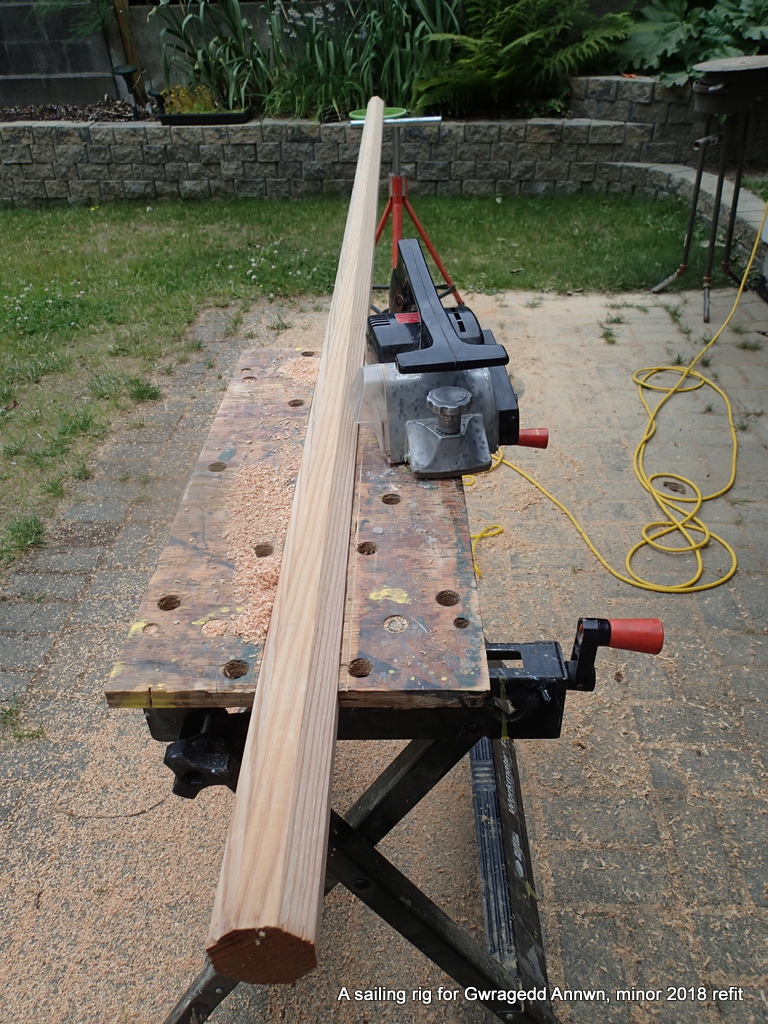
I will use the power planer to make the spar sixteen sided.
I use some shock cord and my workmate to hold the spar for power planing, rotating the spar after each pass. I can move the shock cord enough to get the planer past it on each pass.
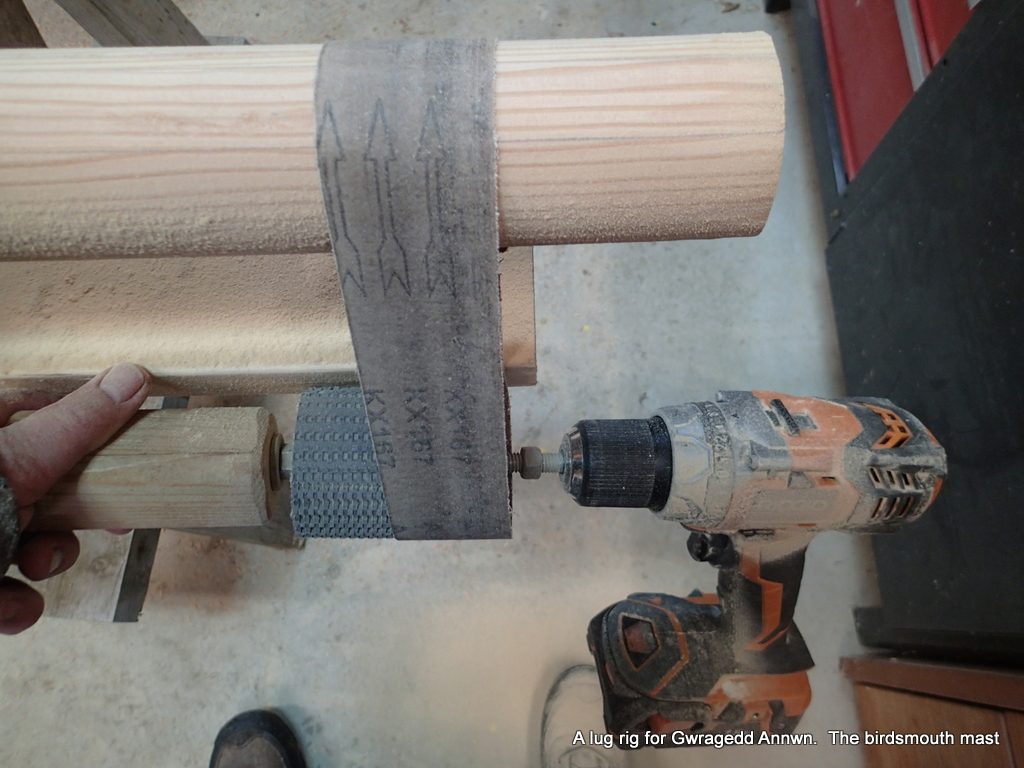
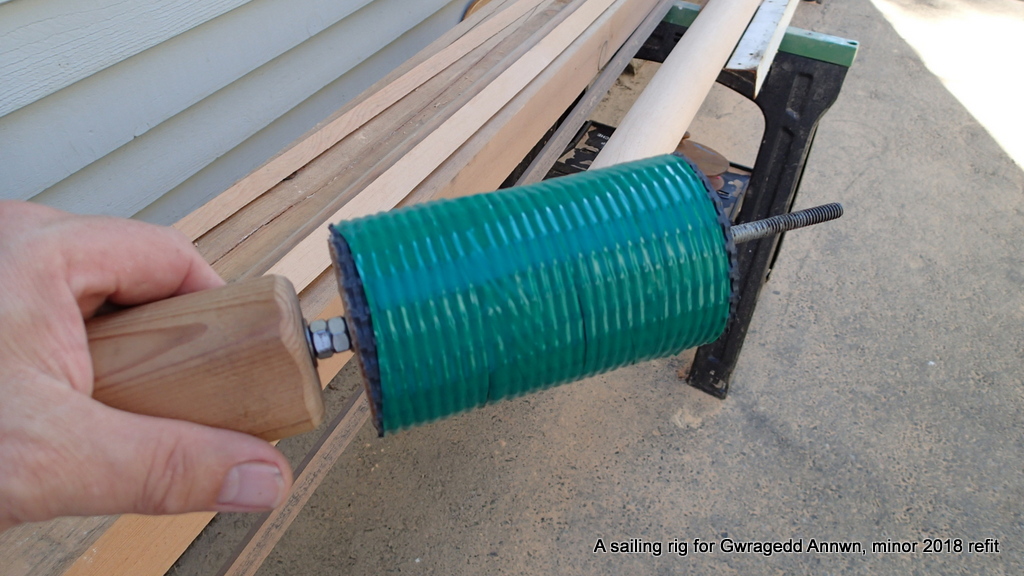
After the rough rounding, (16 sided then 32 sided) I use my sanding jig to fully round the spar.
A sanding belt and this driving wheel chucked to a drill complete the sanding jig.
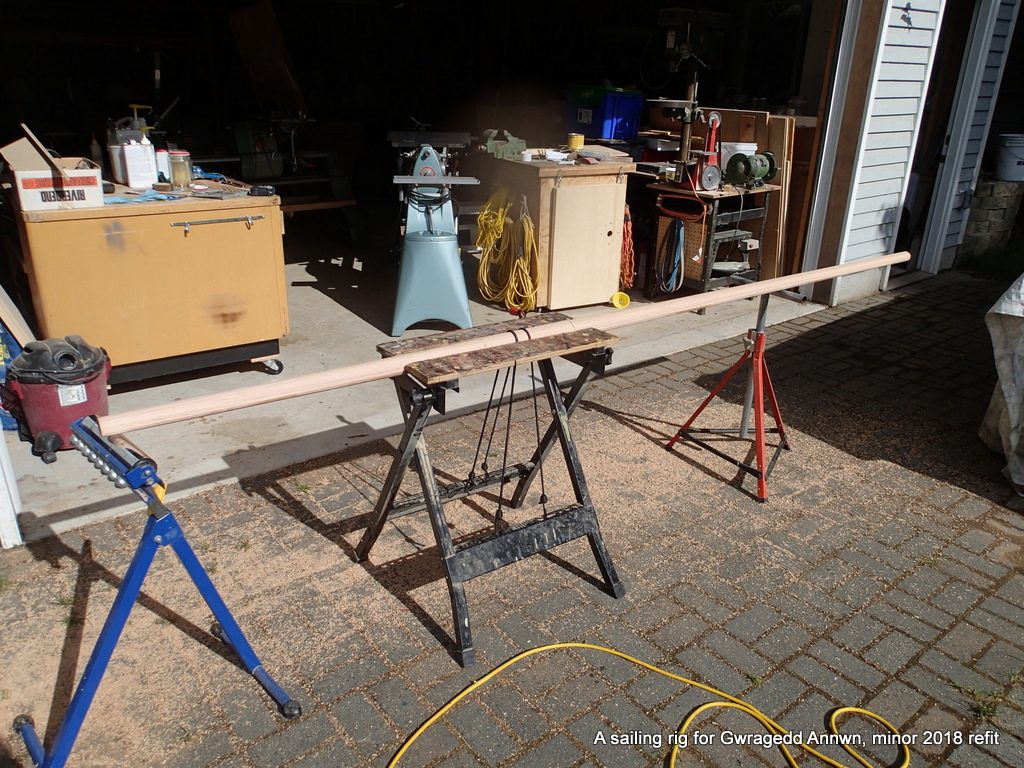
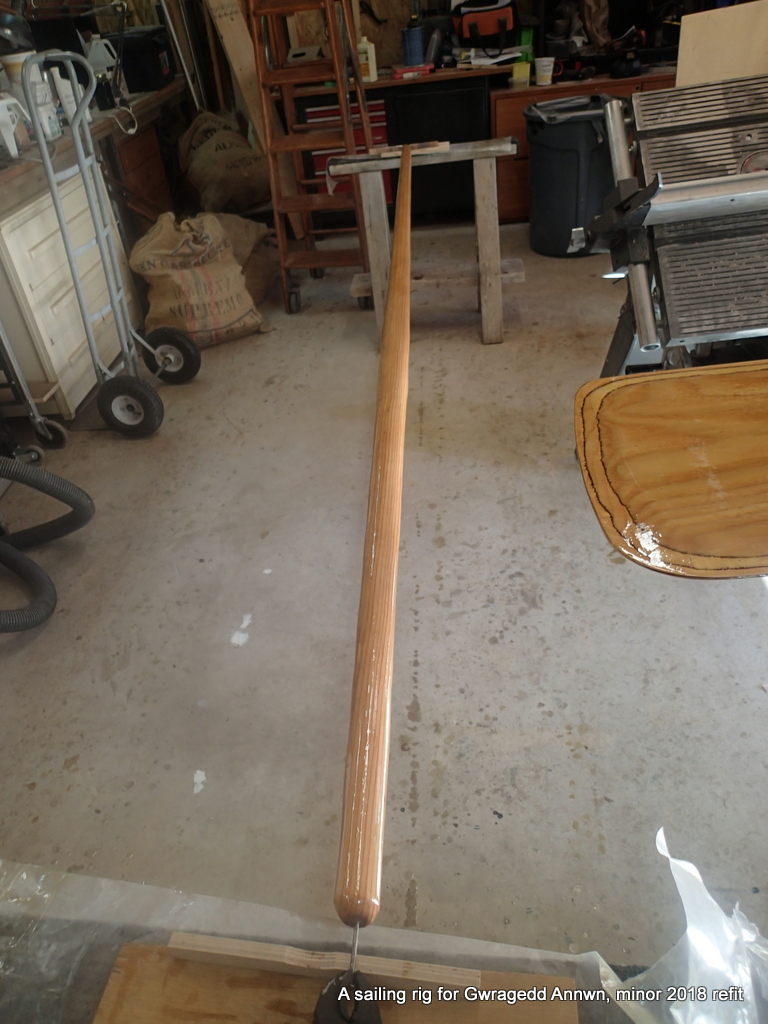
finished spar with a few (7! soon to be eight) coats of varnish.
Now, on to the Mast:
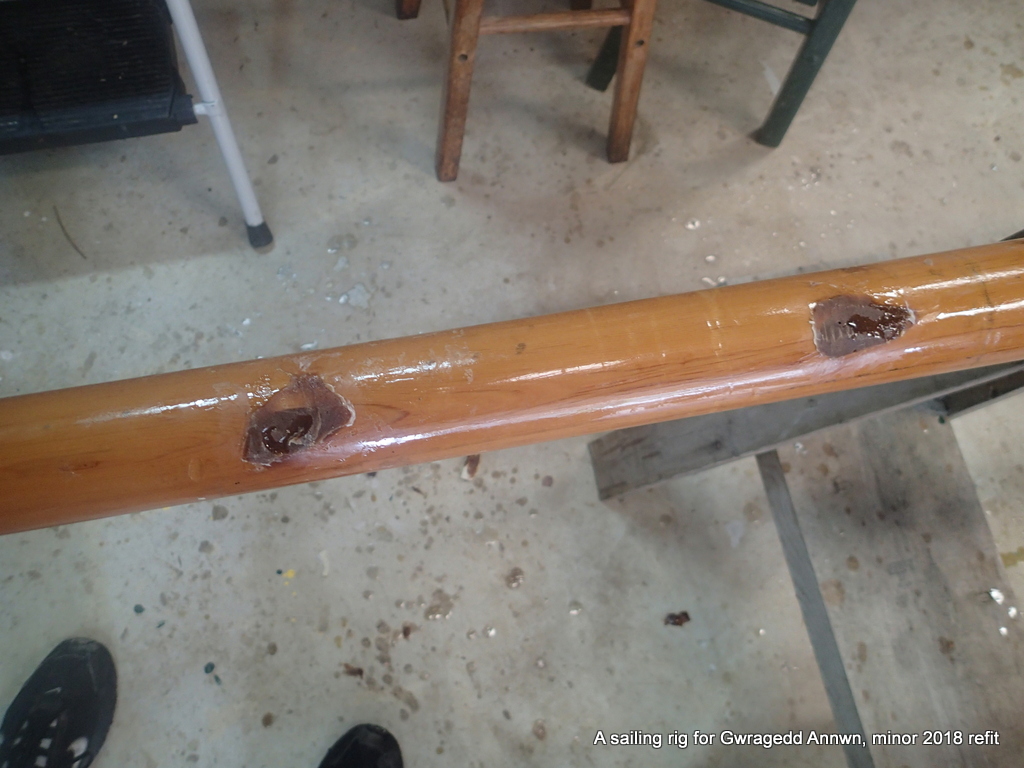
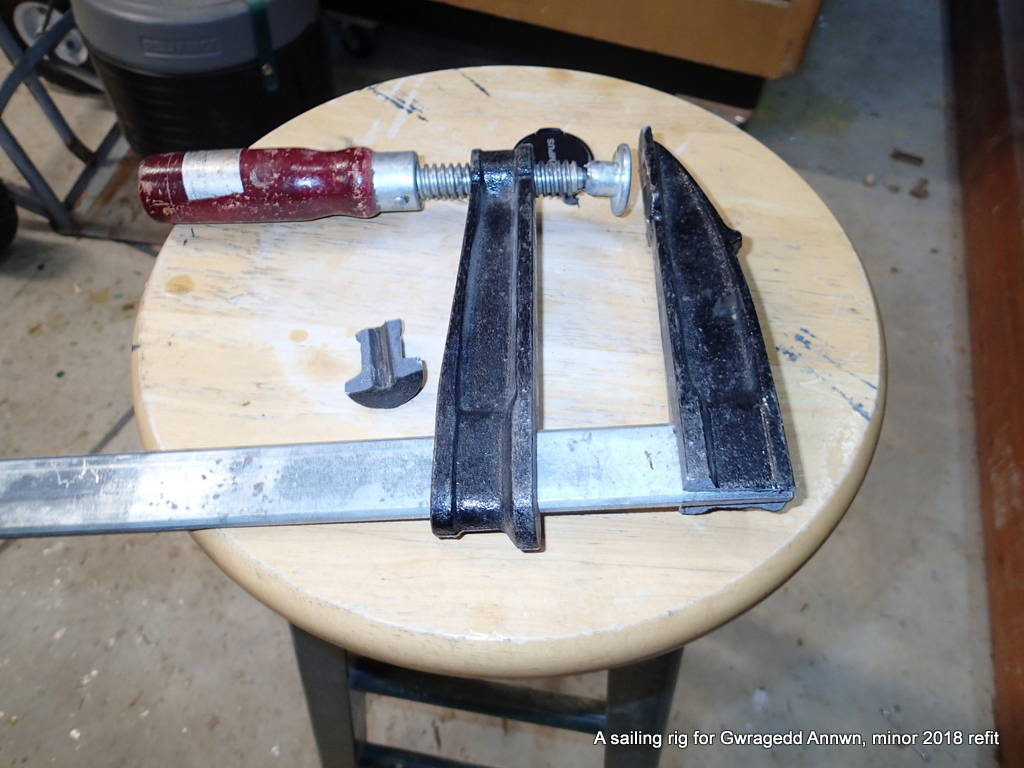
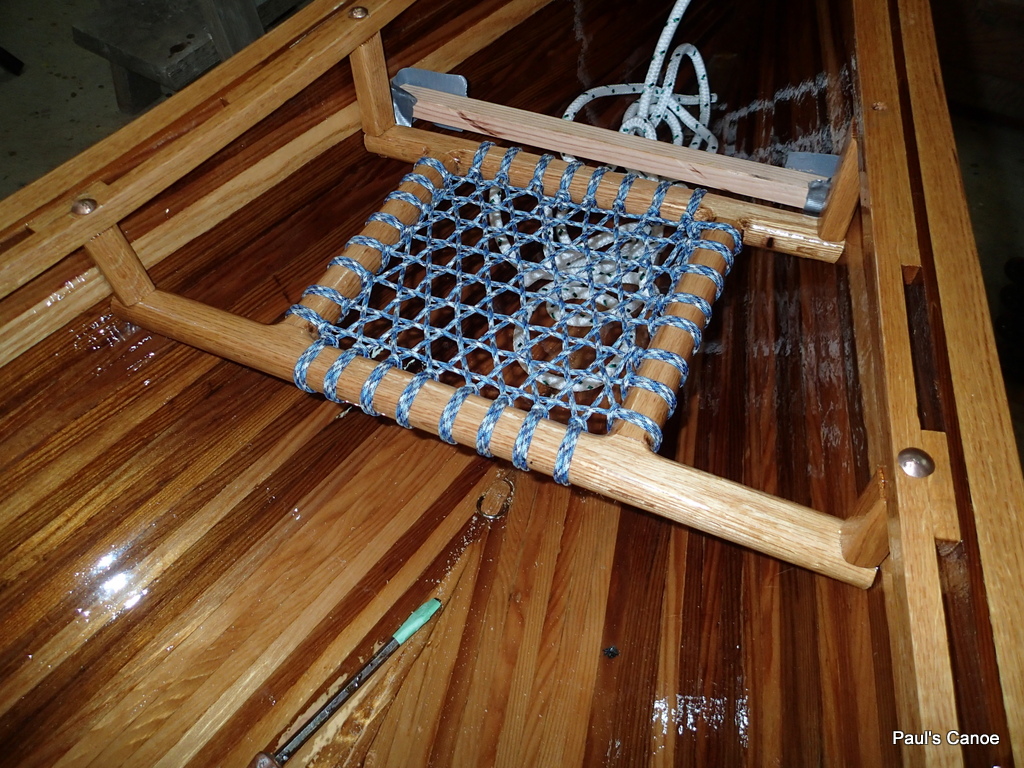
Two unsuccessful dumb sheaves need to be filled for the new cobbled together lug sail.
The new dumb sheave is drilled into the mast and is faired smooth.
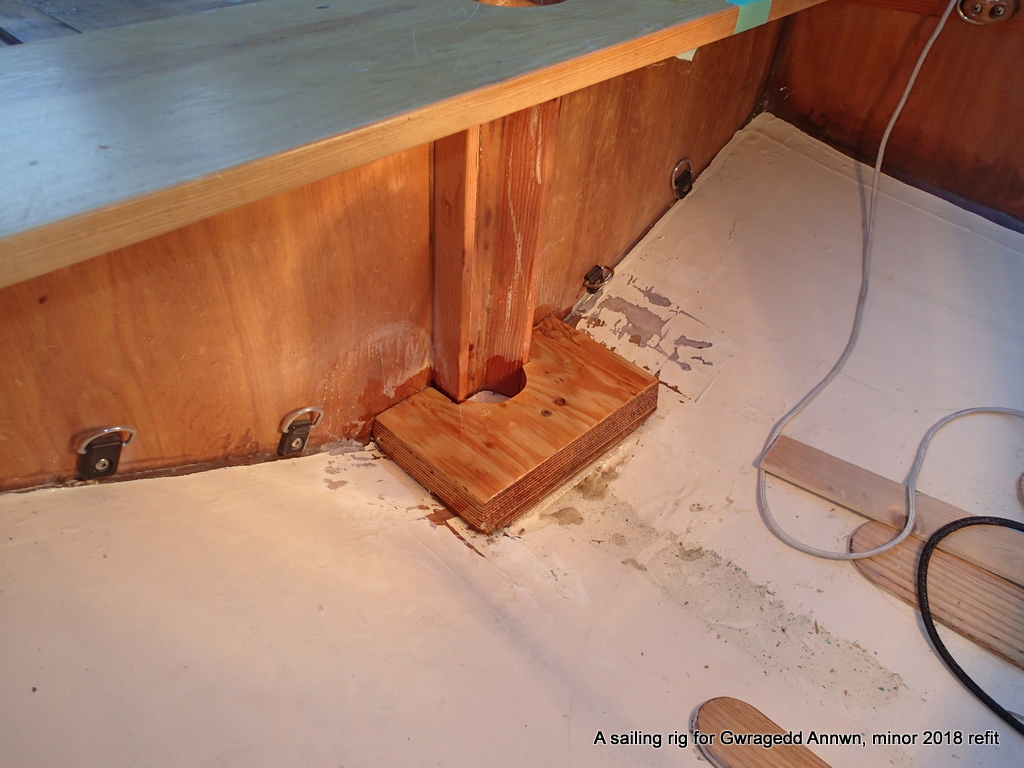
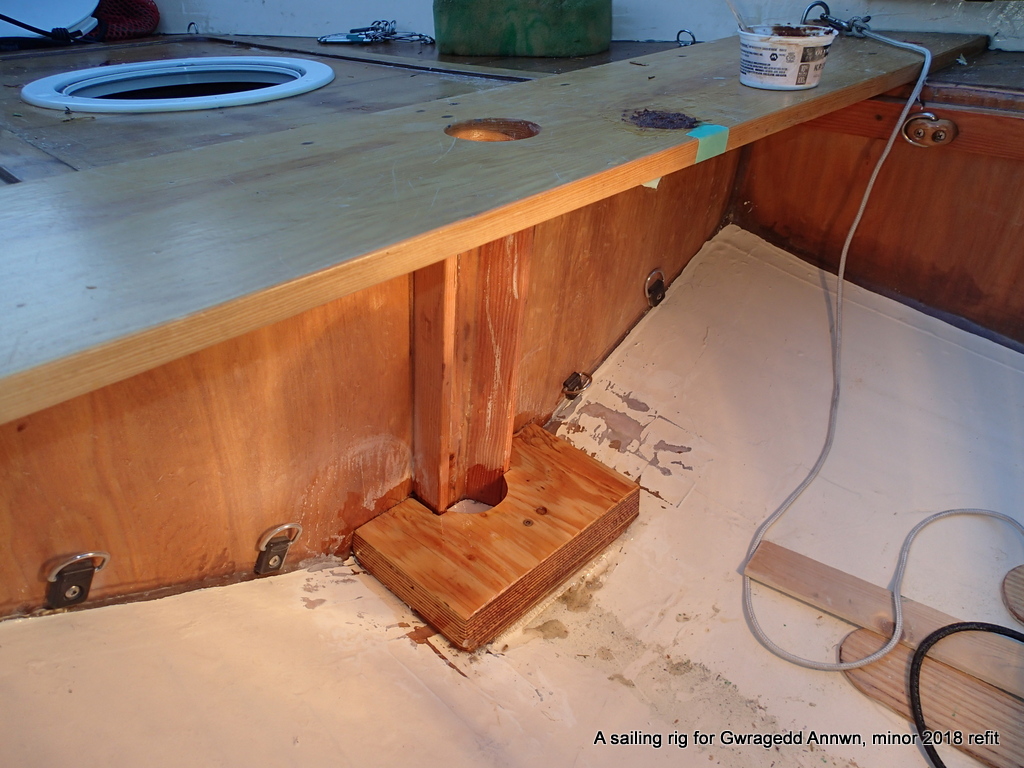
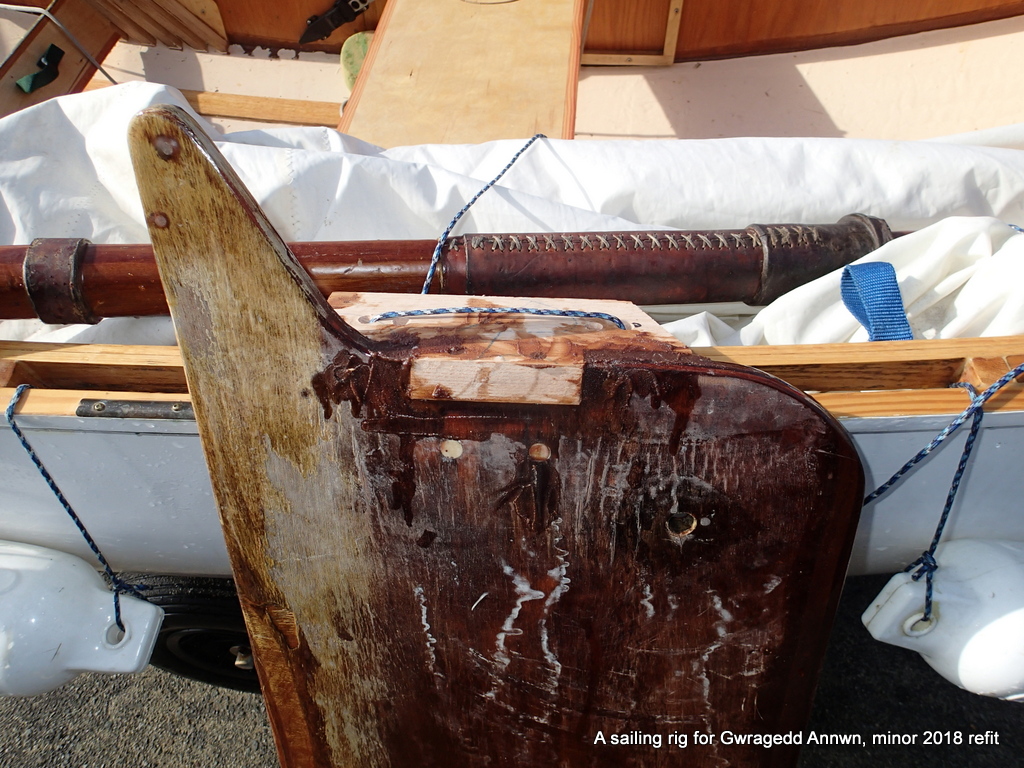
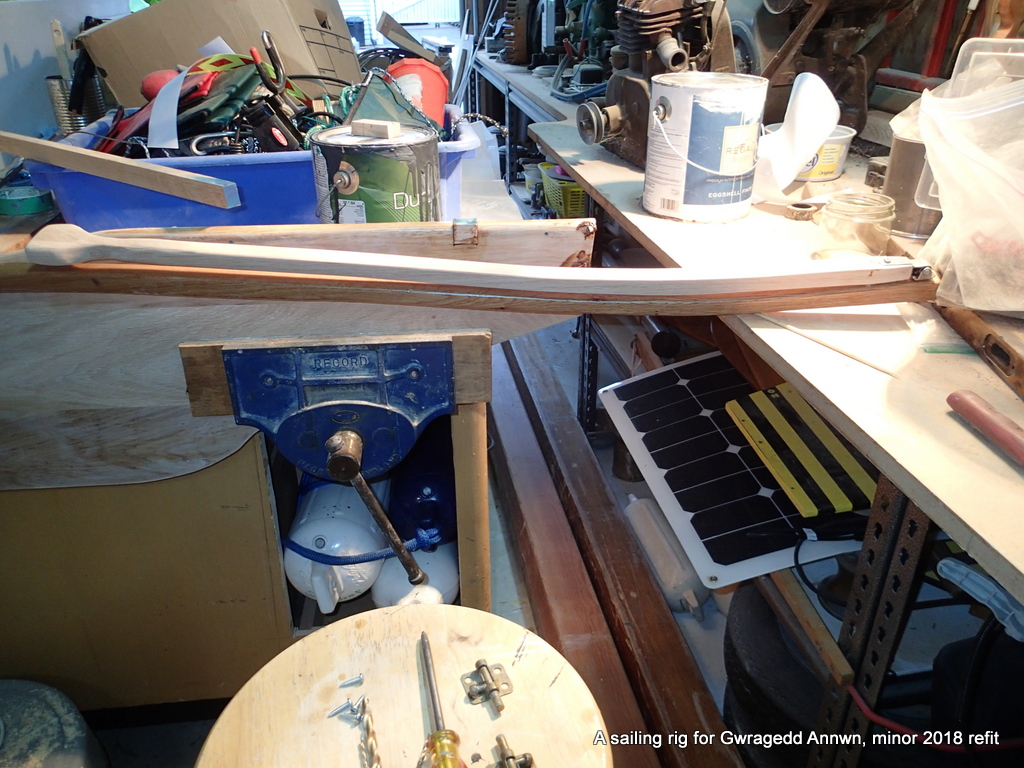
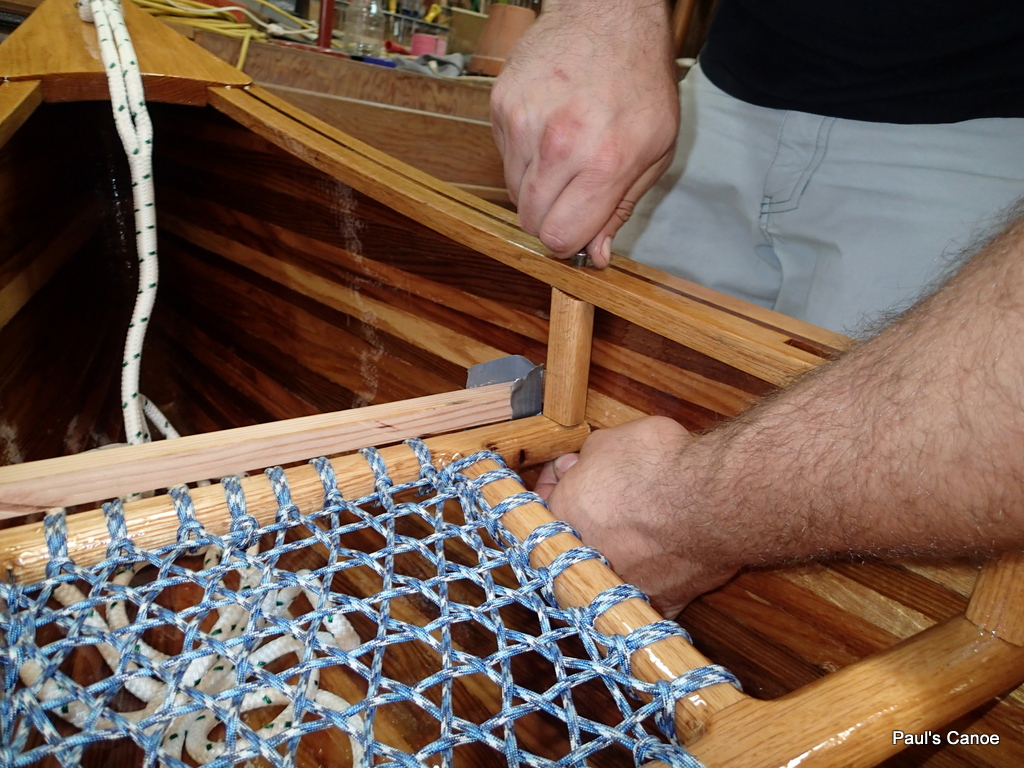
Fitting the mast step base.
The base is epoxied to the bulkhead and onto the keel. It is also screwed to the bulkhead from the inside and into the keel.
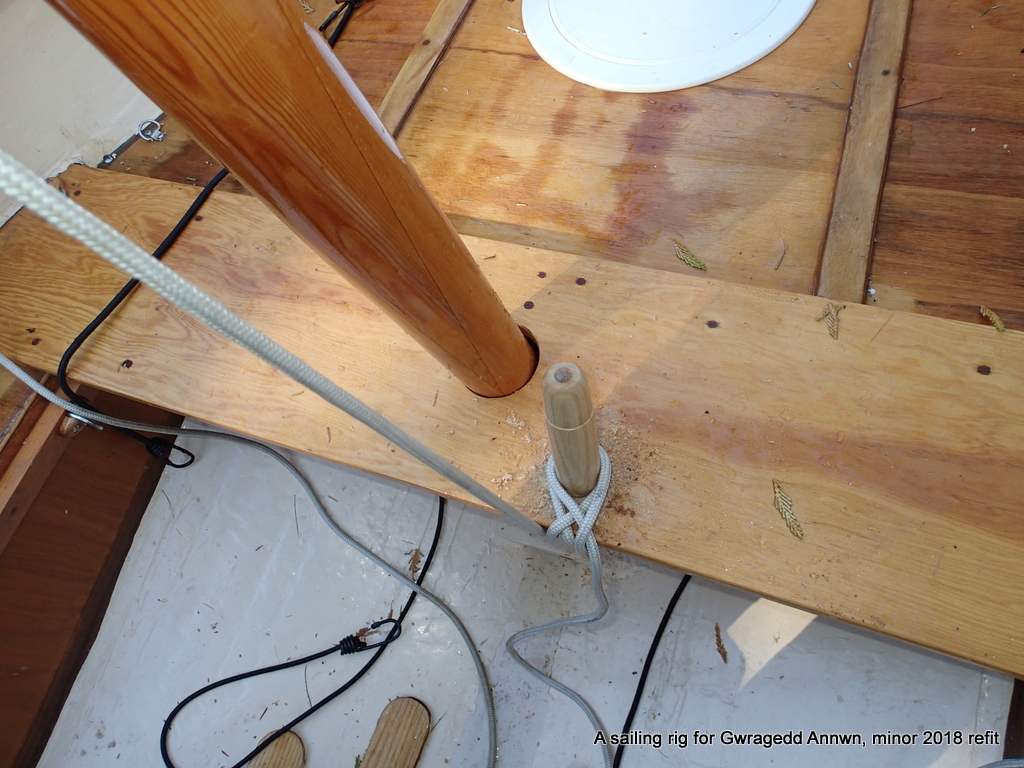
I will line the mast hole in the thwart with leather later.
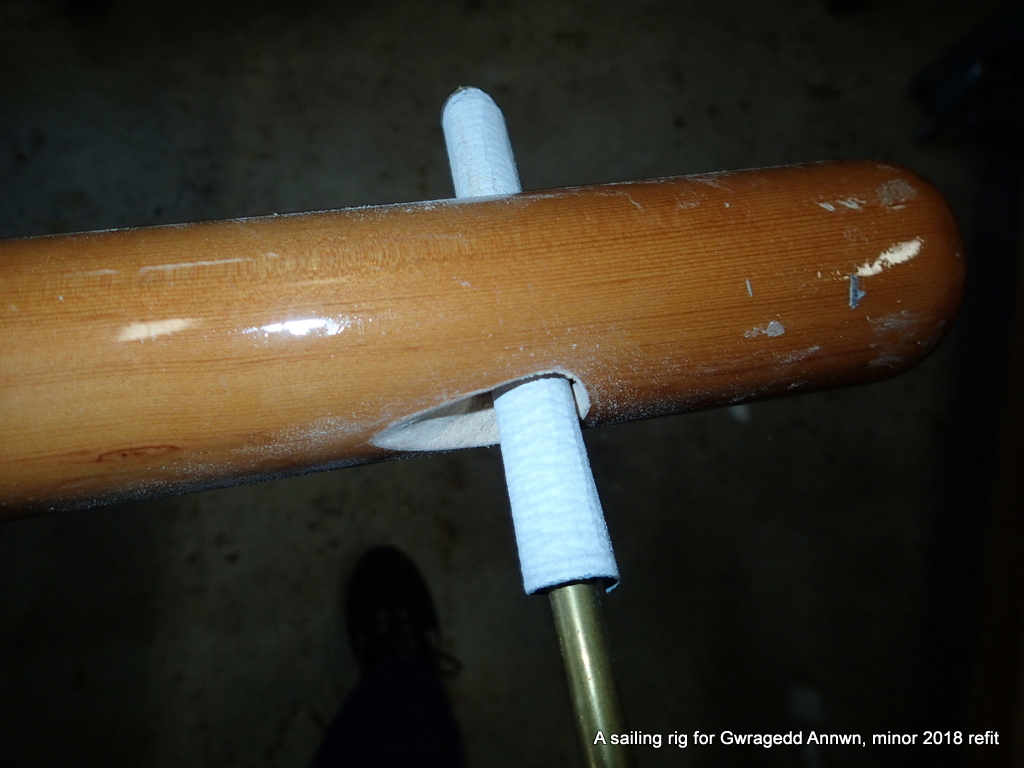
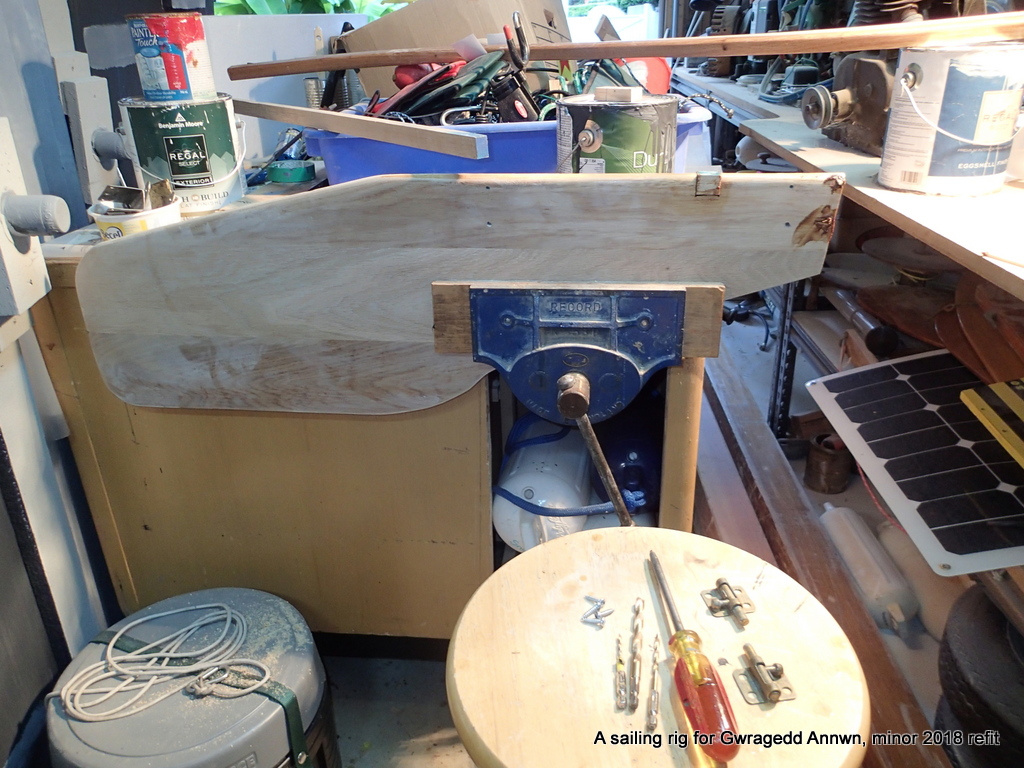
The first time I made the belaying in hole too large. I filled the hole with epoxy and re-drilled it.
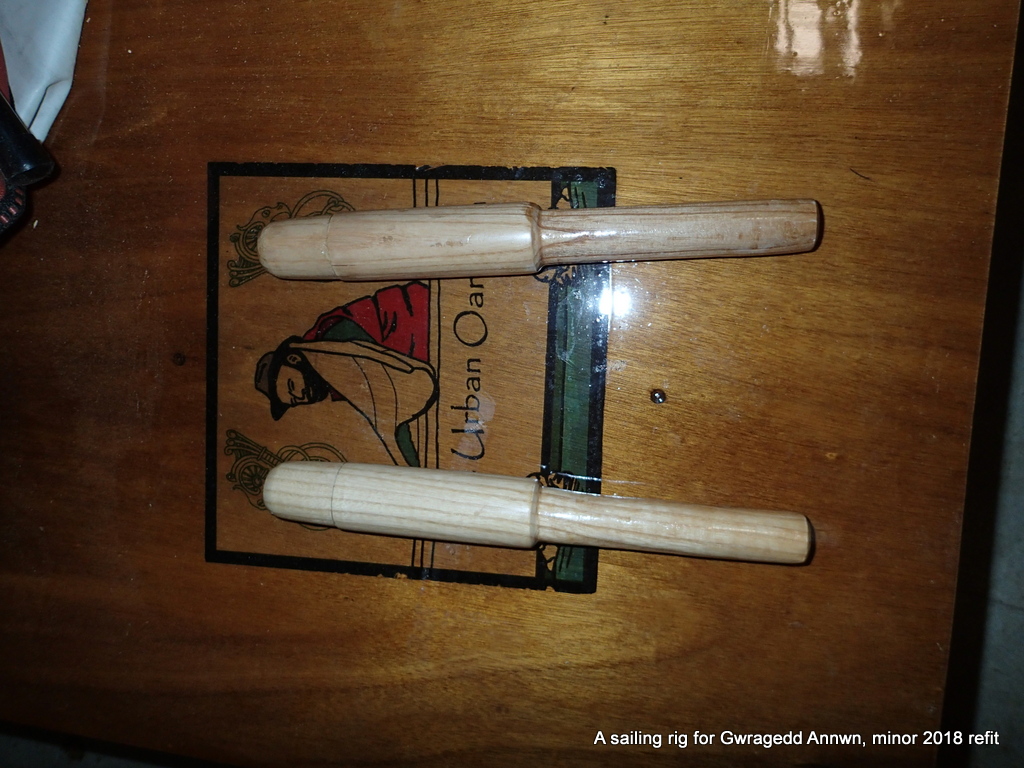
The two belaying pins, made from surplus gardening tool handles.
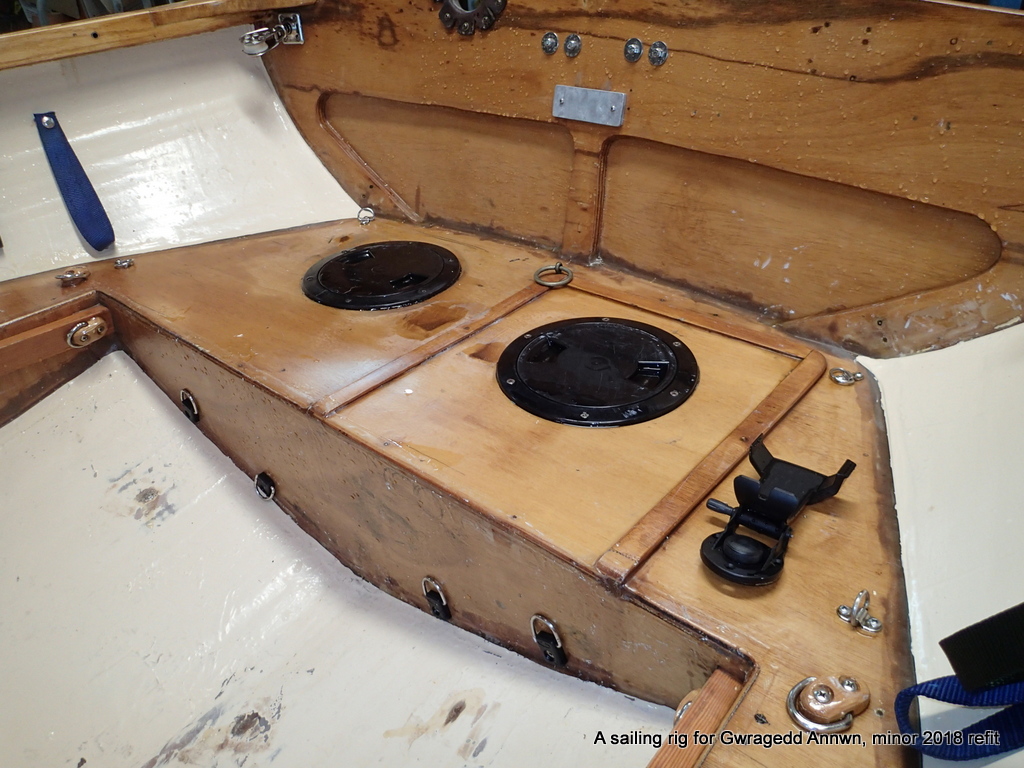
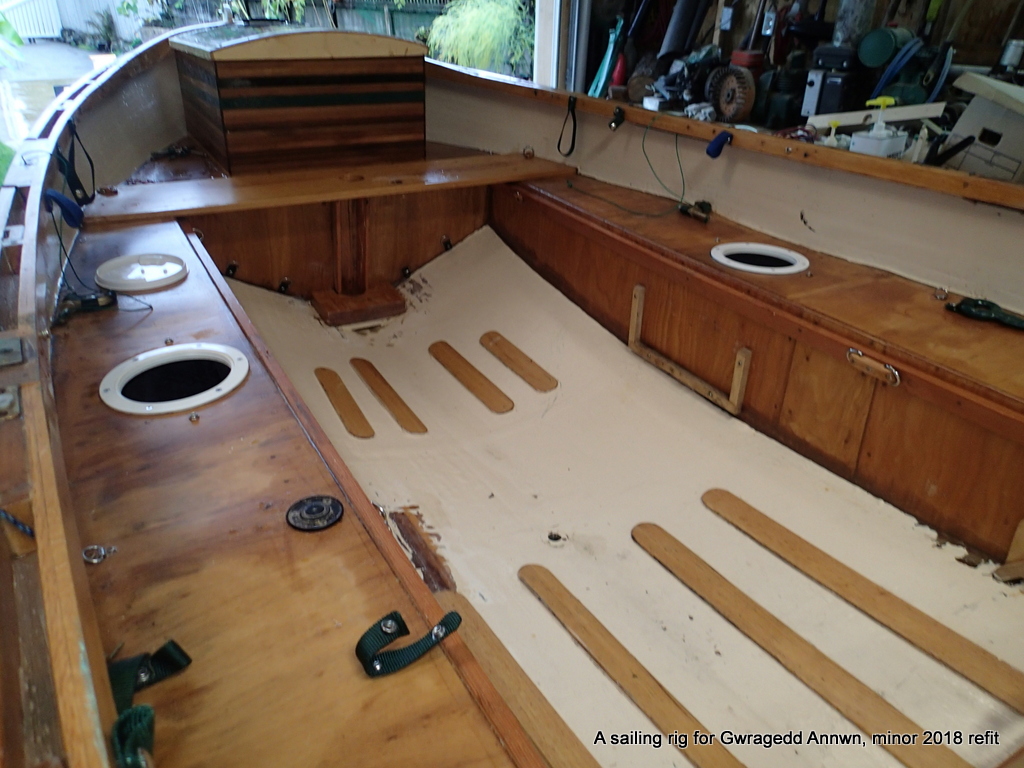
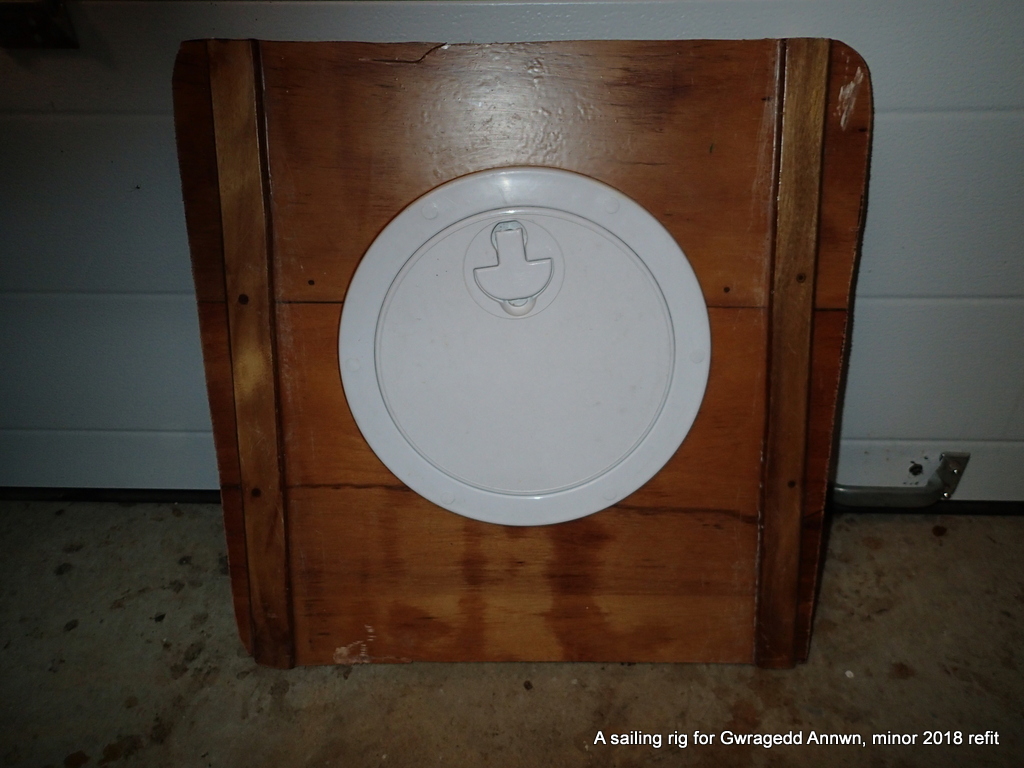
I am going to add inspection ports to all of the buoyancy tanks.
New inspection hatch on the port side of the stern tank
Starboard inspection hatch marked out for cutting.
Inspection hatches fitted and glued in with sealant & screws.
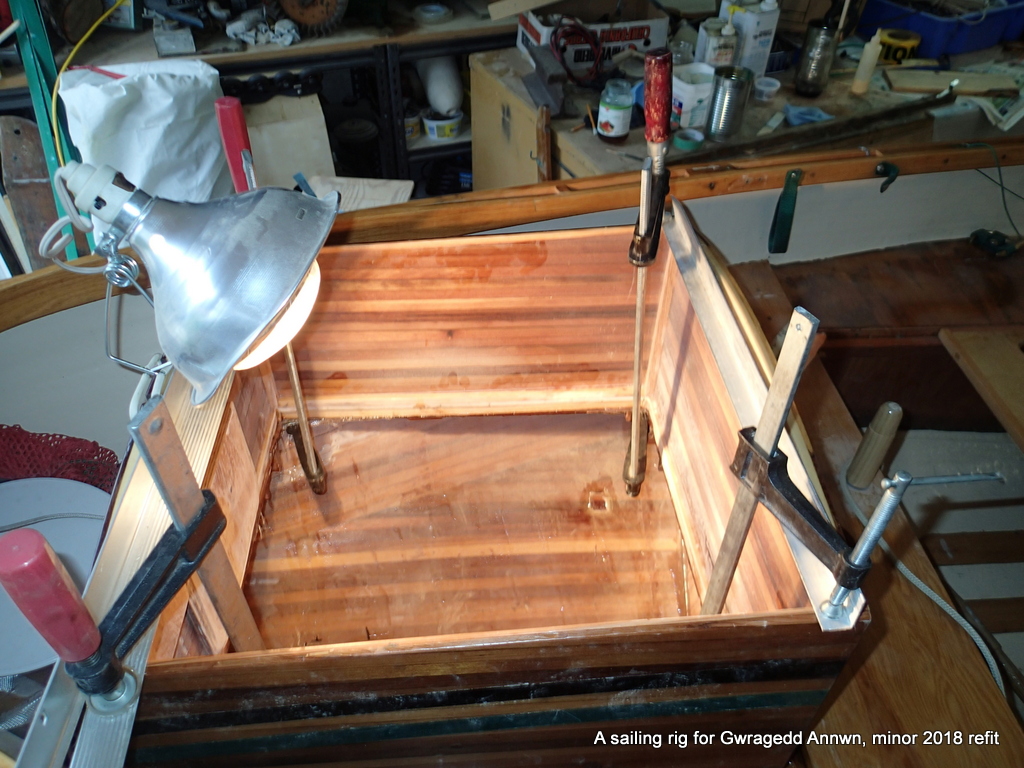
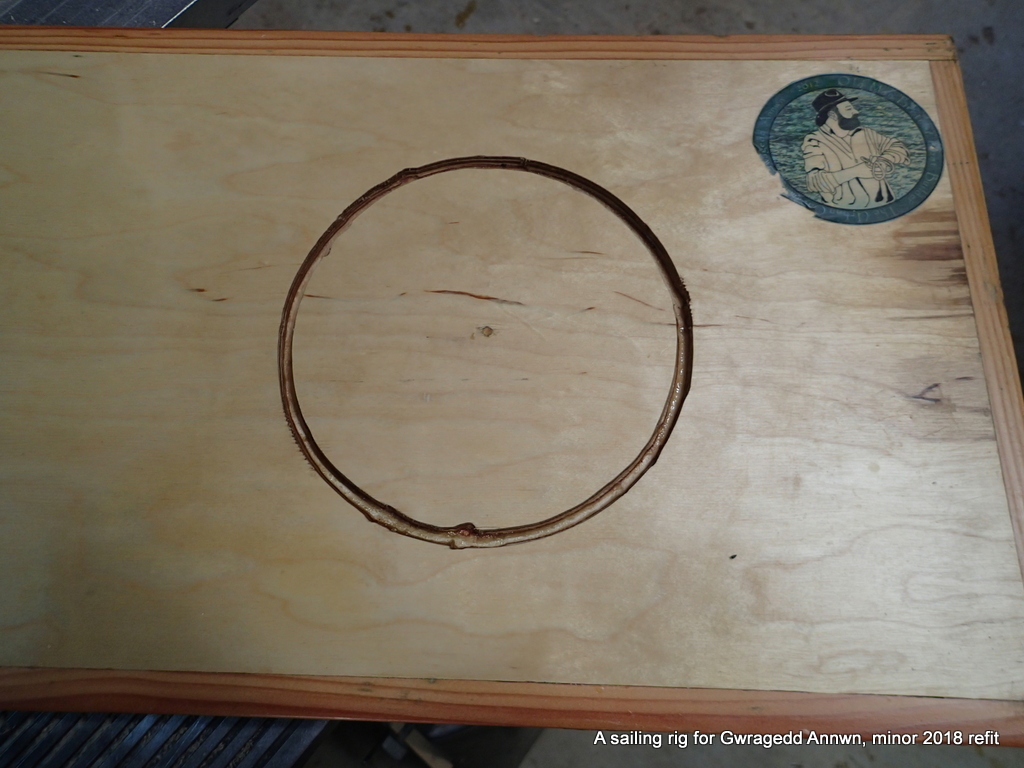
From cruising experience, I decide to take out the forward inspection hatch and replace it with the deck box. This will give me greater access to the dry storage in the forward buoyancy tank.
Forward deck box being used as a cutting guide. I traced around the bottom of the box.
The old inspection hatch cut out for the installation of the deck box.
Bow storage box, bottom cut out, epoxied into place. Heat lamp to help curing.
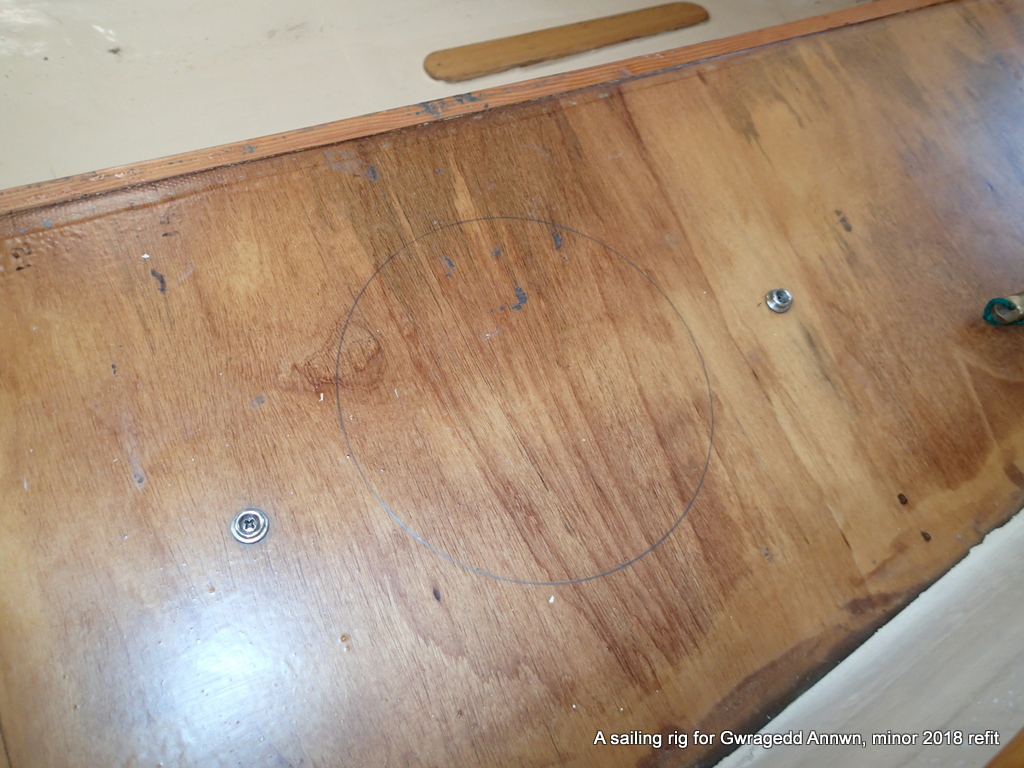
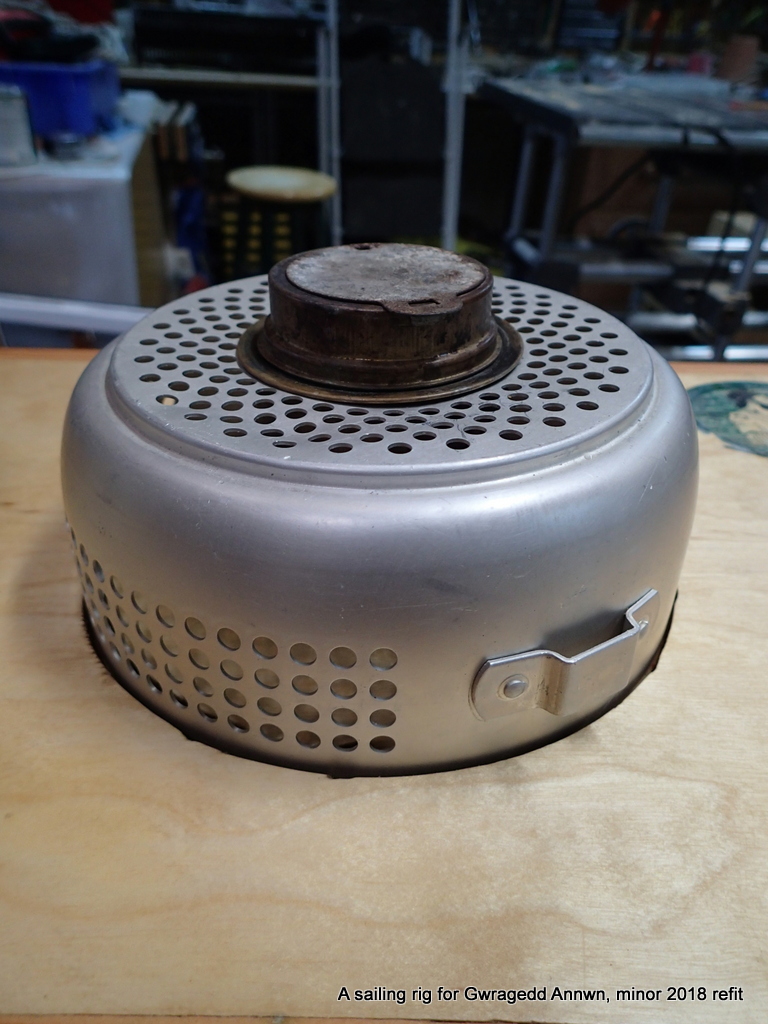
I us my small router to cut a circular grove into a thwart for my stove.
The base of the Trangia stove fits perfectly. Now I can cook at sea!
My wife bought the Trangia stove new almost 40 years ago. (and has used it on a lot of hiking trips since then!) Still works like a charm. Boils fast, simmers slow. A great stove. (You can still buy them from MEC…they do not offer the “kettle”option any longer but, you can order a kettle from the manufacturer) Now, I can take the thwart, flip it so the groove is on the top, put the stove in it and start cooking. The thwart will fit anywhere along the two buoyancy tanks.
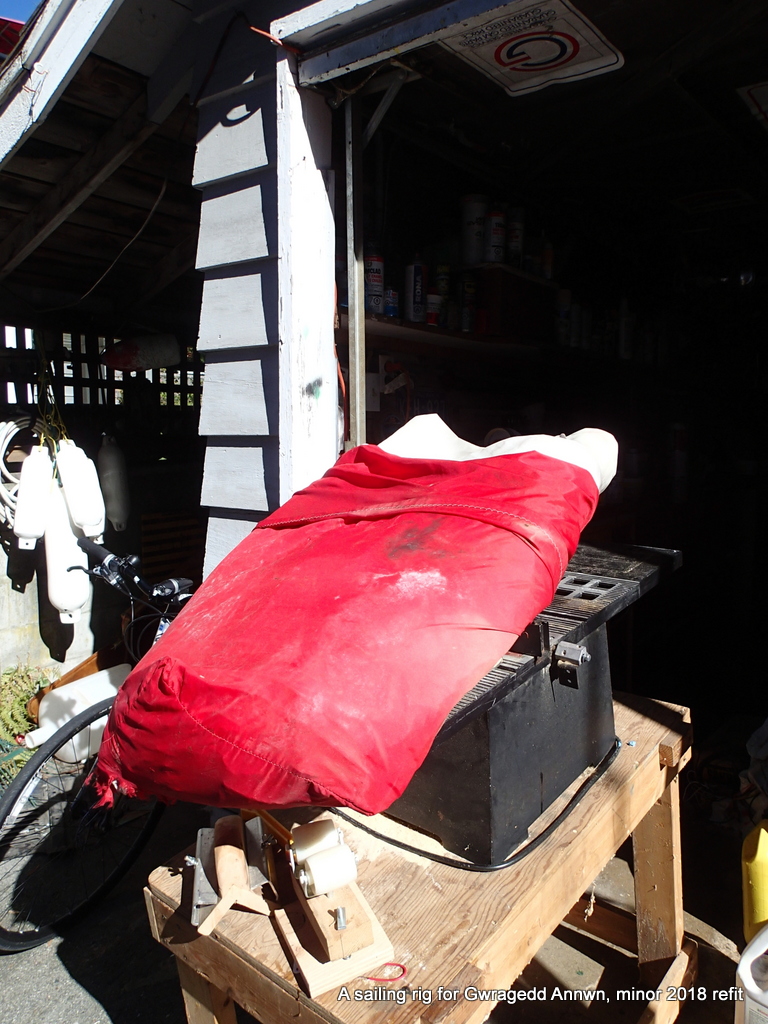
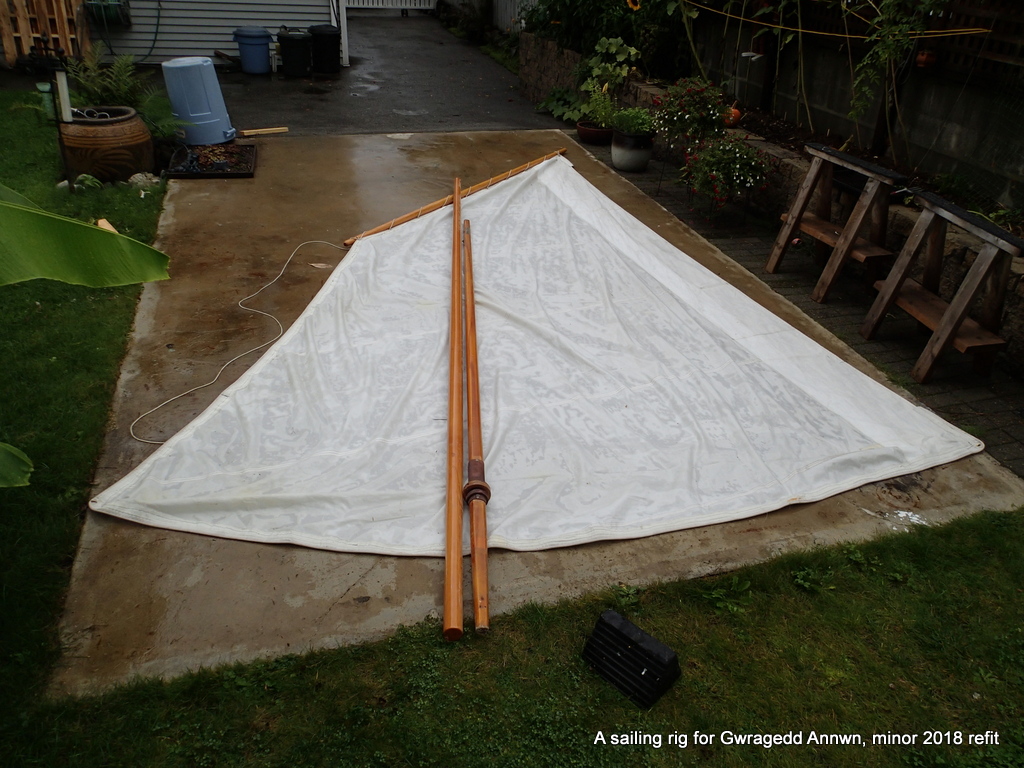
Old big jib sail I bought off of a friend years ago…Too bad he had cats!
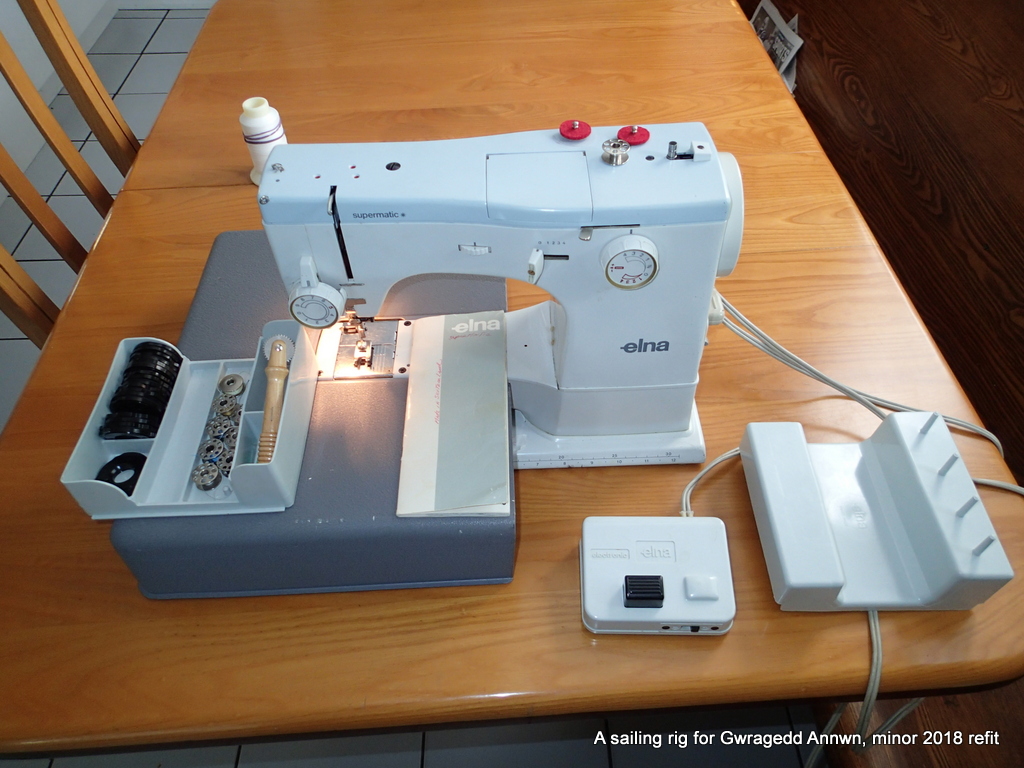
I bought a old Elna sewing machine because it could sew through six layers of sailcloth from the jib.
The Elan sewing machine I used to sew up the cobbled together Lug sail. I cut the top and bottom off of the sail and hemmed it up using the Elna. I kept the bolt rope in the sail, sewing it to the top, The bolt rope was already in the luff and I sewed it into the foot of the sail. The black disks in the tray allow me to do very fancy stitching…I only straight and zig-zagged.
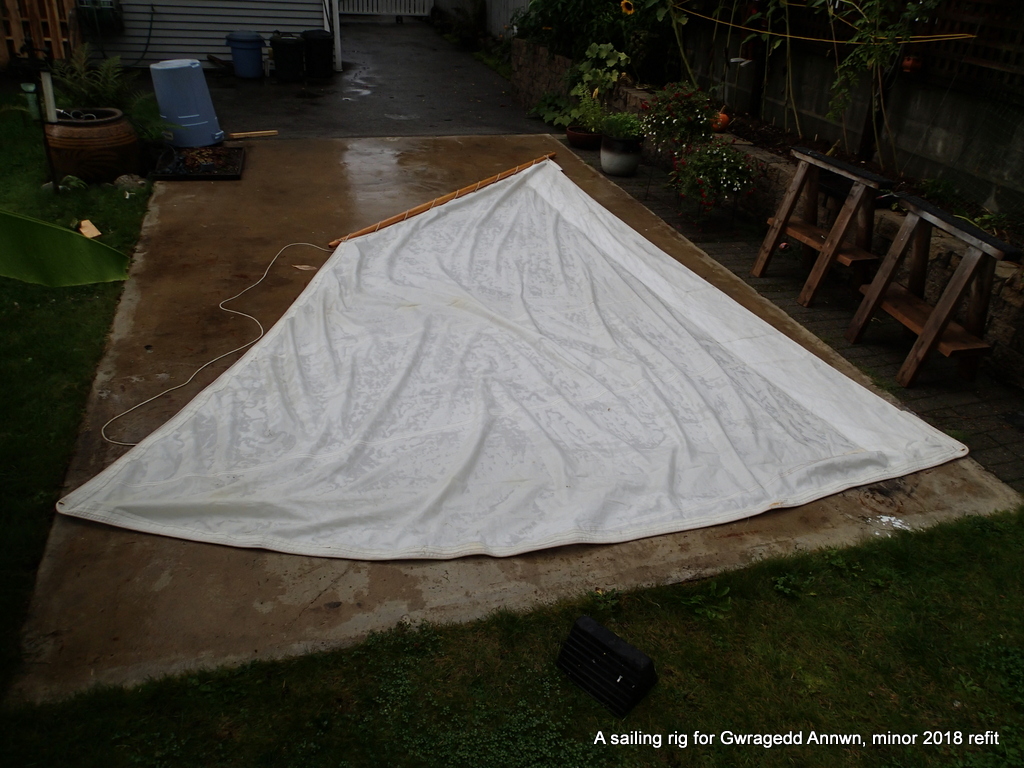
In this photo, you can see that this is a jib with the top and bottom cut off and hemmed.
I put eyelets every foot or so along the top edge. I kept the rope luff on the sail and sewed it to the top and foot of the sail. I guesstimated the curve to go against the yard.
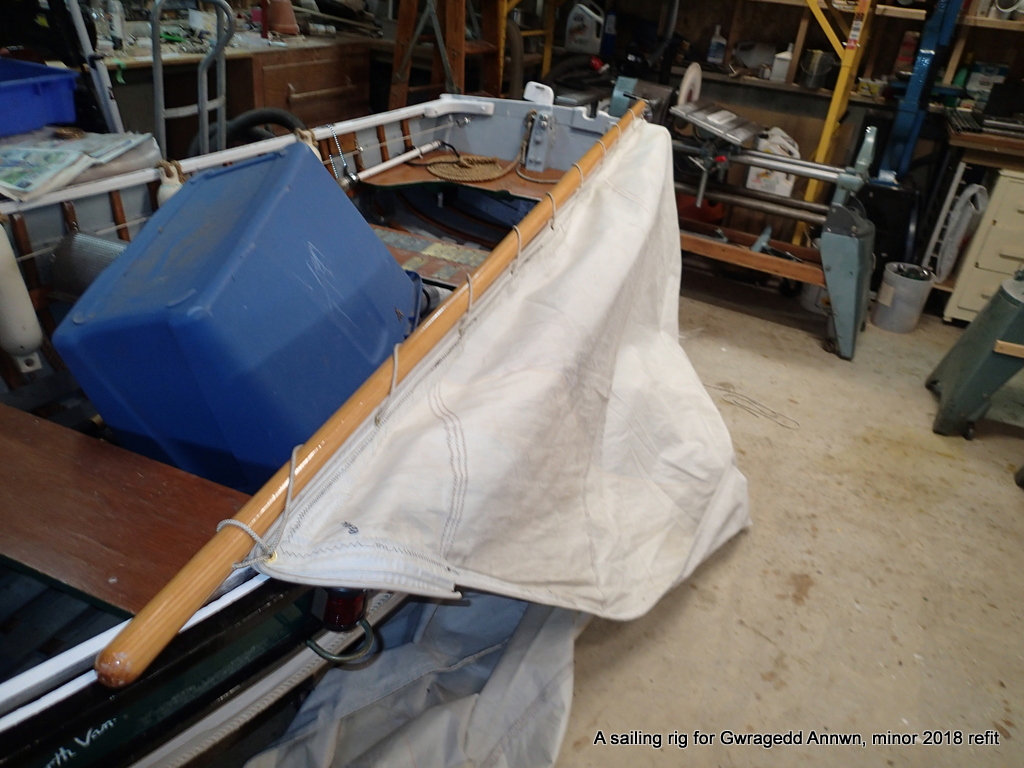
Fitting the mast to the sail.
Lug sail laced to the yardarm. (sitting on my other boat, “Snowdrop” a clinker Turner lifeboat)
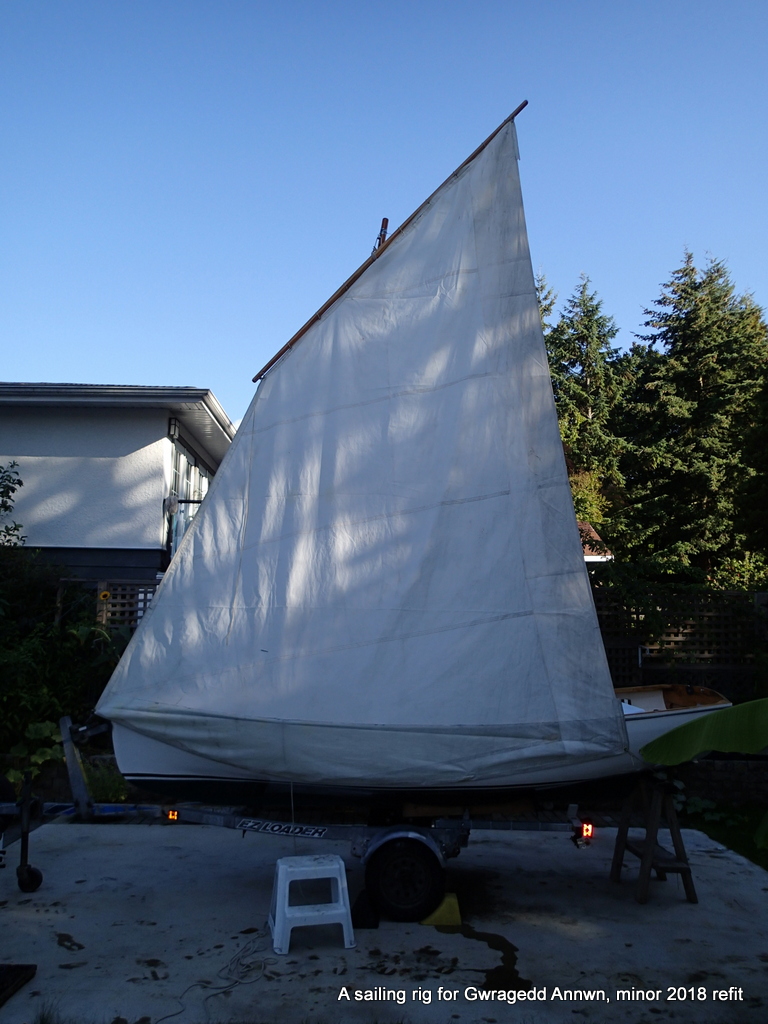
OK, so I hoist the lug sail and see how well it fits!
Looks a little too long, I need to cut off some of the bottom or get a higher mast.
I mark and cut off some of the sail at the bottom and re-hem the sail.
You can see in the photo where I have marked the centre of effort of the sail.
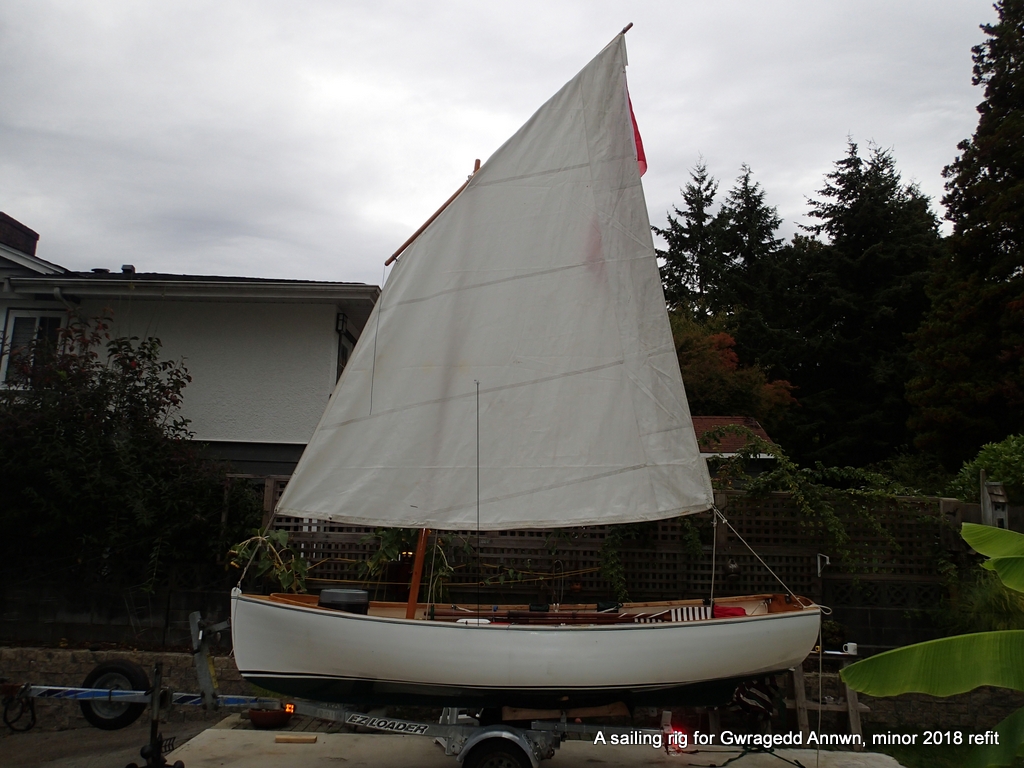
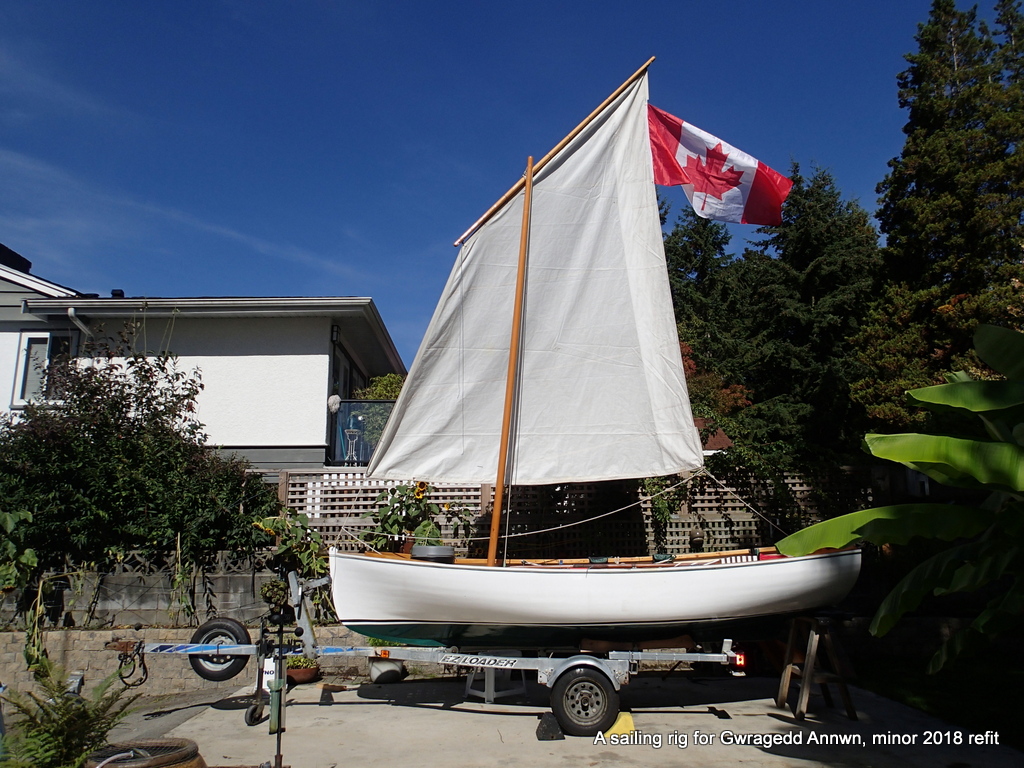
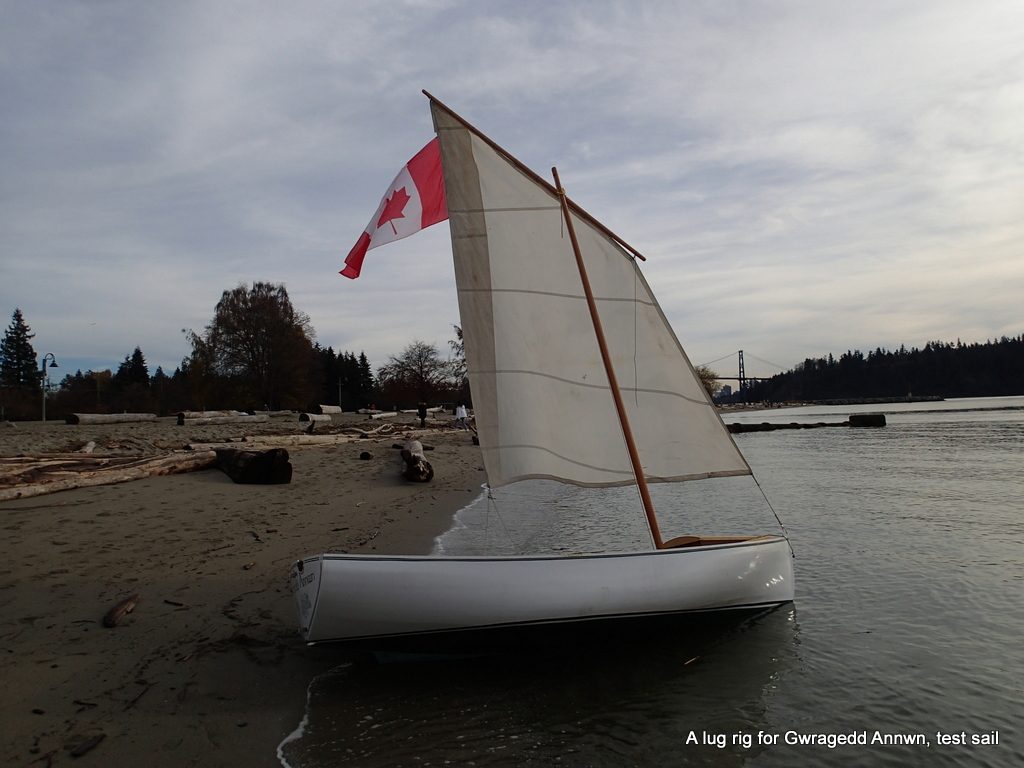
Here is the final sail fitting, I have sewn on a Canadian flag. The sail is now about 85 square feet.
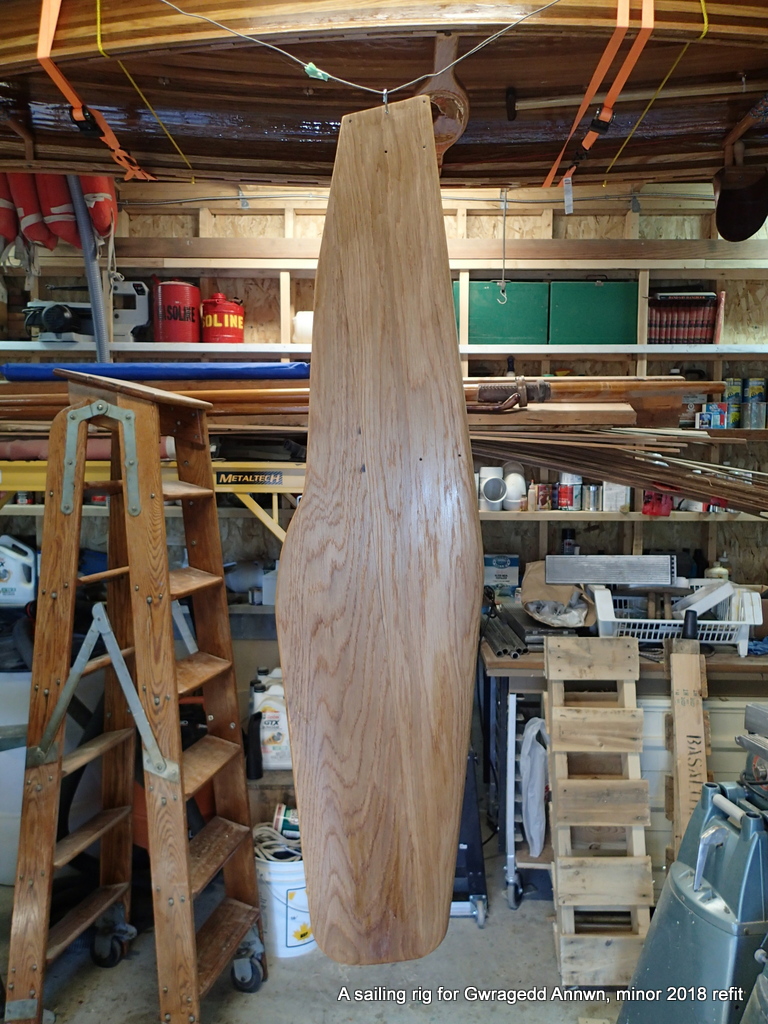
I still have to make a rudder for Gwragedd Annwn.
I use a Taser rudder for parts.
Using the Taser rudder as a guide, I glue up some 4/4 oak for the rudder blade.
The streaks you see is the epoxy glue.
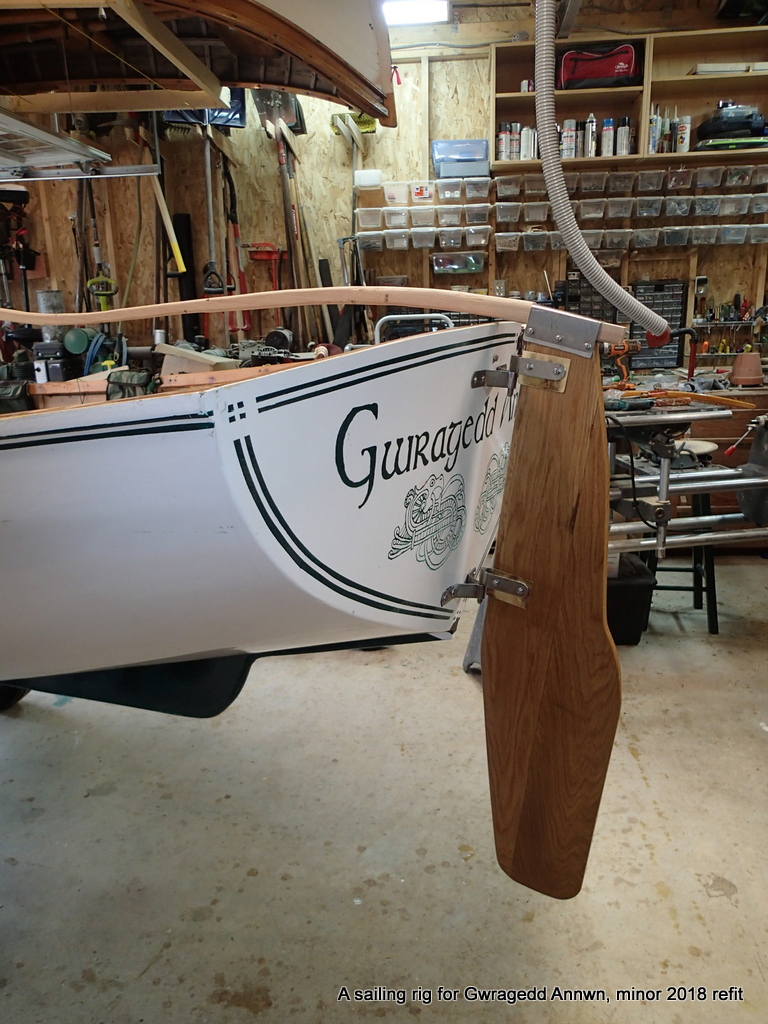
Rudder blank being fitted to the stern of Gwragedd Annwn.
I fit the blank to the stern of Gwragedd Annwn, using the rudder pintles to fit the gudgeons to the transom of Gwragedd Annwn. The gudgeons are bolted to the transom. ( the pintles are bolted to the rudder as well)
After everything is fitted, I dissemble and varnish the rudder.
I make up a new tiller as well using the old Taser hardware. The hose in the picture is part of the dust removal system in my shop.
Gwragedd Annwn’s temporary “test leeboard”, an old Enterprise centreboard.
I will tie the test leeboard to the gunnel to determine where Gwragedd Annwn’s centre of lateral resistance is and where the leeboards should go.
I now have enough done to take Gwragedd Annwn out for a test sail. Will she actually sail well?
I take all of the gear down to the Club, fit it to Gwragedd Annwn and out we go. I forget the camera and GPS. No bailer either. I row her out past the fishing pier and hoist the sail. There is between 5 and 10 kms of wind. I have a bit of a hard time hoisting the sail high enough to keep the luff tension tight. Will have to fix that…a two to one hoist? Theoretically Gwragedd Annwn has enough lateral resistance with her hull shape to sail without a centreboard or daggerboard or leeboards. I watch her stern wake….I can see that she is slipping to leeward. I attach the makeshift daggerboard and try again. This time there is no discernible drift visible in her wake. I move the makeshift leeboard forward and aft to find Gwragedd Annwn’s centre of lateral resistance…where the helm feels best balanced. She sails well, feels fast for the wind speed, and tacks easily. I feel that her rudder could be a little bigger. After an hour or so, I head back to HSC…The sailing test has been a total success!!!
Sadly no photos……
Based on the success of the sailing test, I am going to get a “real” sail made…Sadly, my local sailmaker has retired and his shop is closed. I look for lug sails on line and find that the Goat Island Skiff lug sail is almost the exact same size as my sail, probably within 5% or less. The sails are a deal! I order one from Duckworks in Port Townsend. Most likely will have to make a new taller mast and a longer yardarm. The centre of effort of the sail may be significantly different than my sail so I cannot fix my leeboards permanently. I will have to wait for the new sail, make a mast and yardarm to fit and re-determine where the leeboards should go.
There are things I can work on now…..
I will make the rudder blade bigger…Oh, yea, I have to make the leeboards too.
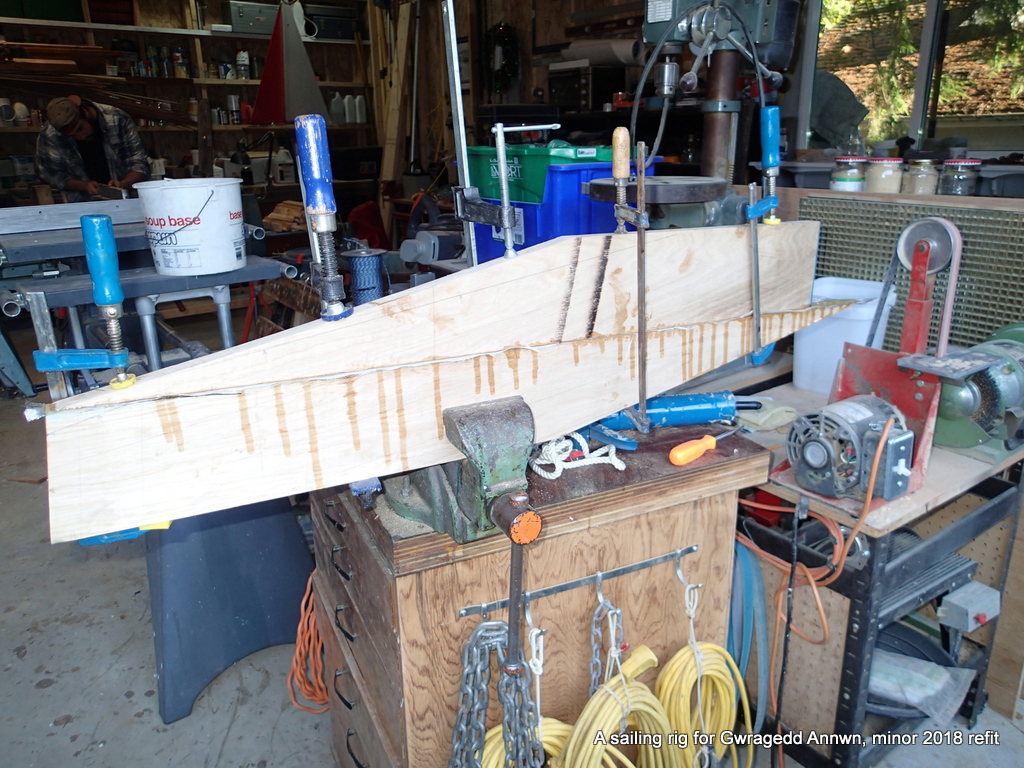
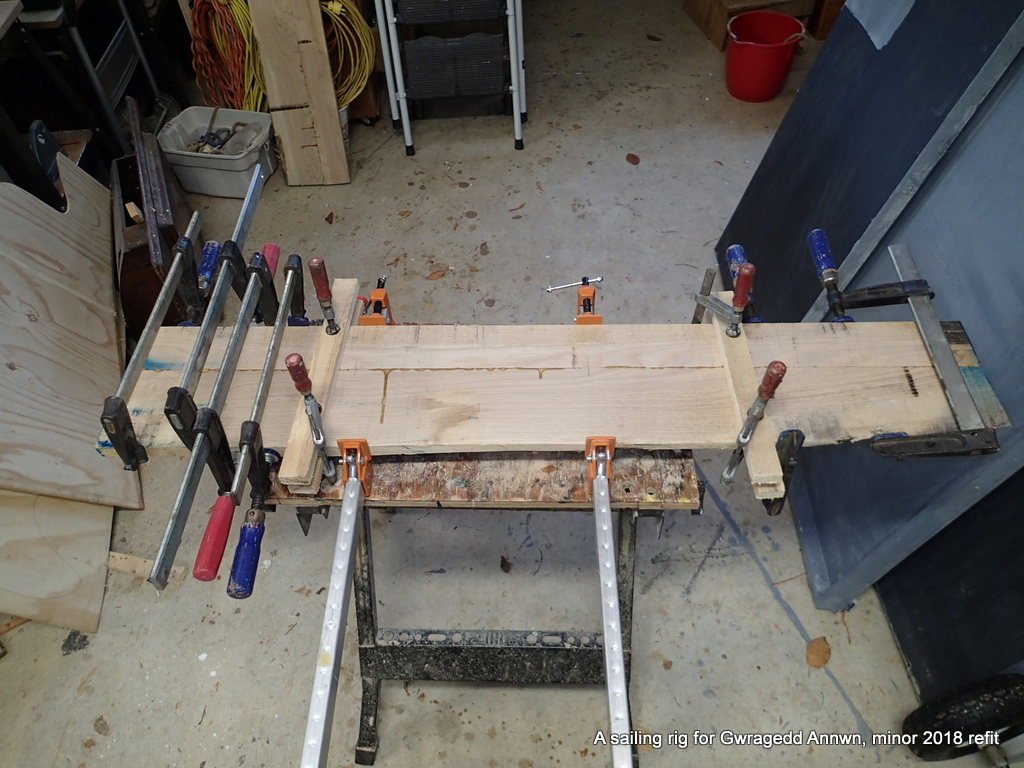
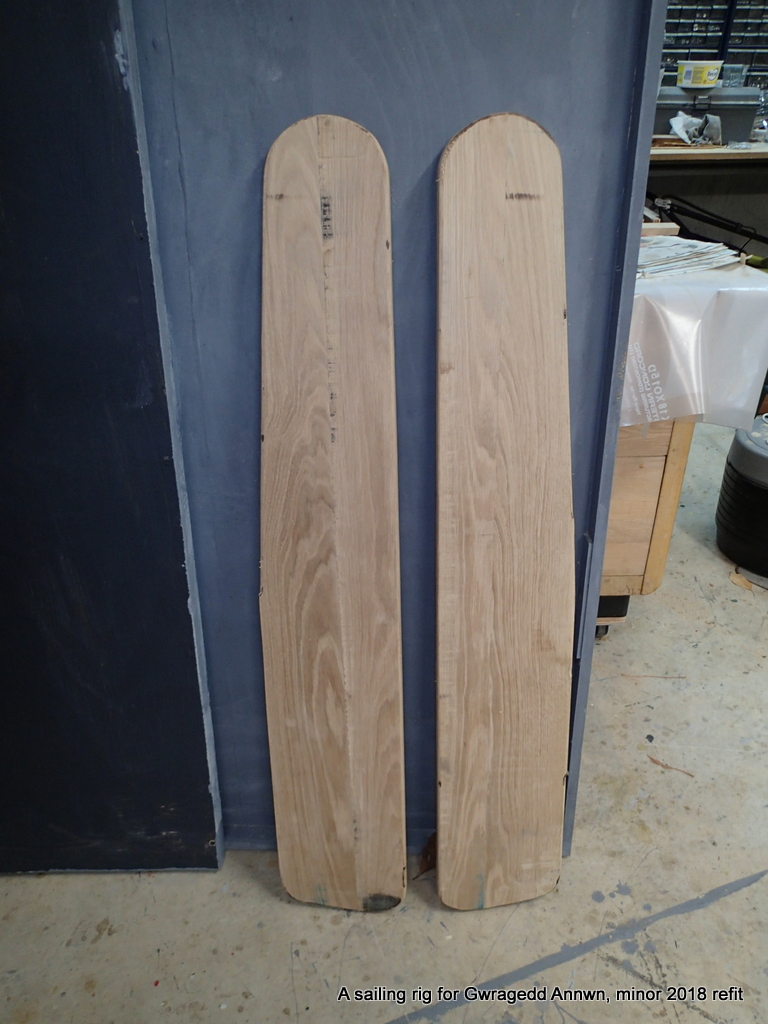
Gluing up the “good” leeboards.
I break a clamp gluing up the leeboards.
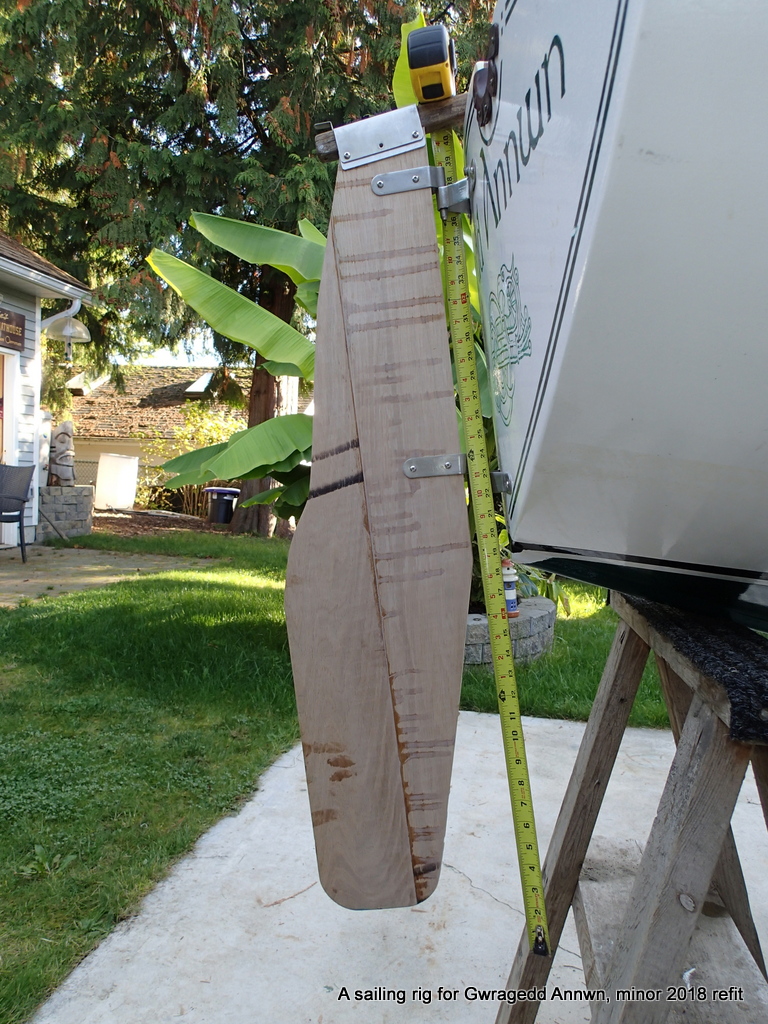
The two leeboards roughed out, ready for foil shaping. The convention is to have the leading edge rounded and the trailing edge tapered about 3 to 4 times as long as the leading edge.
Between the two of them, there will be more surface area in the water than the cobbled-together leeboard I tested Gwragedd Annwn with.
I round the leading edge of the leeboards and taper the trailing edge about 4 to 1. Sand and varnish. (many times)
I remove all of the hardware and cut the rudder down the middle and biscuit joint in a middle piece. I also glue in a piece for the rudder hold-down bracket. I am gong to move the tiller bracket , so I fill in the bolt holes with bamboo skewers and epoxy.
The rudder also needs a tiller extension, so I make one.
I have a tiller extension fitting from another boat. Tiller extension fitting in top centre of photo.
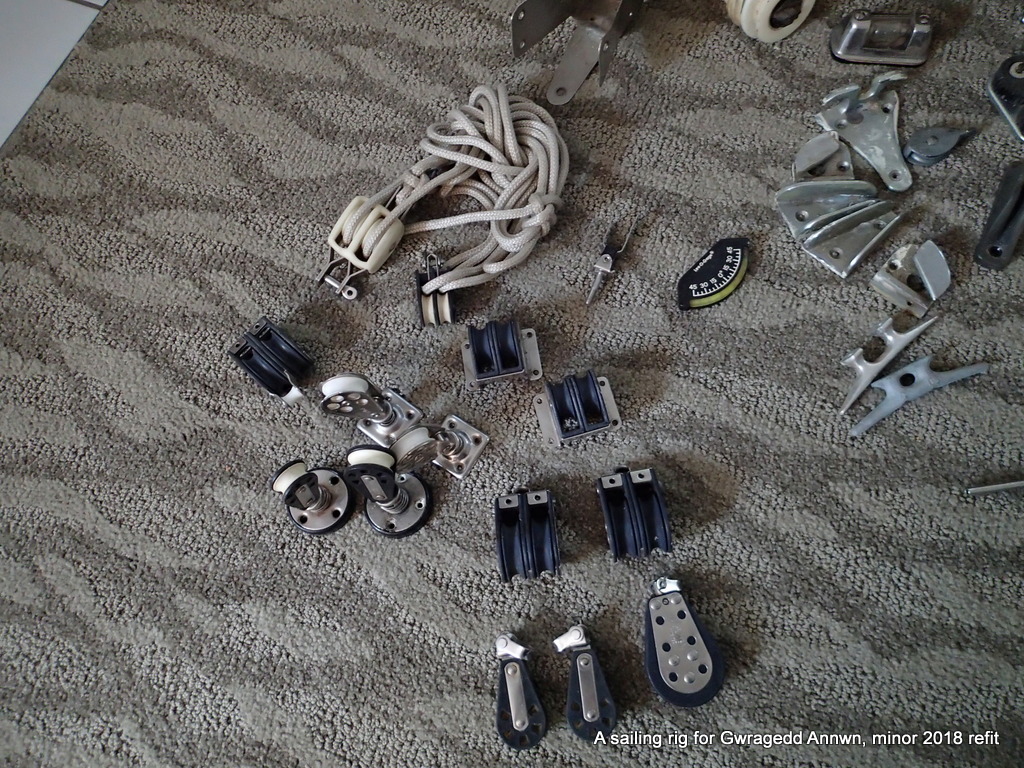
Some of my salvaged fittings.
I cut a tiller extension to mirror the tiller I made before.
Varnishing the tiller extension. Might as well put a few more coats on the tiller as well.
Rudder and tiller final. That is a Halloween decoration castle in the background.
Everything is ready for another test fitting…I do not have the new sails yet, however, I can still do some test fitting…
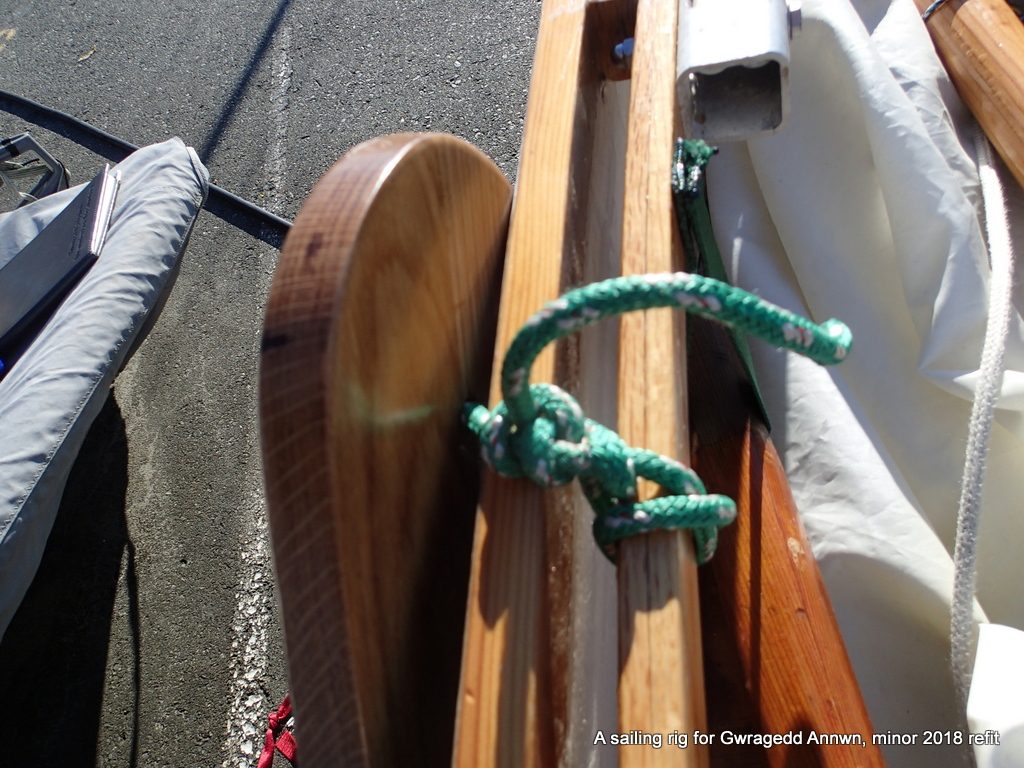
I take the leeboards down to the Club and tie them onto Gwragedd Annwn.
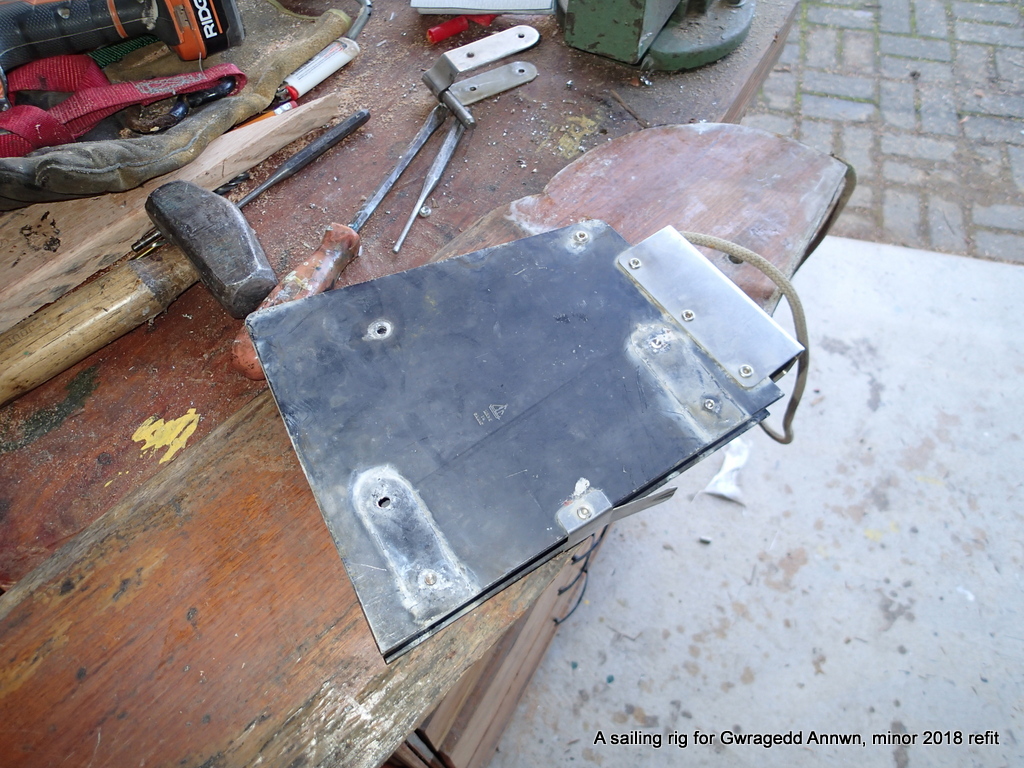
I have to come up with a better attachment than this…I make a plan!
I stare at the leeboard for a while and come up with this attachment support.
The rope (or could be a 3/8″ bolt) fits through the top of the support. It could be attached to a cleat on the support. I add an additional 3/4″ piece on the outboard side of the support. this will allow me to shape the support to allow the leeboard to parallel the keel and not the curve of the hull where the leeboards are. Again, this will depend on the test fitting.
The support blocks glued up next to one of the two plant-pot heaters I use to keep my shop from being damp.
I shape the leeboard supports and give them a coat of varnish, assemble the leeboards:
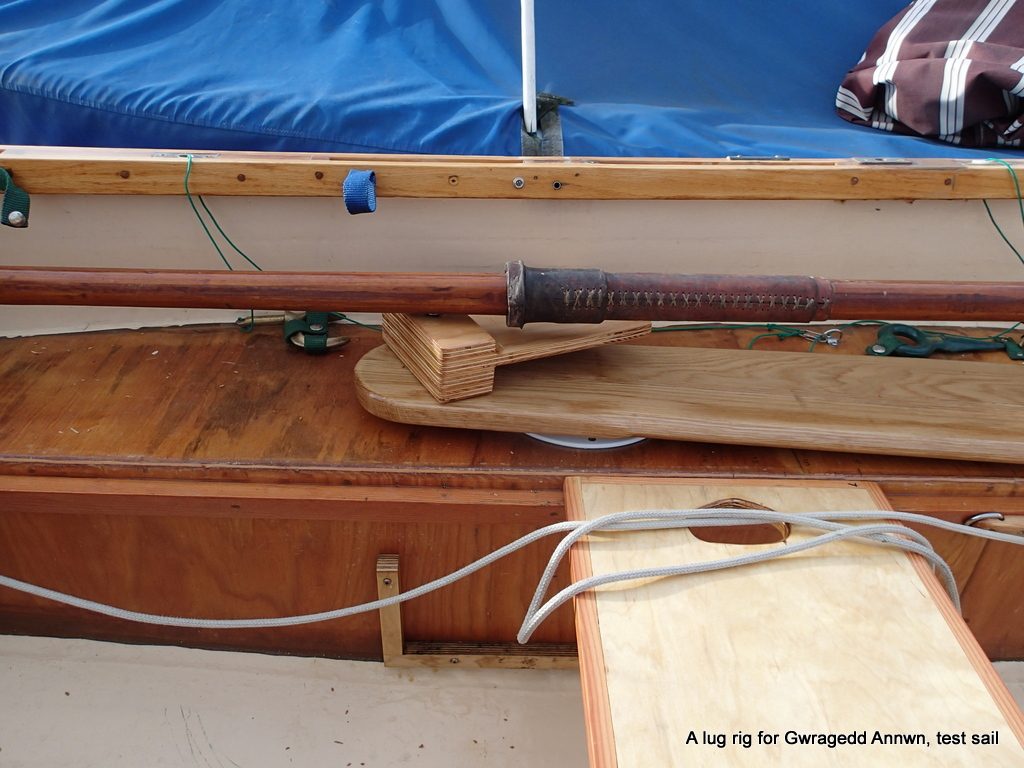
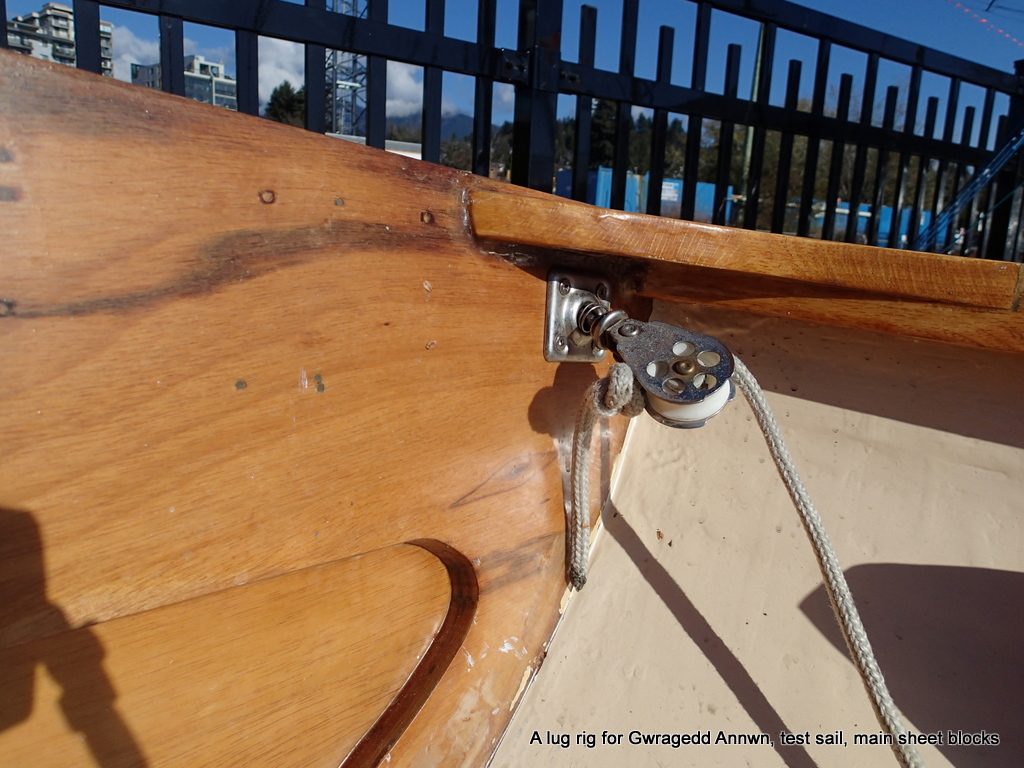
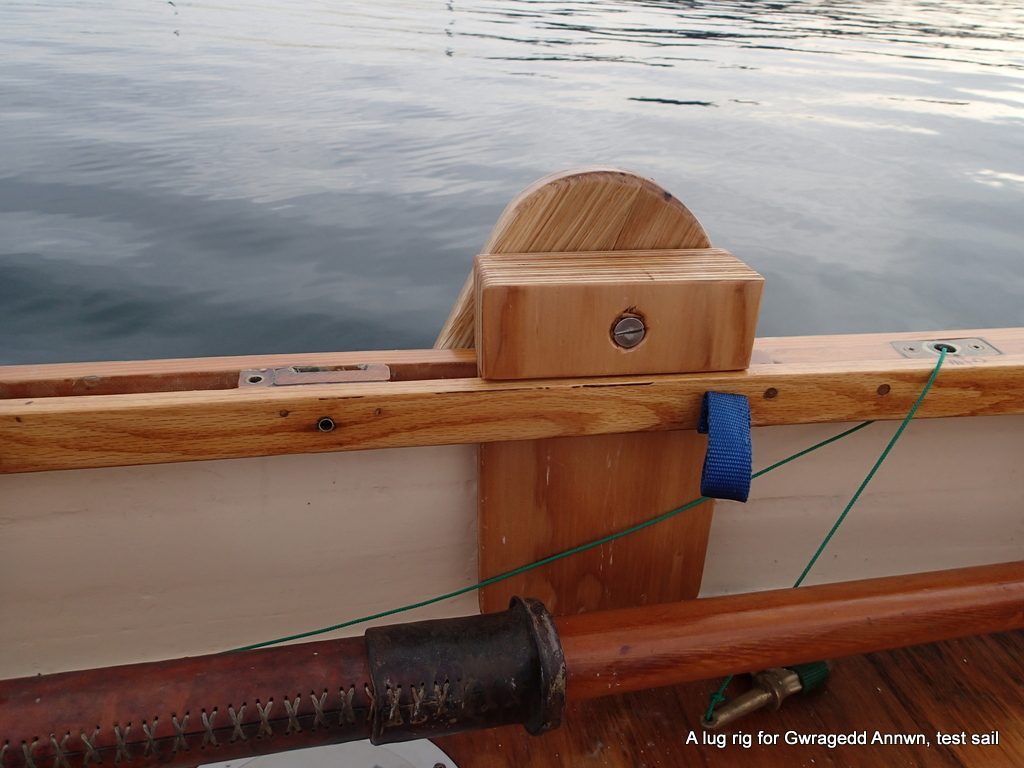
One of the leeboard assemblies in Gwragedd Annwn for the second test sail.I have screwed in two blocks for the main sheet…I am using two main sheets, one on either side of the mast. This is the starboard main sheet and block.
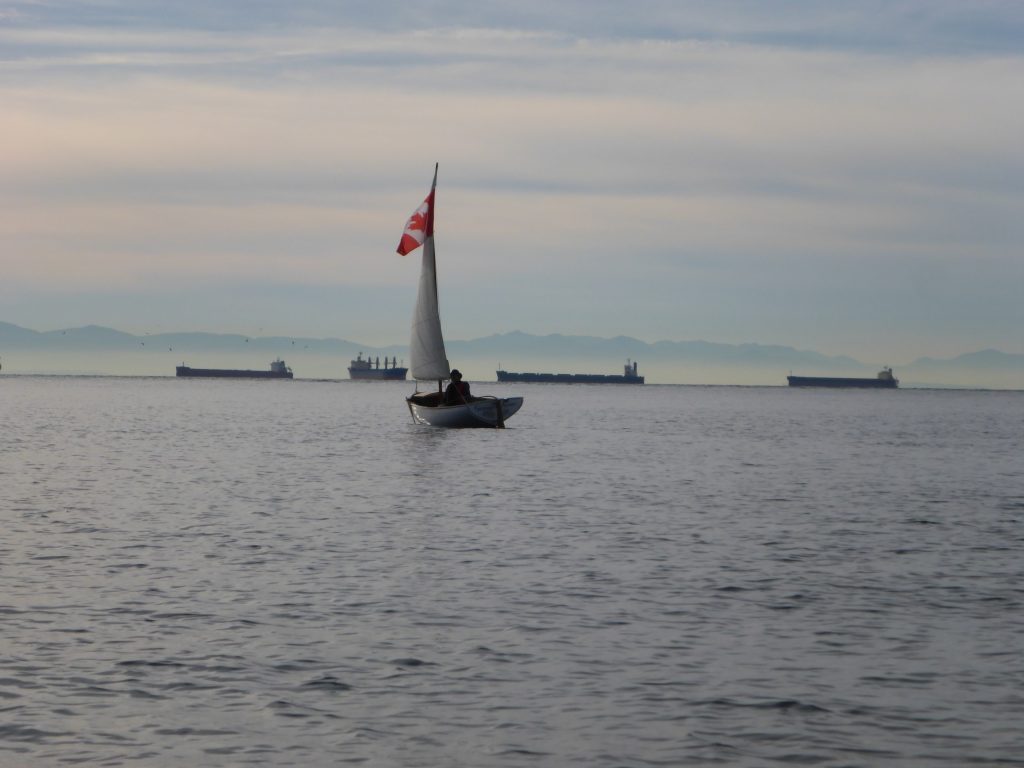
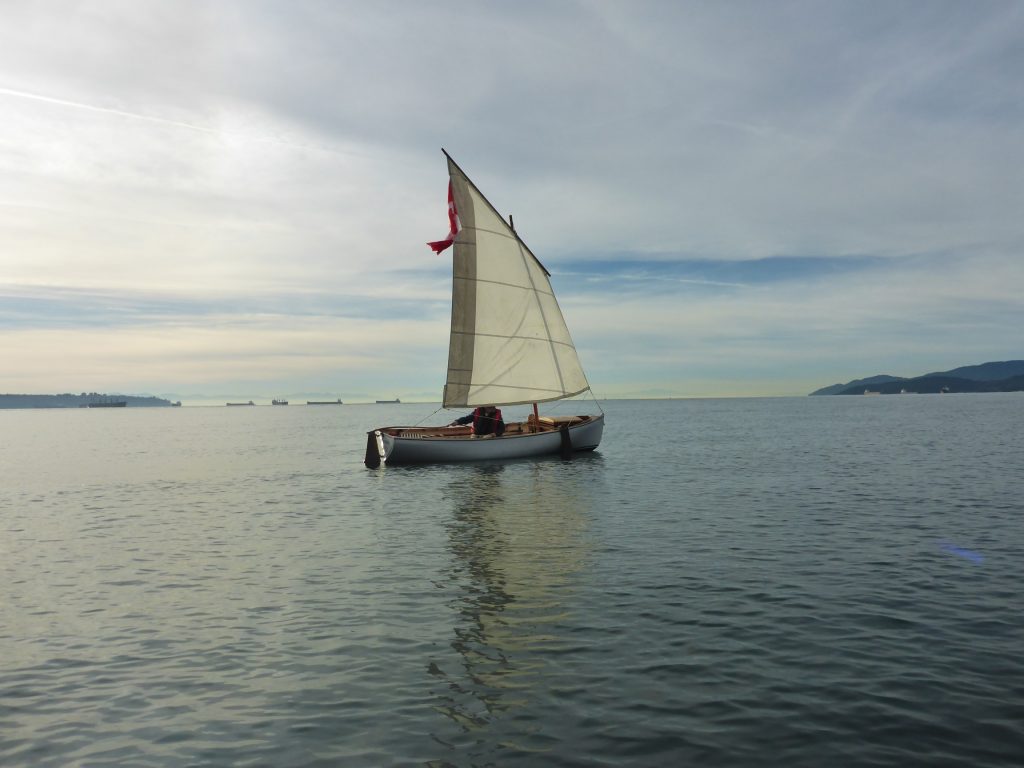
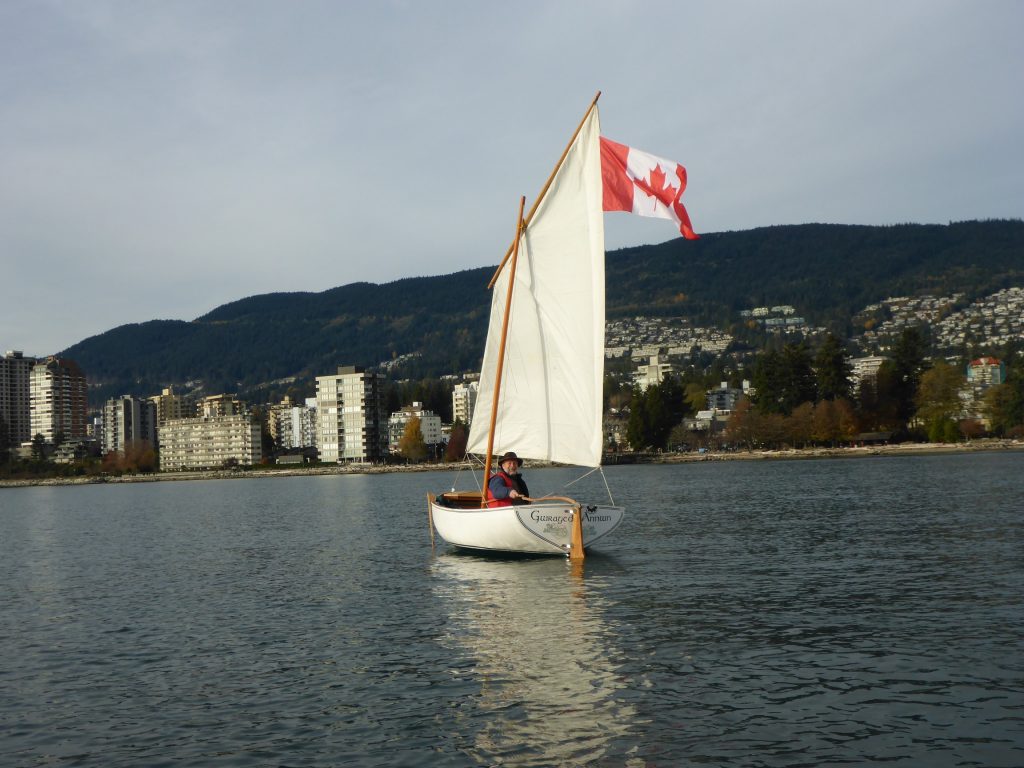
Port main sheet and block.The leeboard assembly in action. The “tab” fits into the space between the inner and outer gunnels. I can adjust my centre of lateral resistance by moving the leeboards forward or aft.Gwragedd Annwn and her dipping lug sail, ready to launch.Gwragedd Annwn sailing in light winds with her dipping lug sail, Starboard tack.Gwragedd Annwn on Port tack.Gwragedd Annwn is sailing quite well. I am very pleased. With her boards down, she makes very little leeway. She has become a sailor!!! I am pleased enough with her performance that I will make a new mast and yardarm for my new “Goat Island Skiff” sail. When I have the new mast and yardarm made, I will do some more test sailing to determine where the best placement for the mast and leeboards are.
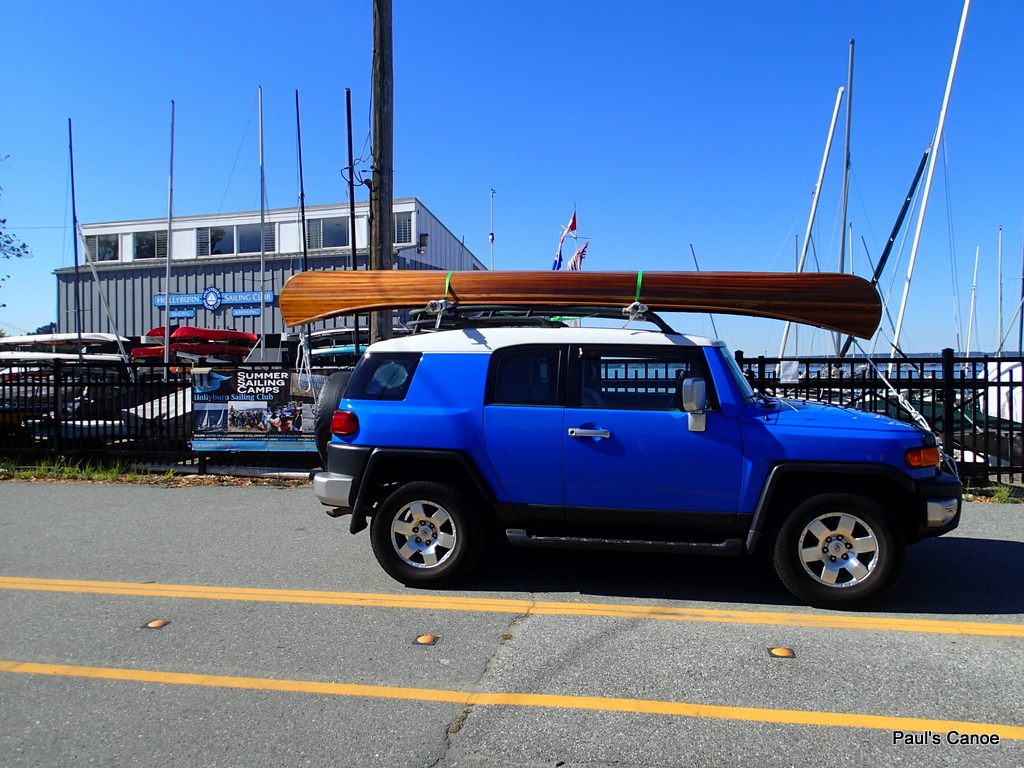
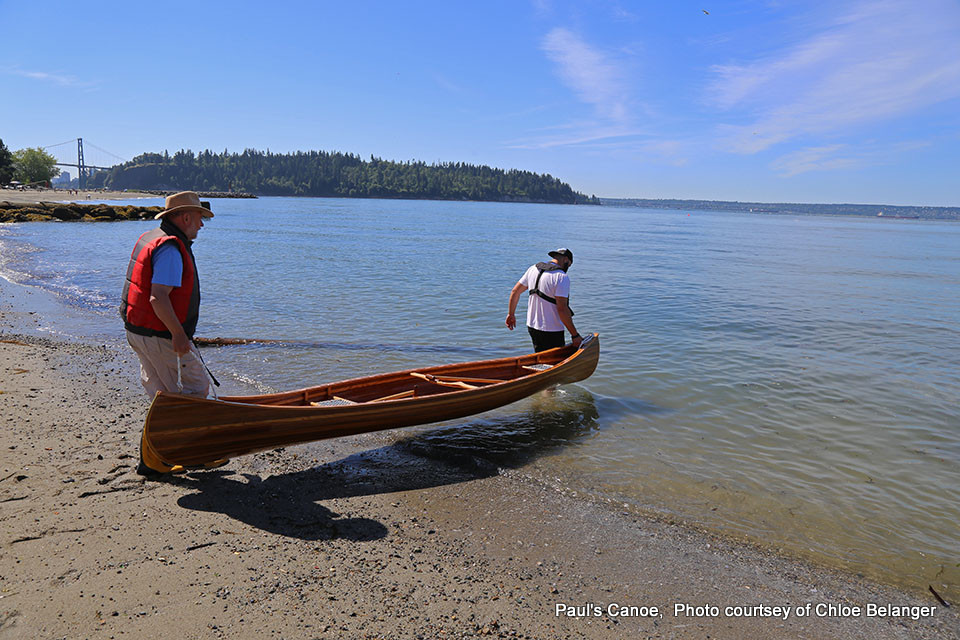
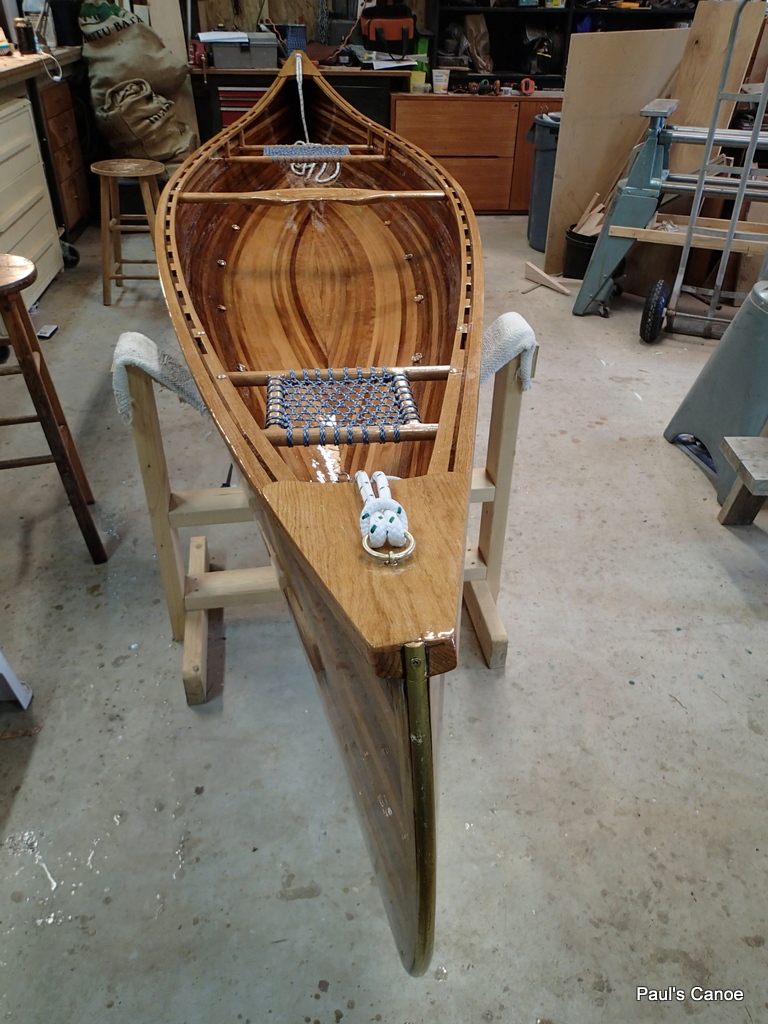
The canoe launch is today, Father’s Day, June 17th , 2018, at the Hollyburn Sailing Club.
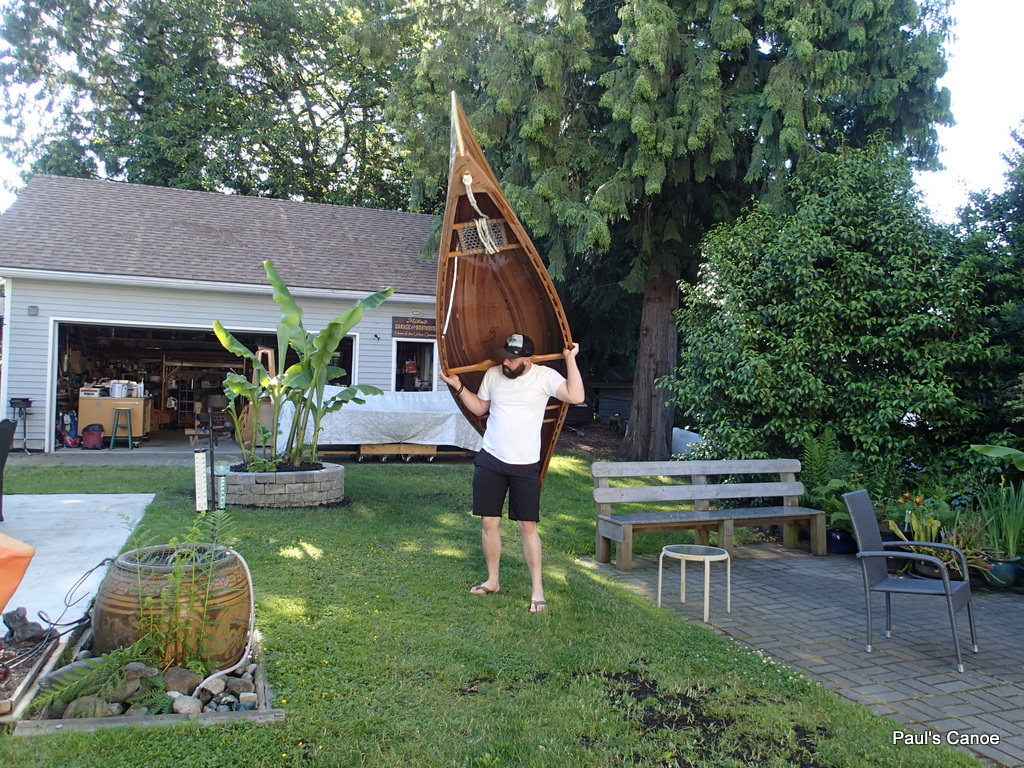
Paul carries the canoe to load onto the FJ.
Paul easily picks up and carries the canoe.
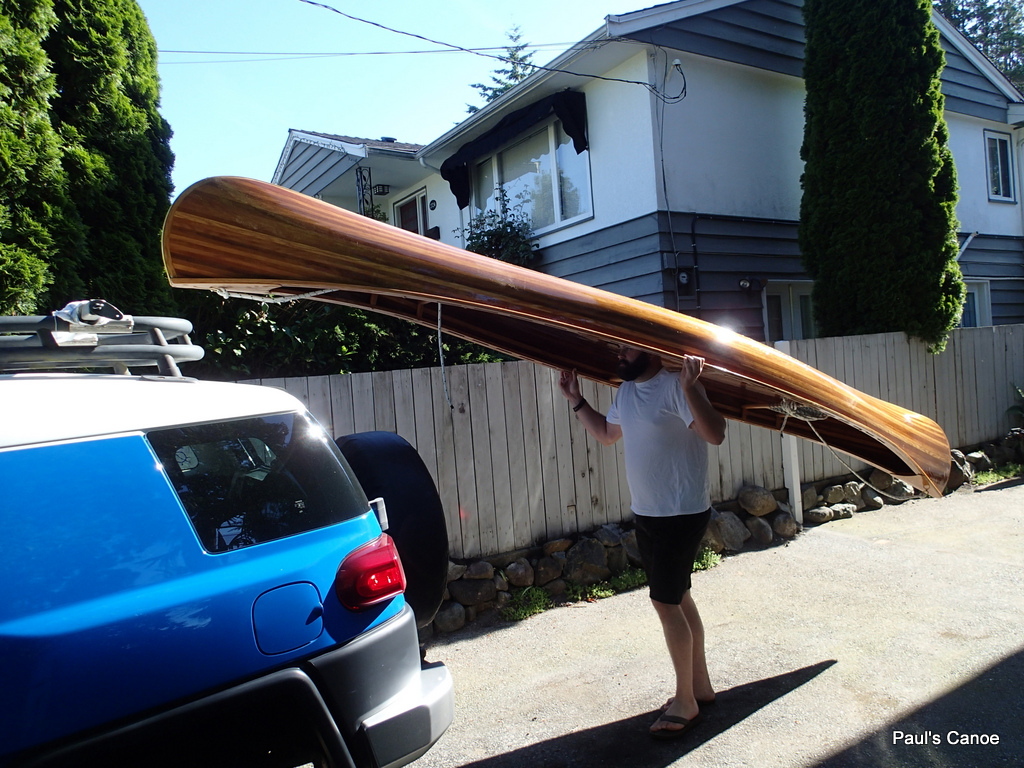
Onto the roof racks.
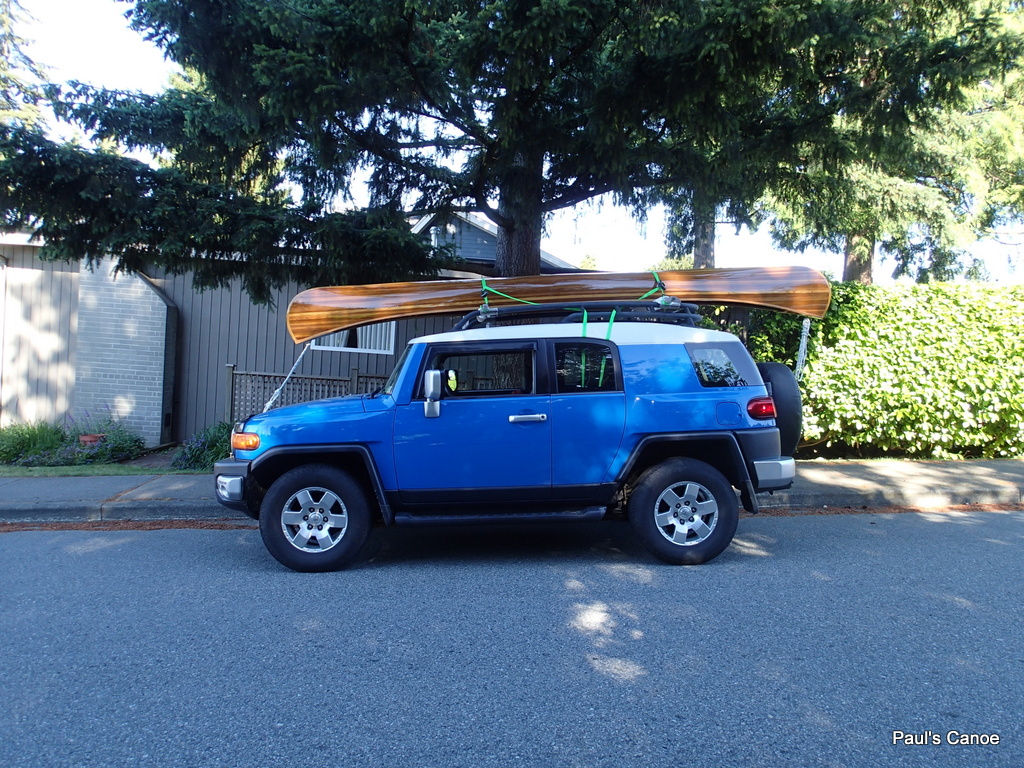
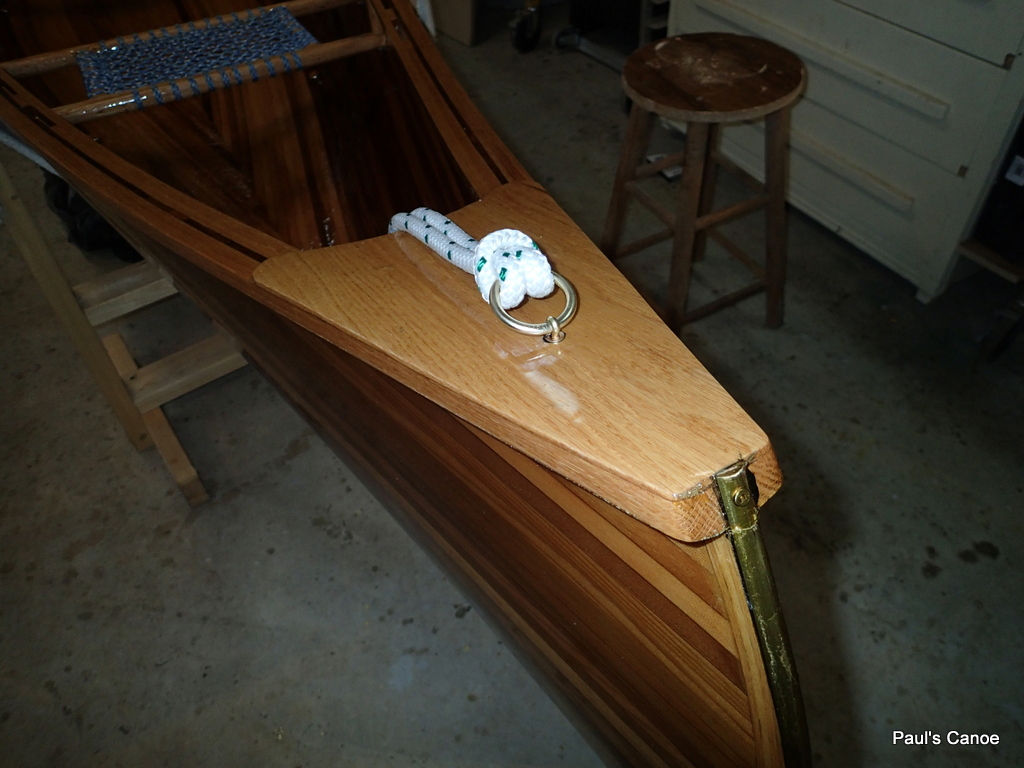
I have taped towels onto the roof rack crossbars. We centre the canoe and I tie it down. The now bolted-in bow and stern rings work well.. Feel very secure.
The bow and stern lines are just the right length to tie to the FJ.
Two green ratchet straps, (the ones used to hold the strips to the station molds) secure the canoe….It could be a little further forward?
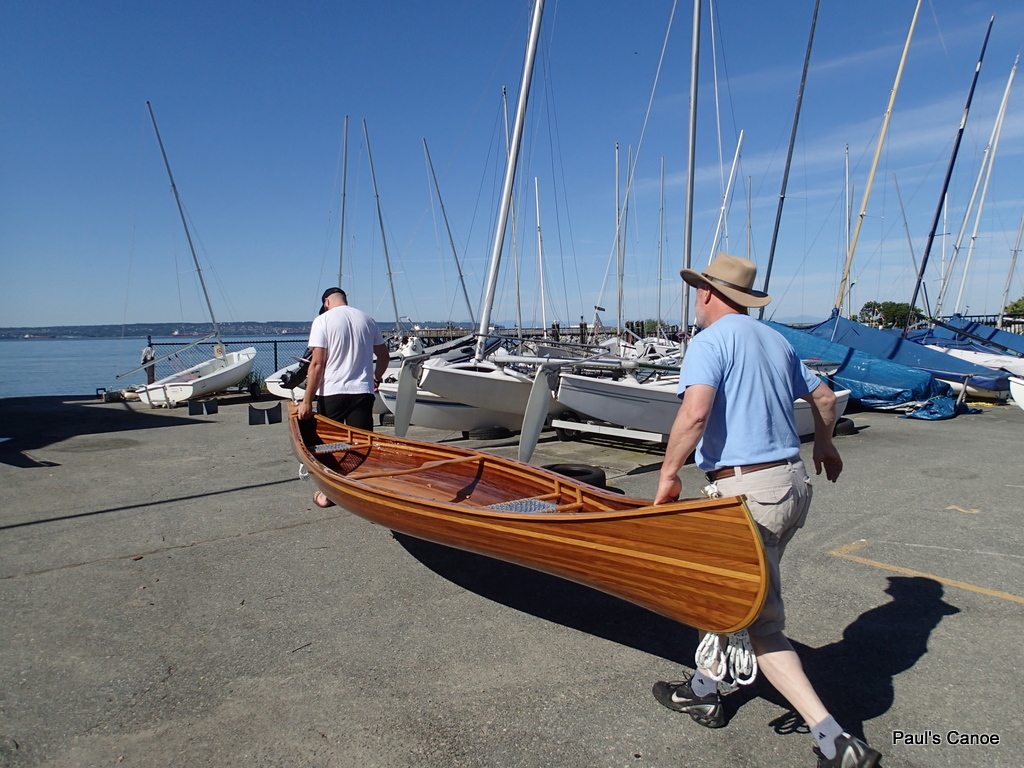
Unloading at the Sailing Club.
Aside from all the admiring glances, an uneventful drive to HSC. Paul and I unload the canoe and place it on two kayak stands.
It is a light carry into the Club.
We put the canoe onto the kayak stands (now canoe stands). This club has everything you need to get out on the water…
We get the paddles and I park my FJ in the Ambleside Park parking lot.
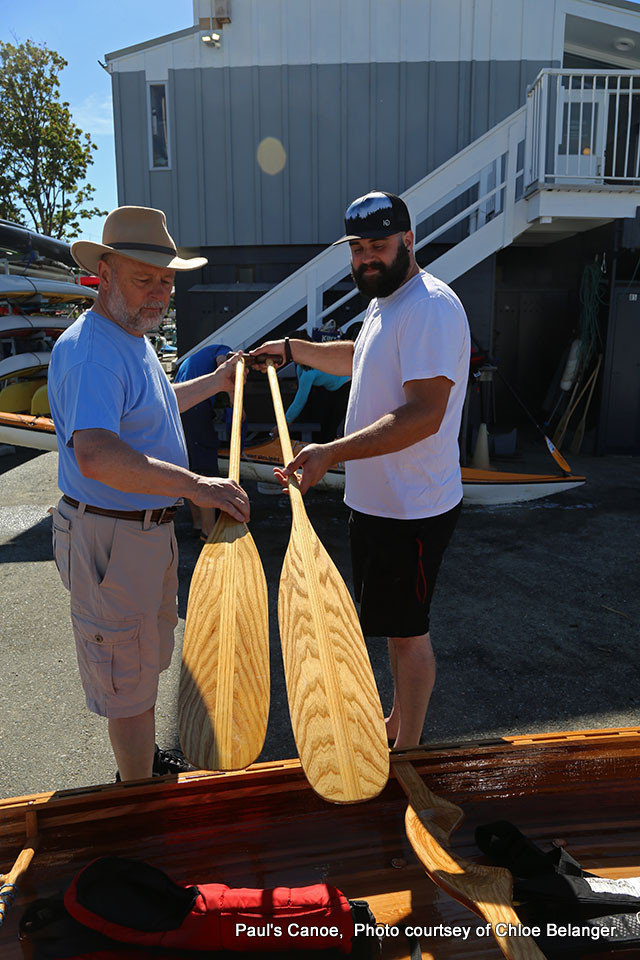
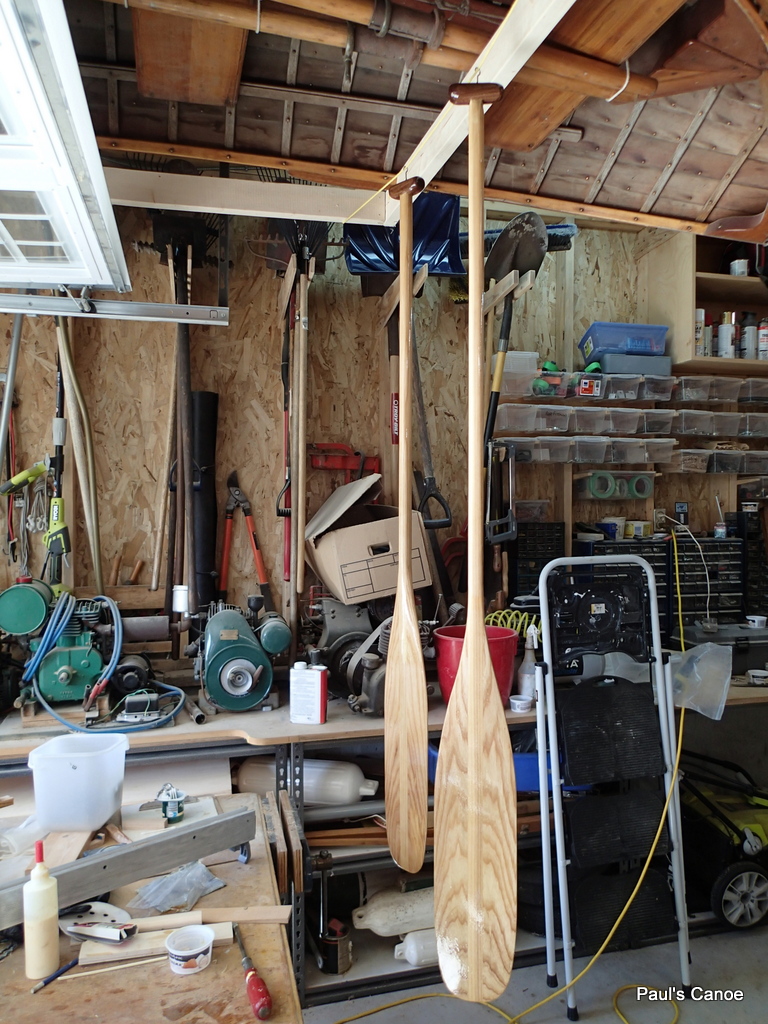
Paul’s paddle is 66″ long and mine is 63″ long. (Paul is 6’2″ and I am 5′ 9″) Today will be a good time to test the lengths for comfort. Paddle length is always a bit of a guess. Today we will fine-tune the lengths.
Showing off the paddles.
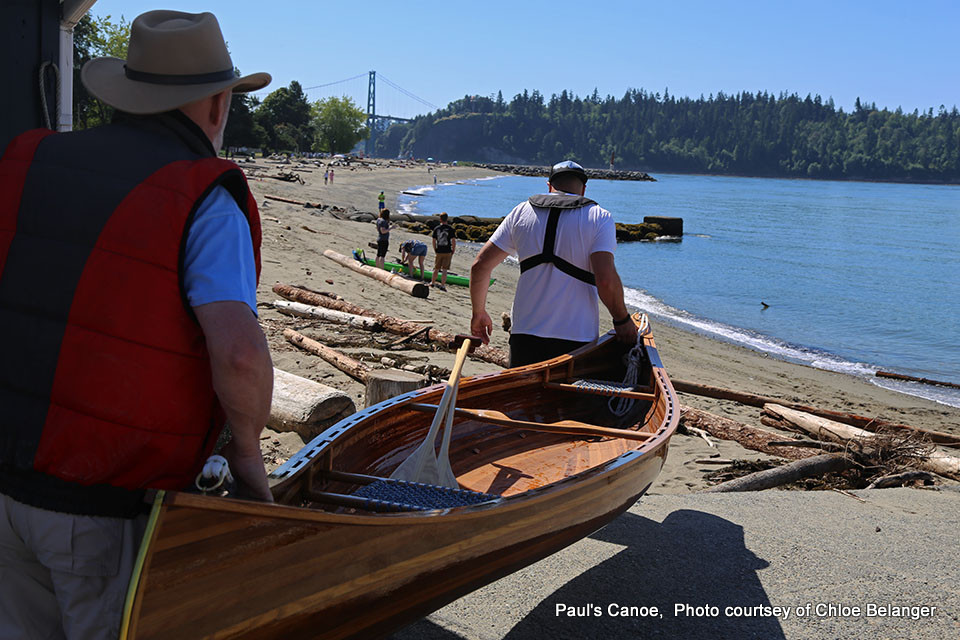
We get our life jackets on and take the canoe to the beach.
…To the beach!…
Paul will take the first paddle solo.
Paul is not one for a lot of ceremony.
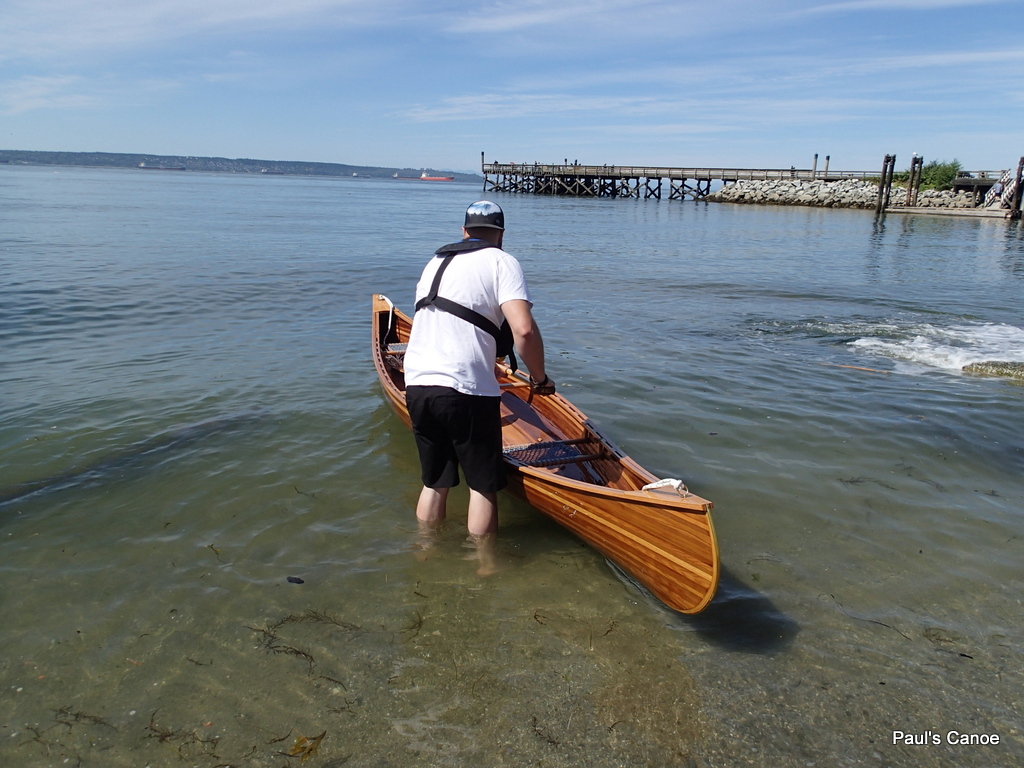
We place the canoe in the water and Paul gets in…
Getting in, waiting for the swell to moderate.
And away Paul goes…No flip, no dump, no hesitation.
A successful launch!
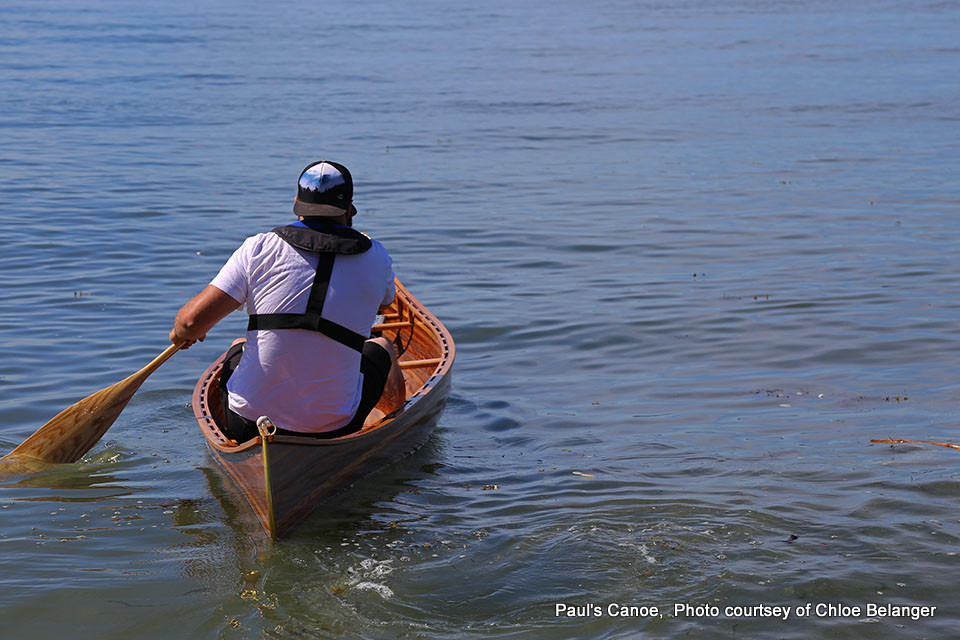
Paul takes the canoe for a test paddle. Looks good!
The canoe is a little stern heavy.
Paul has good balance sitting on the seat. He could be a little more forward.
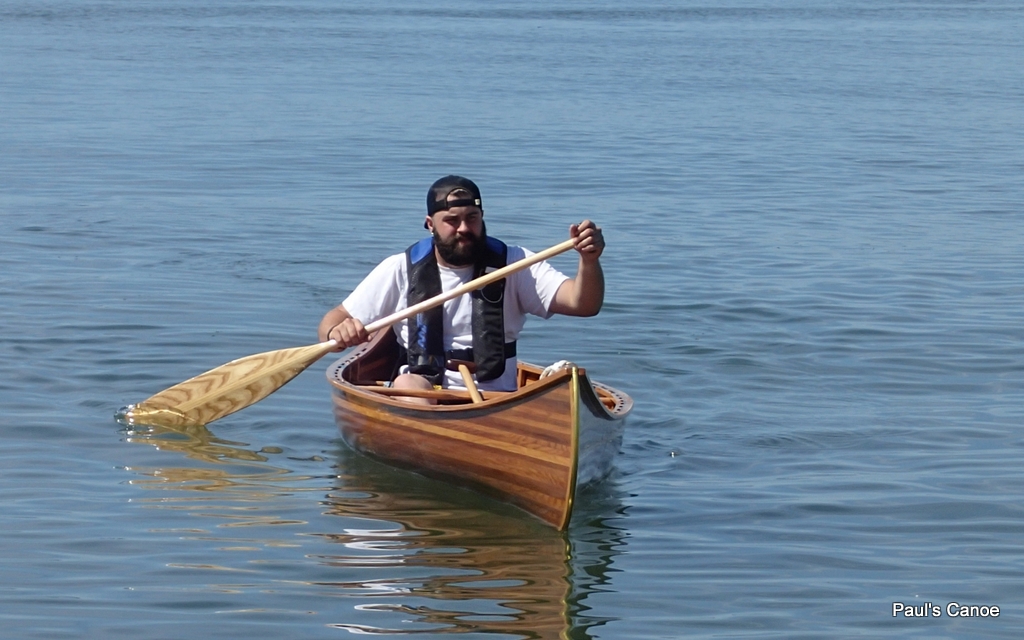
Paul tries sitting on the floor of the canoe just forward of the seat and the balance is perfect.
Paul does several circuits, trying out different sitting positions and both paddles. He is quite pleased with the results.
The canoe tracks well, feels quite stable and is easy to paddle.
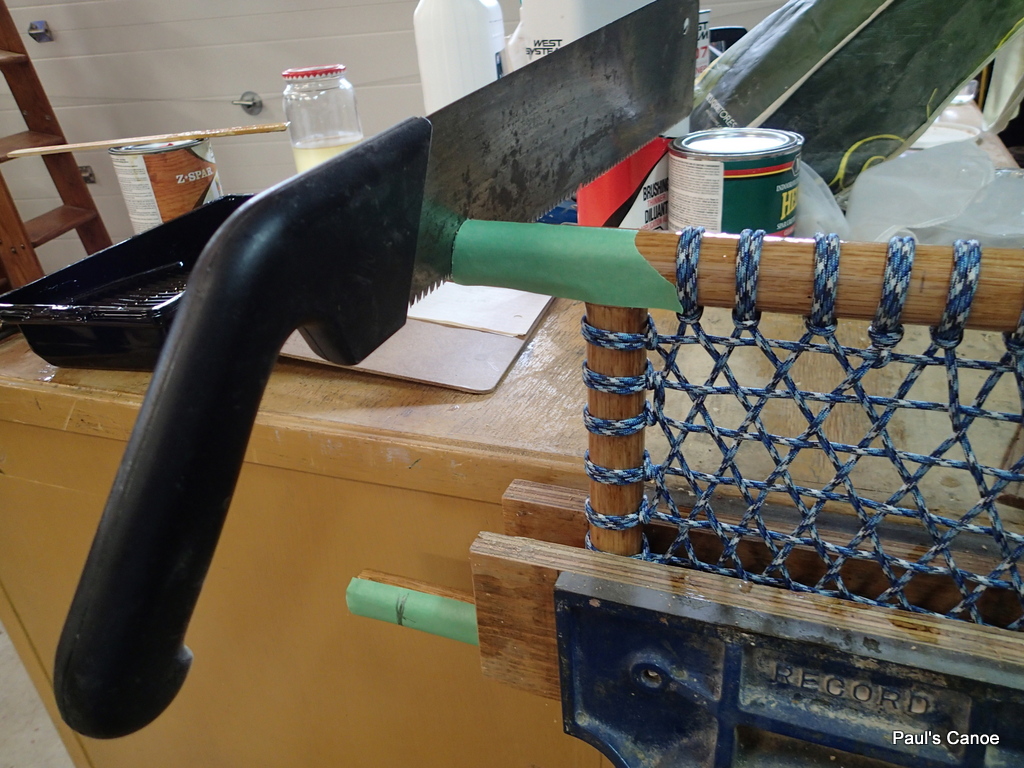
Paul and I are happy with the canoe, still unnamed. Paul feels that his paddle is too long and my paddle is maybe a little too long as well for him. We will take about 6″ off of his paddle and re-attach the handle. We will come out again soon for another paddle trial.
My wife and I take the canoe out for a spin. The balance with two paddlers is perfect. The canoe looks level. No photos of that paddle.
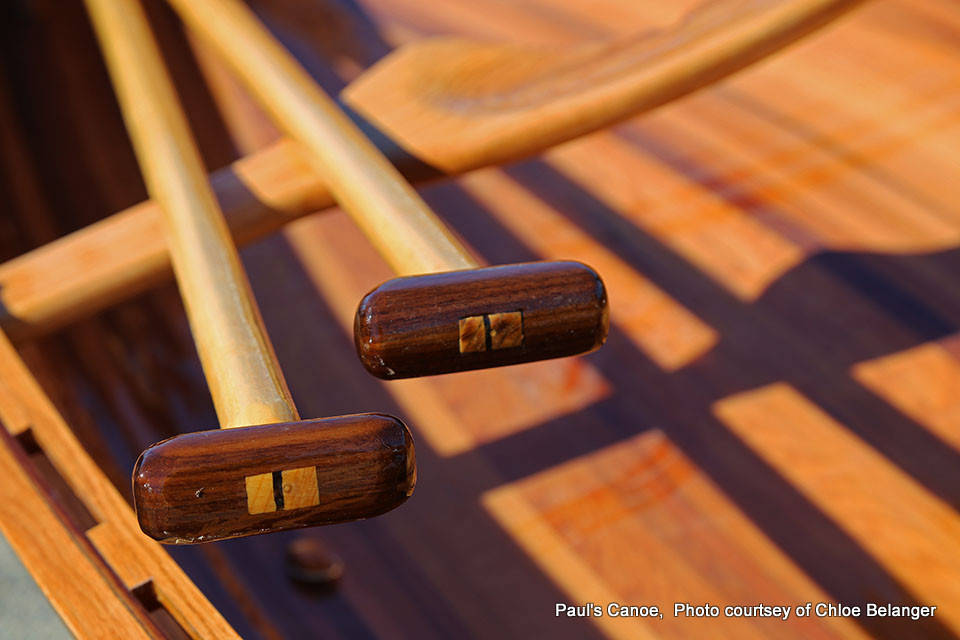
Canoe paddle handle detail.
Paul’s canoe will be ideal for two paddlers and their gear. An expedition canoe. Paul did want to do some tripping and this canoe is the one for the job.
A quick rinse before we go home.
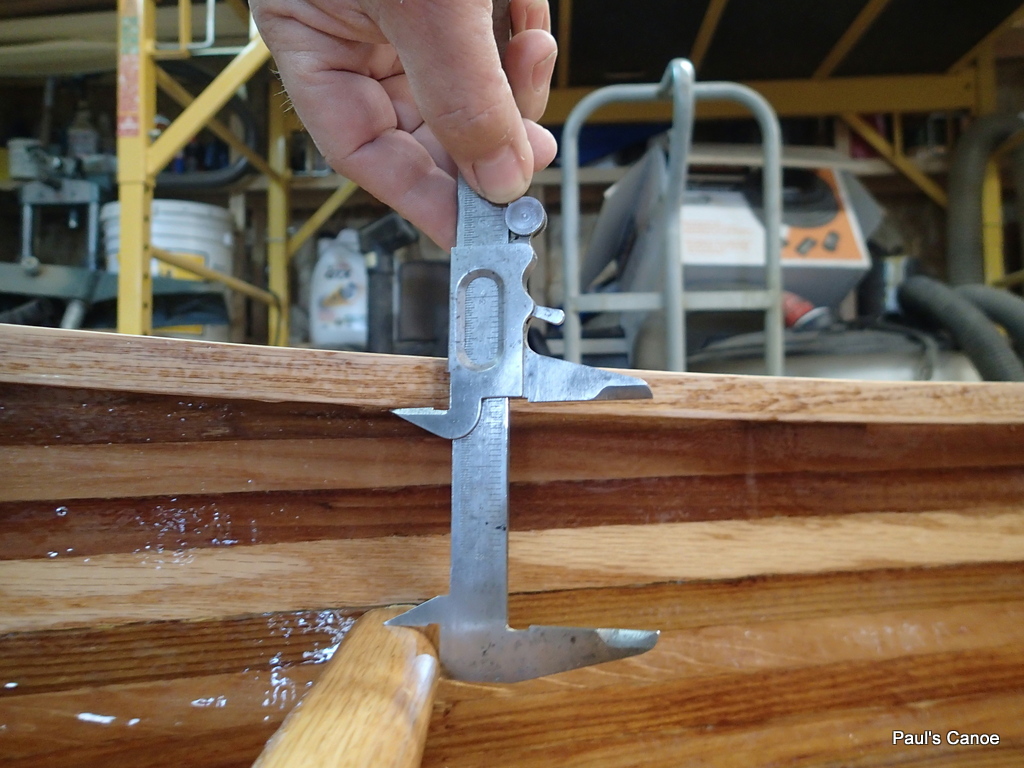
Final stats for Paul’s Canoe: Overall length: 15′ 3″. Width to outside of gunnels: 35¾”, Width to outside of hull: 34¼” Depth of hull: 11½”, final weight 60 lbs. Bow height 19″.
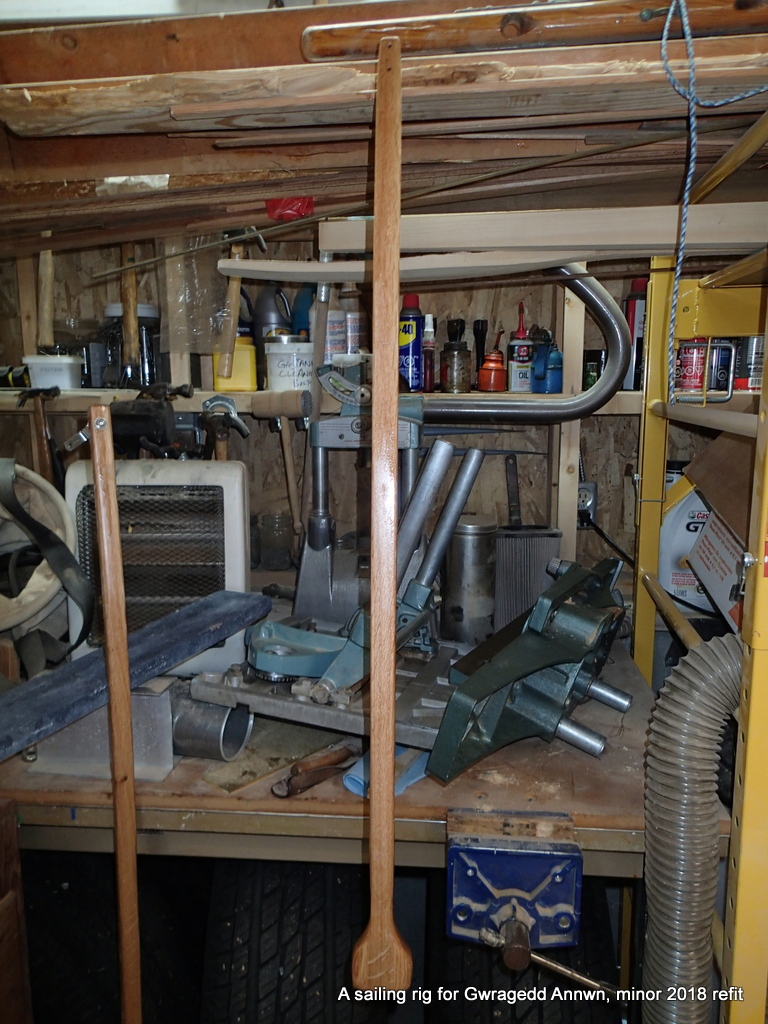
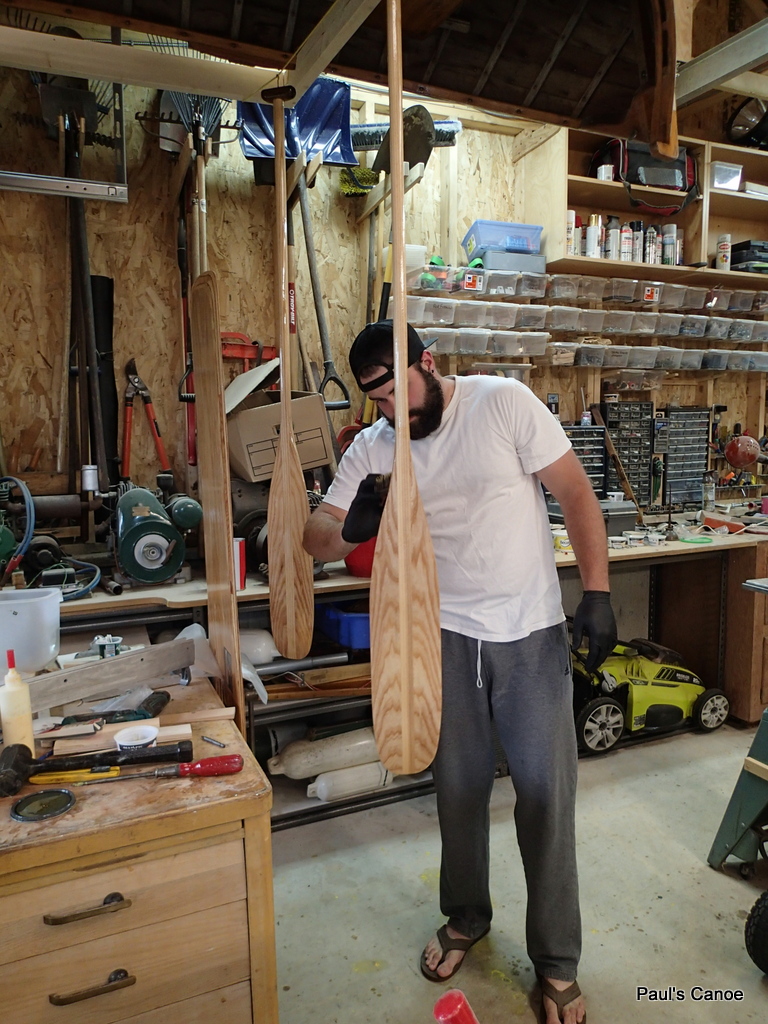
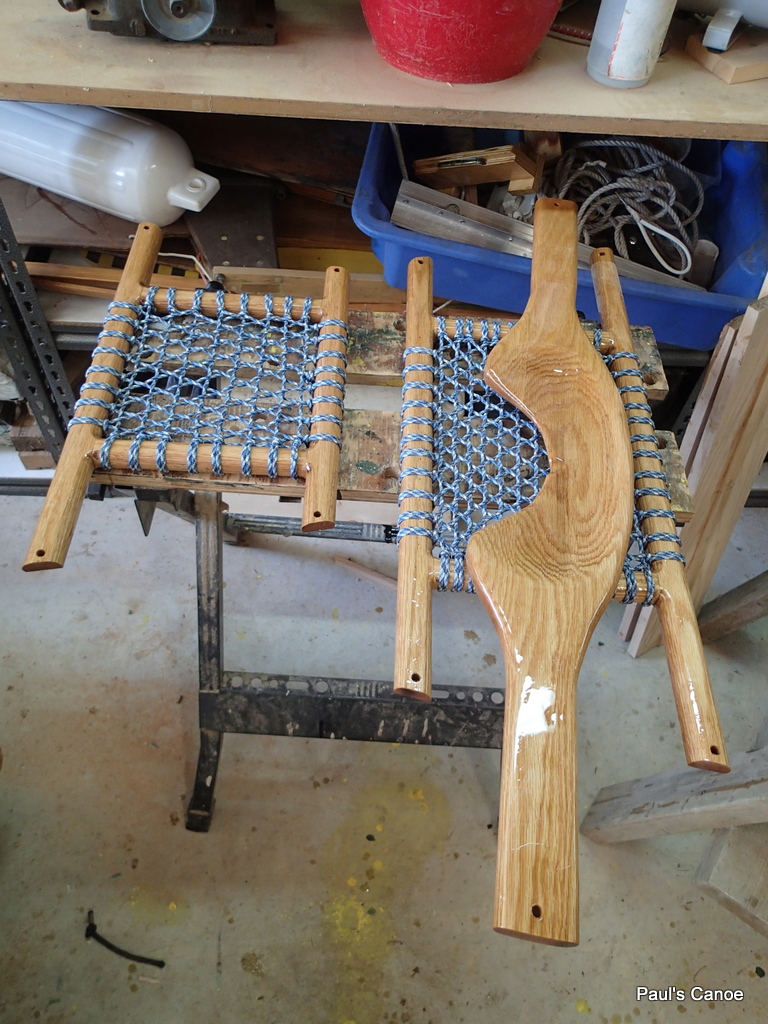
With the canoe finished, Paul and I start work on our paddles. In speaking with fellow Vancouver Wooden Boat Society member, Ian McGrath of Great Northern Craft, I tell him about the paddles. Ian has some paddle blanks and will sell us two. This will save me the hassle of sourcing wood for the paddles. We get the blanks with Ian’s “Otter tail” design drawn on.
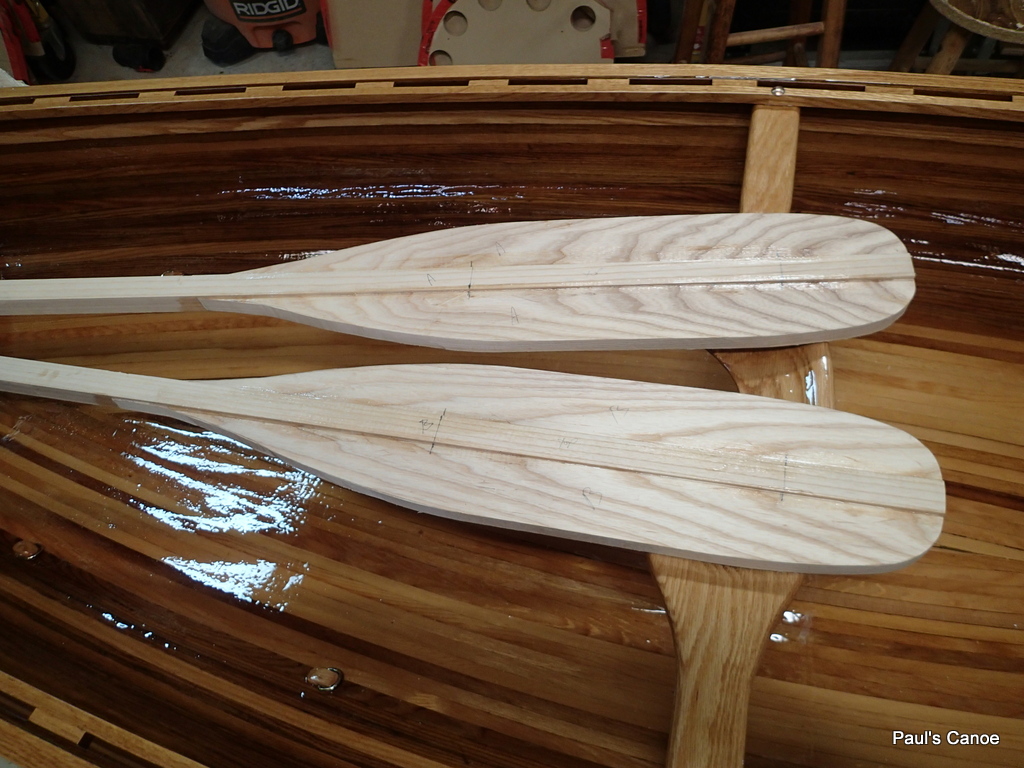
The paddle blanks cut out to the “Otter tail” design.
The lines on the paddle blanks indicate where the biscuits are.
Paul intends to do some longer trips so we have chosen “Otter tails” for long-distance paddling.
Paul marks the blade edge.
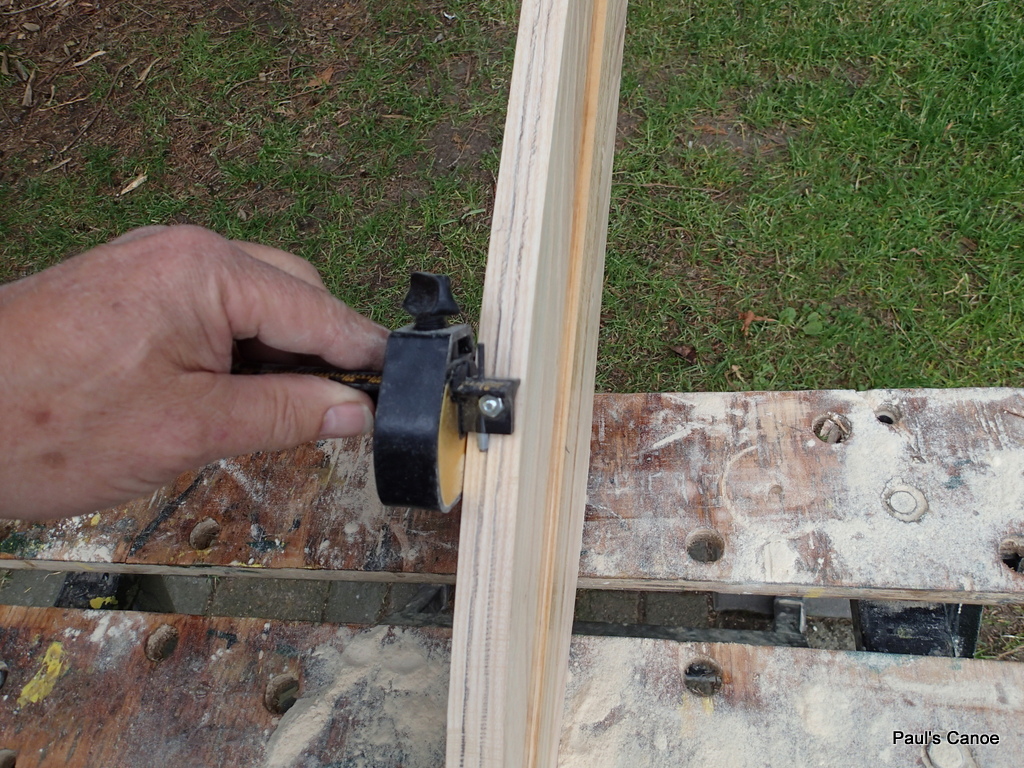
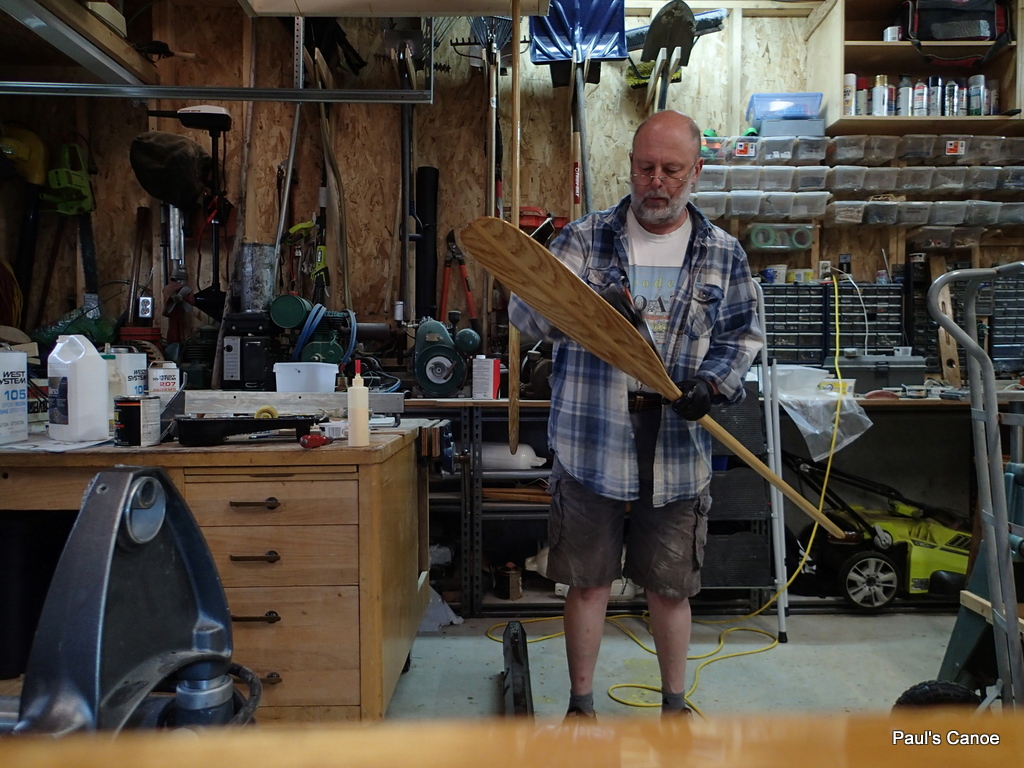
We will use the belt sander to shape the blade.
We start out by clamping the blade and working the sander.
This is really awkward. The workmate keeps moving and it is hard to put any pressure on the sander.
We have to come up with a new plan…
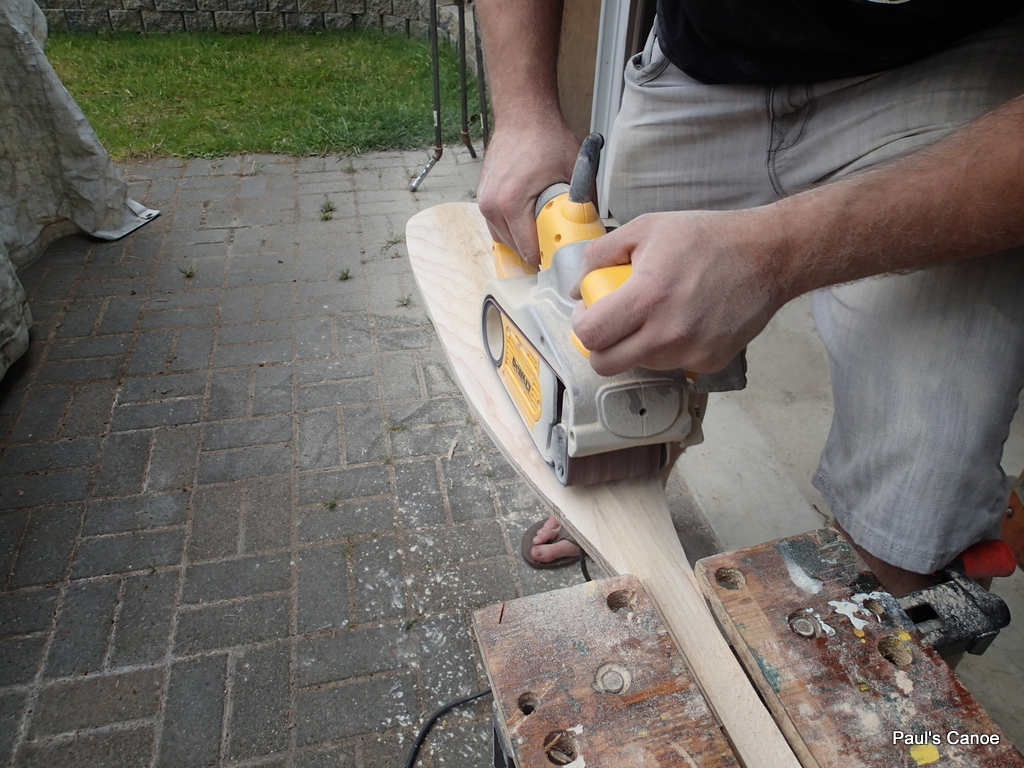
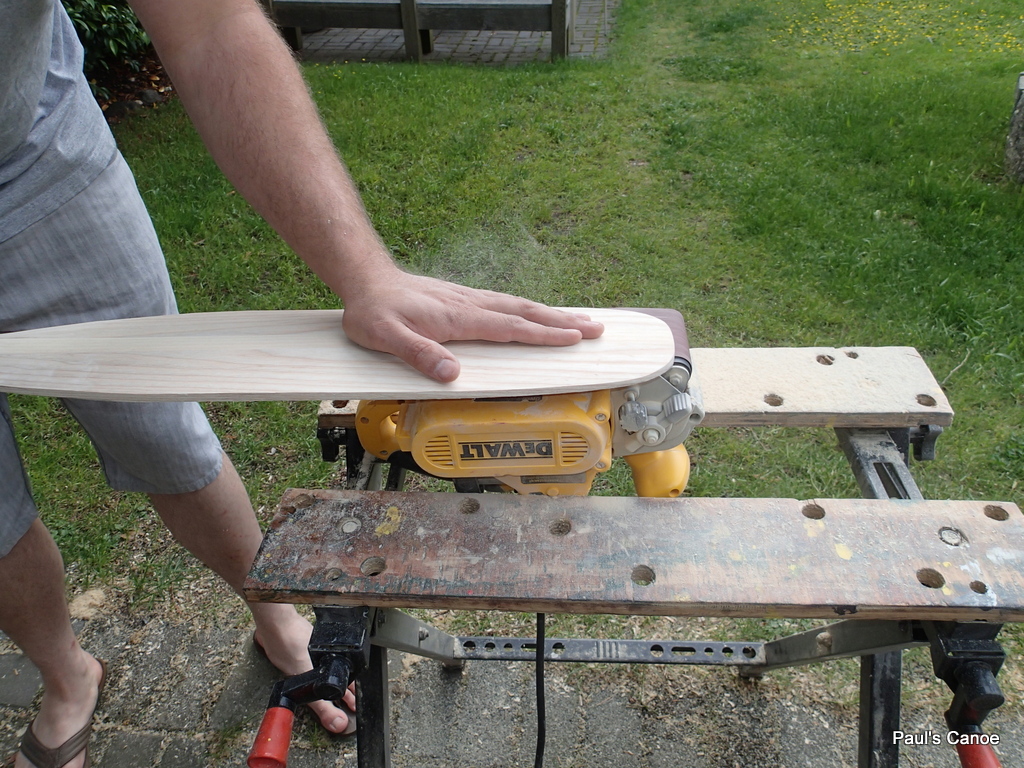
I have seen old photos of workers sanding oars. We decide to clamp the sander and work the paddle.
This way we have more control. We can put more pressure on the sander.
I shape my blade down to a ⅛” edge. Paul leaves his a little thicker, closer to 3/16”. I suppose that Paul will be rougher on his paddle than I intend to be on mine.
The new system works a lot better. We start out with 80 grit and finish with 120 grit on the belt sander. We use my ⅓ sheet sander, with 220 grit paper, to take out the 120 grit scratches. We then go to the random-orbital sander with a 240 grit pad. Hand sanding with 320 grit finishes the job.
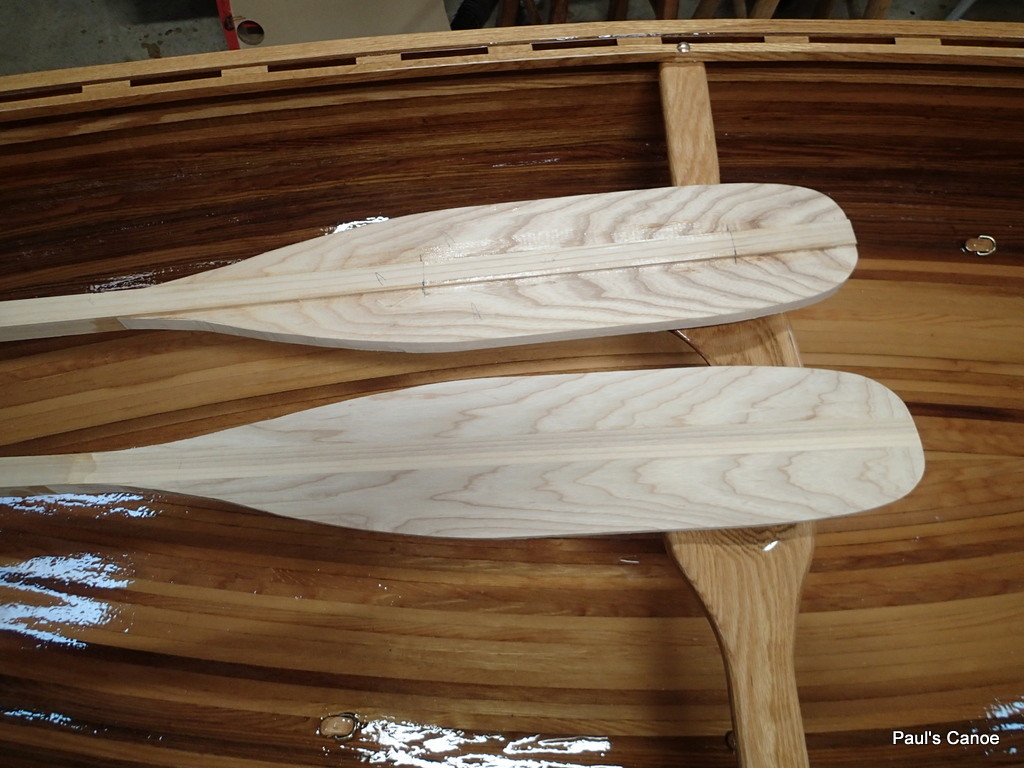
One blade shaped, one to go.
I use a ¼” round-over bit in my router to rough shape the shafts. No photos of that. We finish sanding the paddles by hand.
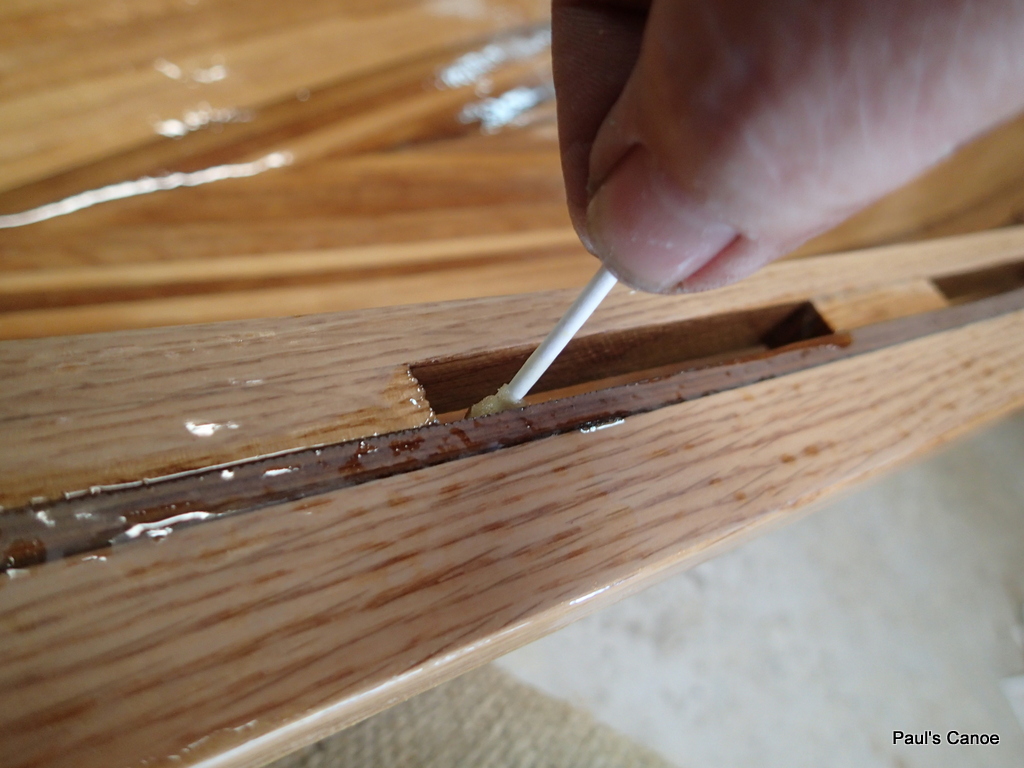
Cutting the slot for the wedge.
We put on the handles. We square up the shaft at the top, cut a notch, and wedge the handle on, (with a little glue of course).
Ready to tap in the wedge, wipe up the excess glue.
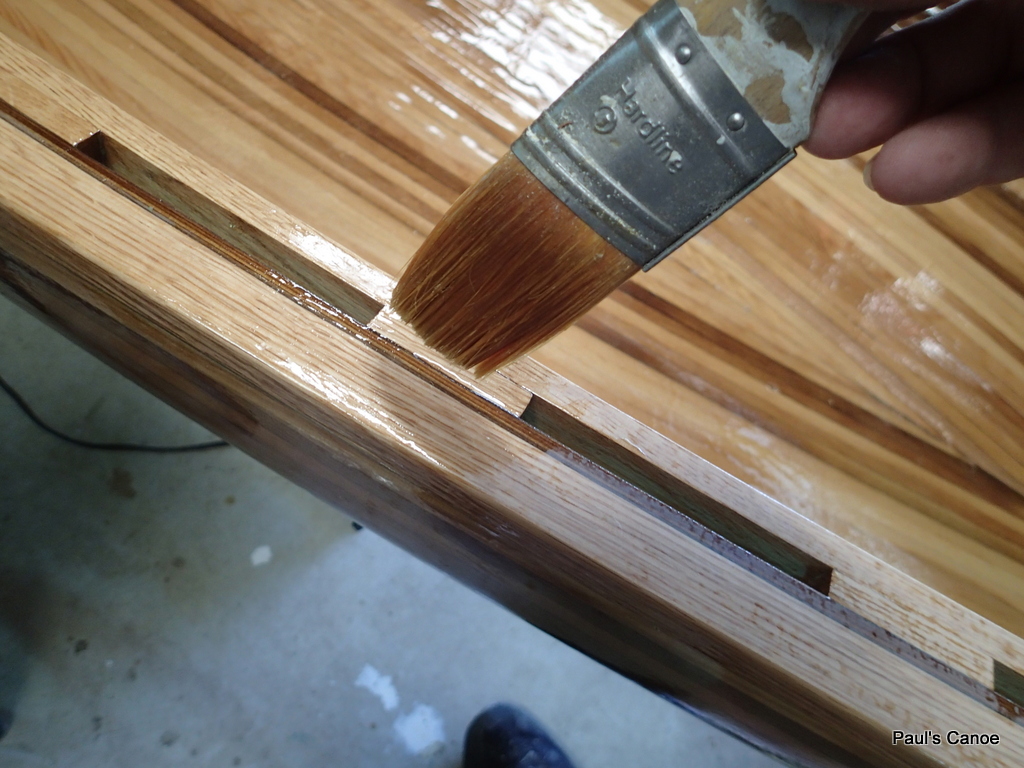
Because Ash has such open pores, we will epoxy coat the paddles for a smoother finish.
Epoxy coating will also make the paddles tougher…The same method worked for Gwragedd Annwn’s spoon oars.
When the glue is dry and the handles are sanded, Paul mixes up six shots of resin and hardener. We roll on the epoxy and brush out the bubbles.
Brushing out the bubbles.
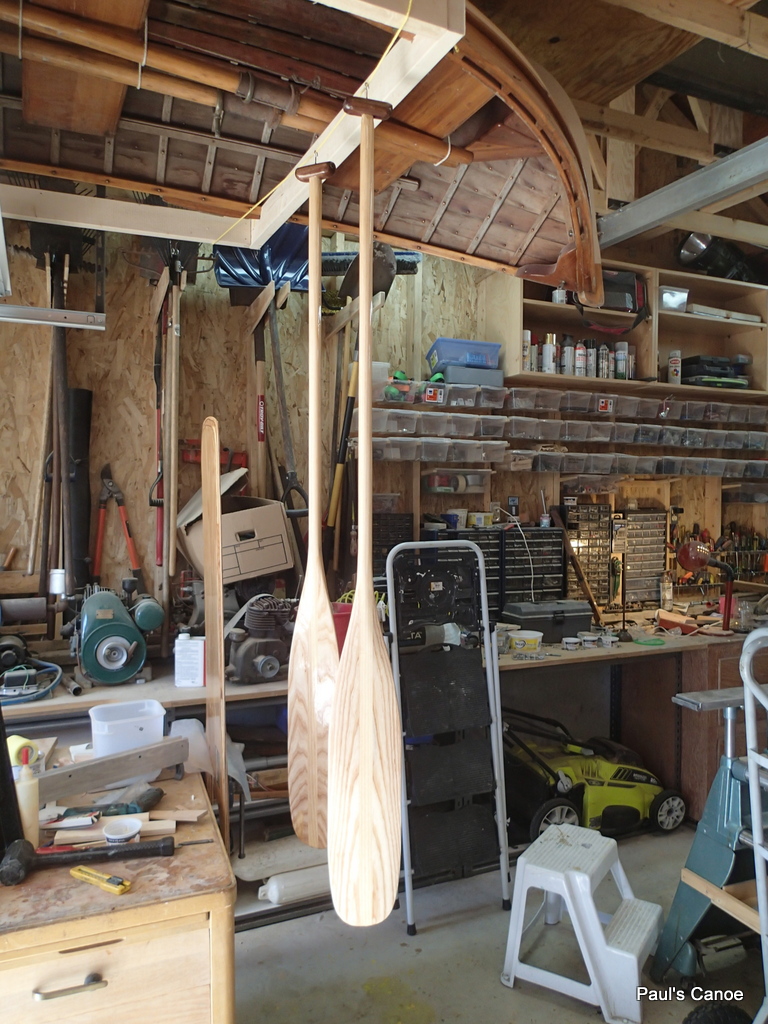
We leave the epoxy to set…then four or more coats of Varnish!!!!
Epoxy cure time. (Actually looks just like Varnish cure time!)
The routine for Varnishing will be a light sanding followed by tack-clothing, a Varsol wash then a rolled-on coat of Varnish brushed out, until we run out of Varnish.
Second coat this morning.
I know what you are thinking…I am just posting a bunch of pictures taken at the same time. I am not, varnish drying just looks the same in every picture.
Third coat this afternoon.
The stuff on the workbench changes.
Put the fourth coat on last night, fifth coat this morning.
Fifth coat in the morning.
Brushing out the bubbles.
Fifth coat to dry, sixth coat this evening.
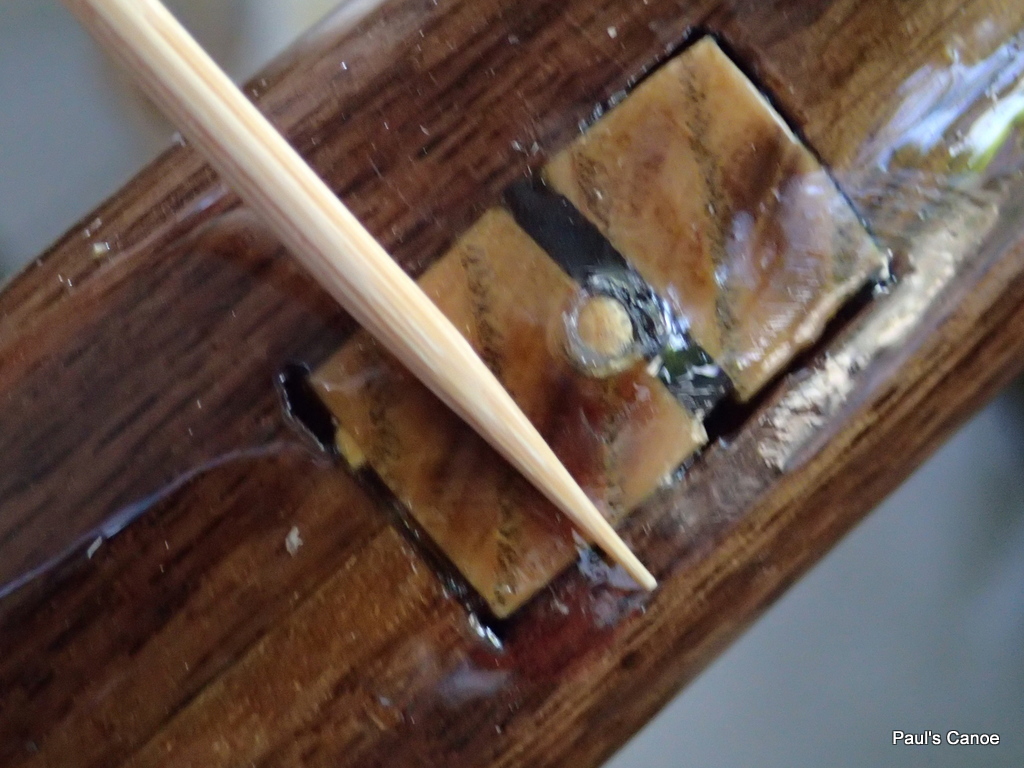
…Three coats later, (Eight coats in total) I take out the eyehooks in the handles and plug the holes.
I cut off the tip of a bamboo skewer and using varnish, plug the hole.
I will give the bamboo & handle a light sanding and a few more coats of varnish to glue in the bamboo plug.
Both holes plugged…ready for use!!
The official launching of the canoe will be on Father’s Day, June 17th, 2018, at the Hollyburn Sailing Club, 1326 Argyle Ave West Vancouver, BC, at 9:30am.
The black goop is dry. Time to take the tape off and trim any excess black goop.
Paul trims off any black goop “flash” and tape.
We give the hull a wipe down with Varsol, to remove any black goop stains or spots.
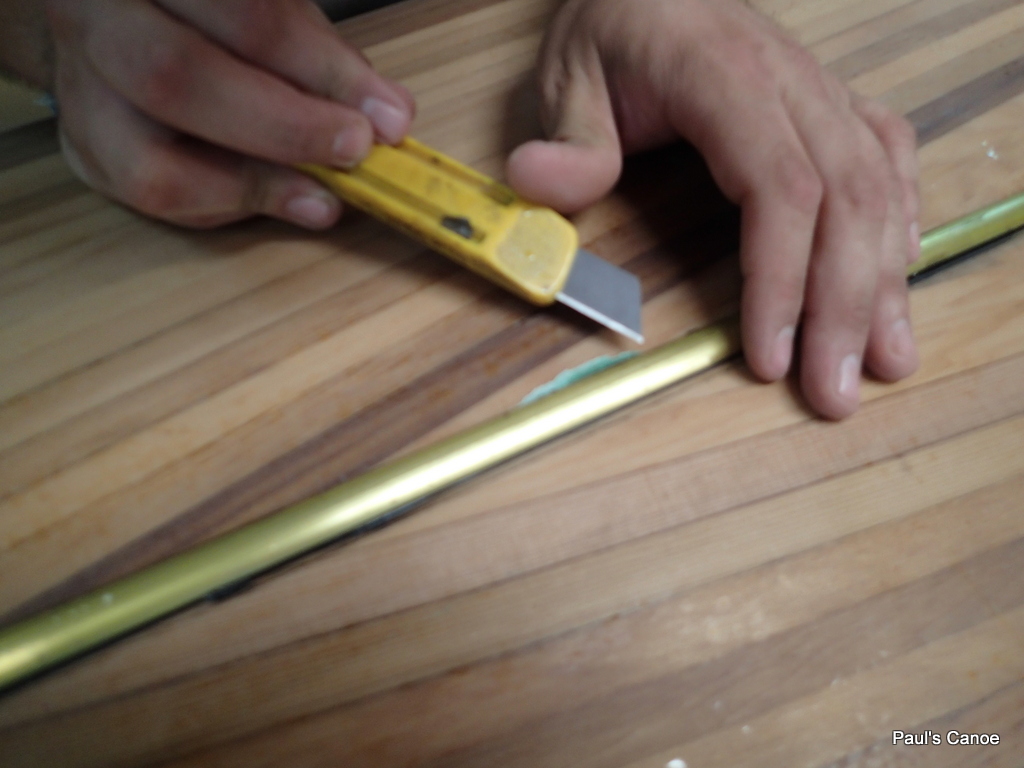
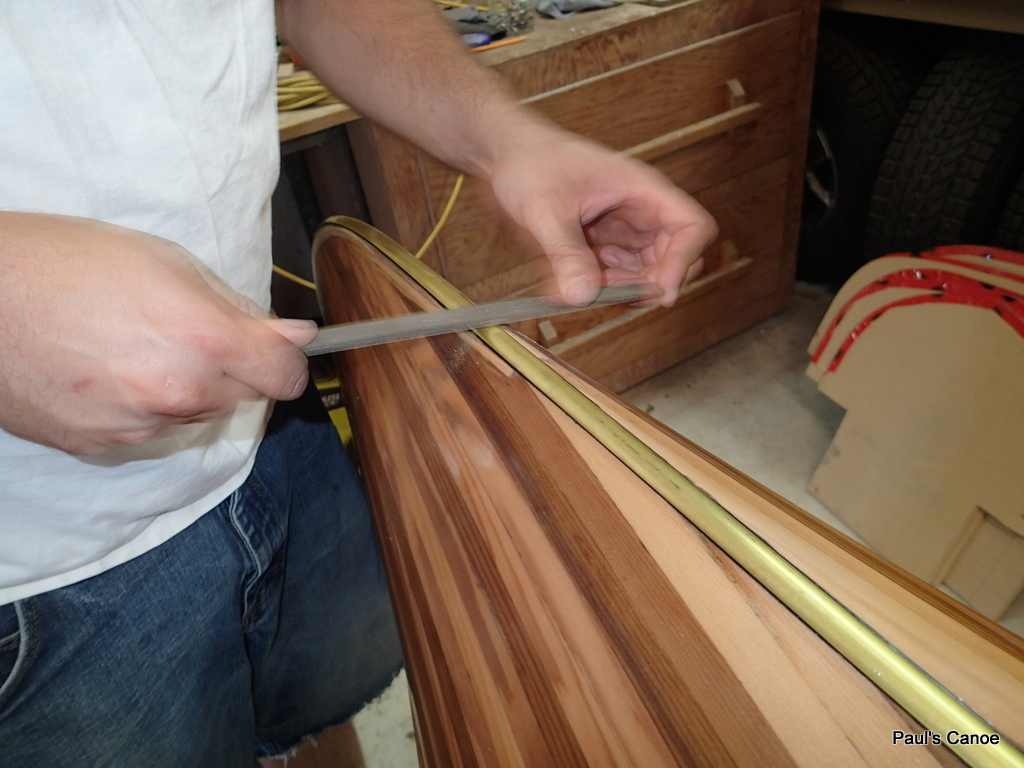
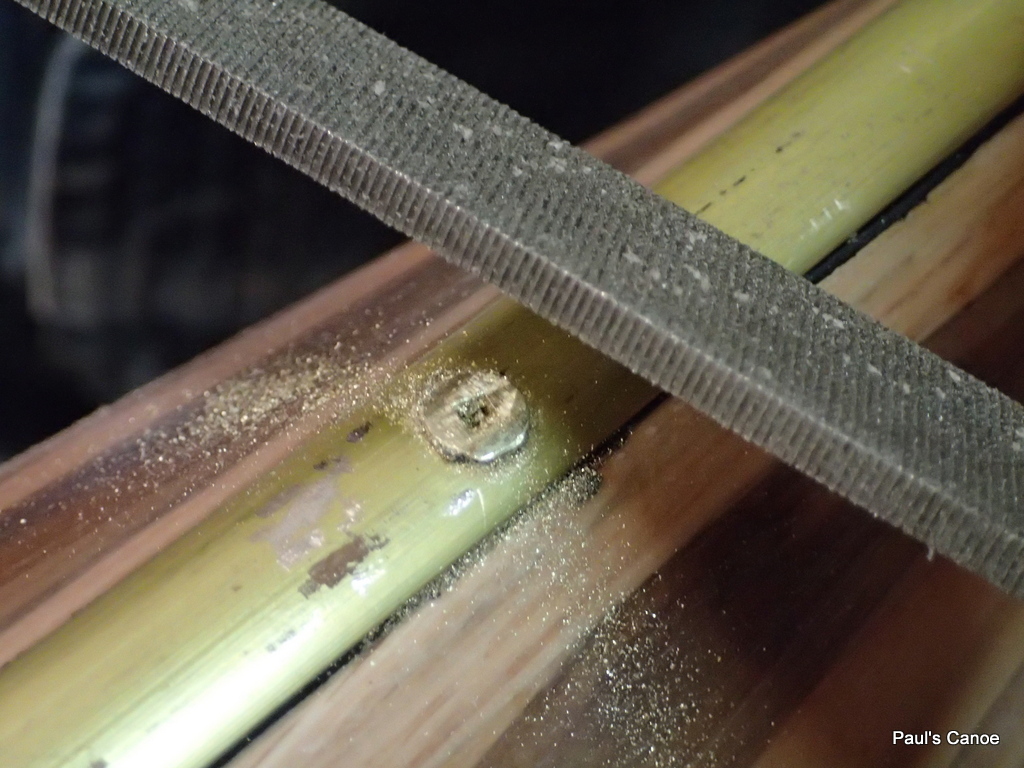
Filing the screw flush.
Paul files the attaching screws more flush with the brass strip.
Almost done filing.
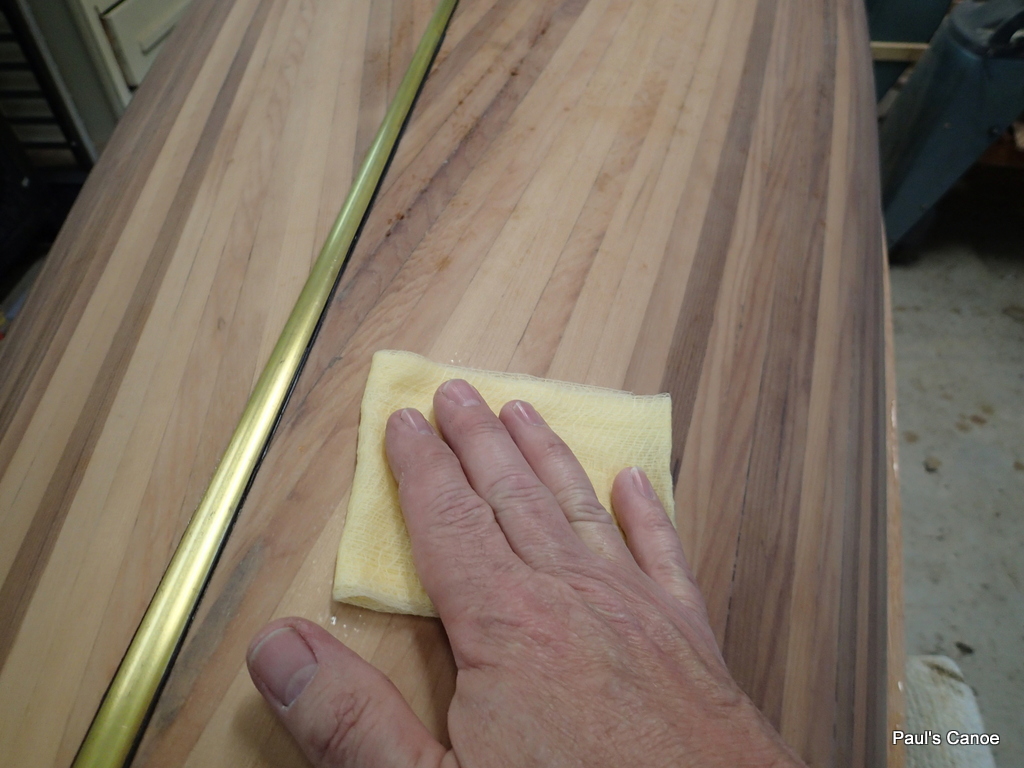
After Paul has filed the screws flush, we vacuum the hull and wipe it with a tack cloth and then give the hull a wipe with the Varsol.
Tack cloth wipe.
We are trying to get as good a finish as we can without going too crazy about it.
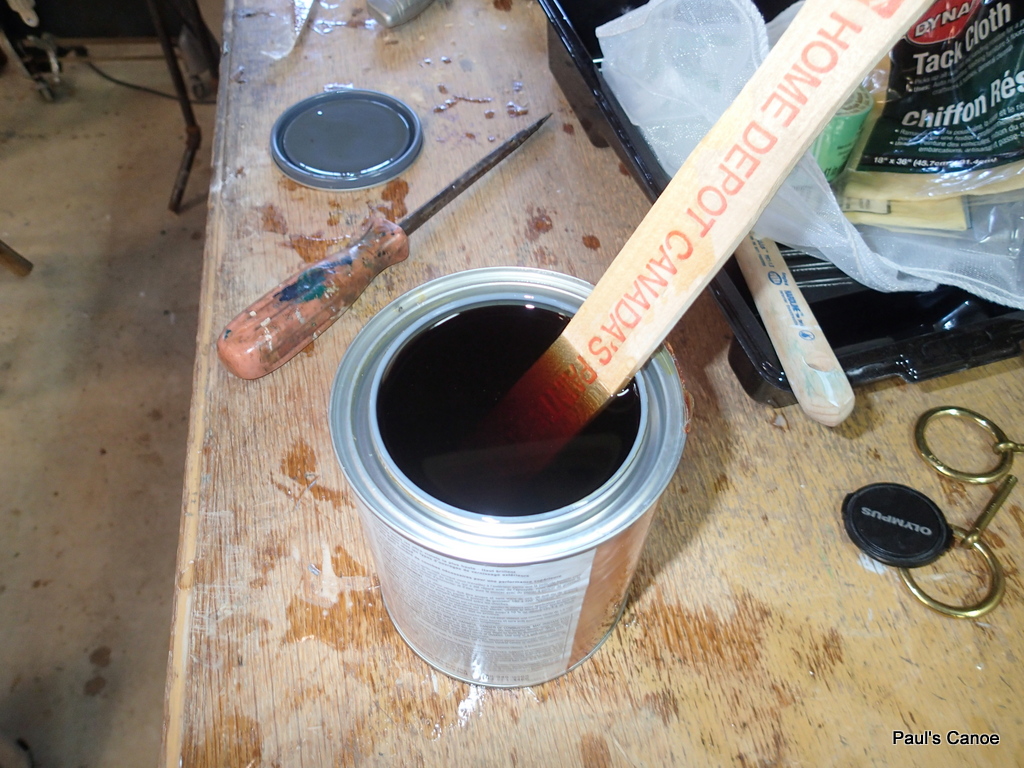
Stir that varnish!
We add a little Pettit solvent and stir. We will roll on the varnish and follow by brushing it out.
Half way there.
We roll and brush out the varnish. Fun, fun, fun.
Brushing out the varnish.
When you are brushing out the varnish, you can feel the brush “drag” where there is a holiday. We re-roll out that piece again.
We spend the next half hour looking for “holidays” and runs.
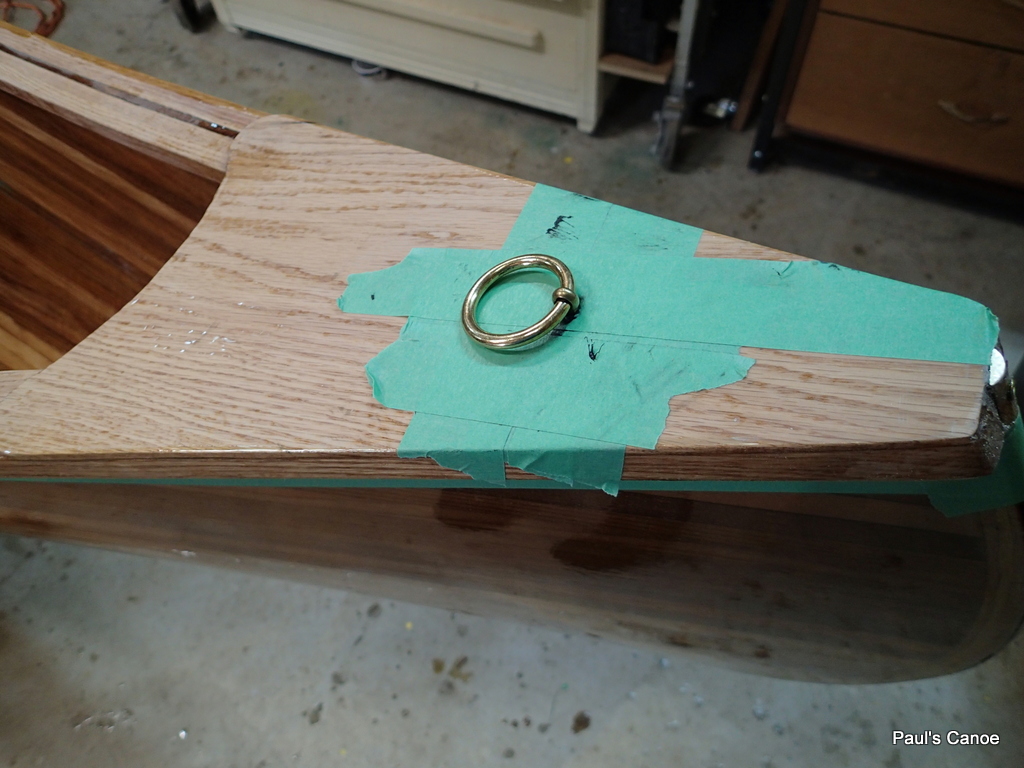
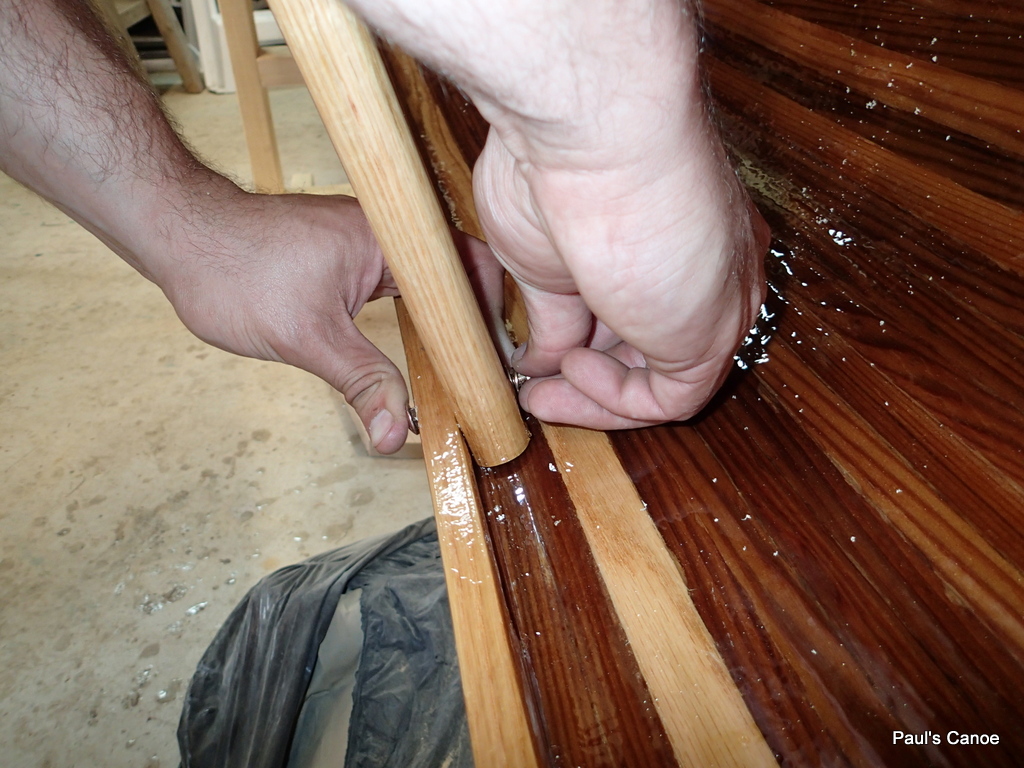
When the outside hull has dried, we attach the stem rings. They are brass cotter pins with a brass ring. We drill a hole in the deck piece, squirt in some black goop and put in the cotter pins and ring assembly.
Stem rings glued in. The tape protects the deck.
When the black goop is dry, I remove the painters tape and install the seats. This way, all the holes I drill for the seats will be varnished on the inside.
Seat placement, marked with tape.
I have used the formula to place the seats, trying for about 200lbs balanced off by 160lbs.
Ready to varnish the gunnels…also eyeballing the seat placement.
Cutting the seats.
Fitting the seats.
I mark all the seats and cut them to fit.
Temporary placement.
I will have to cut the “riser blocks” to hang the seats from the inside gunnels.
Measuring for the riser blocks.
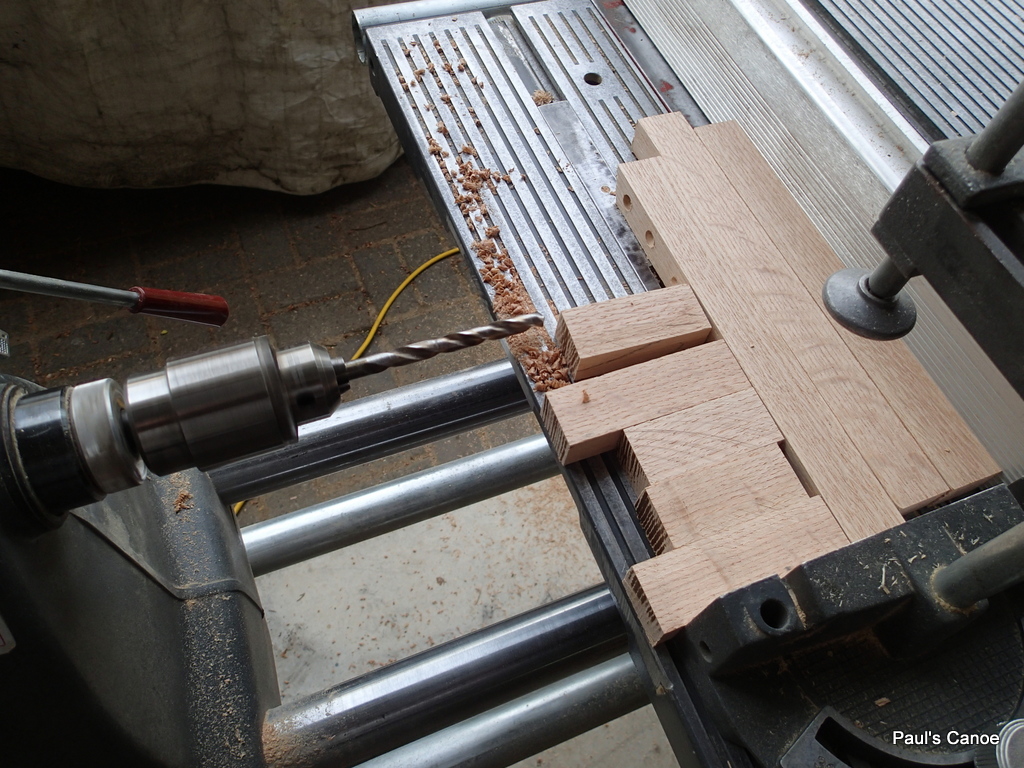
Six of the blocks are the same length, two of the blocks are longer, I cut them out of some left-over oak.
Horizontally boring the holes to hang the seats.
I use the Shopsmith disk sander to shape the blocks.
The colour more matches the seat frames.
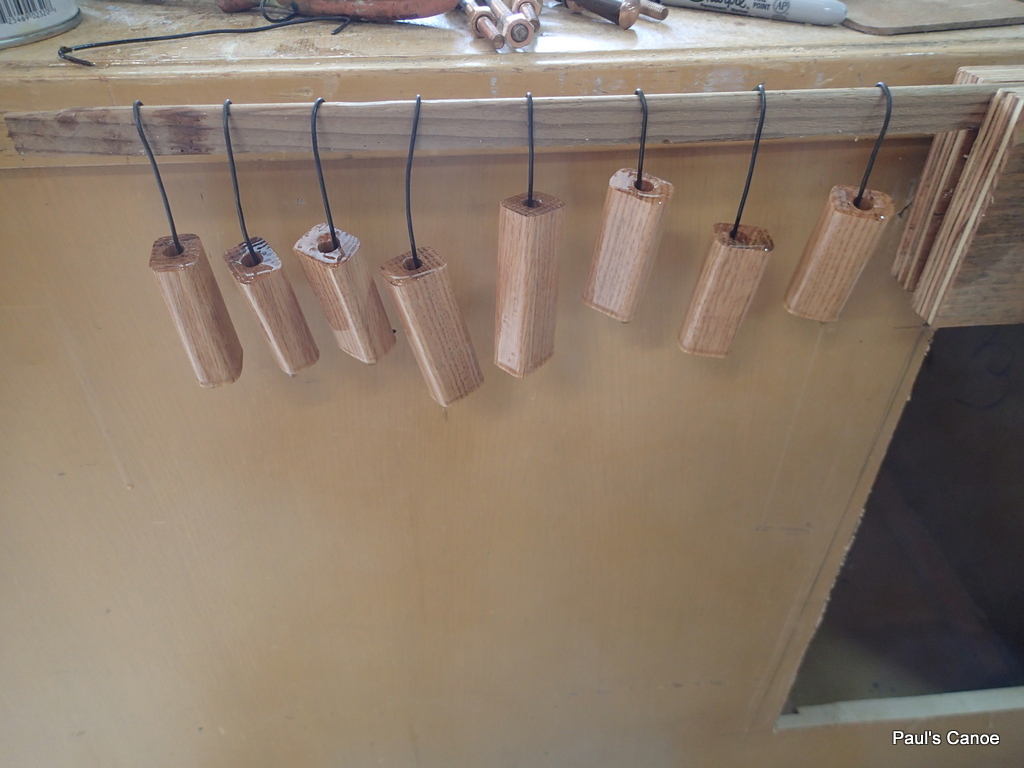
I dip them in the varnish four times.
…jus’ hanging around.
The two longer blocks have an angled top.
I use a nail set as a punch for each hanger hole.
Clamping the seats into position for drilling the hanger bolts.
I have a long ¼” drill bit for the hanger holes. I want there to be some wiggle” room to hang the seats. It will be a tight fit.
I cut all of the hanger bolts to length and thread the ends.
After we have temporary fitted the seats and thwart, we remove them for the hull interior varnishing.
I put the seat and thwart to one side.
I have put painters tap along the underside of the gunnel (inside and outside) to catch any drips. You can see them a lot better against the painters tape than the varnished hull.
I start by using a q-tip to varnish the scuppers.
Scuppers varnished.
Q-tips are cheap, and I use two of them a side. I roll on the varnish and brush it out on the flat part of the gunnels.
Six coats of varnish for the gunnels.
The next step is to varnish the inside of the hull…Five coats.
Ready to varnish the inside…Sanded, tack clothed and washed with Varsol.
Paul and I will roll out the varnish and then brush it out….
Under the deck.
Rolling out the sides.
Rolling out. The roller leaves bubbles, but and overall even coat.
Brushing out the bubbles.
The brush takes care of the bubbles.
Dry, varnish, repeat five times.
Final coat. (at last!!)
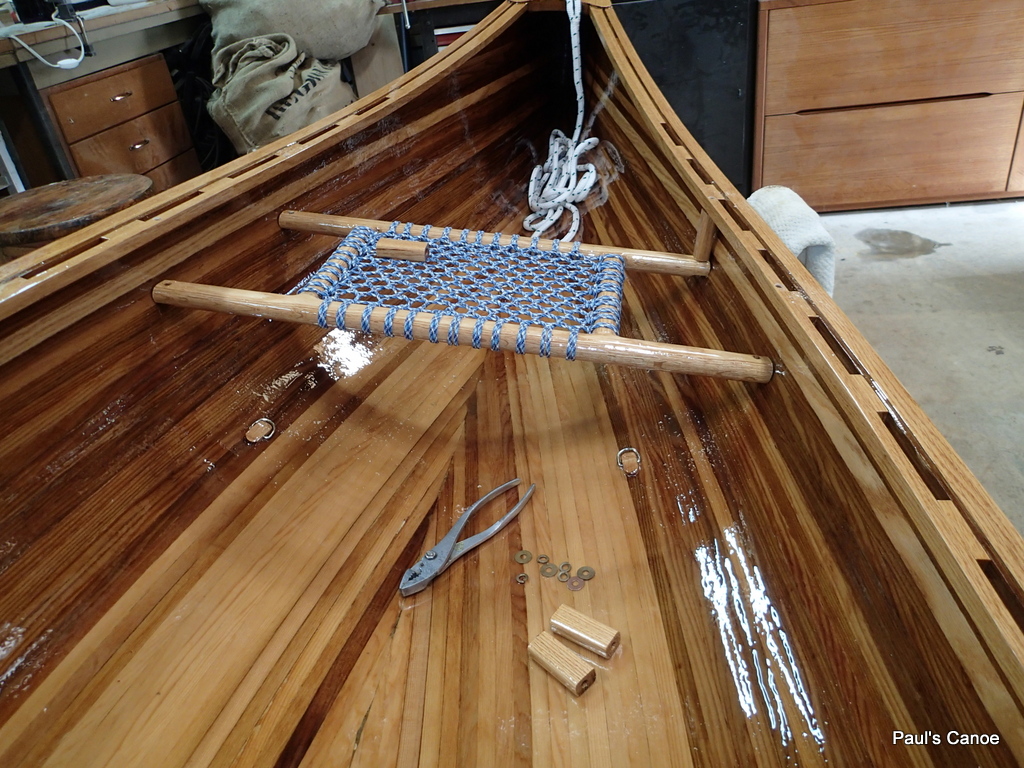
When the last coat is dry, Paul and I install the thwart and seats.
We roll the canoe on its side. Thwart goes in first.
We put a dab of the black goop to stick the seats to the hull…put a little less stress on the hanger bolts and gunnel when it is dry and we are using the canoe.
Thwart is in.
We give the bolts a wipe with Varsol to remove any excess black goop.
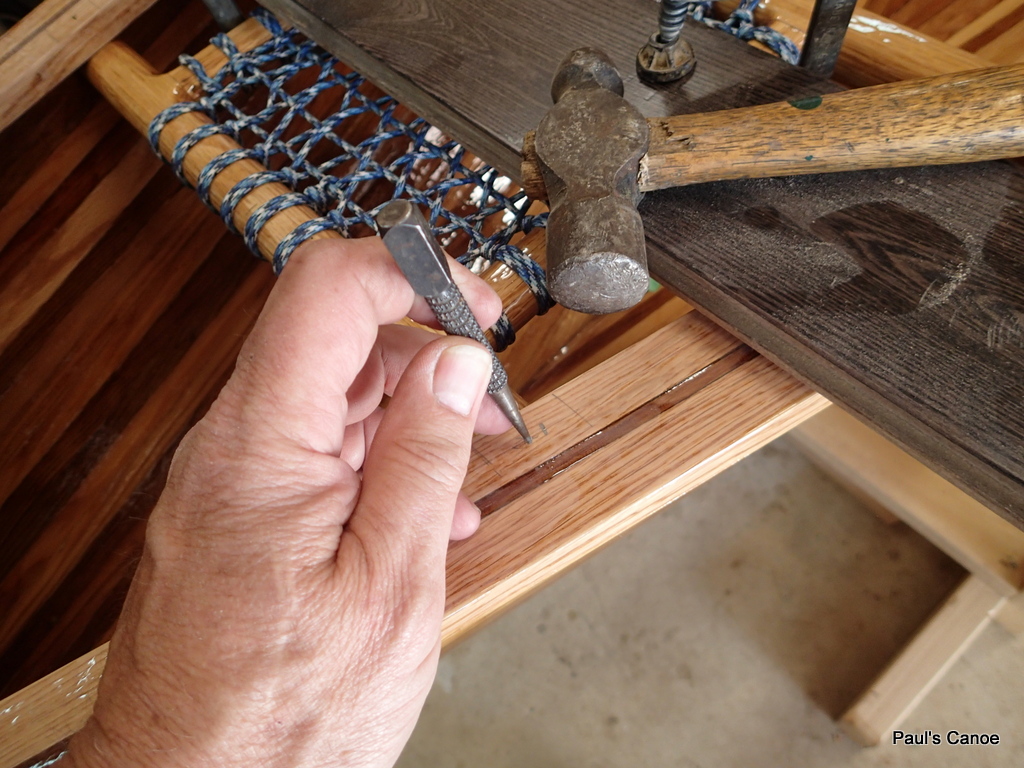
We slowly work the hanger bolts in, cutting them to fit.
It is a tight fit. We use dabs of black goop as a thread locker.
Cutting the hanger bolts to fit.
It is very tight for the seat. We use a piece of wood to push the canoe sides apart to get the nuts on.
Note the tape on the screwdriver and the piece of wood…do not want to mark the canoe.
This is slow painful work..It is a very tight fit for the seats. Next canoe will have wider inside Gunnels and no scupper where the seats will go.
Last hanger bolt goes in.
We give the bolt heads a wash with Varsol. Time to let everything dry. The canoe is done.
Ooops!
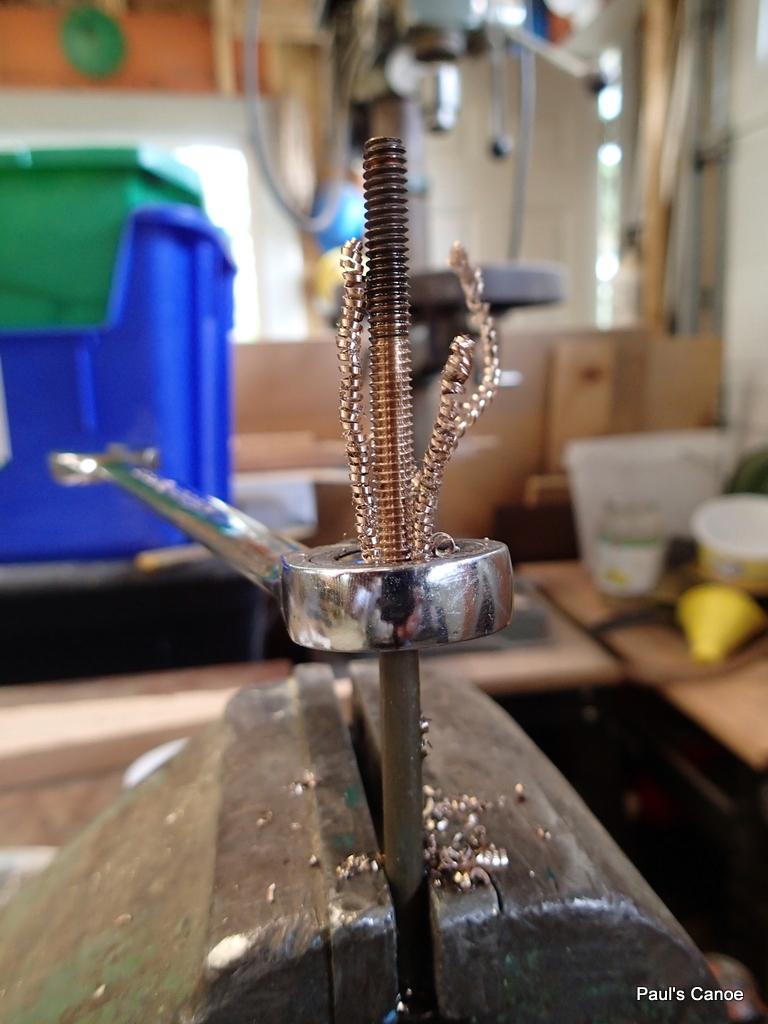
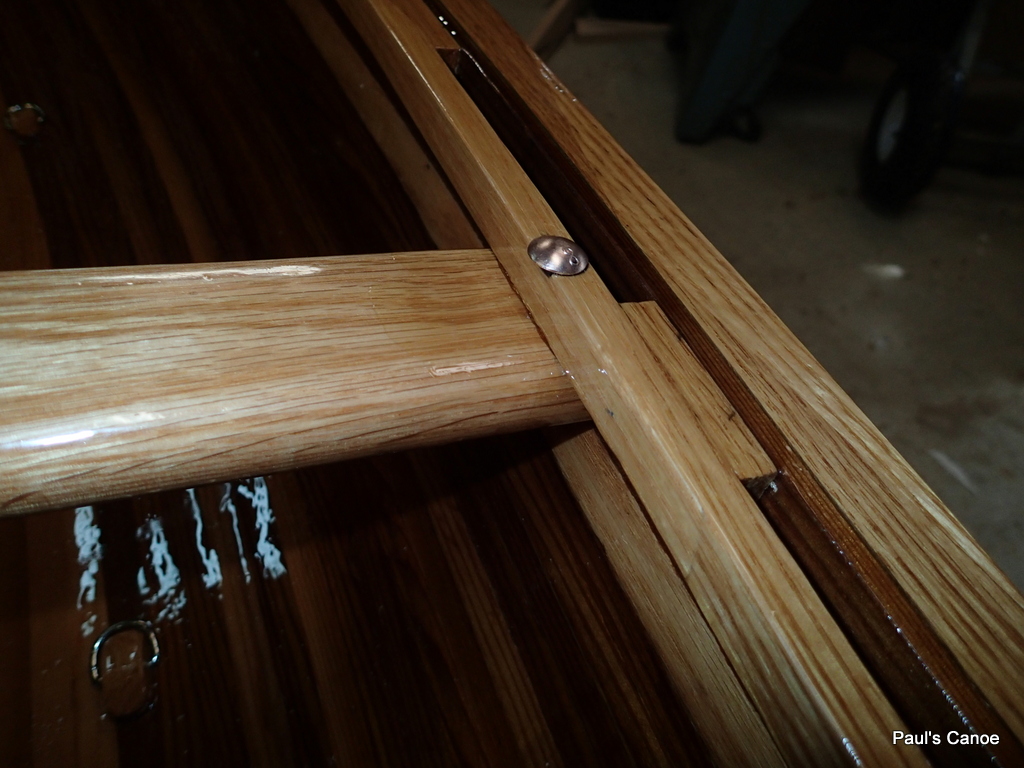
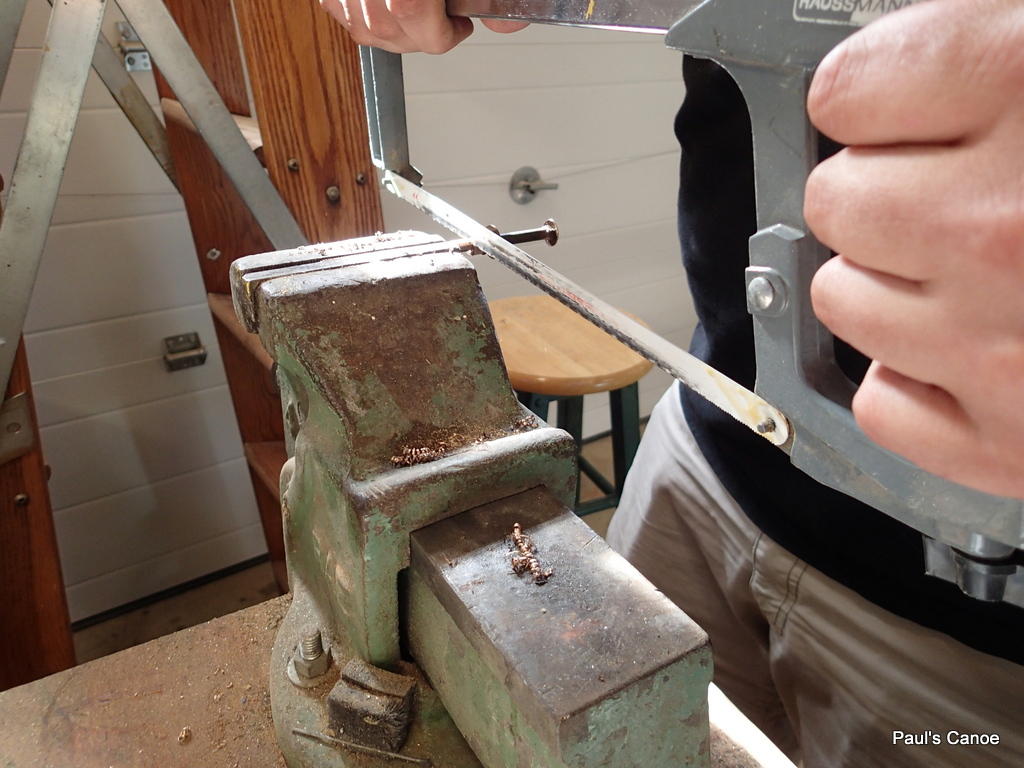
Paul and I have an Ooops. We hang the canoe by the stem rings to weigh her and the rings pull out. I buy new brass cotter pins, put the rings in them and solder them up.
Threading the new brass cotter pins.
I thread the new cotter pin assemblies (brass ring, cotter pin soldered and threaded, brass washer, brass washer, brass nut), we drill the old holes through and bolt the new stem ring assemblies in. No coming out now!
New stem ring assembly installed.
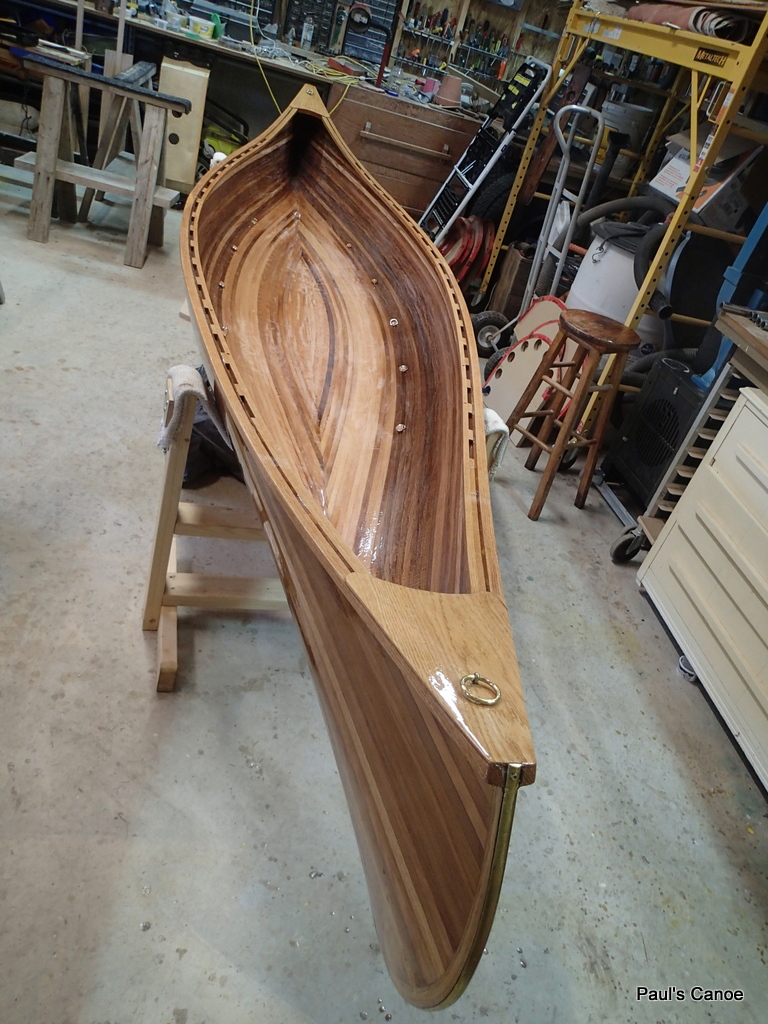
The canoe is now finished! Final weight, just under 60 lbs. Time to get those paddles done.
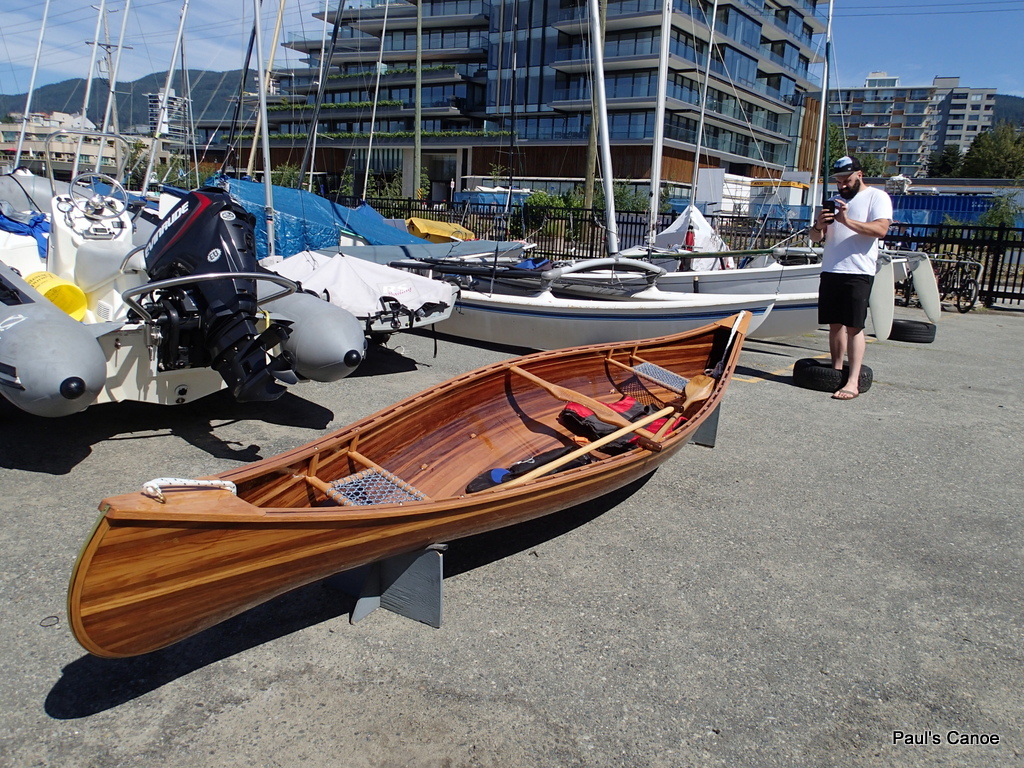
Paul’s Canoe.
See you out on the water. The launching date is set for Father’s Day, June 17th, 2018 at Hollyburn Sailing Club. now to get working on those paddles!
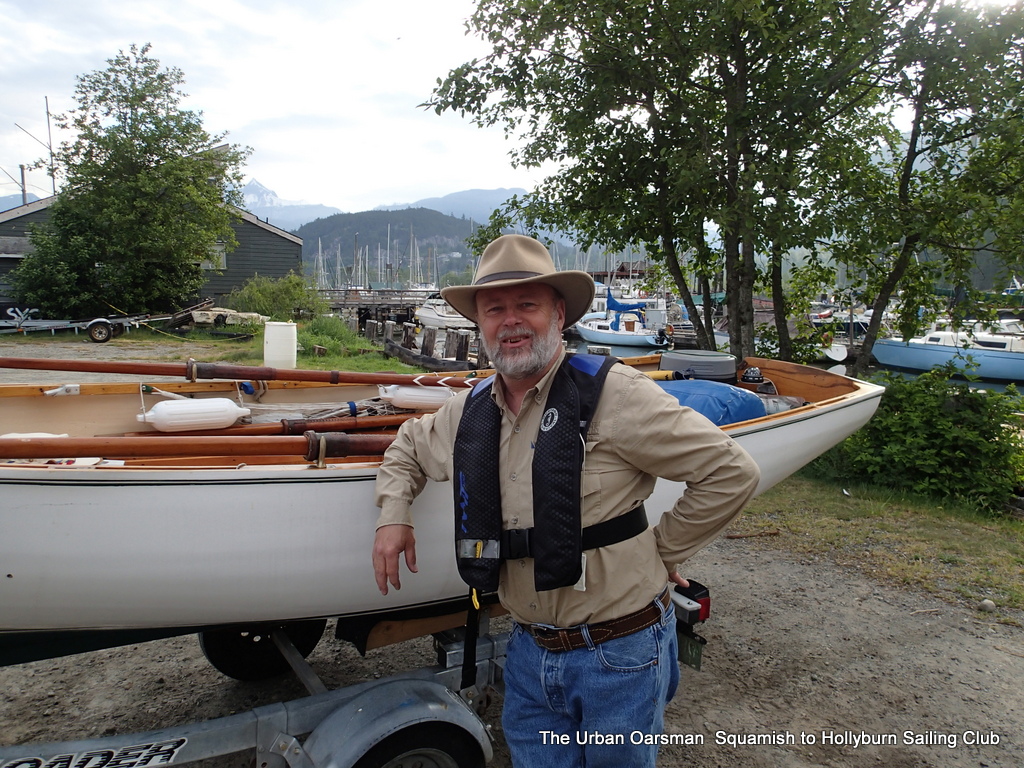
Maciej, Lars and myself at the Squamish boat launch.
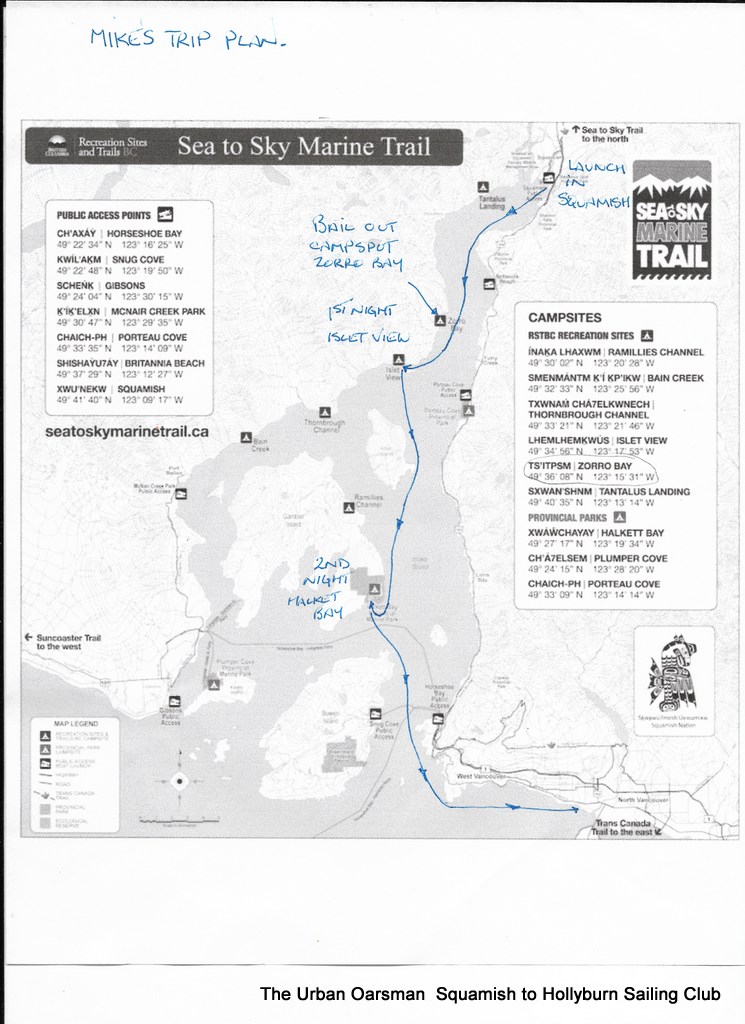
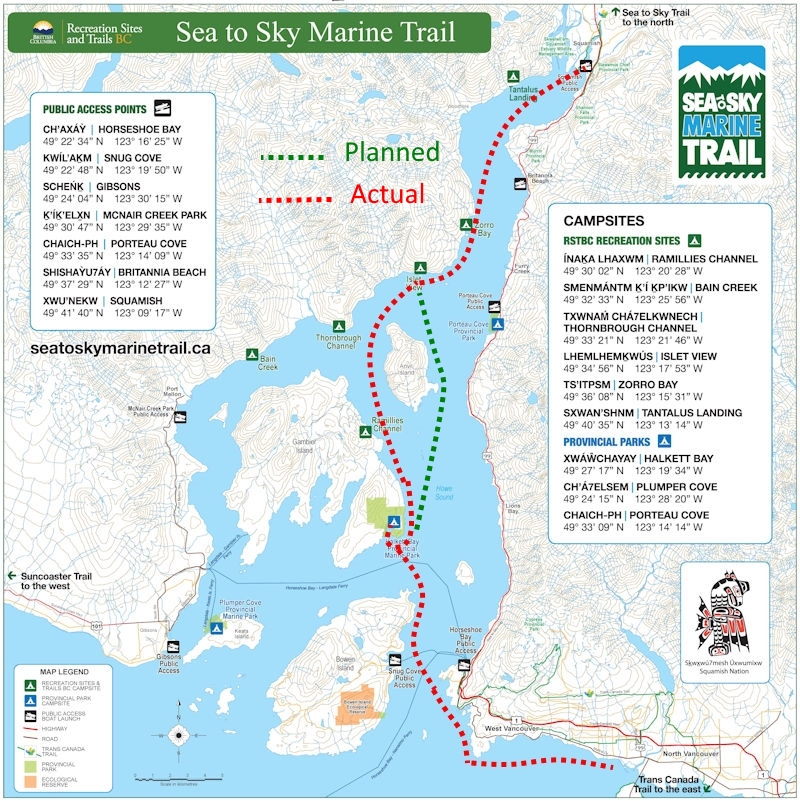
For every trip, you need to have a trip plan and leave it with someone who can call for help if you are overdue.
Original trip plan:
Trip as actually done:
Trip plan showing our planned route and the route we actually took.
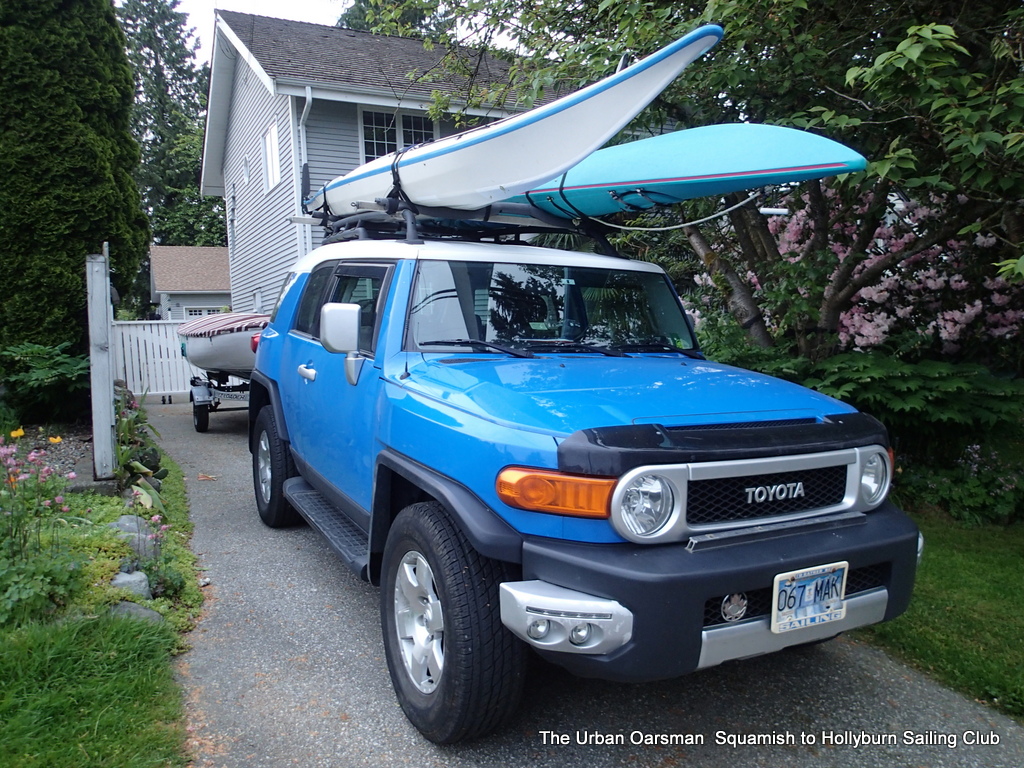
We leave too early in the morning to pick up Maciej and Lars. I am towing Gwragedd Annwn and have Maciej’s and Lar’s kayaks on the roof racks. Paul has volunteered to drive the FJ home from Squamish.
FJ loaded and ready to drive to Squamish…4:56am!
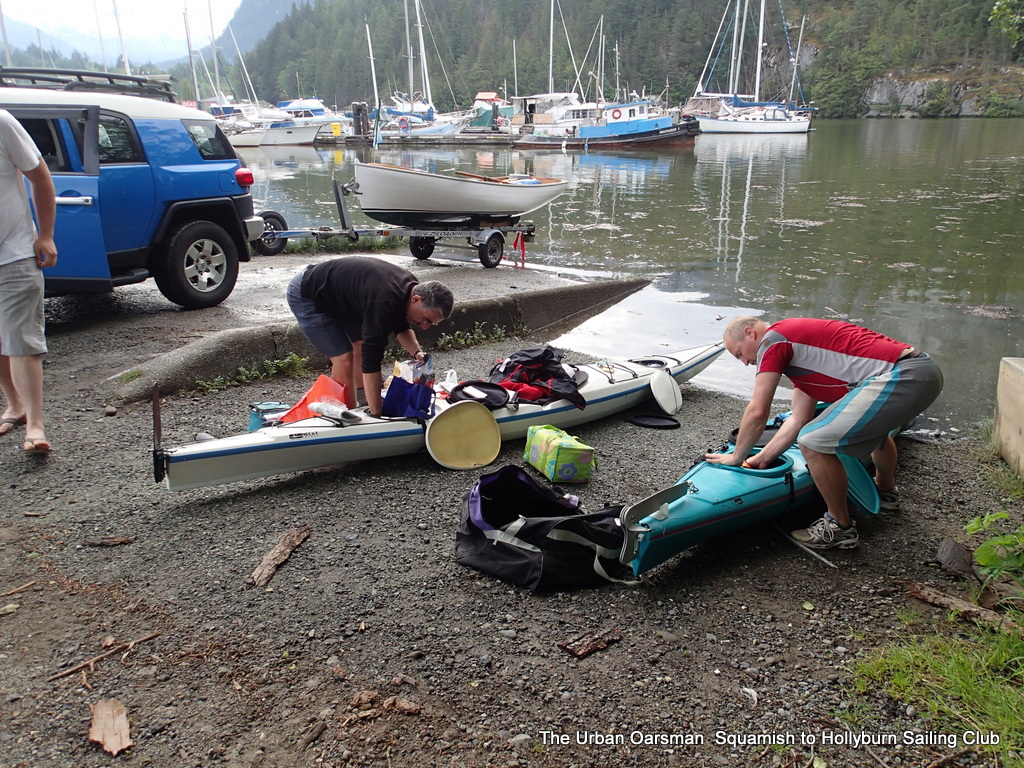
When we get to the Squamish boat launch, Maciej and Lars load up their kayaks.
Loading up the kayaks.
Gwragedd Annwn is already loaded and ready to launch. This will be a “test” cruise to see how well Gwragedd Annwn works on longer trips.
Ready to launch.
I get in Gwragedd Annwn and Paul launches me.
Paul says a final “good-bye” and heads back home.
Lars and I head out, Maciej says he will be along shortly.
We paddle out of the Mamquam Blind Channel.
Conditions are very good. An outgoing tide and no wind.
The “Cheetahs” of the sea.
Maciej and Lars will paddle together…The kayaks are twice as fast as Gwragedd Annwn.
I rapidly fall behind.
Leaving Squamish in the distance.
I take my sailing boots off and row in my runners.
Waiting for me at Watts Point. Those two specks on the rock are Maciej and Lars.
The real advantage I have in Gwragedd Annwn is I do not have to go to shore to get a snack or a drink or anything else. The kayakers have to.
No break for the rowing.
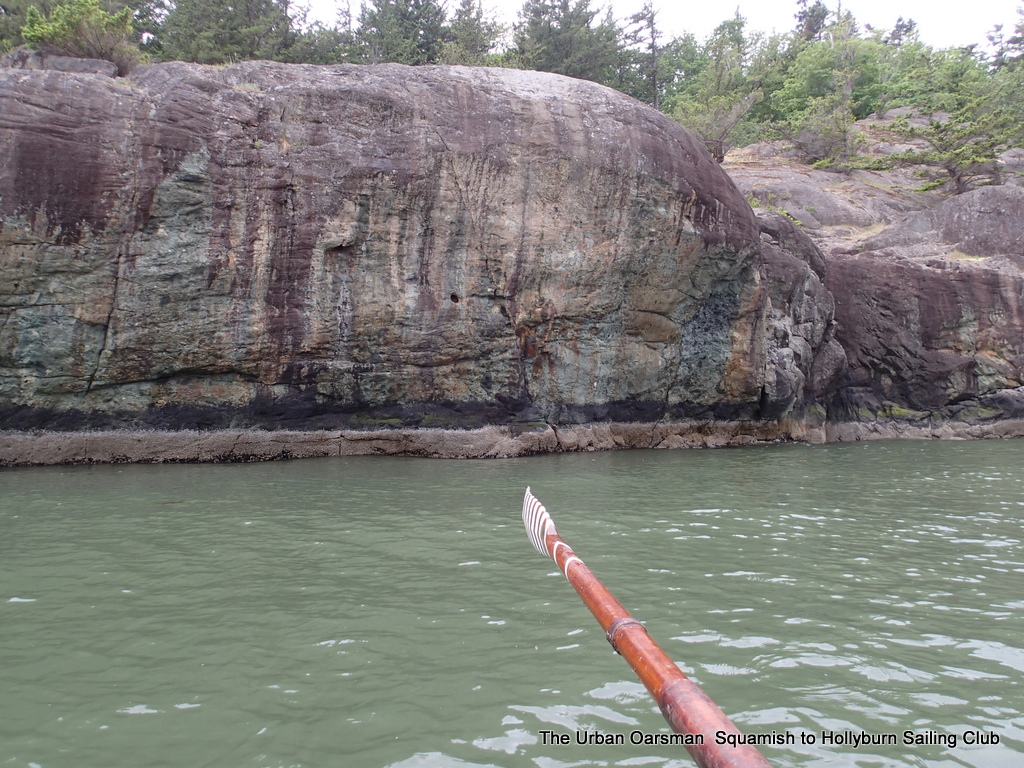
I row on, rowing by a breaking rock by the point.
Rowing past Watts Point.
The breaking rock:
Breaking rock by Watts Point.
It is almost 8:30 in the morning and conditions are still good.
Gwragedd Annwn is down by the stern…I will have to move some cargo forward.
I row on, past the Point, Maciej and Lars pass me again.
The “cheetahs” of the sea pass me.
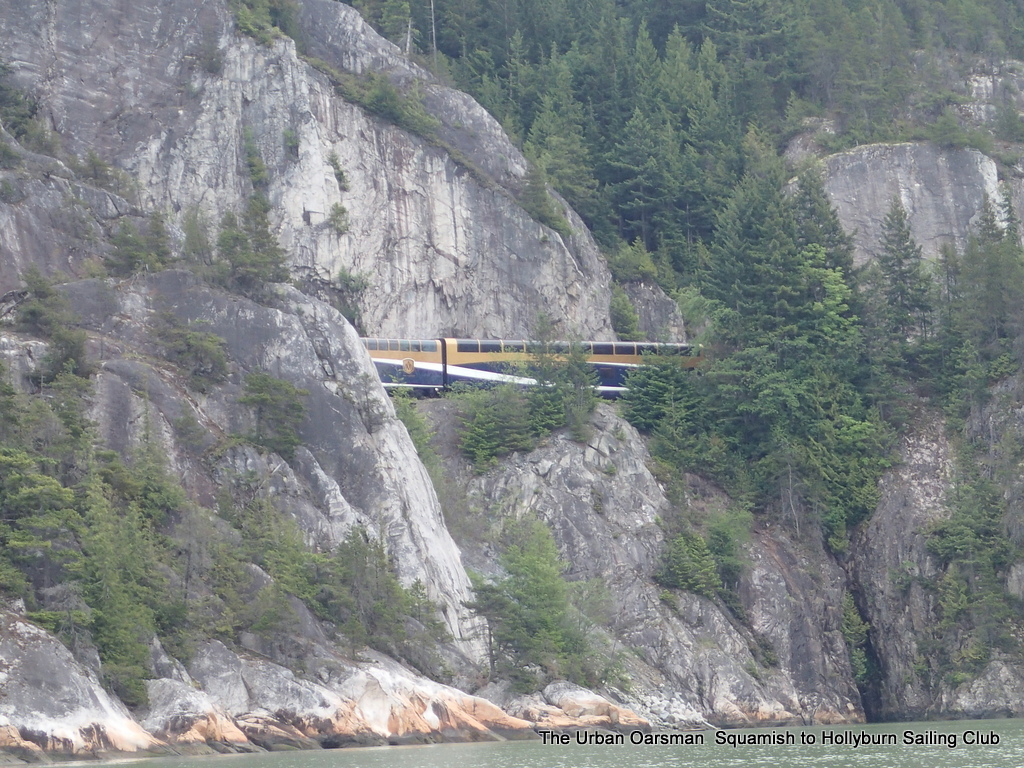
I hear the train:
The Rocky Mountaineer heads up the Sound.
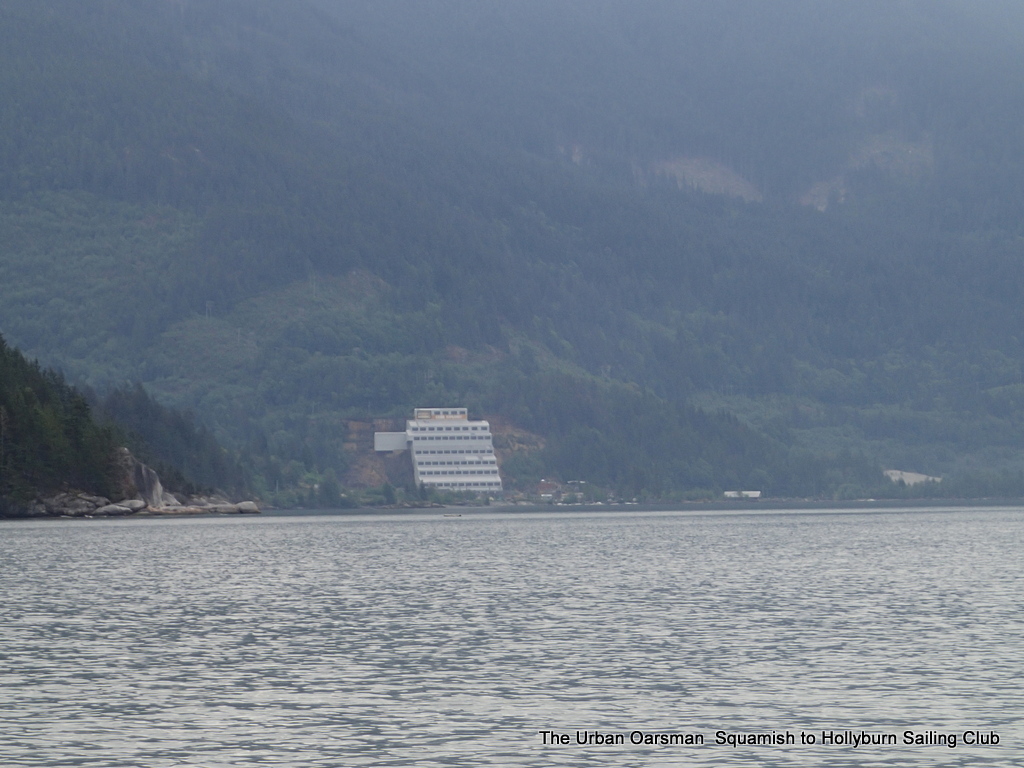
The BC Mining Museum is in the distance.
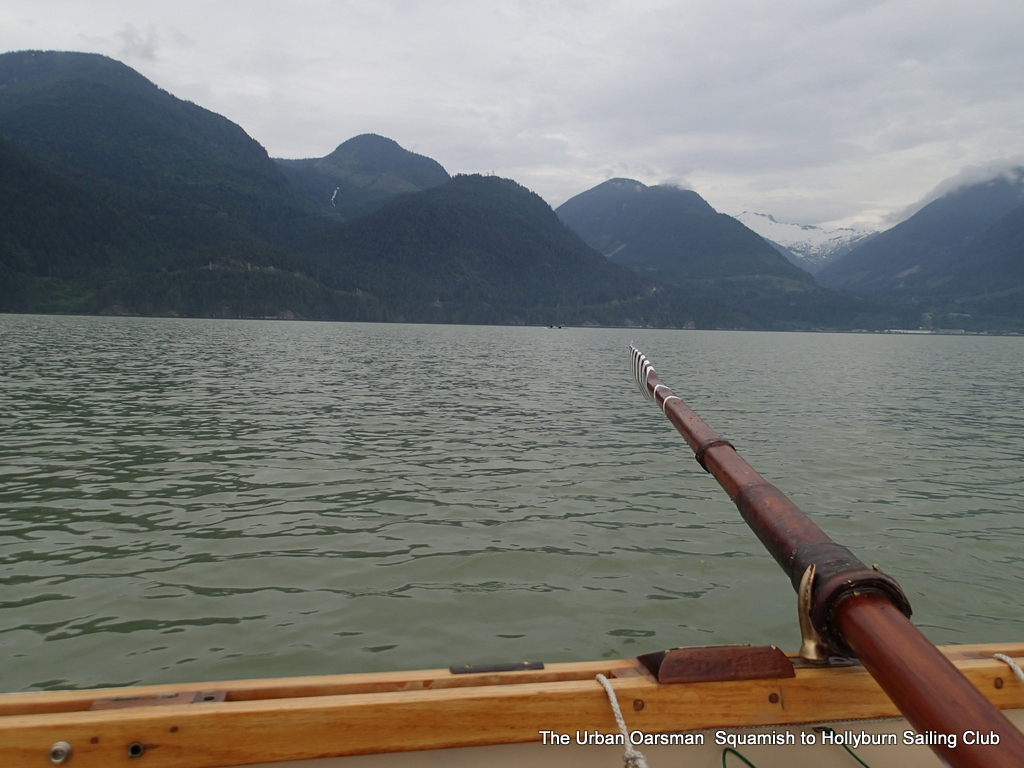
View to the East from Gwragedd Annwn.
View from the kayakers:
Those kayakers are fast!
I am so far behind, I am not even a speck!
The kayakers go into Ts’itpsm (Zorro Bay).
TS’ITPSM (Zorro Bay)
It is the kayakers job to set up camp so everything is ready when I arrive….at this rate, they will have a lot of time to do that.
I arrive at Ts’itpsm (Zorro Bay):
9:45am.
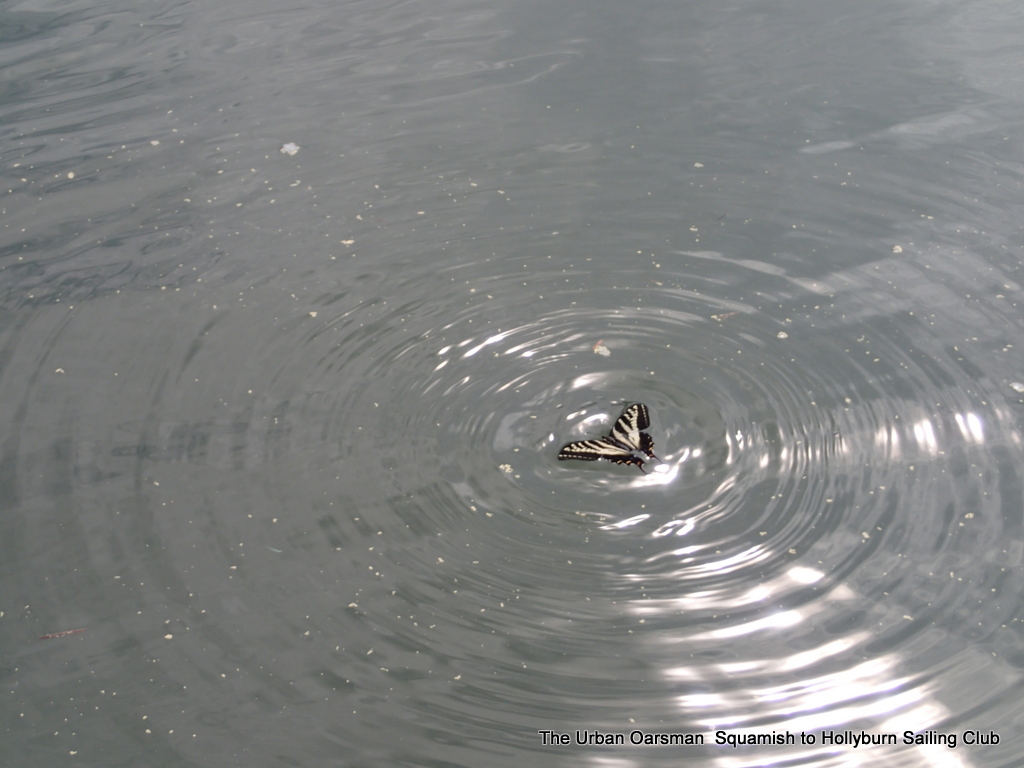
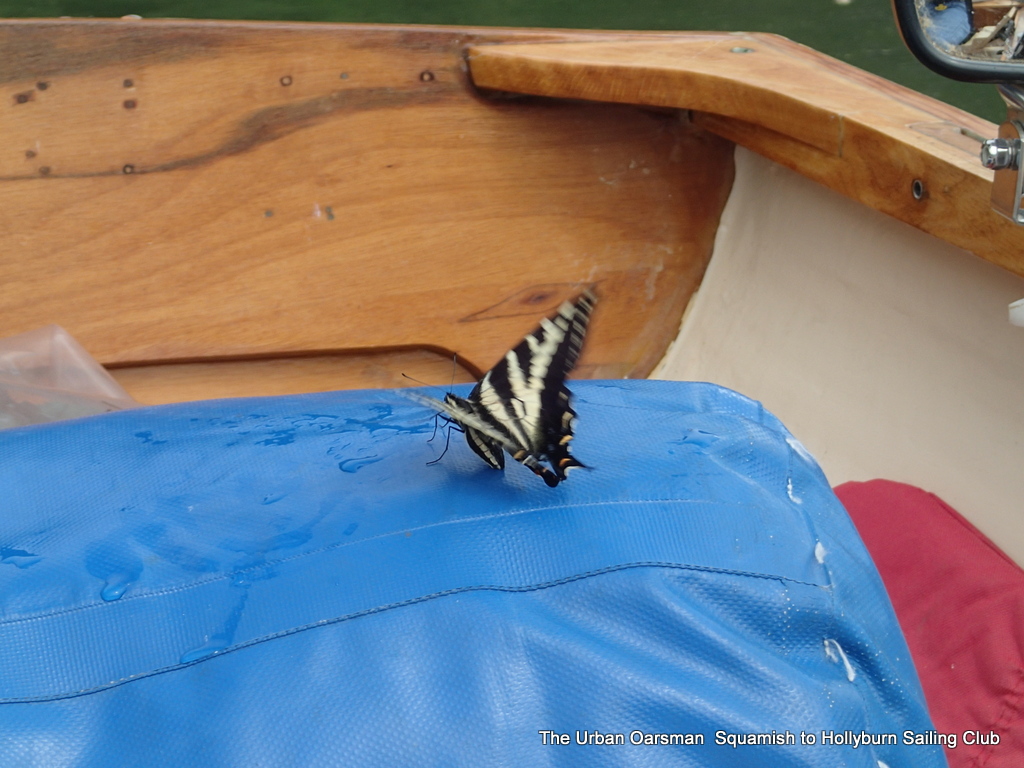
I spot a Zebra Swallowtail butterfly in distress.
The Urban Oarsman to the rescue!
Rescued, I row the butterfly into shore.
Drying wings.
Almost there…..
Butterfly rescue.
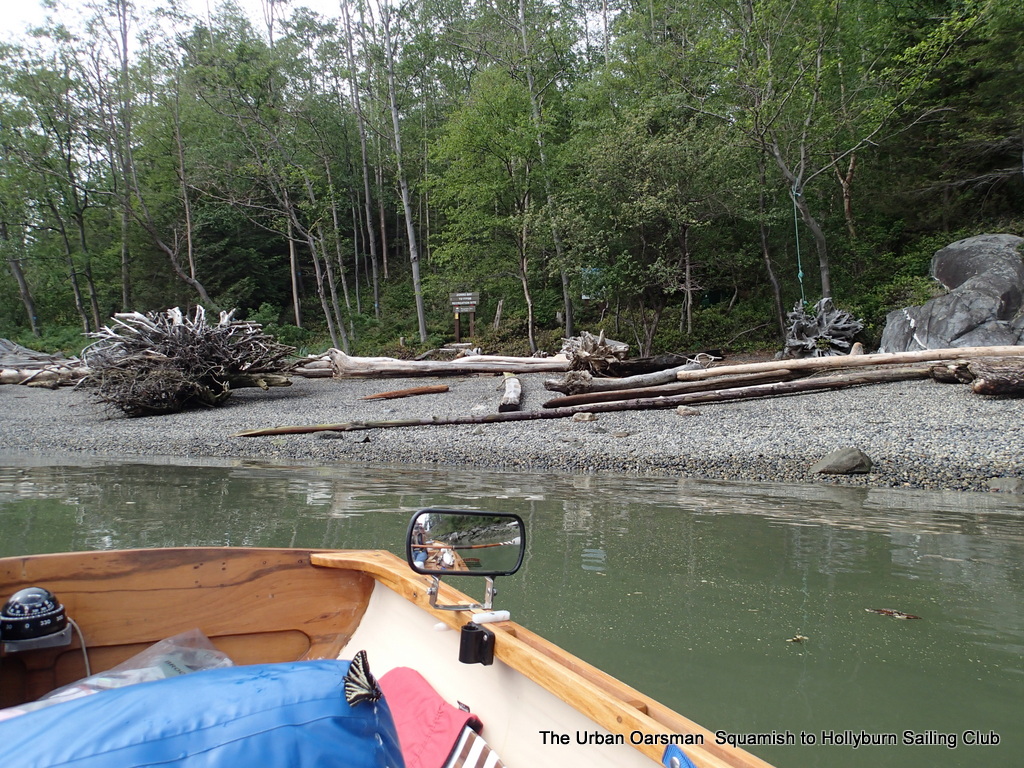
Entrance to the campsite. I am not going to bail out… I row around the bay and head on to Lhemlhemkwus (Islet View).
Around the point and on towards Lhemlhemkwus (Islet View).
Eastern Defence Island.
One of the Defence Islands.
I row on. You can see my chart, #3311 sheet 2 of 5 HOWE SOUND, part of the Sunshine Coast series of charts. I had bought a map bag from MEC, but it was a little too small. I ended using a big “Glad” bag, $2.50 vs, $35 for the map bag.
Hard rowing passing Defence Islands.
There is a 2 to 3 kilometer an hour counter current along the shore. Gwragedd Annwn’s progress slows to a crawl. I row for a long time to go not very far. I arrive about 12:30pm.
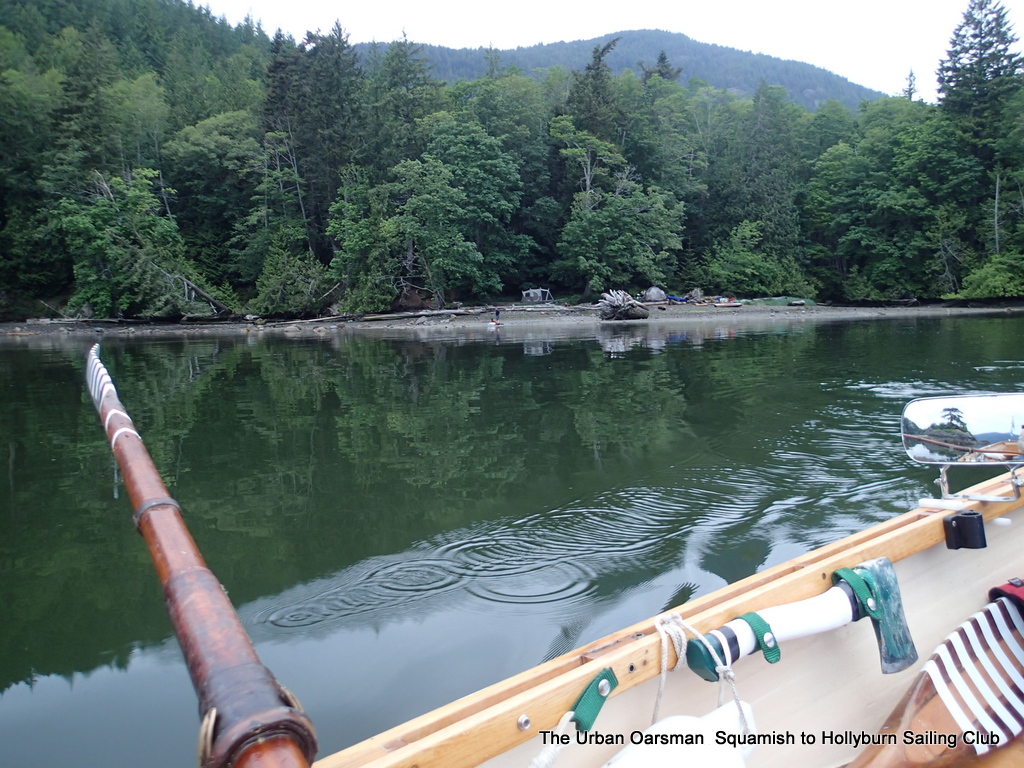
The cleared beaching area.
I find the campsite. There is a cleared beaching site. I beach Gwragedd Annwn and shortly after, she is dry. I must admit, I am tired from the row, about 6 hours and 15 minutes at the thwart.
I am going to anchor Gwragedd Annwn off of the beach.
The tide will go out far enough for me to set her anchor by hand (or foot as it turns out).
Setting the anchor.
The tide is still going out to the low low tide. I have checked the tide tables, The tide will not be this low again tonight. I will have plenty of water for Gwragedd Annwn. Maciej and Lars have a fire going. Time for lunch.
Some chicken noodle soup.
The current is flowing the wrong way past the landing area quite quickly. I am happy to be ashore.
’round the campfire.
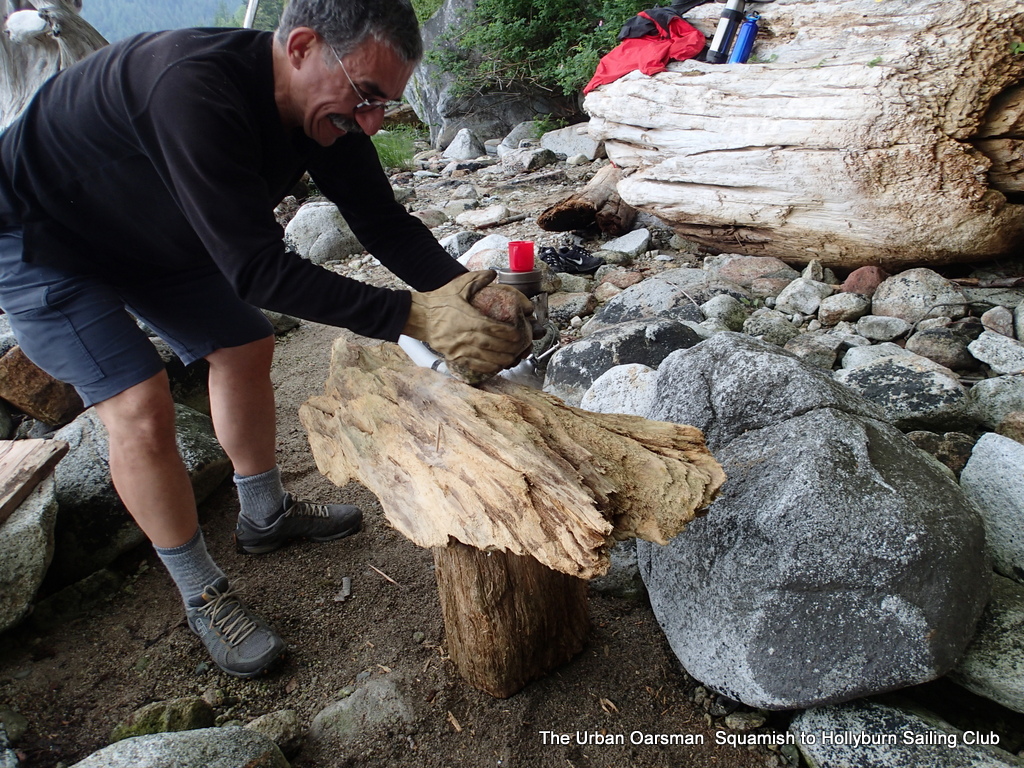
Maciej chops up some firewood using my axe..note to self, do not let him use the good axe!
Oh well…I can grind out the dents when I get home.
Maciej and Lars have set up their tents. I am going to sleep aboard Gwragedd Annwn. There is a slight change of plans, Maciej and Lars want to paddle down the West side of Anvil Island. Fortunately there is cell phone coverage throughout Howe Sound. I call in and amend my trip plan…No sense looking on the wrong side of Anvil for us.
Islet View campsite.
Lars forgot his cup. Maciej makes him a new one.
Lars’s new cup.
When the tide has re-floated Gwragedd Annwn, I board and prepare for bed. The current is still flowing to the East, even on the rising tide. Weird.
I am anchored and have a stern line to shore. Set for the night.
Maciej says there is no rain forecast in the weather report. Great, it will be easier to sleep aboard Gwragedd Annwn than drag her up and then down the beach in the morning. The tide will be very high tonight and quite low tomorrow morning when we wish to leave.
It takes a while to get organized.
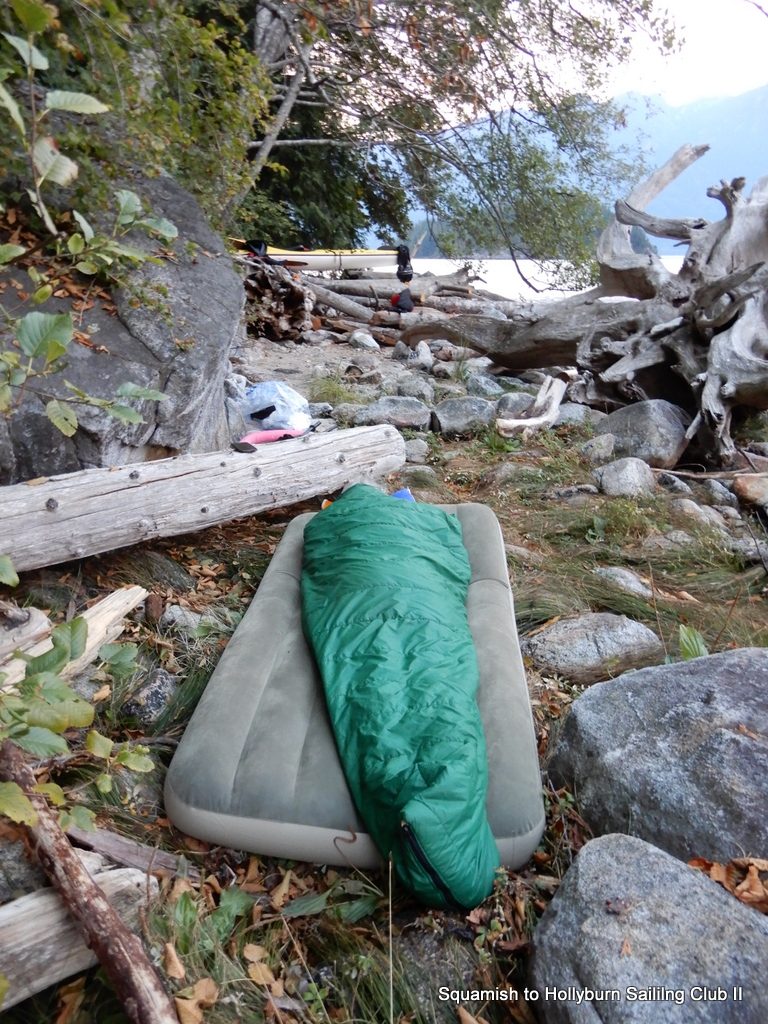
Because there is no rain forecast, I am not going to pitch my tent, I am going to sleep on the deck. I still have to put the deck pieces in place, stow gear, assemble my camping cot and get my sleeping bag ready.
Ready for bed.
I have my sleeping bag laid out, on top of a self-inflating mattress which is on top of my camping cot. As I prepare my bed, another couple has arrives. You can see their zodiac on the large stump. The tide will rise past the base of the stump. The current is still flowing to the East.
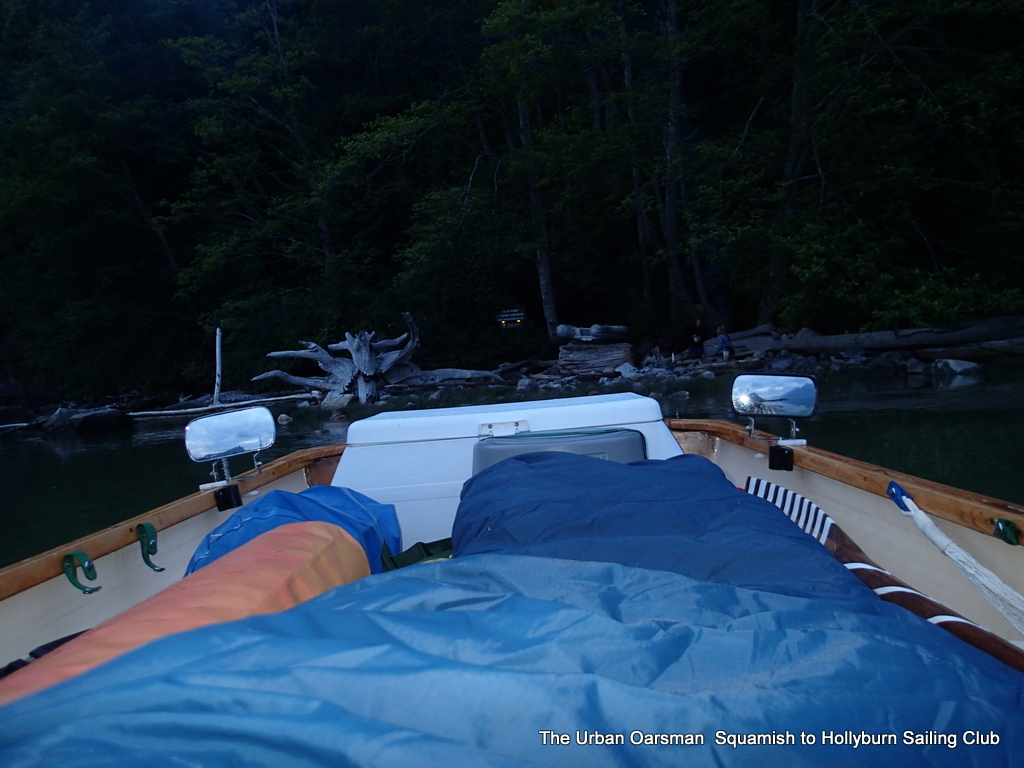
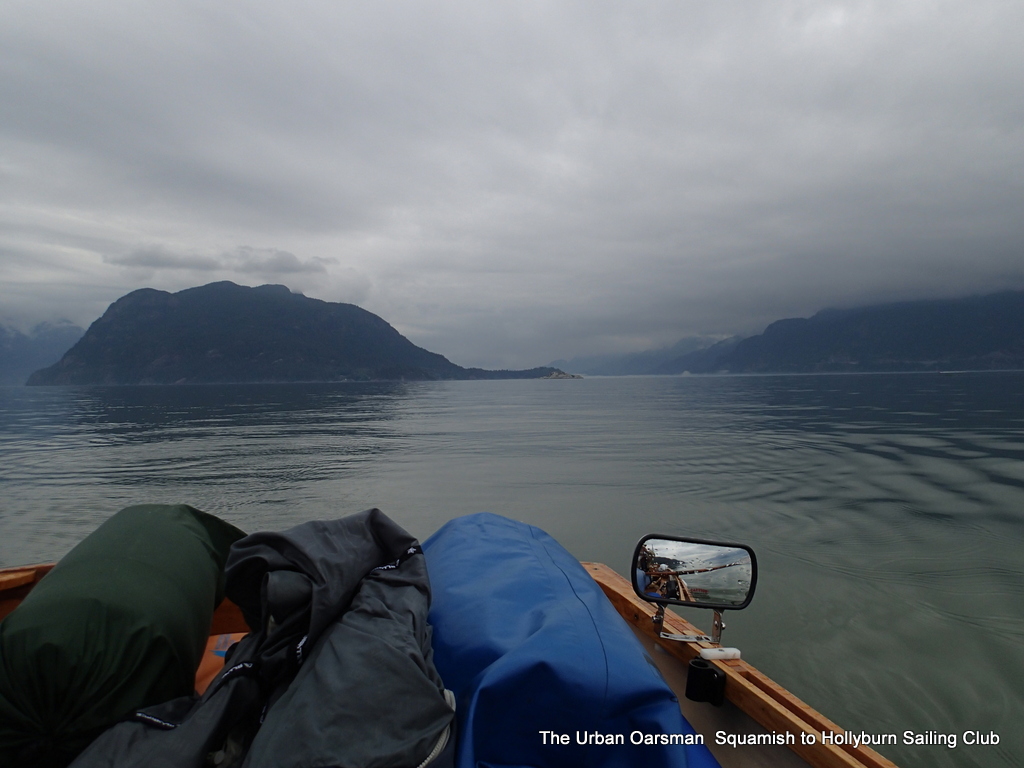
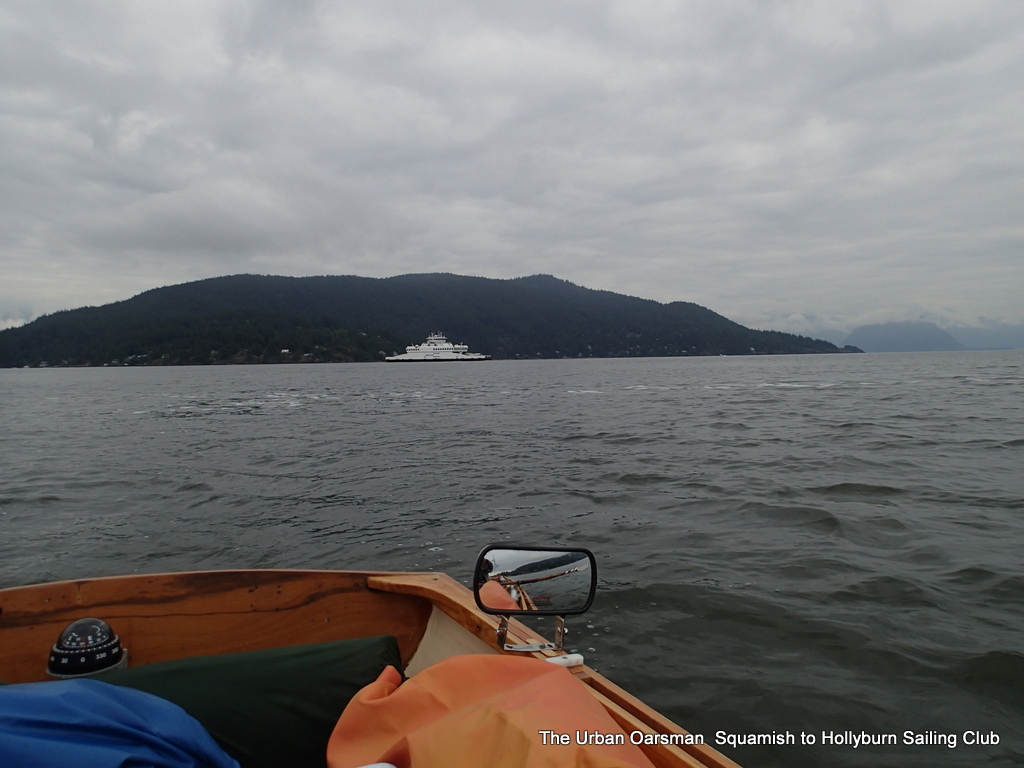
20 minutes of rain in the middle of the night. See the drops on the mirror.
The weather liars lied. At around 12:20am, it starts to rain. I am uncertain as to what to do. I have a tent, and I could go to shore and pitch it and sleep in my spare sleeping bag, but what a hassle. It is not raining very much, I am warm, so I decide to wait it out…I put my jacket over my sleeping bag, my hat over my head and hope that it stops soon. If I start to get cold, I will go ashore and pitch my tent and sleep in it. After 15 minutes or so of light drizzle, it stops. Saved!!
Around 1:30 it begins to rain again. Rats! Again I decide to wait it out…It stops by 1:40pm. It is dry for the rest of the night.
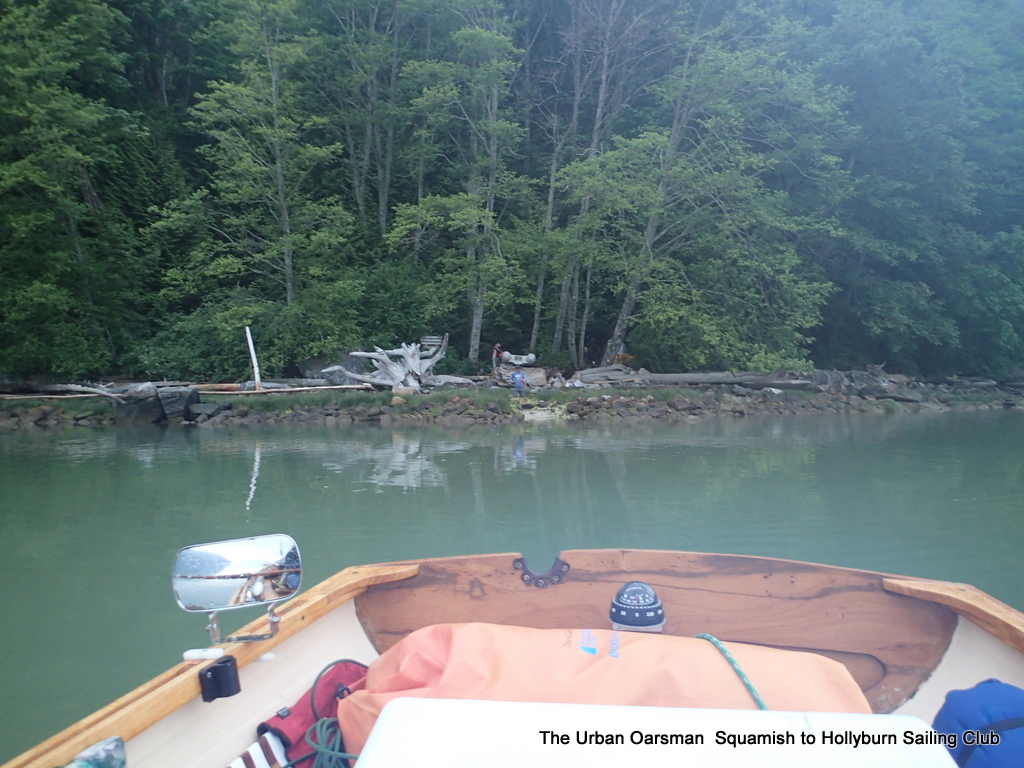
When I wake up, my sleeping bag is dry, my body heat has dried up all of the rain. Gwragedd Annwn’s decks are still wet. I carefully pack up. I go ashore, have breakfast with Maciej and Lars and set out.
Leaving the campsite. Note the raindrops on the mirror.
Again, I am the first boat out. The current is still flowing to the East.
I am the speck in the distance. The current starts flowing to the West just past the islets.
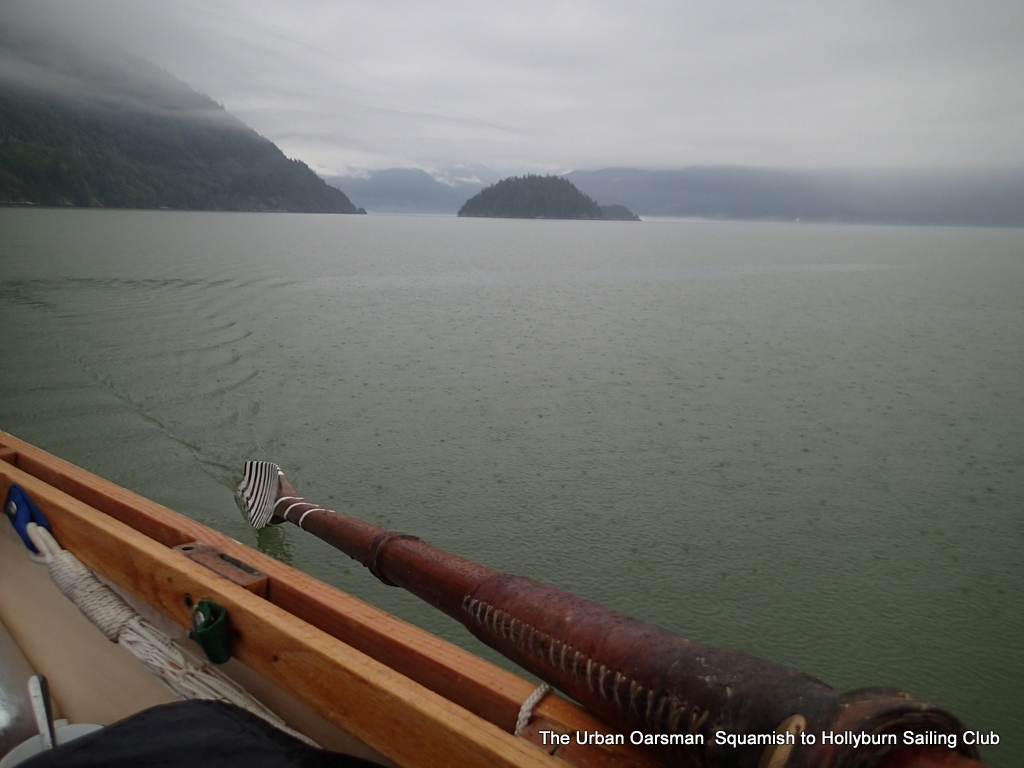
Looking back, it begins to rain again, but, at least I am rowing and warm. Not far from the islets, the current switches and now is pushing me to the West.
Defence Islands to the East.
It is raining a lot heavier that it did last night. I feel sorry for Maciej and Lars packing up in the rain.
Maciej and Lars paddle out of the rain.
West side of Anvil Island is to the right of the picture.
We share an orange and have a chat as they pass me….We will meet again at Halkett.
Confirming plans to meet in Halkett Bay.
Gwragedd Annwn is sitting much more level.
Maciej and Lars press on.
Passed by the Cheetahs again.
I can smell the mill.
Port Mellon way.
I row past Anvil Island. No landing here.
When you are this close to land, every turn seems to be another point of land.
Conditions are still good…Maciej was right, conditions are usually better early in the morning.
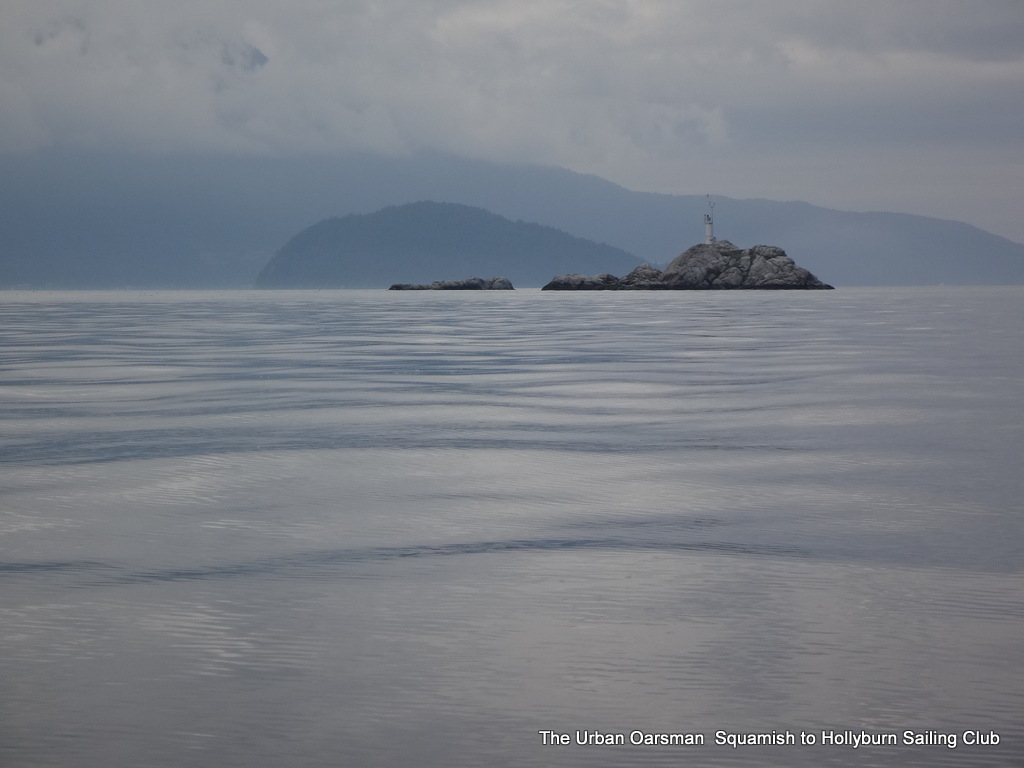
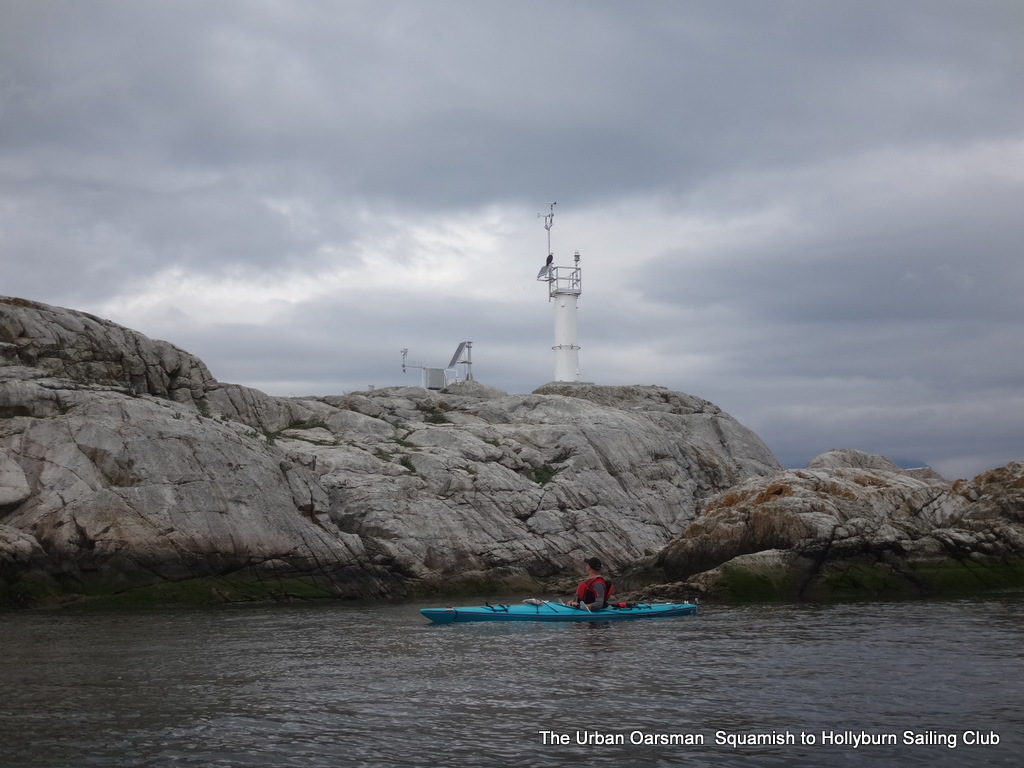
Pam Rock.
Maciej and Lars make a detour to Pam Rock.
Pam Rock.
Pam Rock
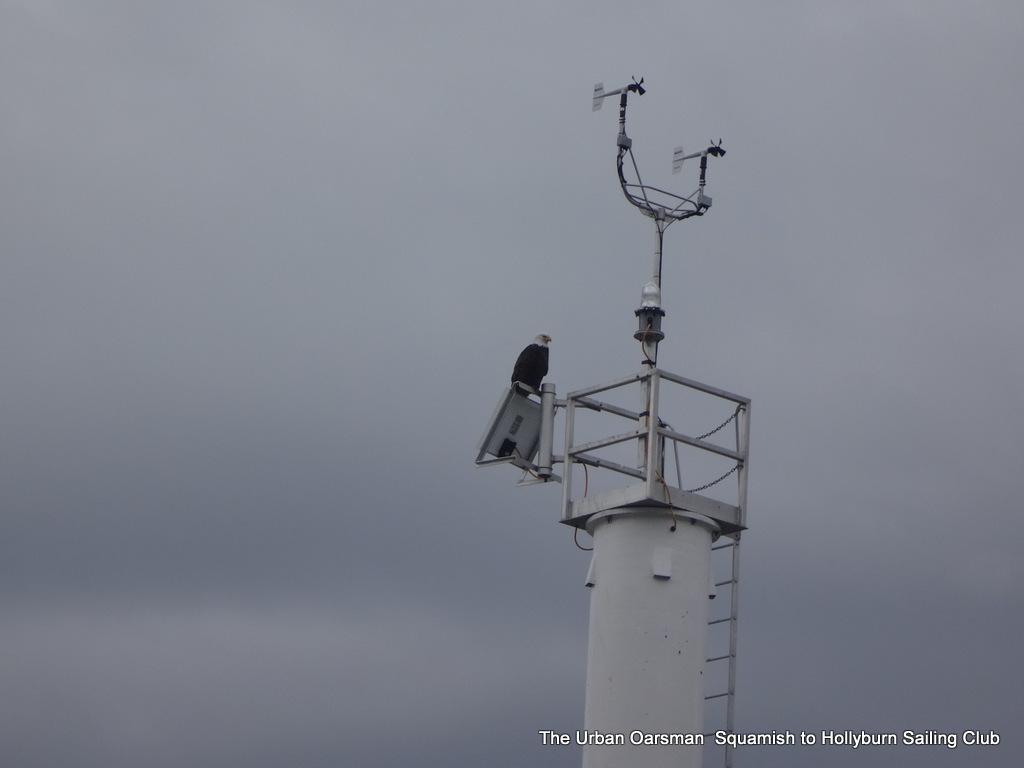
The sentry at Pam Rock.
I, on the other hand, row straight towards Gambier Island.
Leaving Anvil Island behind.
Rowing beside Gambier, Anvil Island in the distance.
Most of my gear is dry.
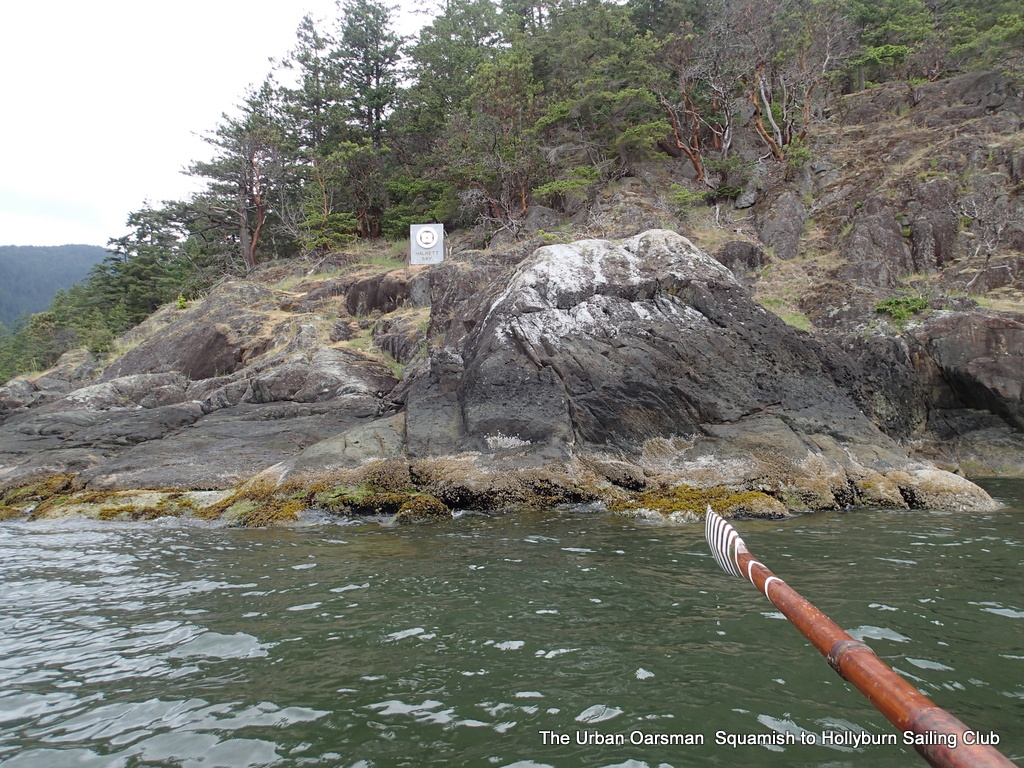
I continue on to Halkett Bay.
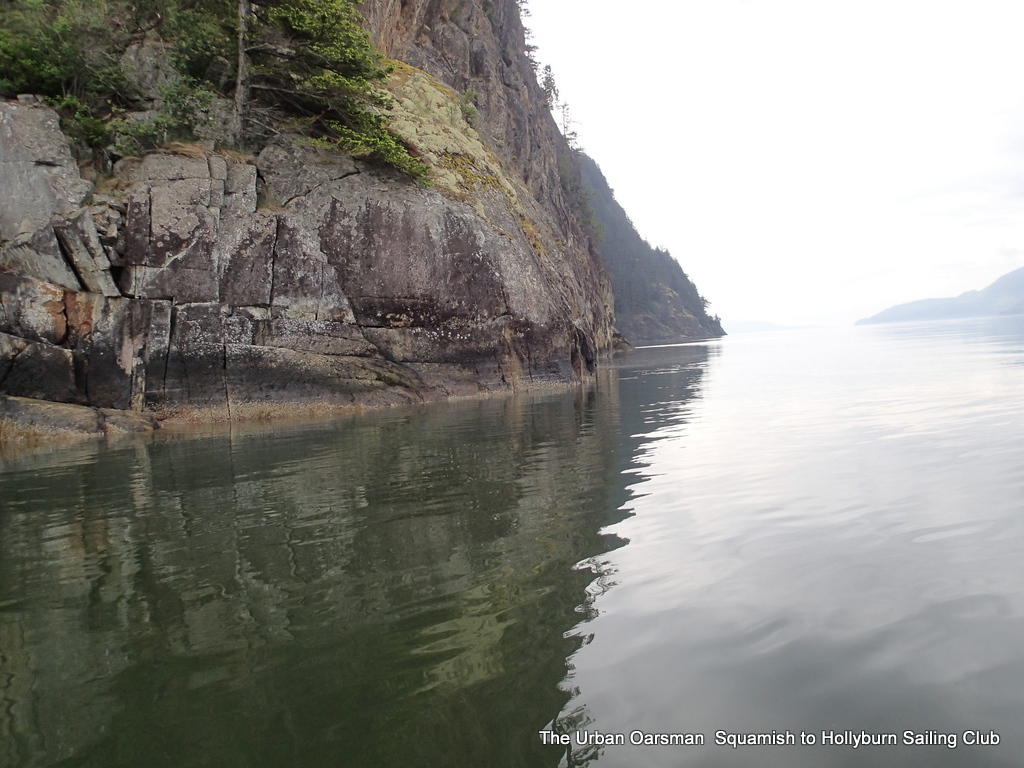
Steep cliffs on Gambier.
As I close on Halkett point, Lars calls me on the radio…the campsite is full and he is heading home, continuing on to HSC. Maciej is staying behind to find a campsite.
Lars leaving Halkett Bay heading home.
Lars will probably be at HSC before I get to Halkett Bay.
Langdale ferry.
Halkett Point. The wind begins to pick-up from the South East.
Rounding the point.
Not much further now. The wind picks up more for the run into Halkett Bay.
Maciej at Halkett Bay.
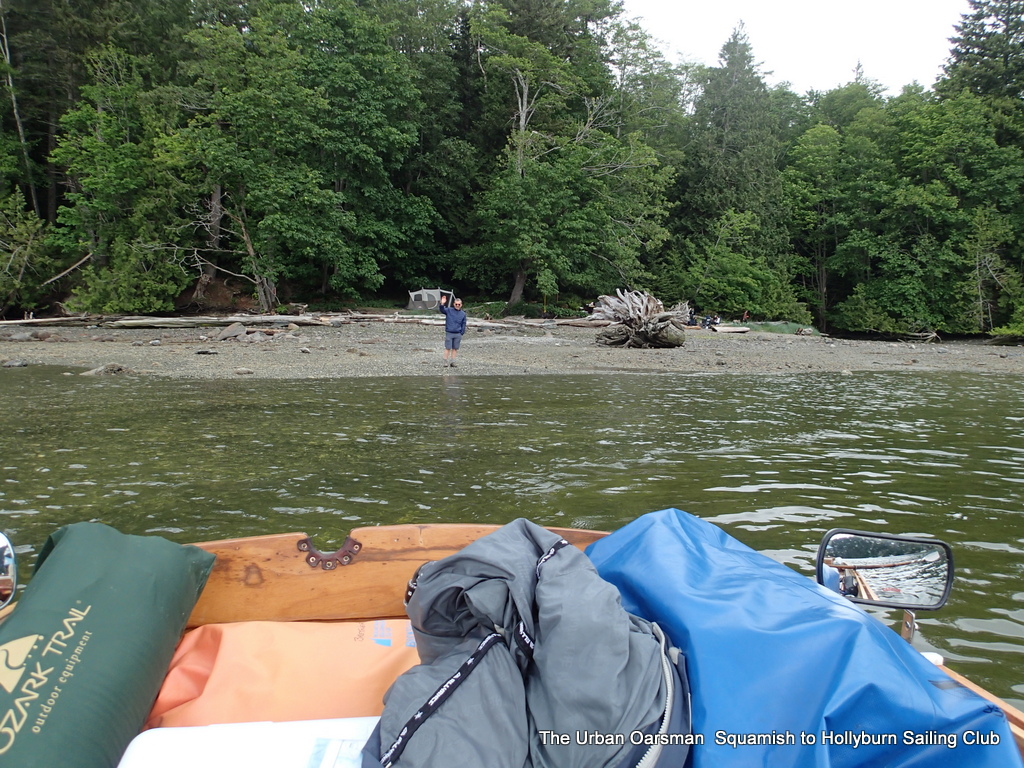
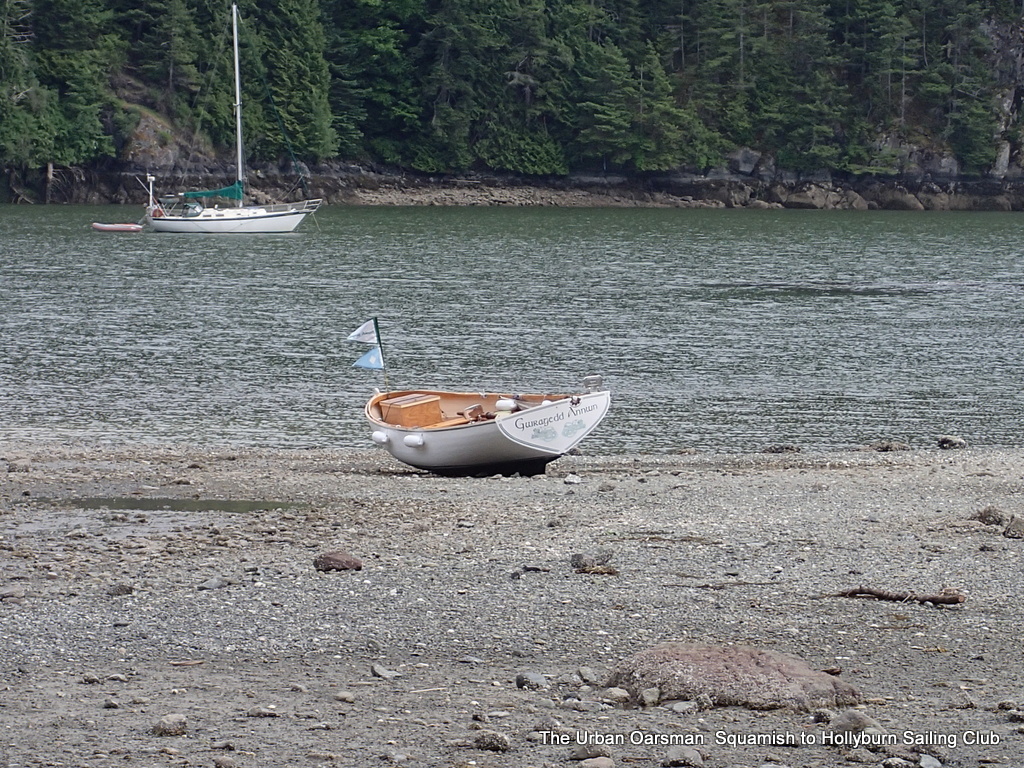
When Lars left, the tide was past the big stump behind him. I beach Gwragedd Annwn. Maciej and I quickly discuss continuing on to HSC. Maciej has found a good campsite and we decide to say. I go ashore to the campsite Maciej has found. About 5½ hours at the thwart.
Gwragedd Annwn on the hard at Halkett Bay.
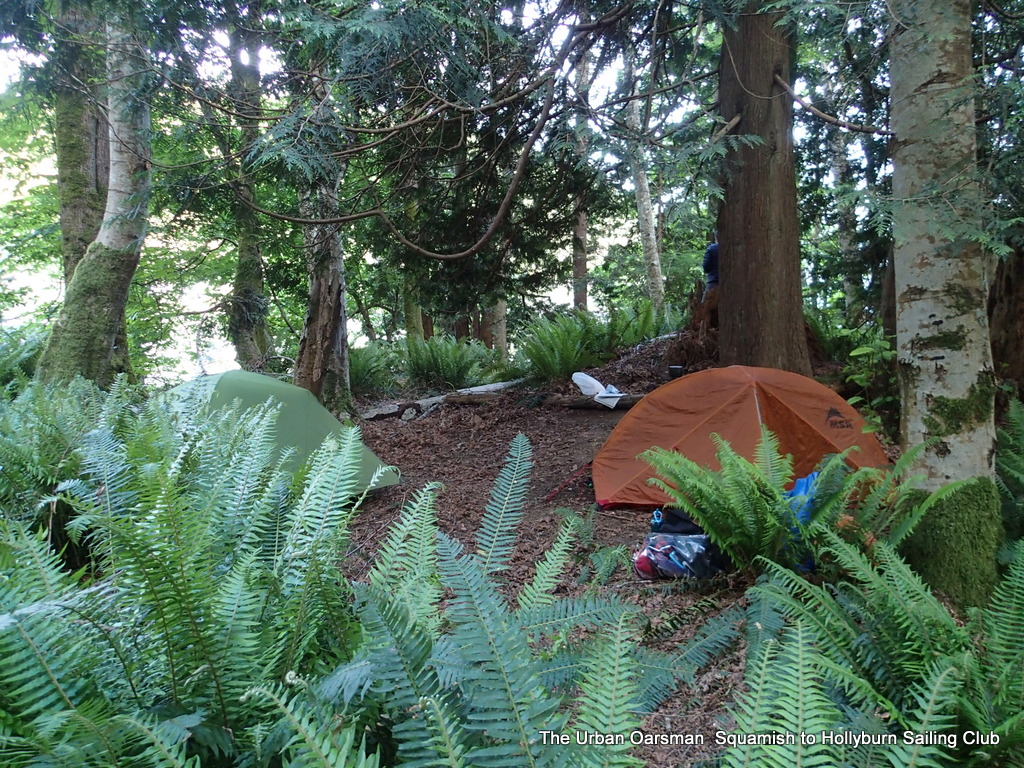
Our campsite:
Our campsite in the fern forest.
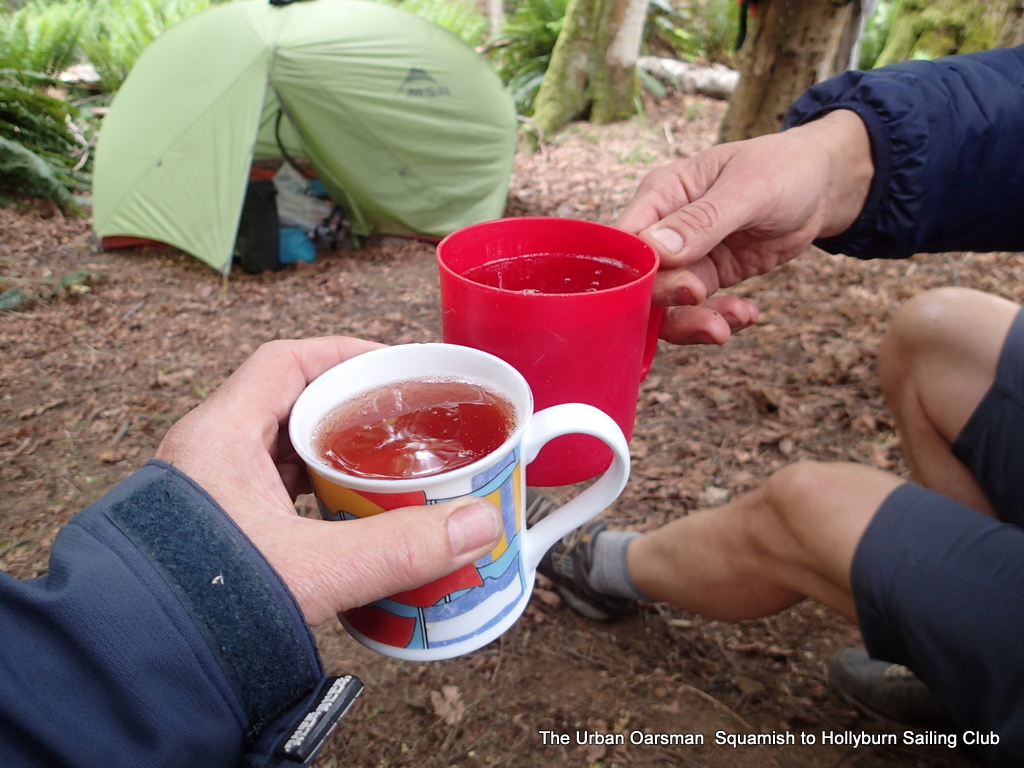
A toast to being here.
Sparkling cranberry and soda.
I turn in for a nap. As the day progresses, some campers leave, the tide comes in, space open up and I can tie Gwragedd Annwn to the dinghy dock. We get word that Lars is back at HSC.
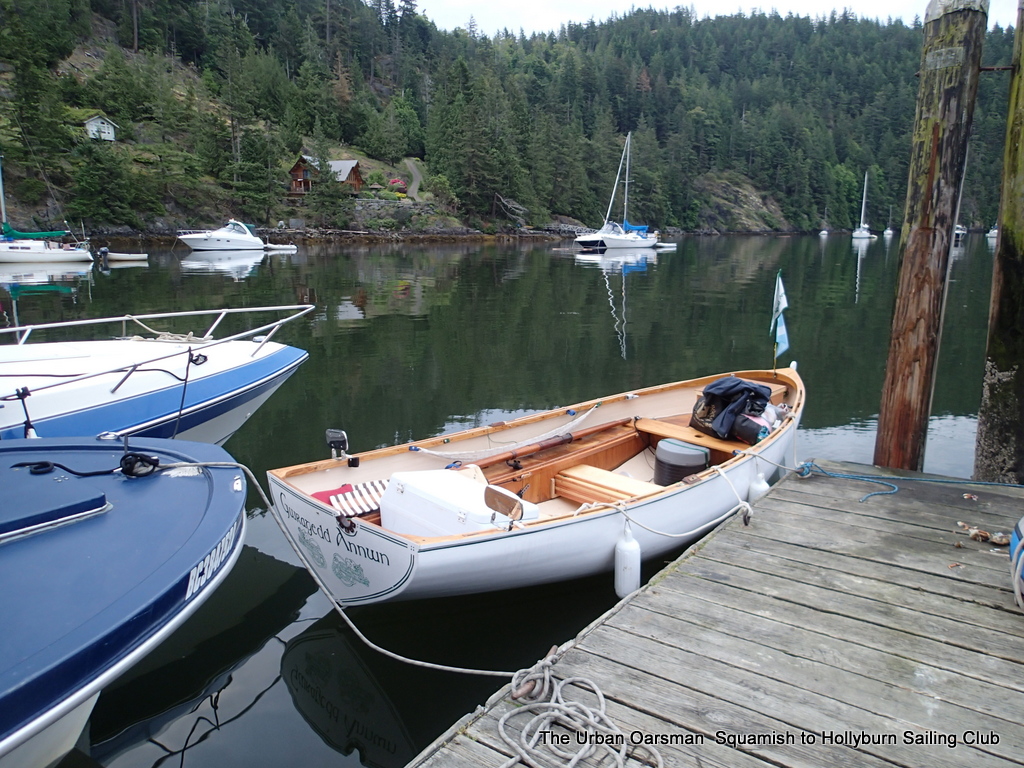
Gwragedd Annwn at the Halkett Bay dinghy dock.
We will have another long day ahead of us, so we turn in early. The loud music starts by 9pm and then abruptly stops at midnight. No music no more voices. Did a ranger make a visit?
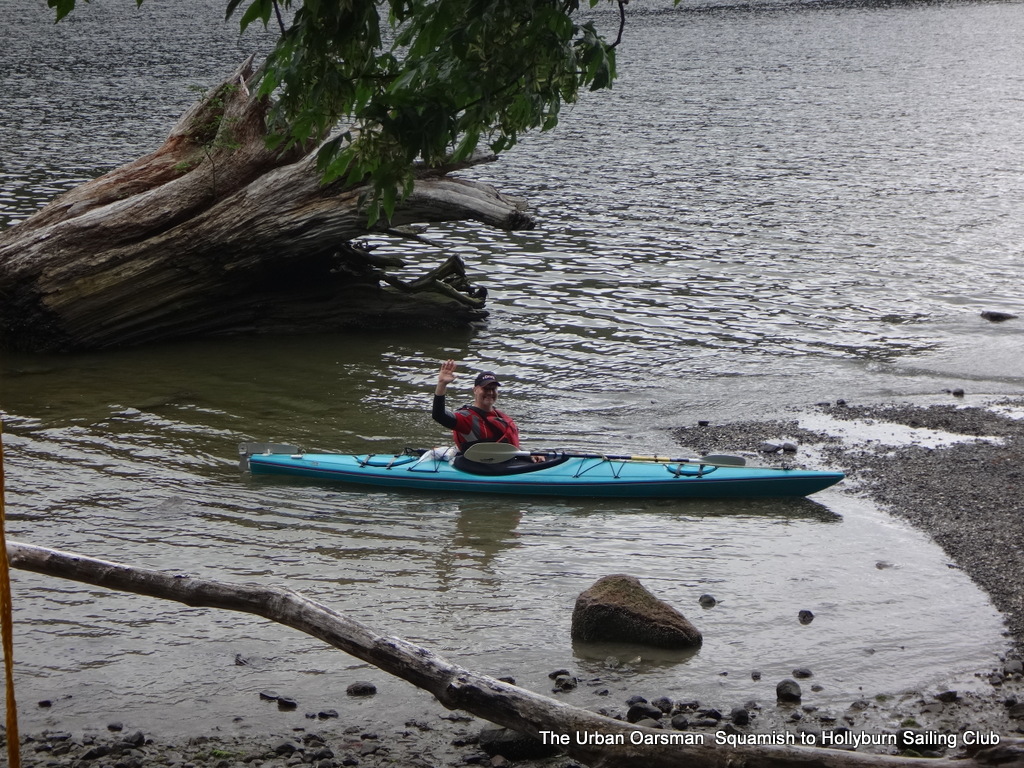
Early start.
I row Gwragedd Annwn over to the beach below the campsite and load up. I help Maciej carry his kayak to the water. I get a head start while he loads up. He will catch me shortly.
6:25 am, I am on my way.
Conditions good, flat calm, no wind.
On my way, Langdale ferry in the background.
Maciej and I will have to watch out for the ferries.
Langdale ferry.
Maciej passes me.
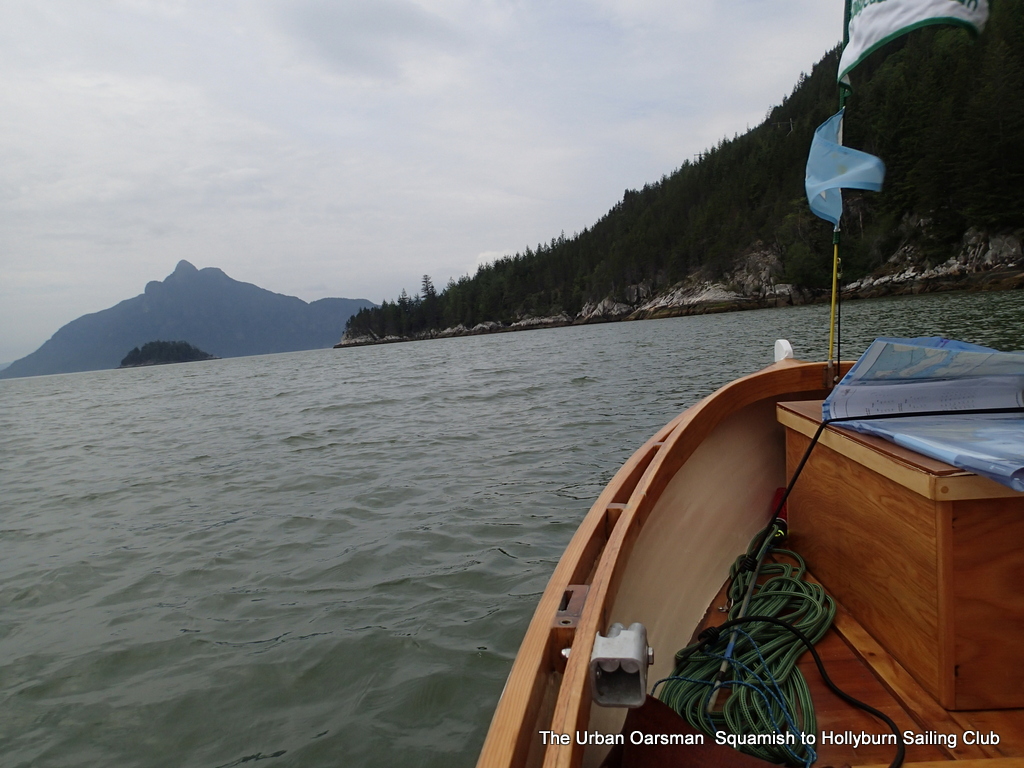
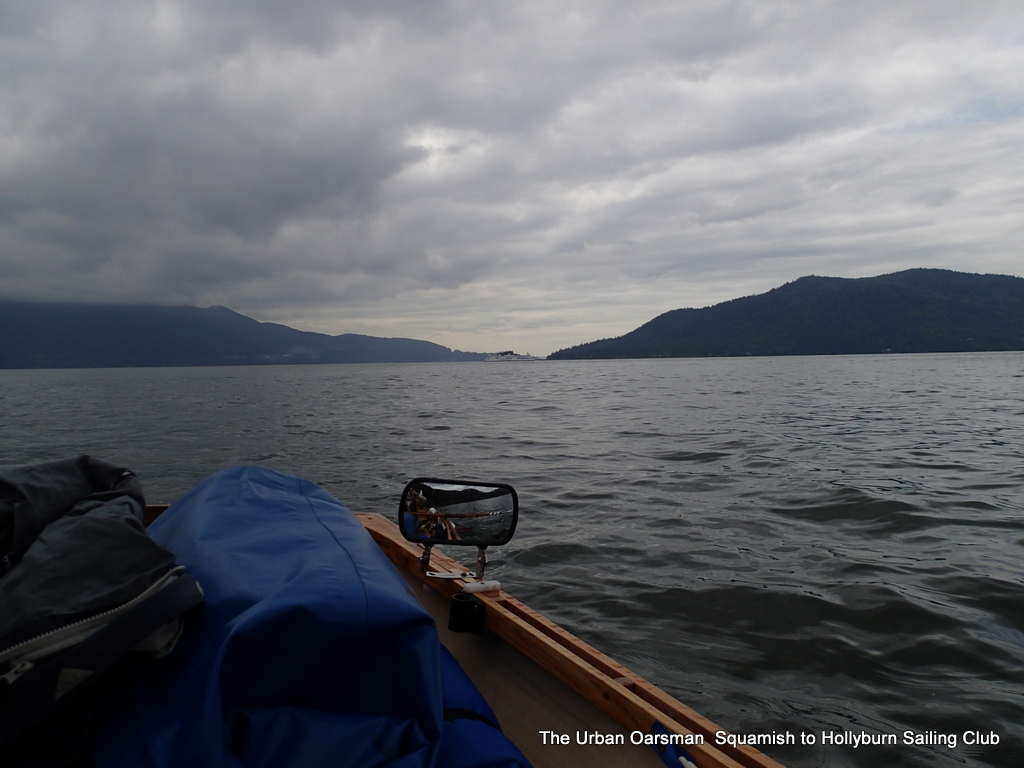
Finisterre Island to the left, Bowen Island to the right.
Maciej is going to try to go between Finisterre Island and Bowen Island. I do not think that the tide will be high enough for Gwragedd Annwn to make it. I go around.
Doorway to Finisterre Island.
The tide is too low even for Maciej, he carries his kayak across the spit.
Rowing past Bowen.
Maciej and I had intended to cross the Queen Charlotte Channel together. Here we are discussing the crossing. There is a problem. If Maciej paddles slowly enough for me to keep pace with him, he gets cold! We decide to cross at our own pace and meet just past Point Atkinson, in Starboat Cove.
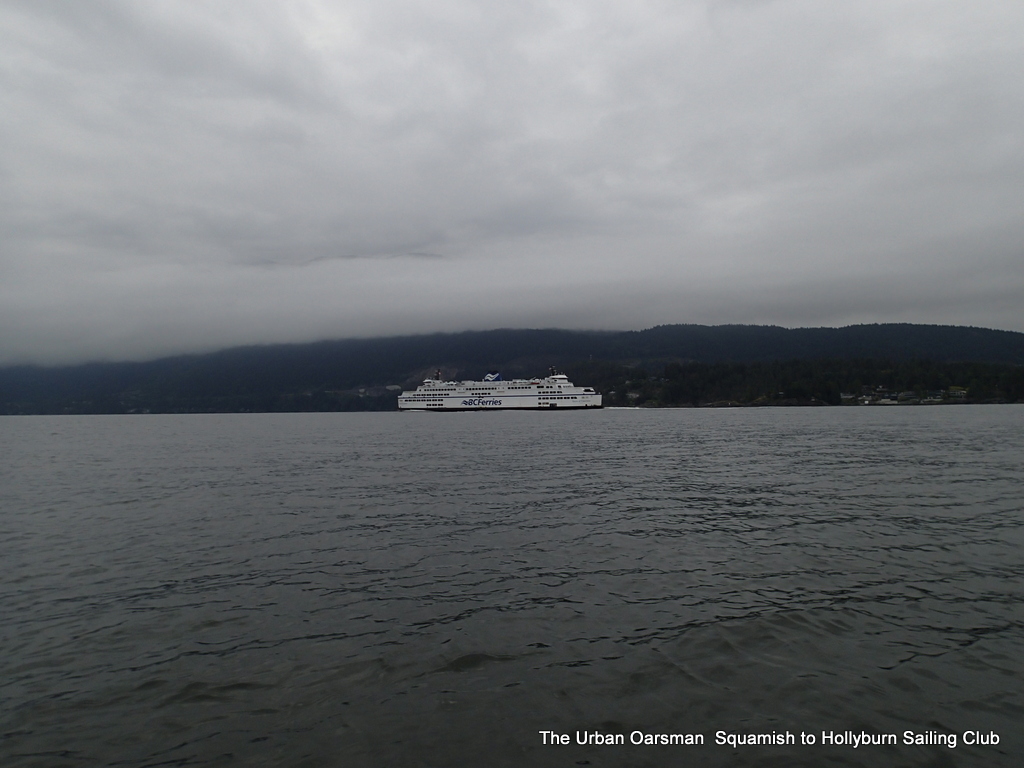
Bowen ferry.
We have two ferries to dodge. The Bowen and Nanaimo ferries.
Dodging the Nanaimo ferry.
I see the Bowen ferry and stay to the North of her route to Snug Cove. When she passes, I row on. I spot the Nanaimo ferry quite far out but I will never be able to cross her route in time. I stay to the South West of her route until she passes.
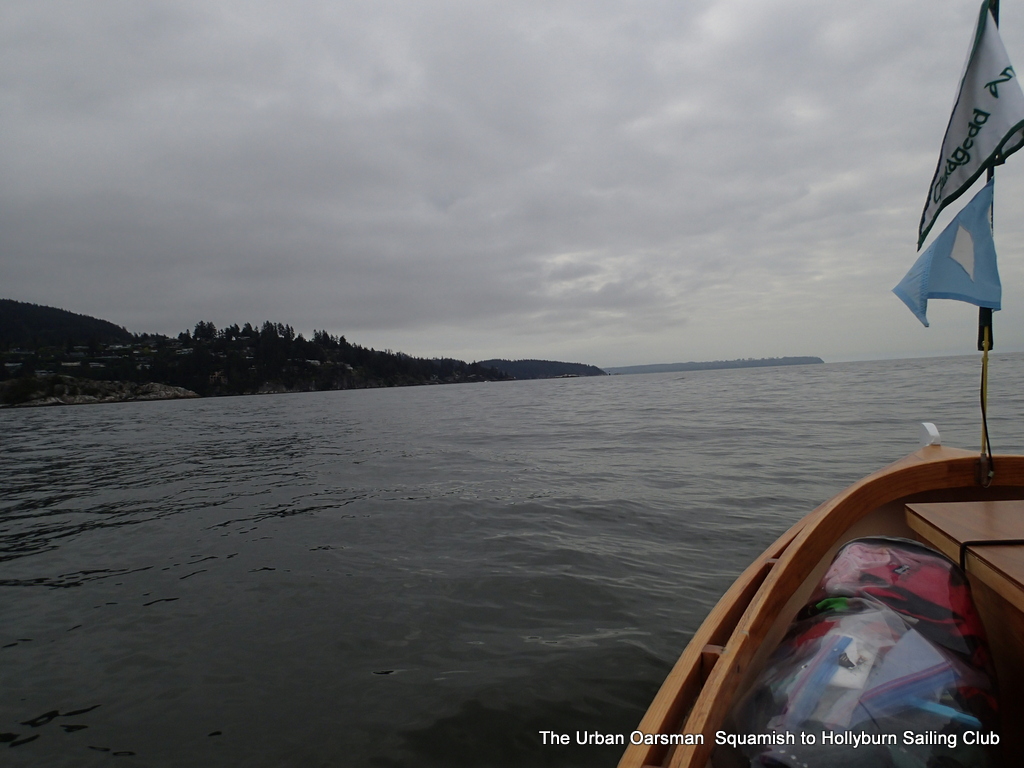
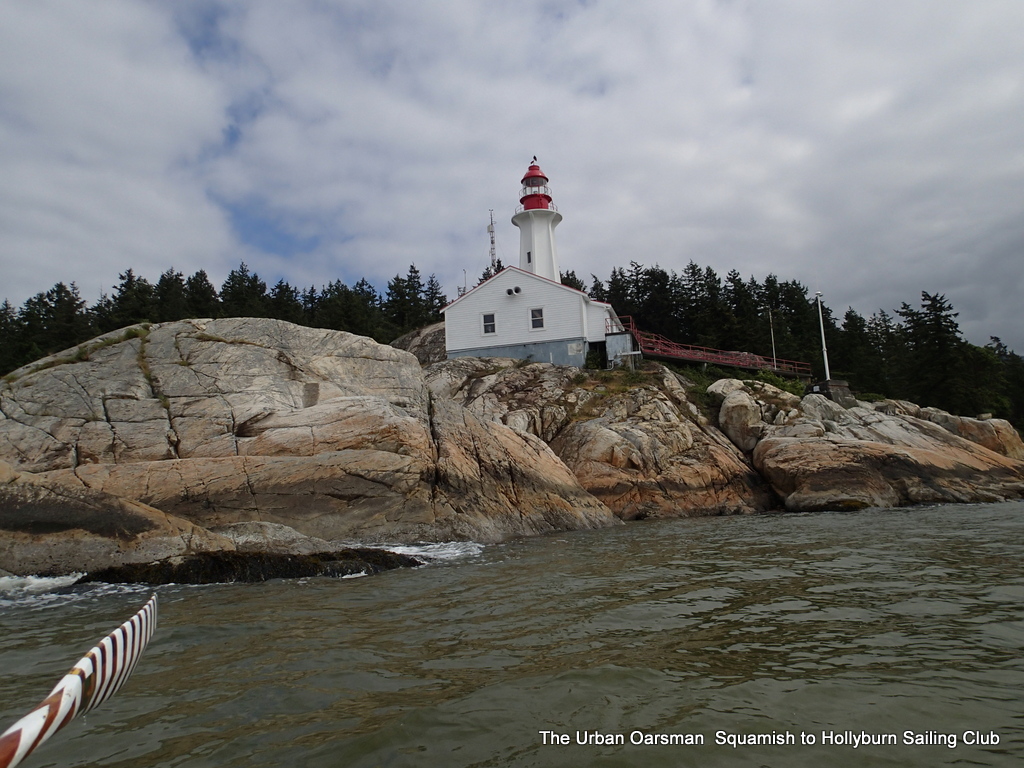
Nanaimo ferry past, White Cliff Point.
I row past White Cliff Point, Whyte Islet, Bird Islet, Batchelor Point, Fishermans Cove.
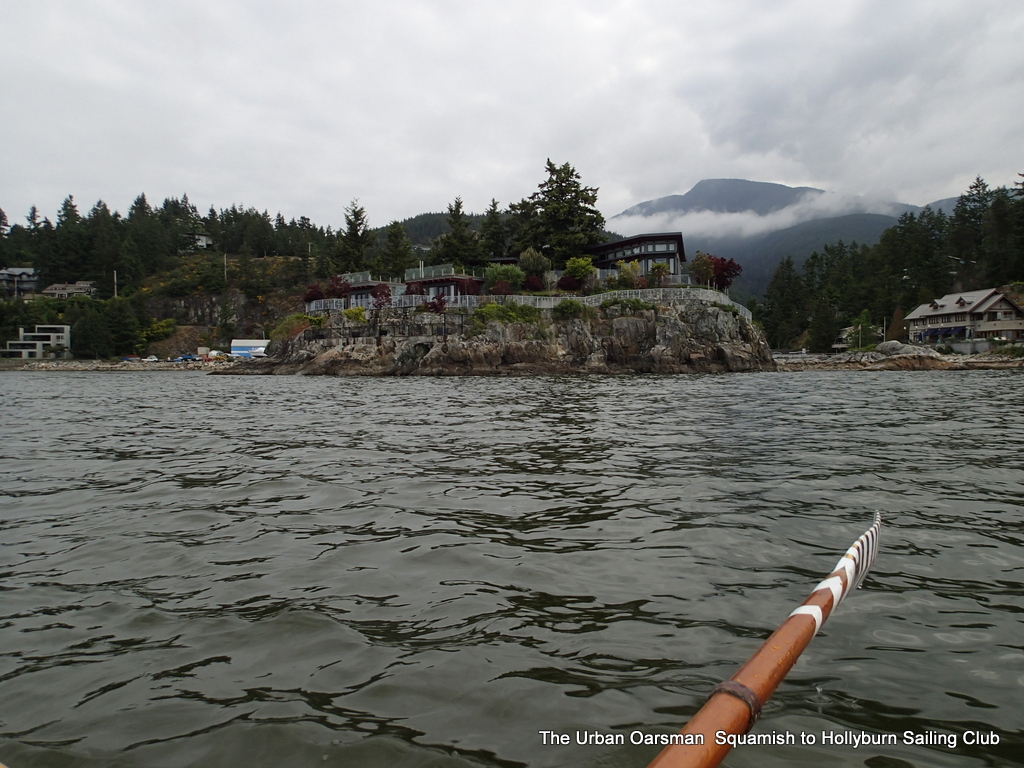
Eagle Island, Fishermans Cove.
The rowing gets tougher…I have run head-on into a counter-current. My speed over ground slows to less that two kilometres an hour.
Slog, slog, slog.
I creepy-crawl past Grebe Islets, Indian Bluff.
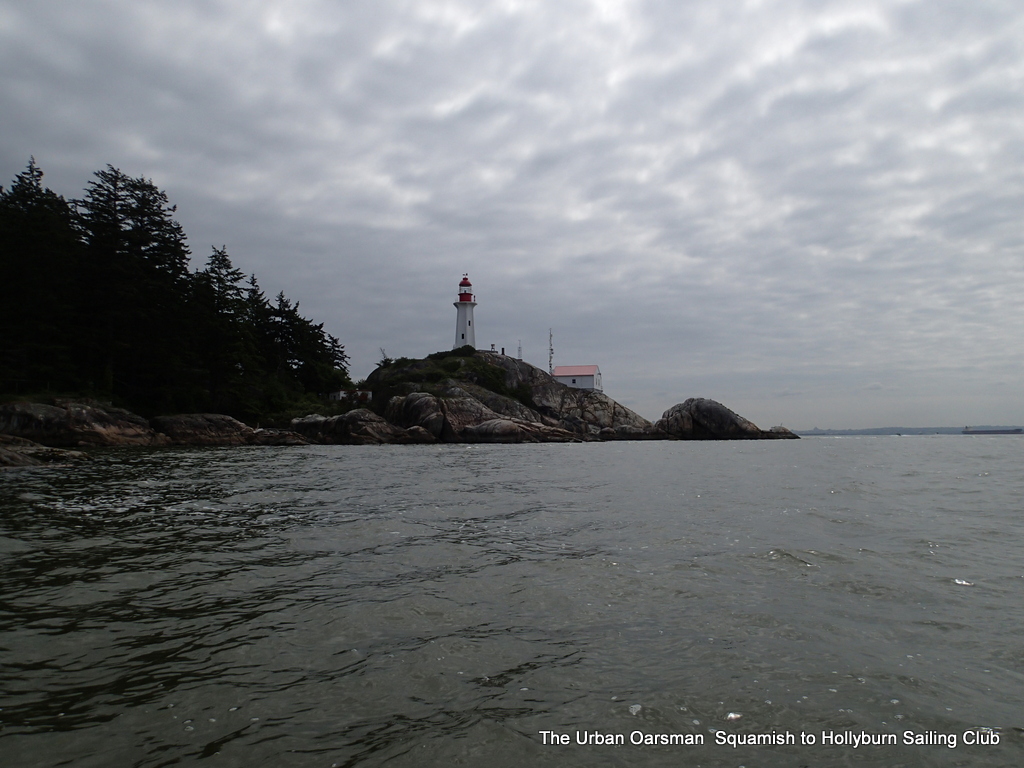
Point Atkinson, the Lighthouse at last!
The going to here has been painfully slow. I round the point.
Point Atkinson Lighthouse.
Maciej should be just around the corner, in Starboat Cove.
Maciej spots me from the rocks.
A slight change of plans, Starboat Cove is too full of driftwood for a landing. Rounding Atkinson, the current and wind are now in my favour. I decide to carry on to HSC.
Get goin’ while the goin’ is good.
Maciej will pack up and catch up to me soon. I am making good time.
Maciej passes me near anchorage 14.
The tide and current continue to favour me. I carry on.
Anchorage 13.
Maciej vanishes into the distance. Those kayakers sure are fast. I row on.
Arriving at Hollyburn Sailing Club.
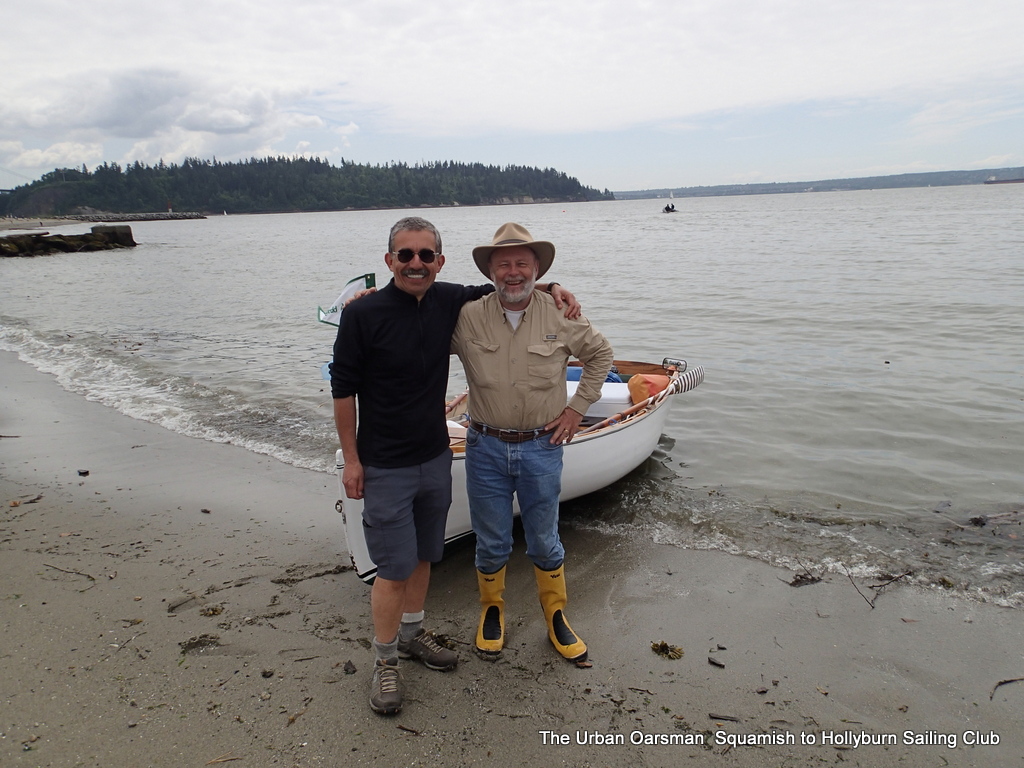
Maciej and I on the beach at HSC.
Back at the Club.
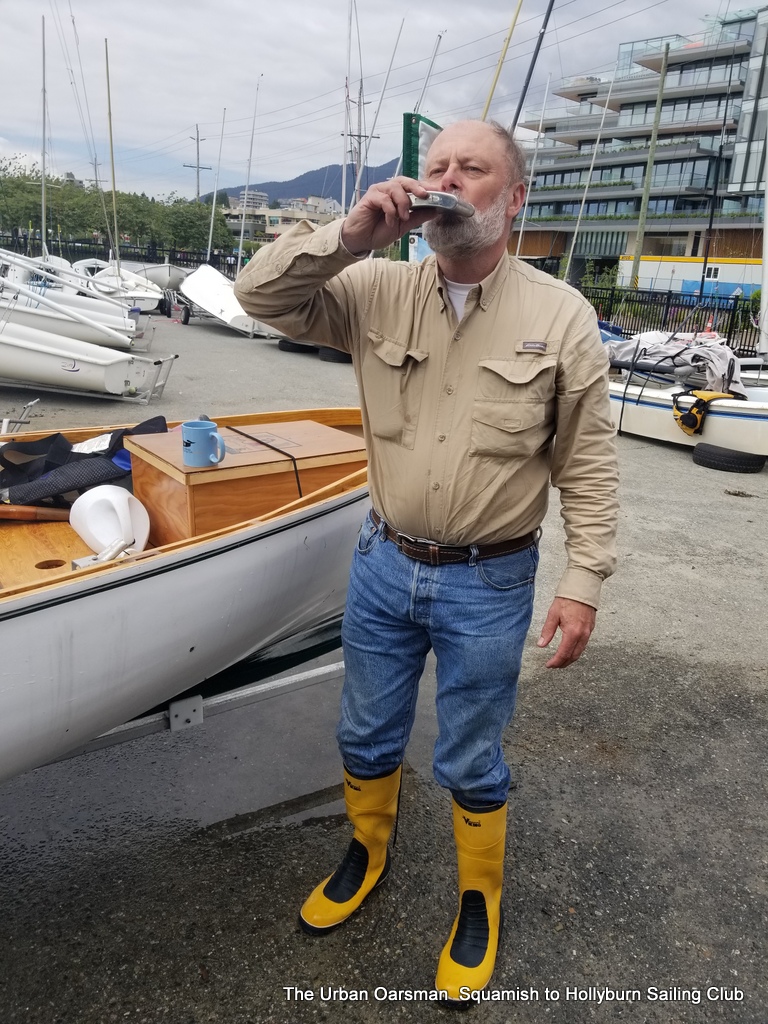
Toast to the trip.
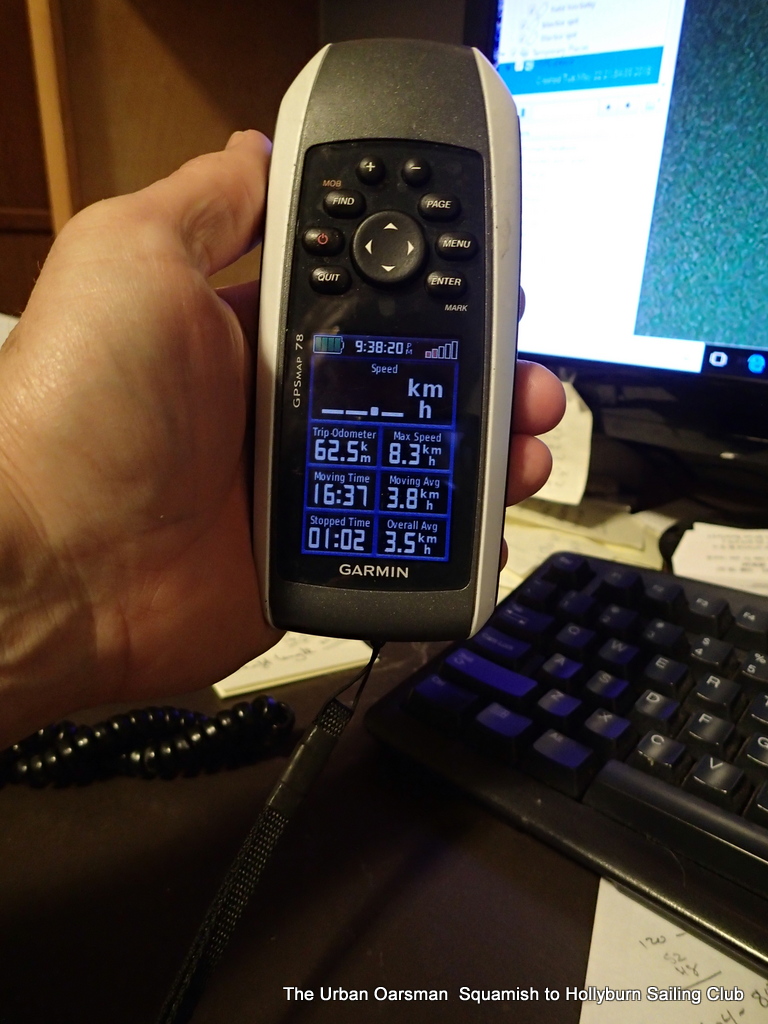
Trip stats:
GPS numbers.
All in all a great row…no blisters and good numbers.
Many thing worked well…I can sleep on Gwragedd Annwn. She does row well with a load. The stove worked, the tent worked, the food storage worked, the equipment storage worked. The anchoring worked. All in all a good row and a good result.