
Storage Seats, Breasthook/Mast Collar, Decking, Main Hatch and Oarlocks.
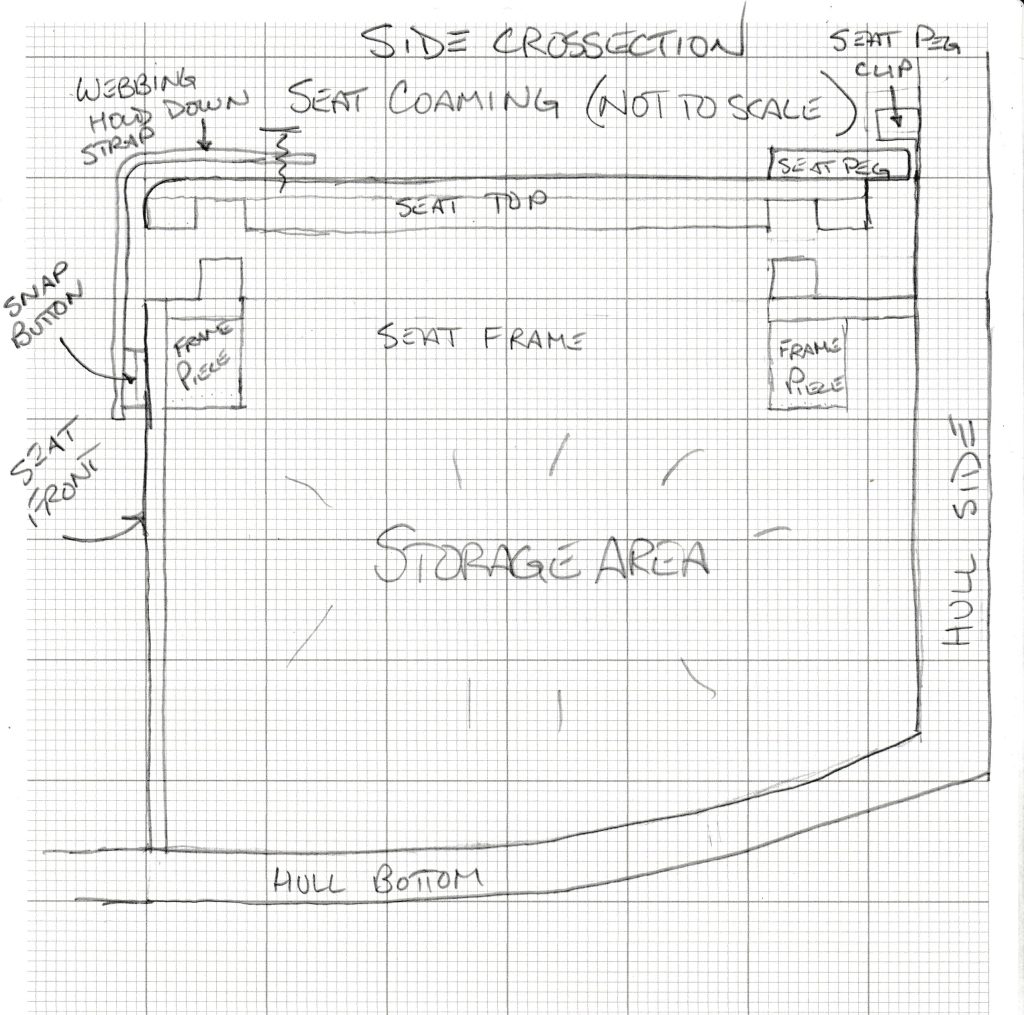
I have decided to put seats into my Prince William Sound Yawl. I am a little too old and creaky to sit on the floor to sail her. I debated back and forth about using the seats for storage or only for floatation. I decided to try to do a little of both. The seats will have somewhat of an air seal but I will be able to open the top to access the storage area. Later, If I decide that I do not need the storage space, I can epoxy the seats shut resulting in buoyancy tanks.
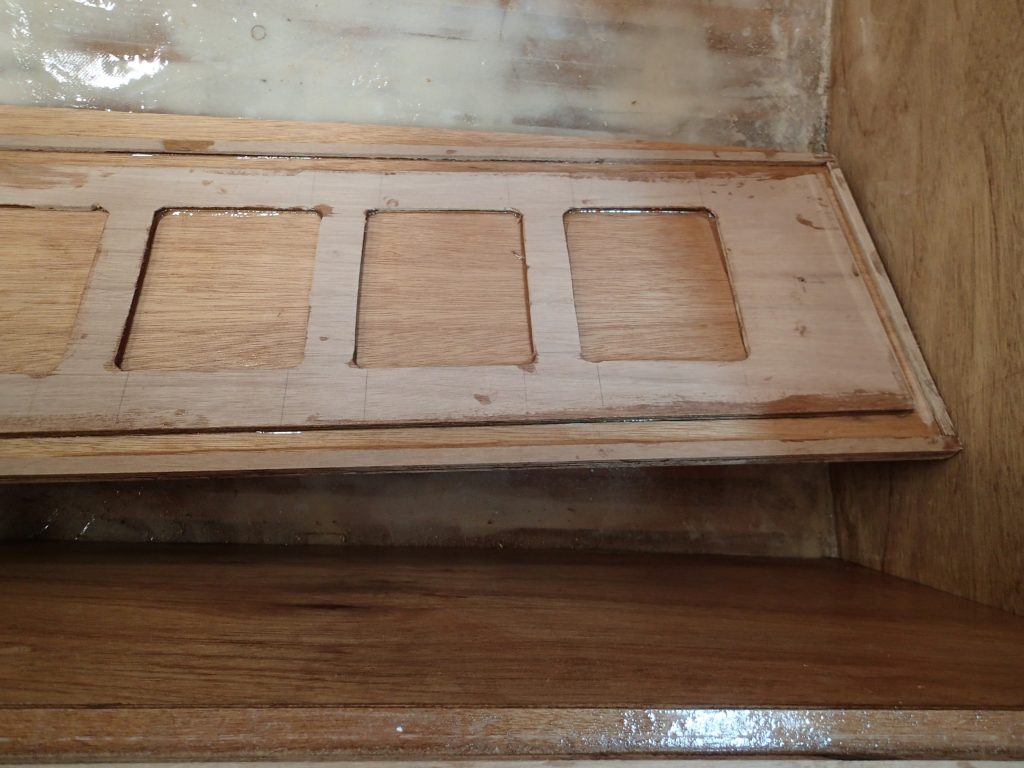
I have run a coaming around the seat frame. There will be a matching coaming in the seat top that will fit on top of the frame. This will give me a 6mm (1/4″) lip to keep the water out.
If I get water in the storage areas, I could glue a rubber seal onto the coamings.

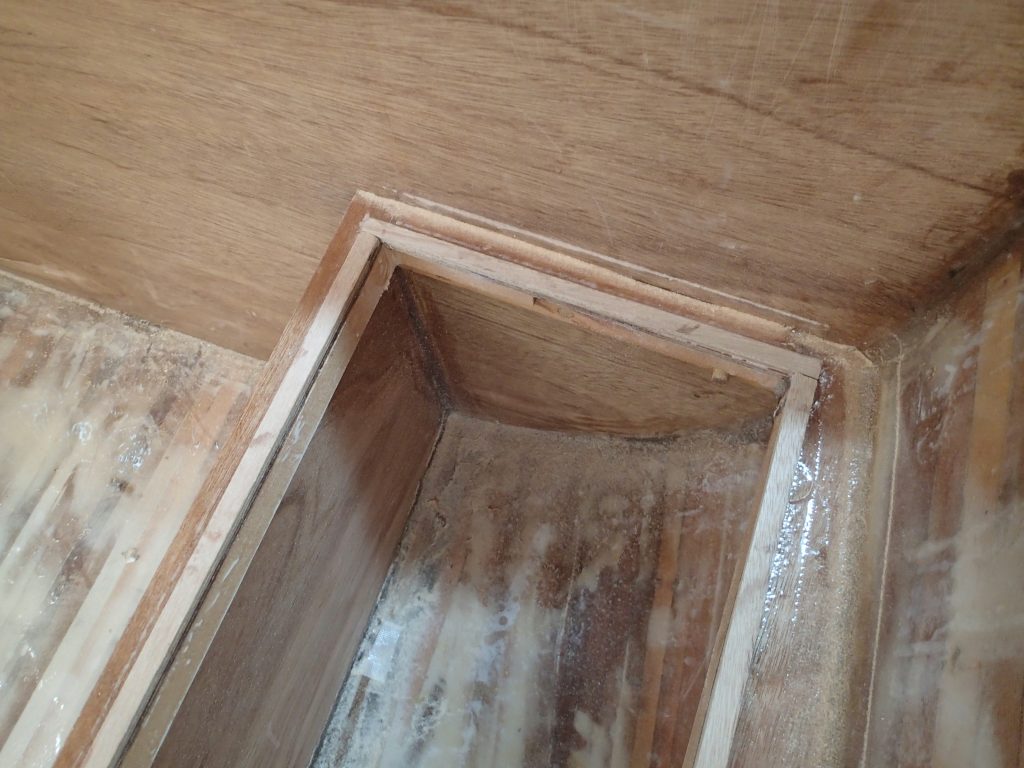
Here is a close-up of how I am holding the back of the seats down onto the frame. The seat peg fits under the clip, holding the back of the seat down. I will use webbing with either snap buttons or clips to hold the front of the seat down.

The end result will be that the tops of the seats will be 1/2″ higher than the seat frame. The seats are inset from the edges by 1/2″ or so for drainage. I had this problem of rain water sitting on the seats with Gwragedd Annwn, because I did not put in any way for the water to drain. I am hopeful that this arrangement will allow the water to run off of the seats, down the sides and into the bilge. If that is not effective, I may put scuppers along the top of the sea frame to drain water to the outside of the hull.
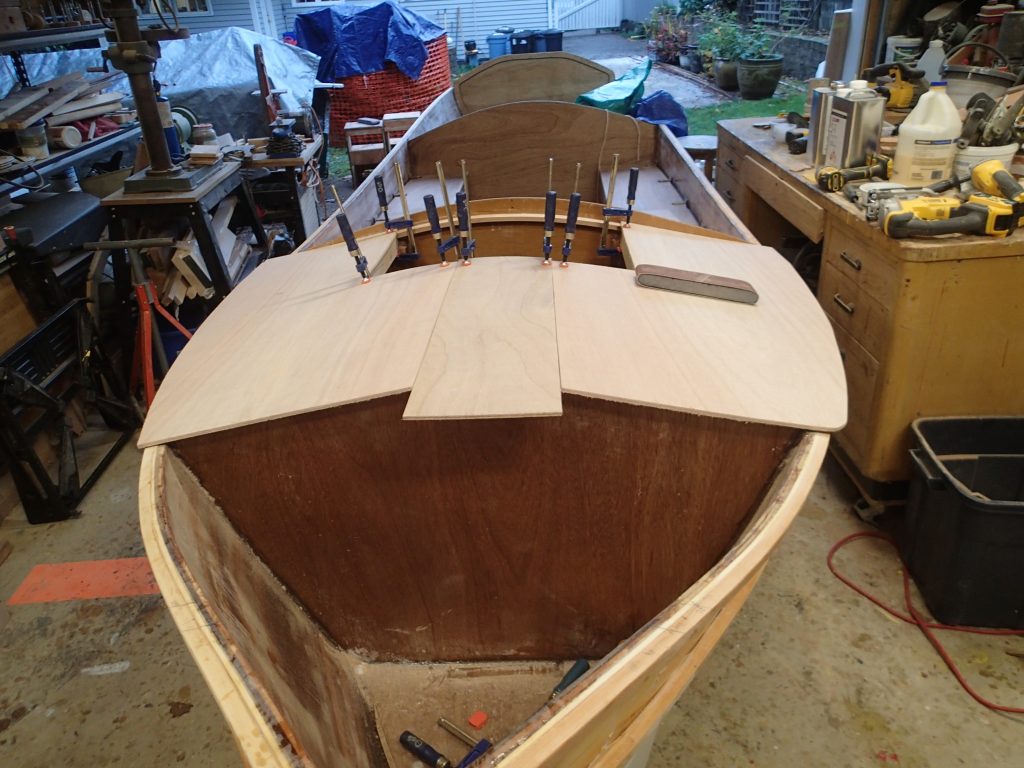
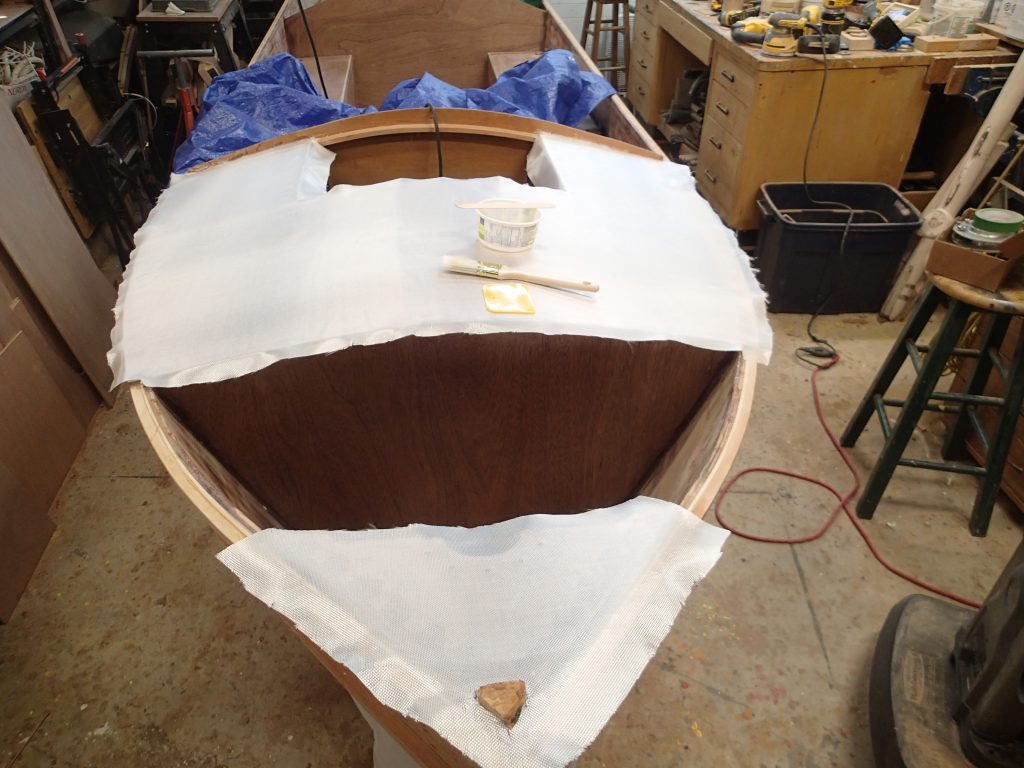
Here I am deviating from the plans again. In the plans, Phil has a breasthook with a hole in it for the mast. With Gwragedd Annwn, I found stepping her mast to be difficult, almost at the limits of my strength. I had to lift and balance the 15′ birds-mouth mast up about two feet and put it into the mast partner in the thwart and then into the mast step on the keel. For this build, I have decided to make a folding mast collar.
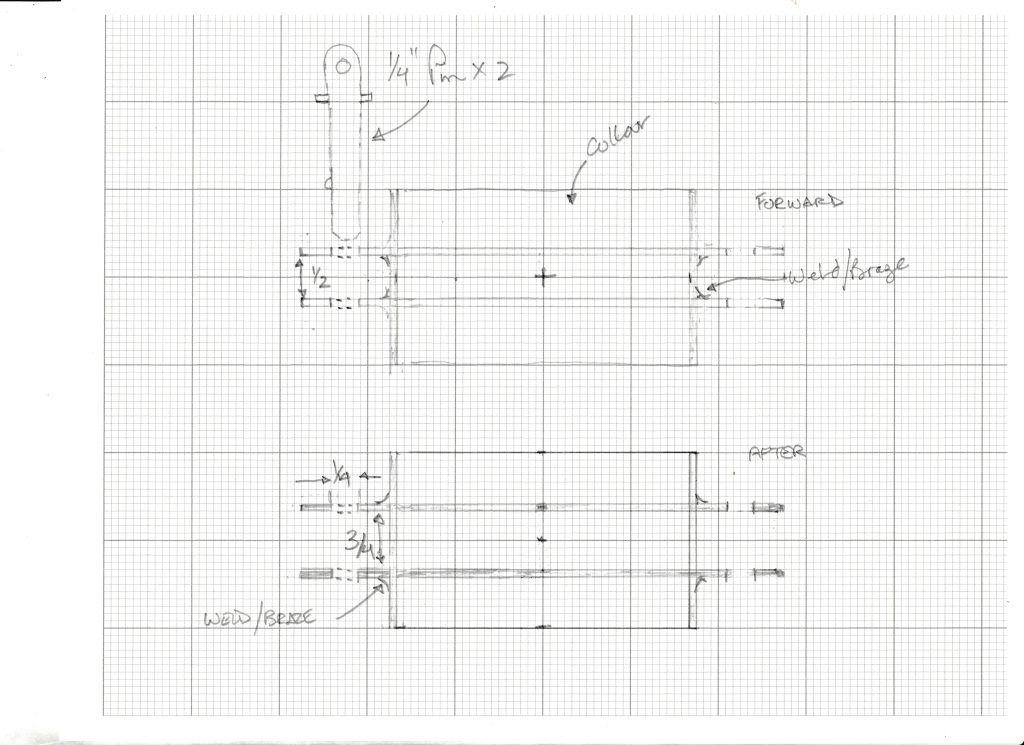
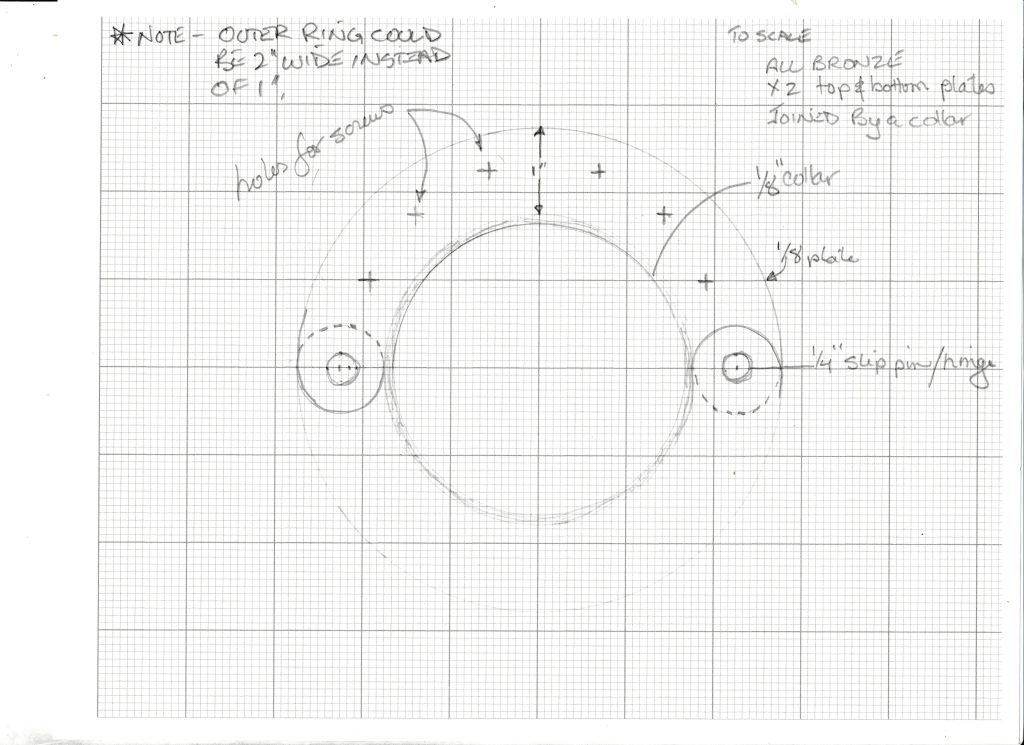
My Millwright friend, Matt, made this up for me out of stainless steel. He did not have any Bronze. He also made the two side pins 1/2″ instead of 1/4″.
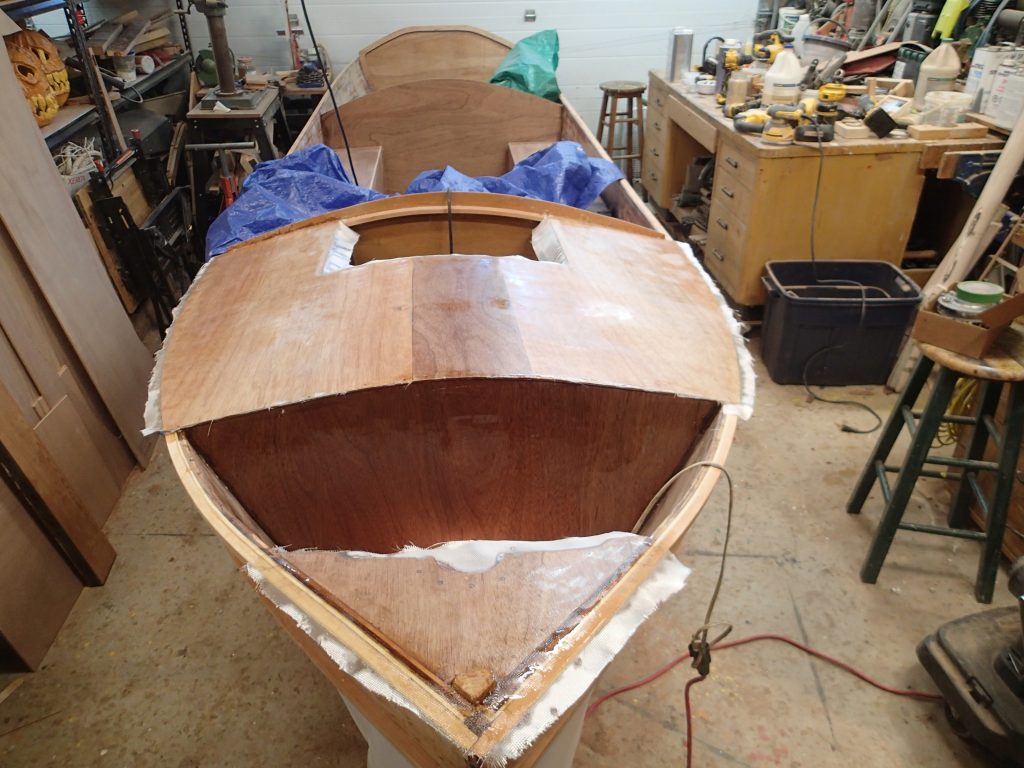
Relative to the plans, the mast will be in the same spot. I have made the breasthook smaller and doubled its thickness to compensate. There will be more surface area for gluing than in the original plans. The breasthook will also get covered by epoxy and cloth.
The mast collar is stainless steel, 3″ inside diameter. 1/2″ bolts on either side to hold the collar together. One is the hinge side the other is the locking pin side. The distance between the top and bottom plates is the thickness of two 6mm marine plywood pieces with a coat of epoxy and cloth. The collar will swing open for the mast and then closed with a pin to hold the mast in place.
I am also going to fit the breasthook.
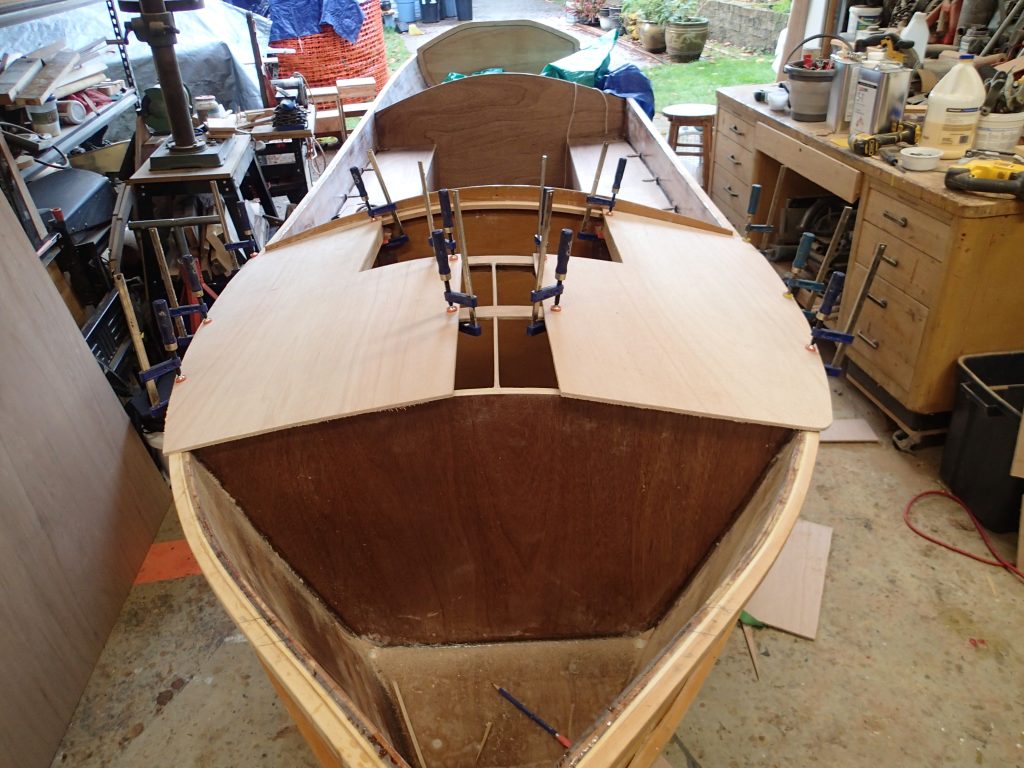
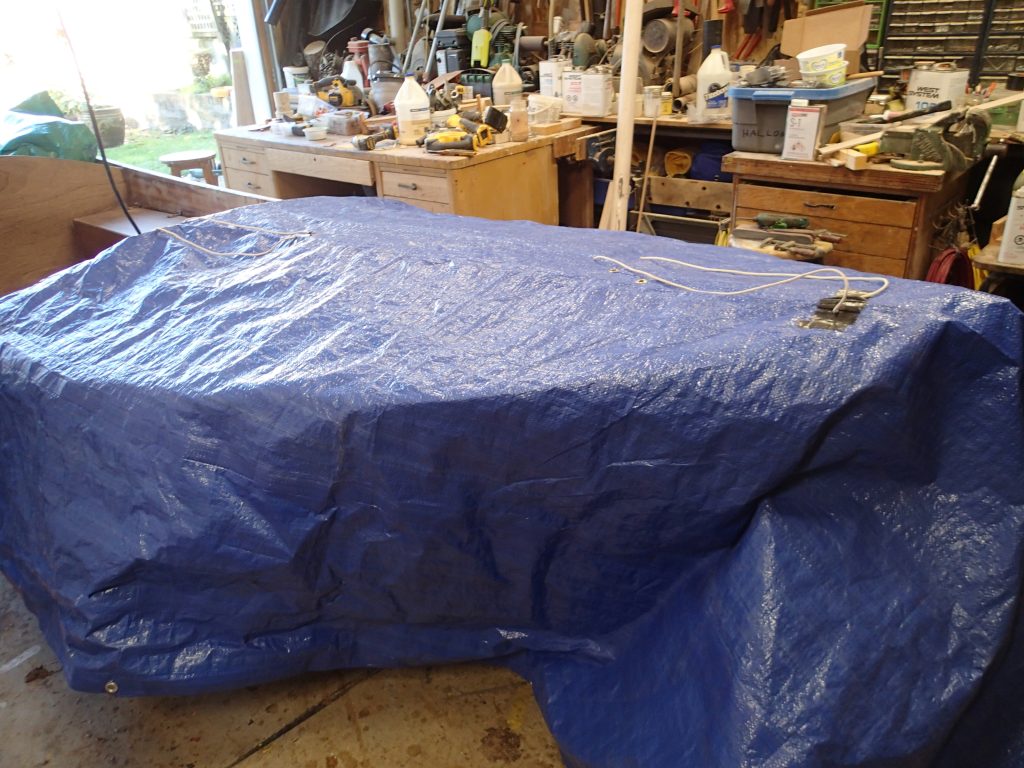
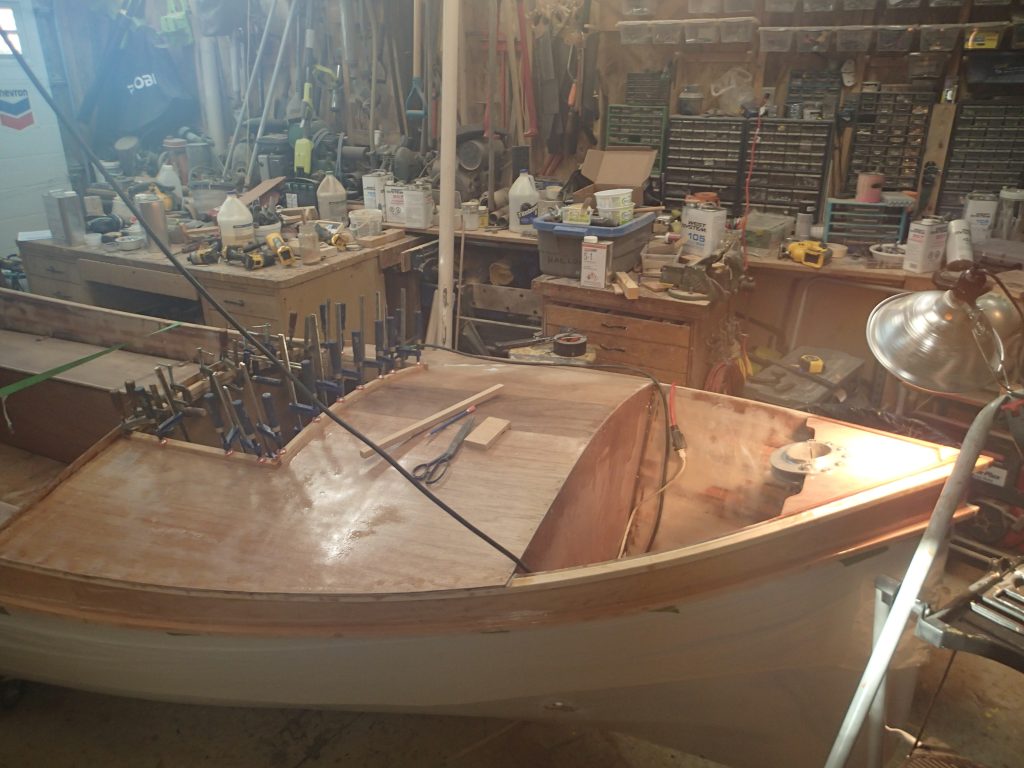
Here I am prepping for the glue-down. I will use a combination of clamps and clamping screws to hold the deck down to the framing. I mixed up epoxy and sawdust, spread the mixture onto the frame tops and the gunnel tops. Put the heater into the storage area and covered the boat with a tarp to keep the heat in.
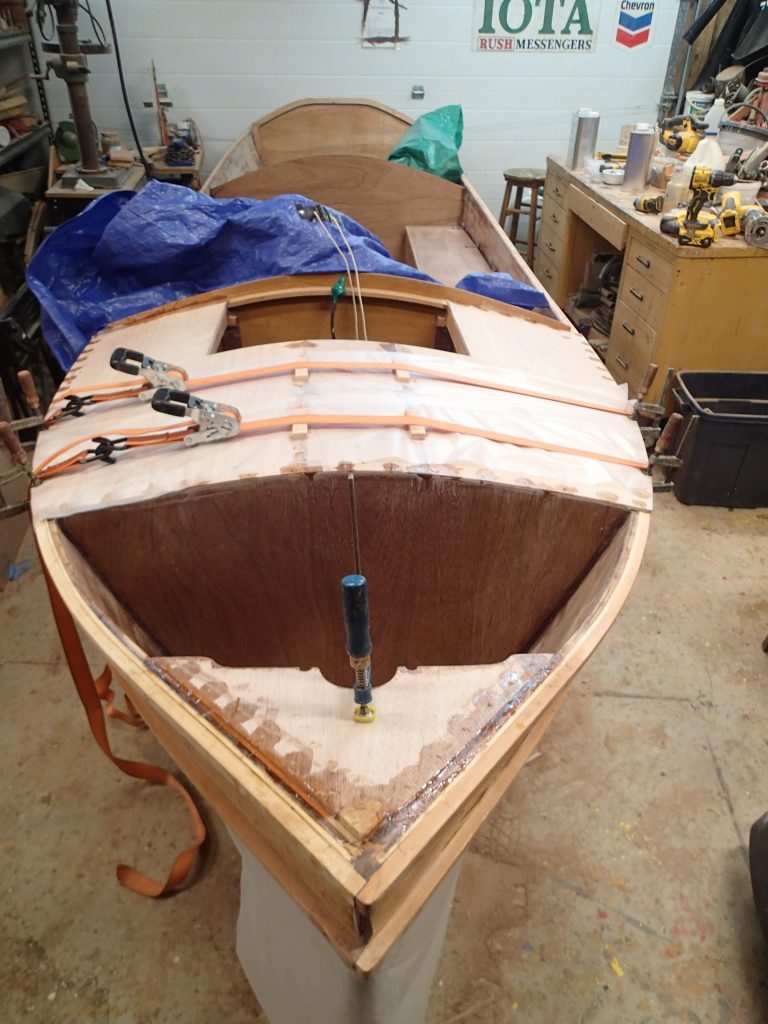
I had an “oops”. One of the clamping screws let go overnight. The deck popped up in the centre. I had to cut out the epoxy mix between the frame and the deck piece, mix up some more and re-clamp the deck down to the frame. In the photo, you can see how I am holding the deck down for the fix. You can also see that I have filled every clamping screw hold with a bamboo skewer piece epoxied in. This “pins” the deck in place and reinforces the joint. I do this wherever I use screws to temporarily hold something, pinning and epoxying afterward.
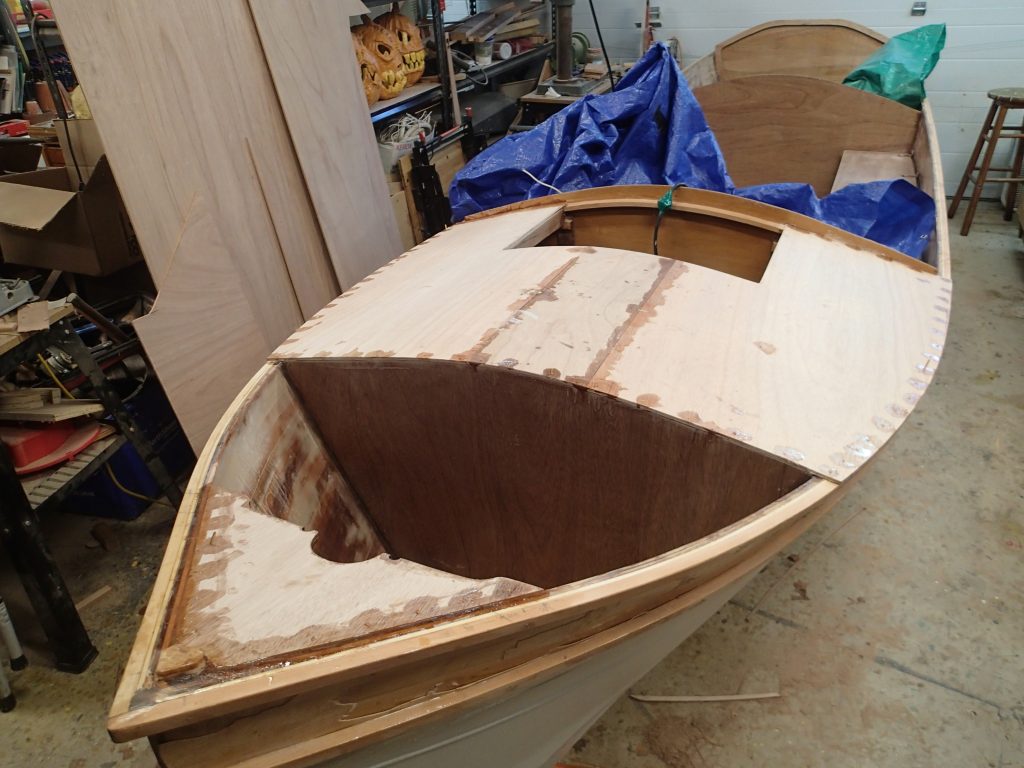
After the epoxy has set, I cut off any protruding skewers and give the deck a good sanding.
I lay out the cloth. The heater has been in the storage area, heating up the deck. I also have a heater warming the breasthook. I will leave the heater on overnight.
The epoxy and cloth has covered the deck and sealed in the bamboo skewer pegs.
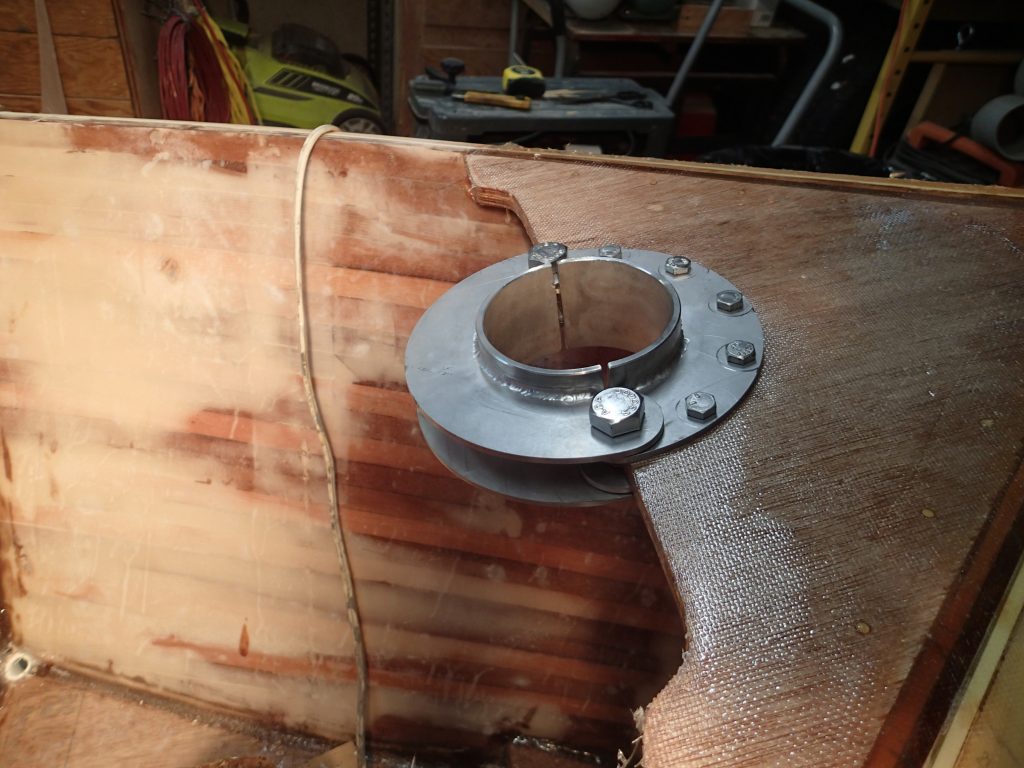
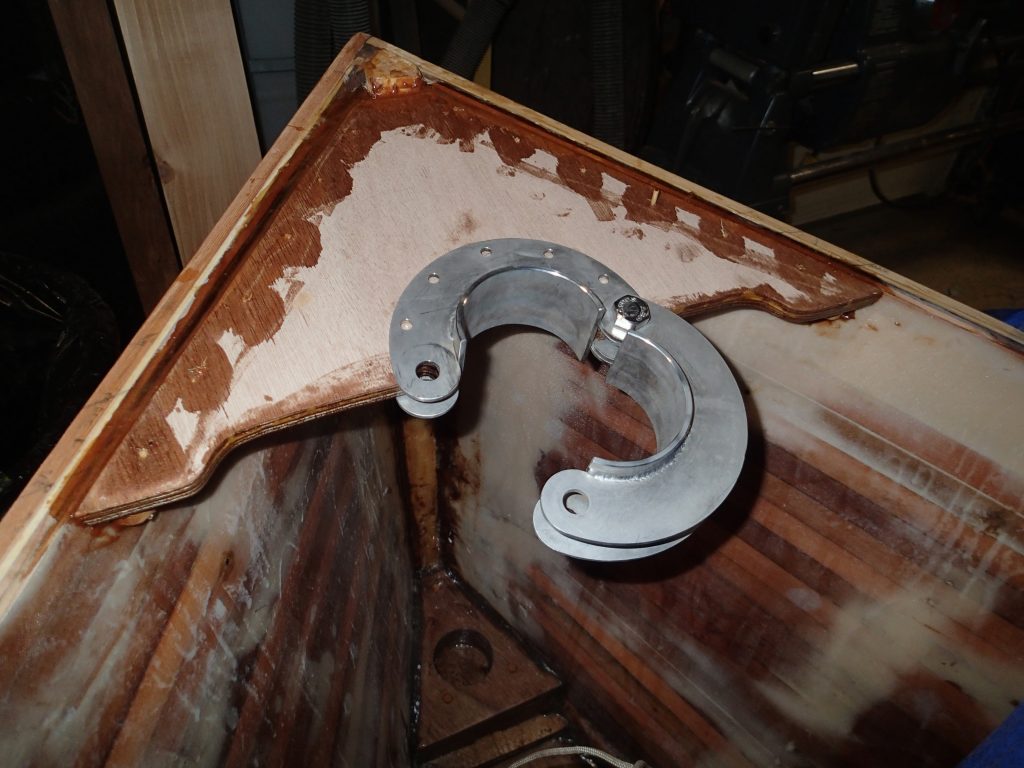
I sand off all ot the sharp edges and test fit the collar. I drill the securing bolt holes and put the bolts in. Looking good.
I am making a simple hatch for the storage area. In the plans, Phil says about the Slide “Slide lifts out and stows; try how access to forward stowage works without this bulkhead opening, as it would obviously be better not to have it.” So, I will try it without the slide opening. If it is unworkable, I can always add it later.
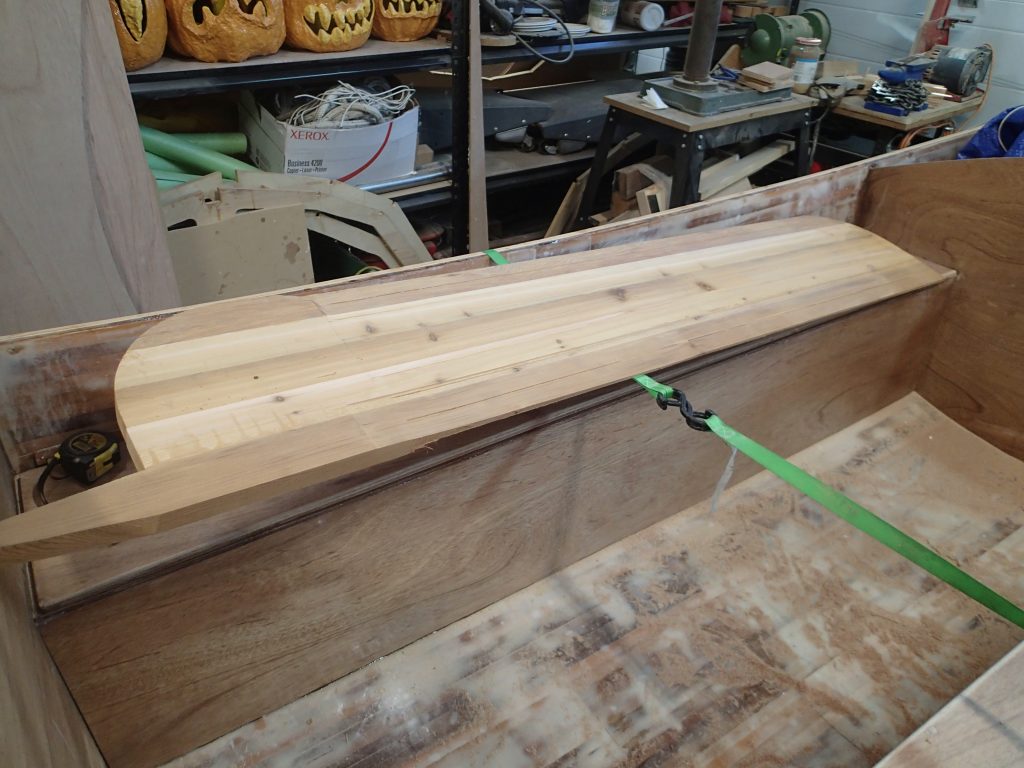
I am not really a fan of leeboards, so, I am going to have a centreboard. It will be offset to Starboard, against the Starboard seat. This will keep the centre of the boat open (about 25″ wide). My centreboard is not as wide as the leeboard in the plans, but, it will go deeper into the water. The area in the water for both is almost the same, with the centreboard being slightly larger in area. The centre of balance will be at the same point. My centreboard is made up of laminated Red Cedar, using biscuit jointing. After shaping, I will coat with epoxy and cloth. To get the shape, I made longitudinal cuts, taking the blade depth from the plans. This gave me a guide for the shaping. Plane down to the cuts and then you know that you have removed enough wood. The centreboard is a complex shape.
I hope the weather warms up a little.

Mike
