Stripping the West side of the canoe was much harder than the East side. After the first four, every strip had to be fitted, with a bevel on each end of the strip.
We are lucky that we can overlap the first few strips at the South end.
Strip one goes on…..
Strip two. We do not have to bevel the first four strips at the South end of the Canoe.
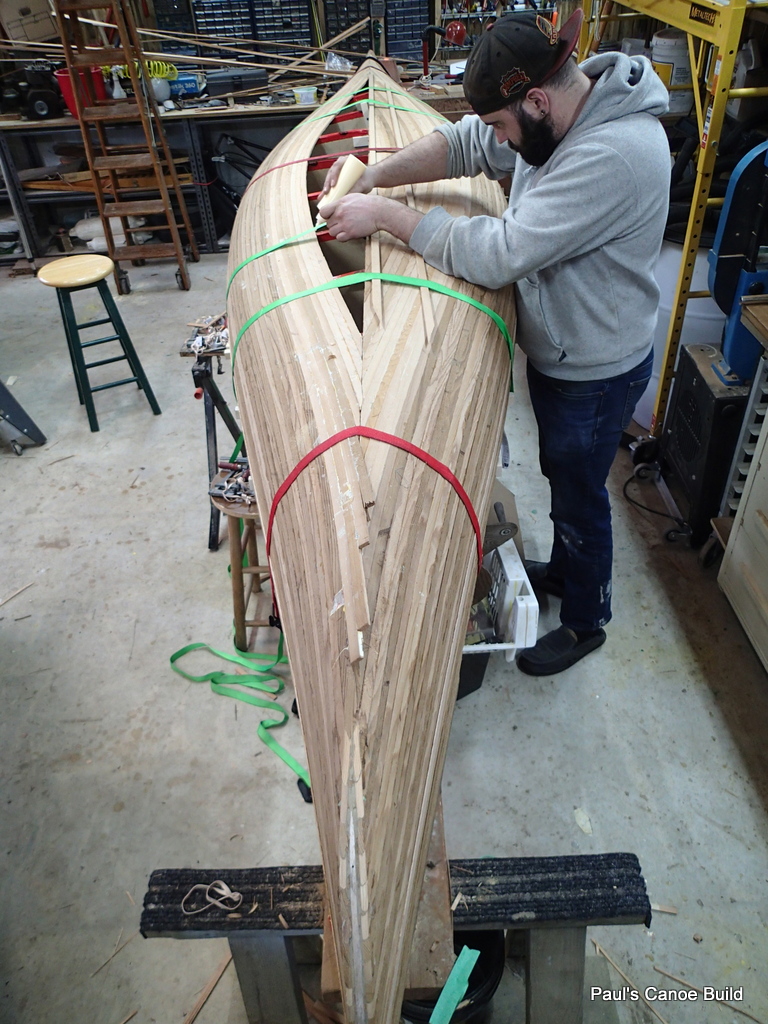
To increase the tension of the rubber-band clamps, We twin the rubber-bands where necessary.
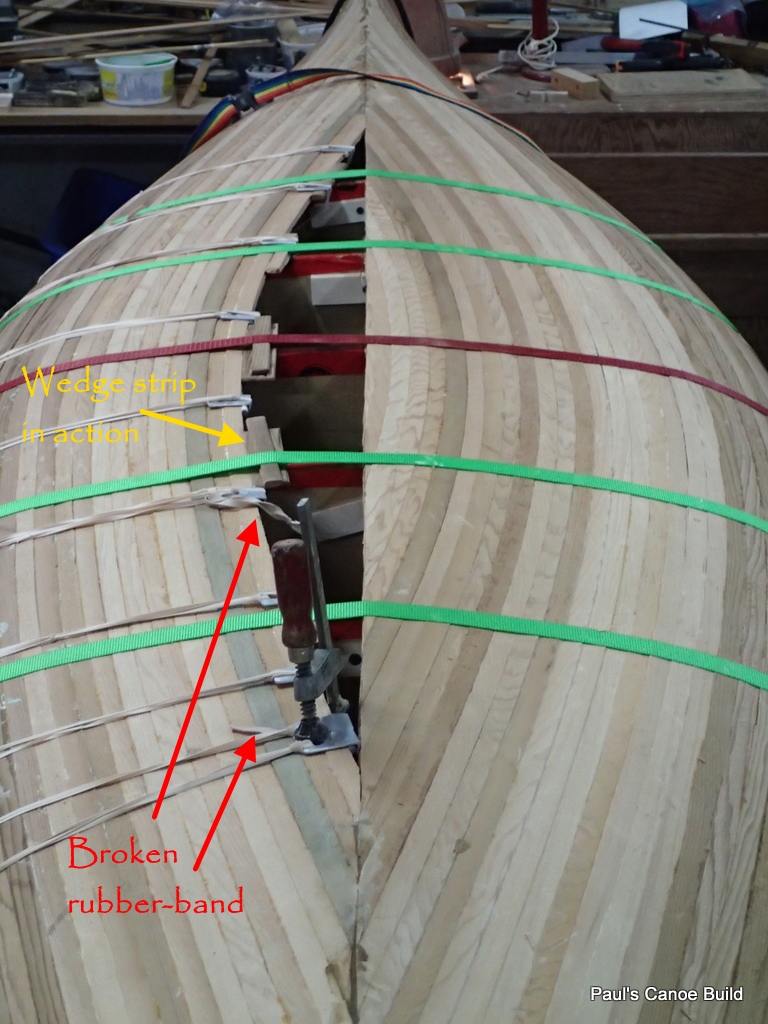
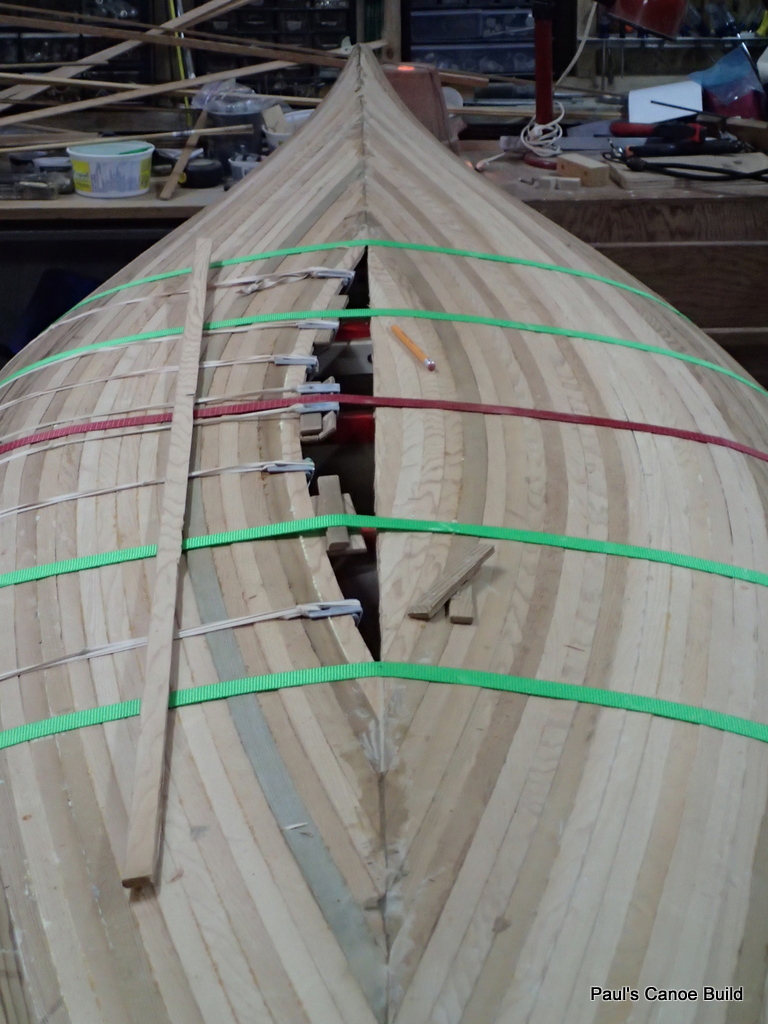
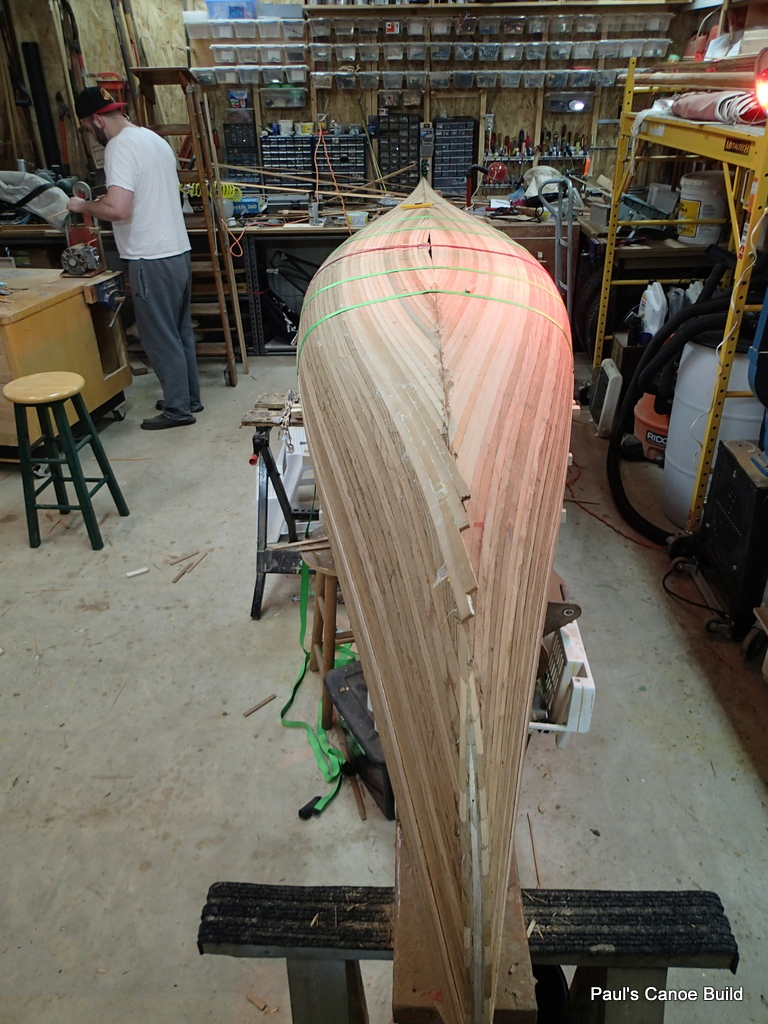
North end of the Canoe needs a beveled end to fit. You can see by the pencil marks in the left side of the picture that the strips are not aligning up….They are “sneaking” forward. Between the station moulds, we use a lighter strap to hold the strip down. If we apply too much pressure between the moulds, we will distort the canoe’s shape.
We will have to address this issue soon, or the strips will not line up on both sides.
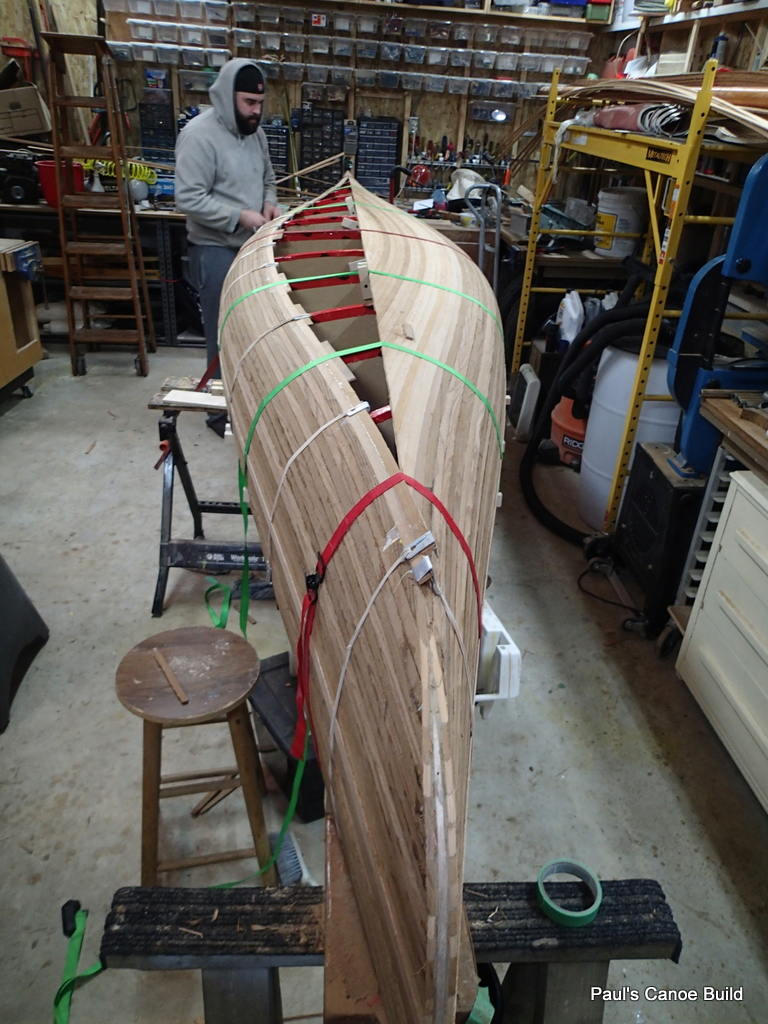
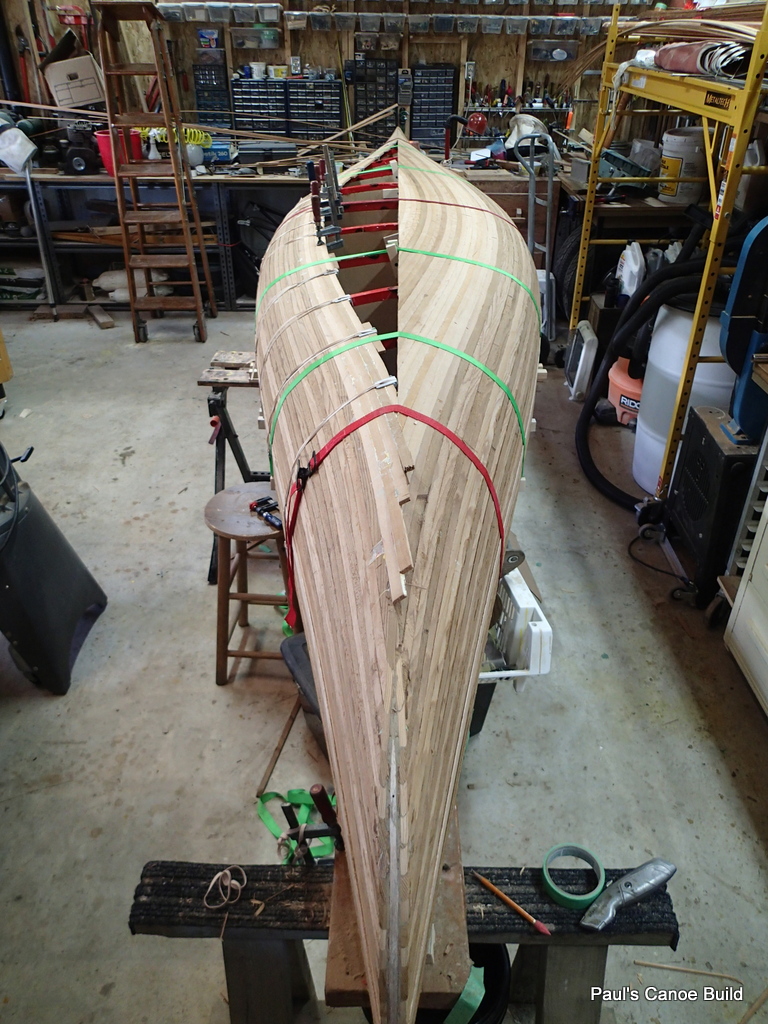
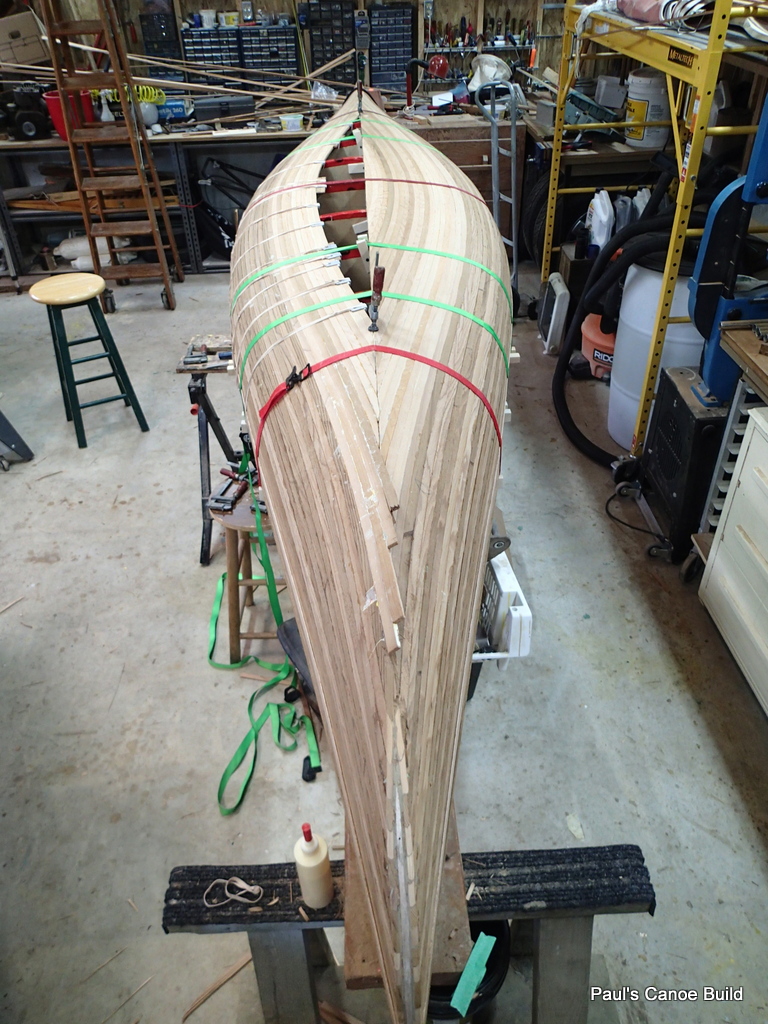
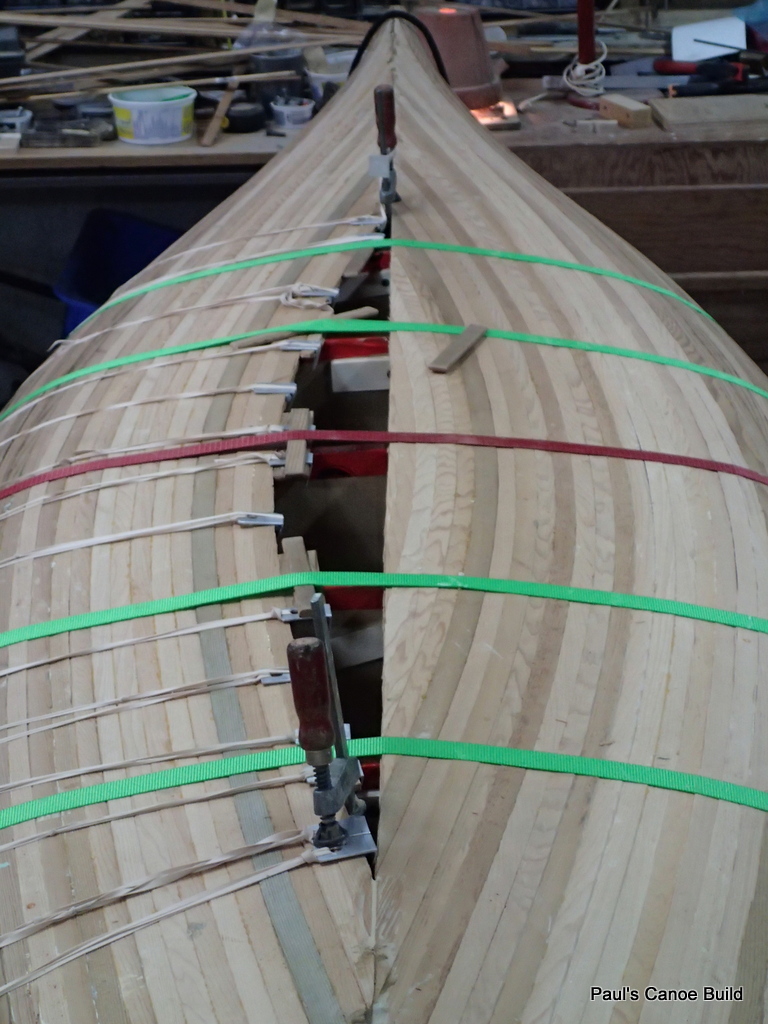
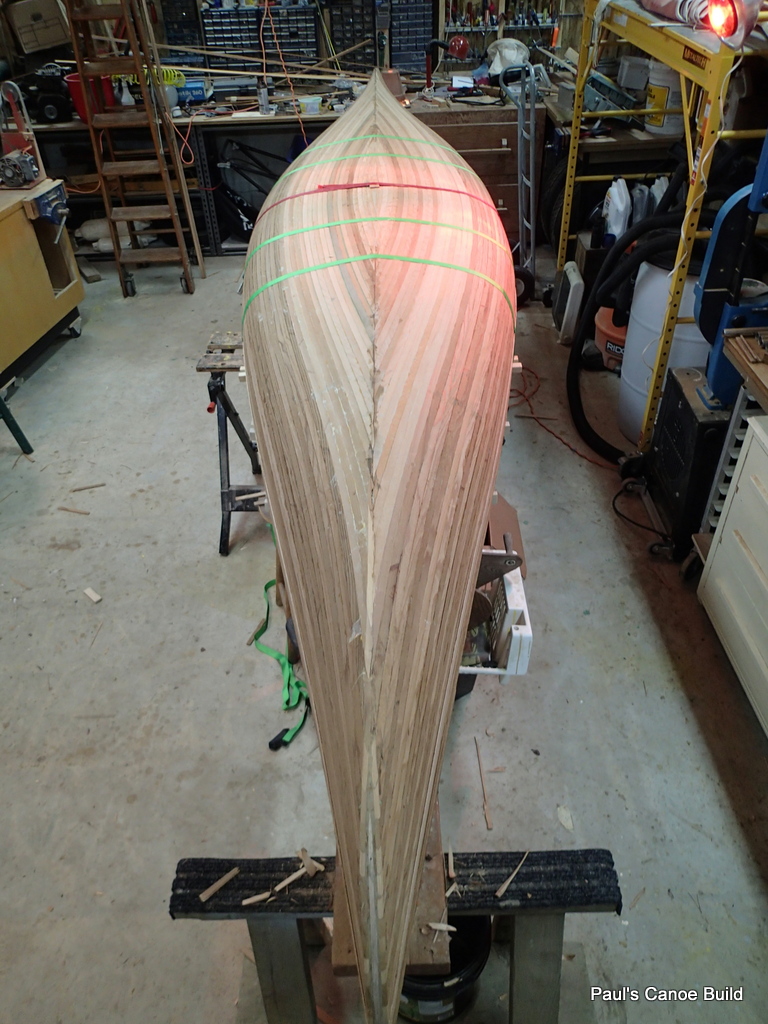
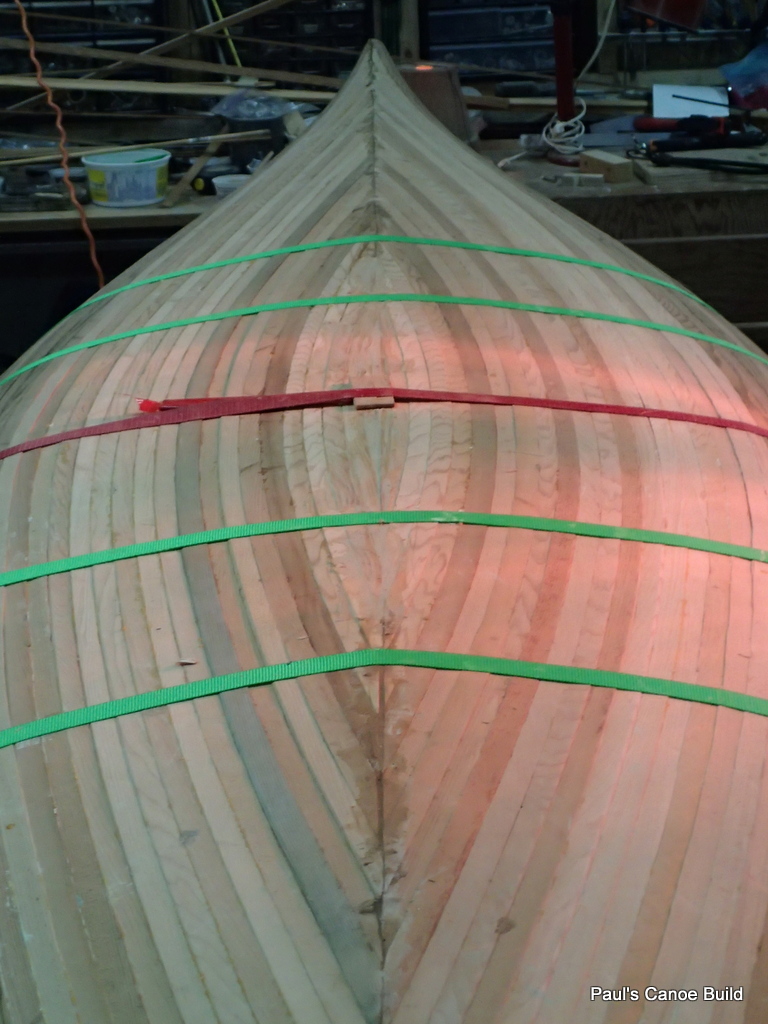
The strips strapped and “clamped” up.
We try to get some “squeeze-out” of the glue between the strips.
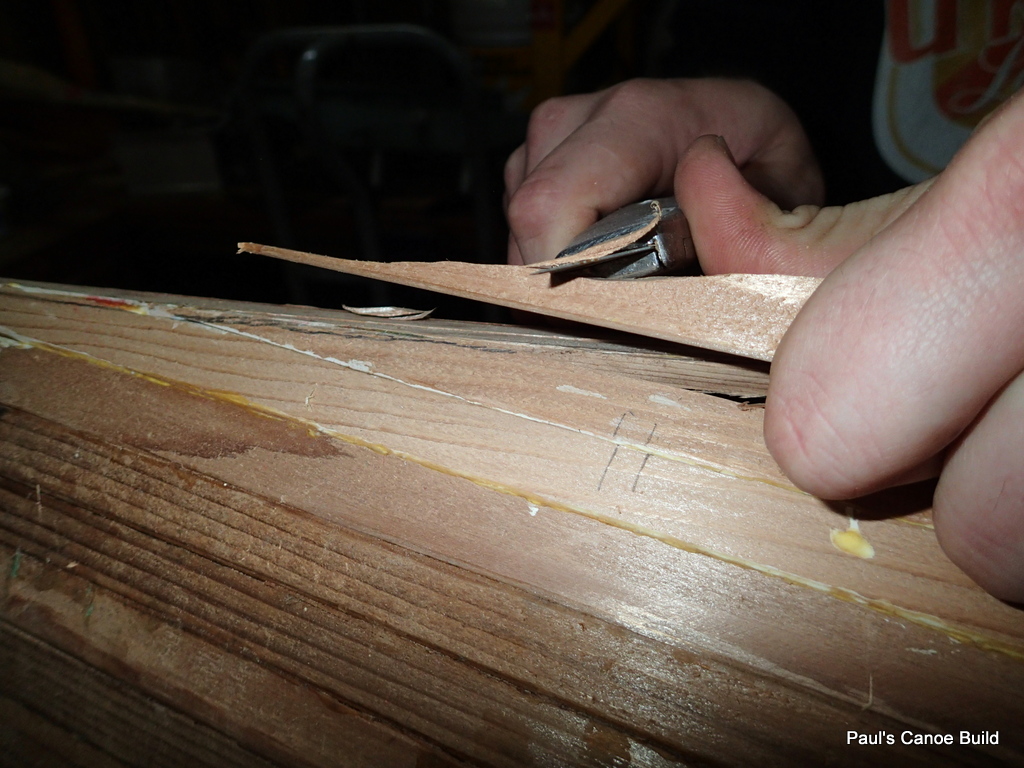
Paul carefully whittles the strip to fit. Note the 2nd strip “creep” indicated by the registration ticks.
When the strip is fitted, we glue it in
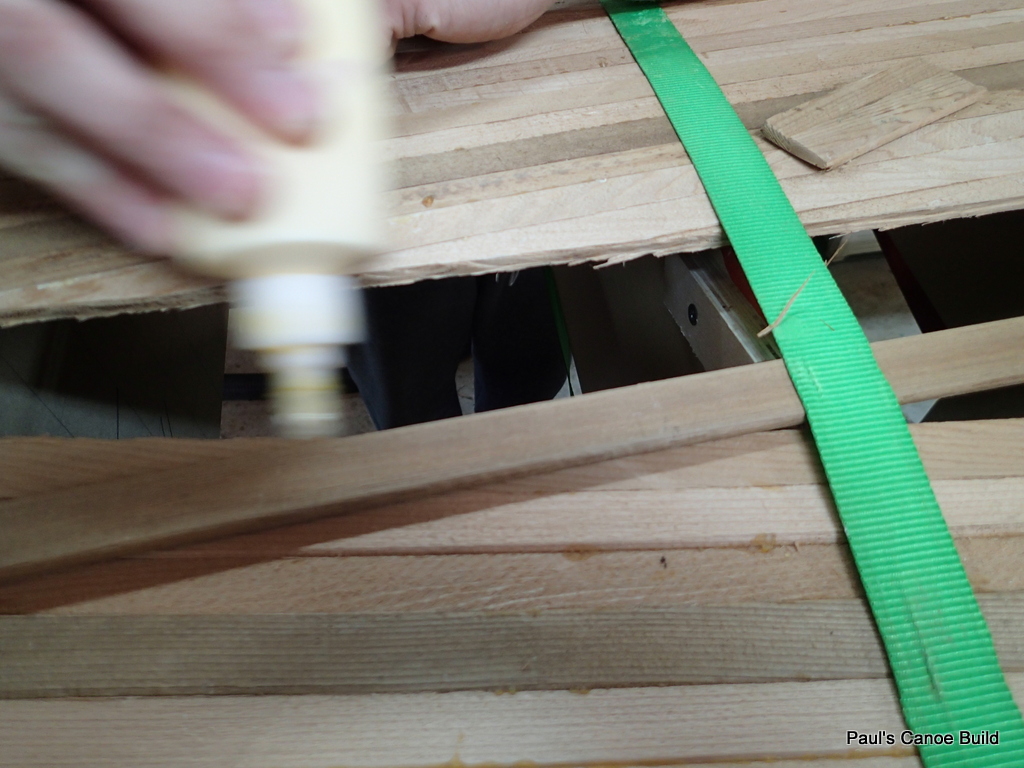
Applying glue.
We try to put only as much glue on as we need to get some “squeeze out”.
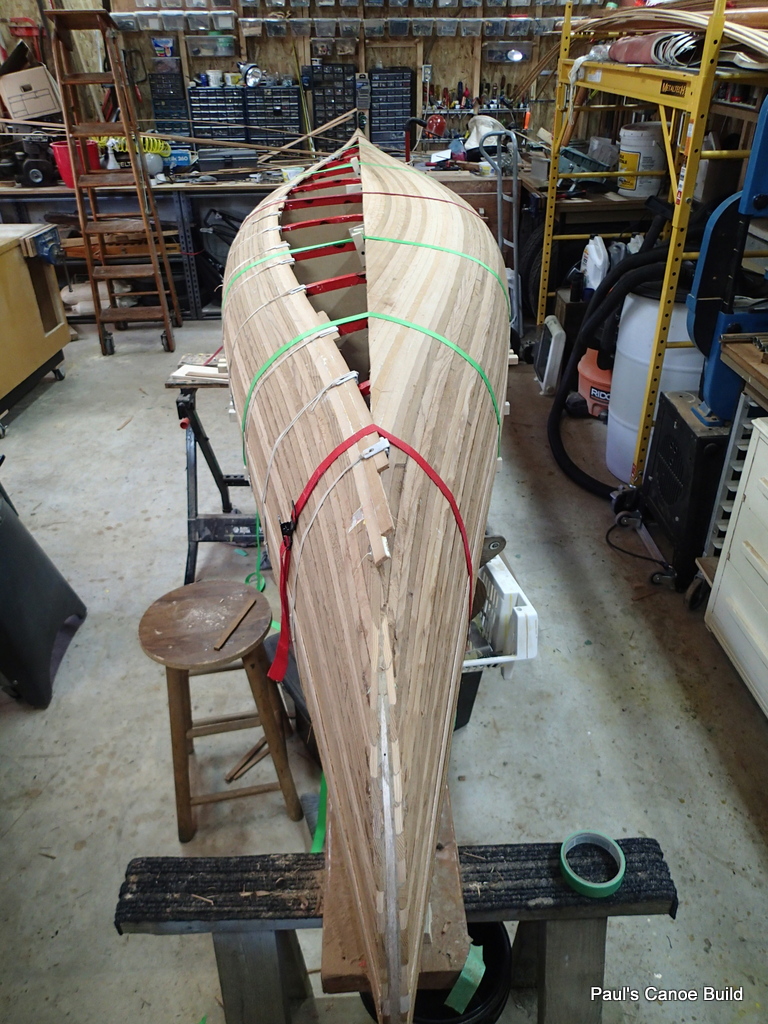
Strip three on. We use three pairs of cleats on each station mould to keep the straps aligned to the station molds.
We are only able to do one strip at a time….
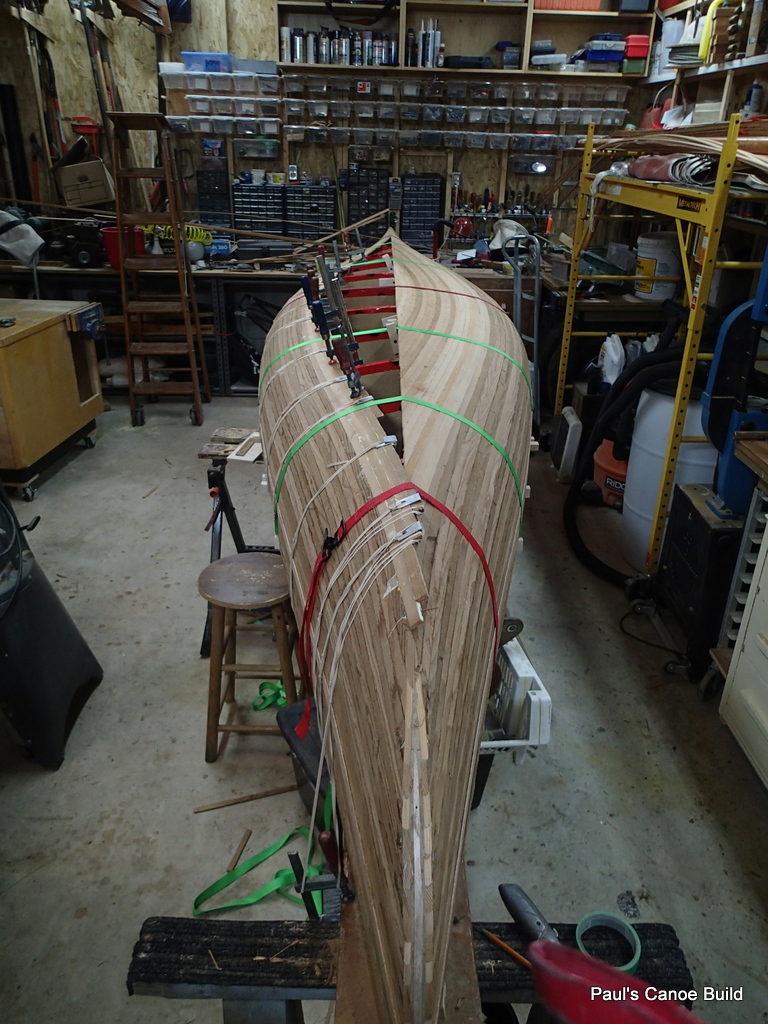
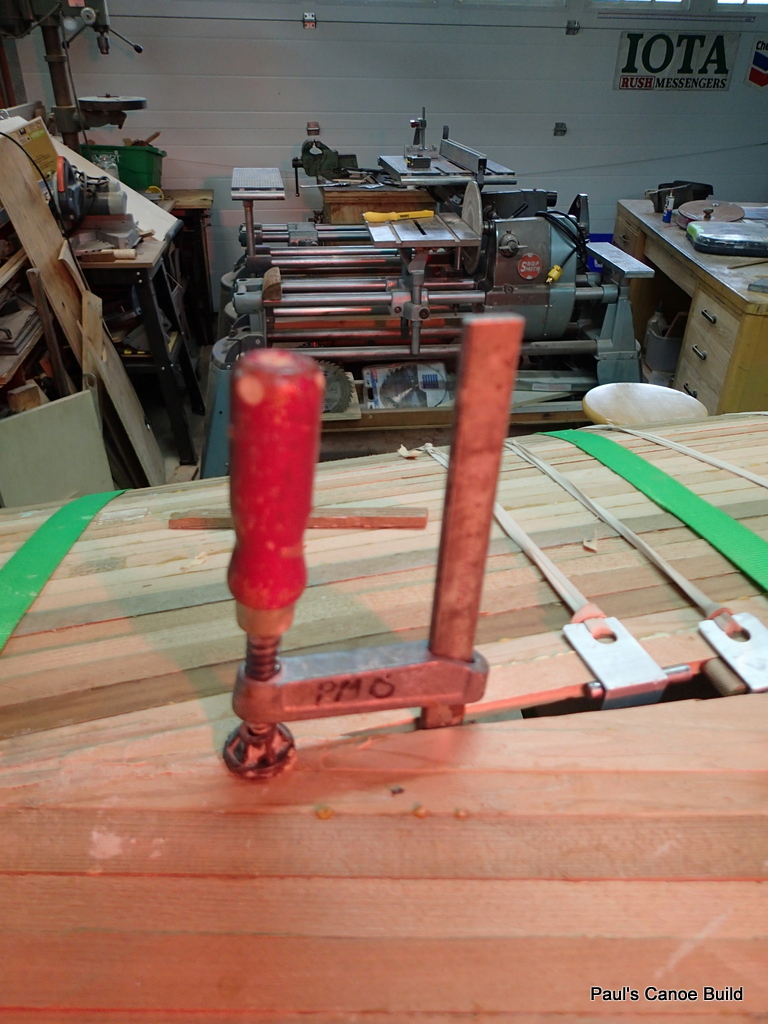
We use “F” clamps to keep the strips from buckling.
….another day, another strip….
The first strip that is beveled at both ends.
When Paul is at work, I can glue-up three strips a day, morning, afternoon & evening.

Fitting the “cheater” strip to bring the strips into alignment.
A better view with strip six fitted:
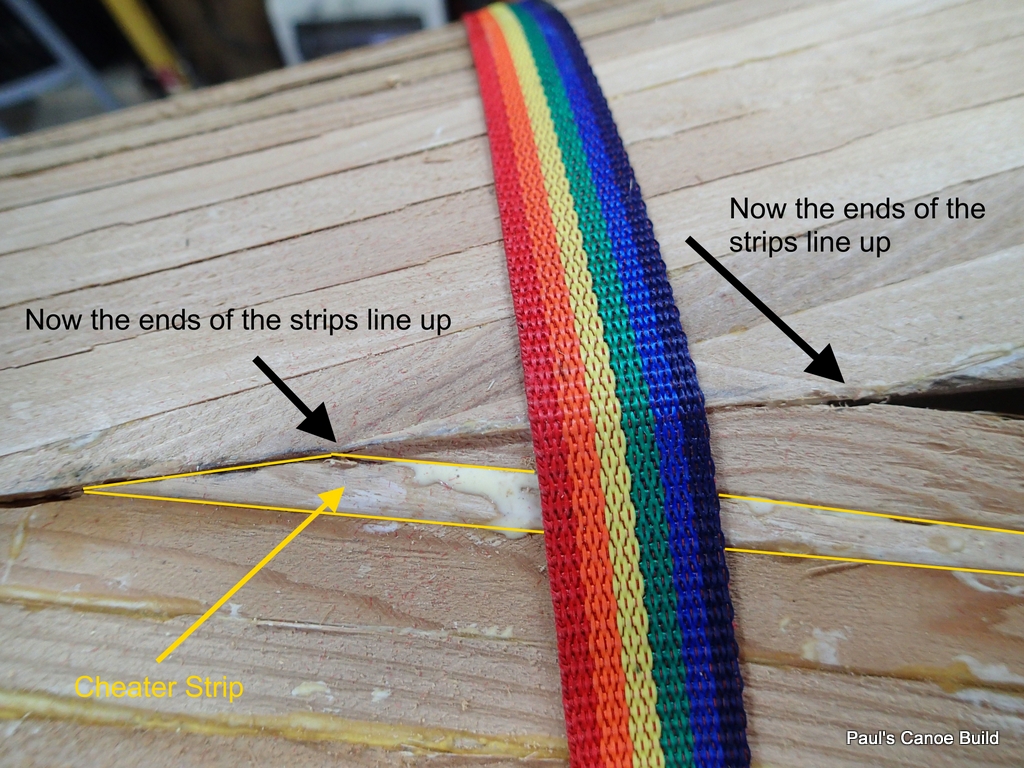
“Cheater” strip brings the rest of the other strips into alignment.
We carry on:
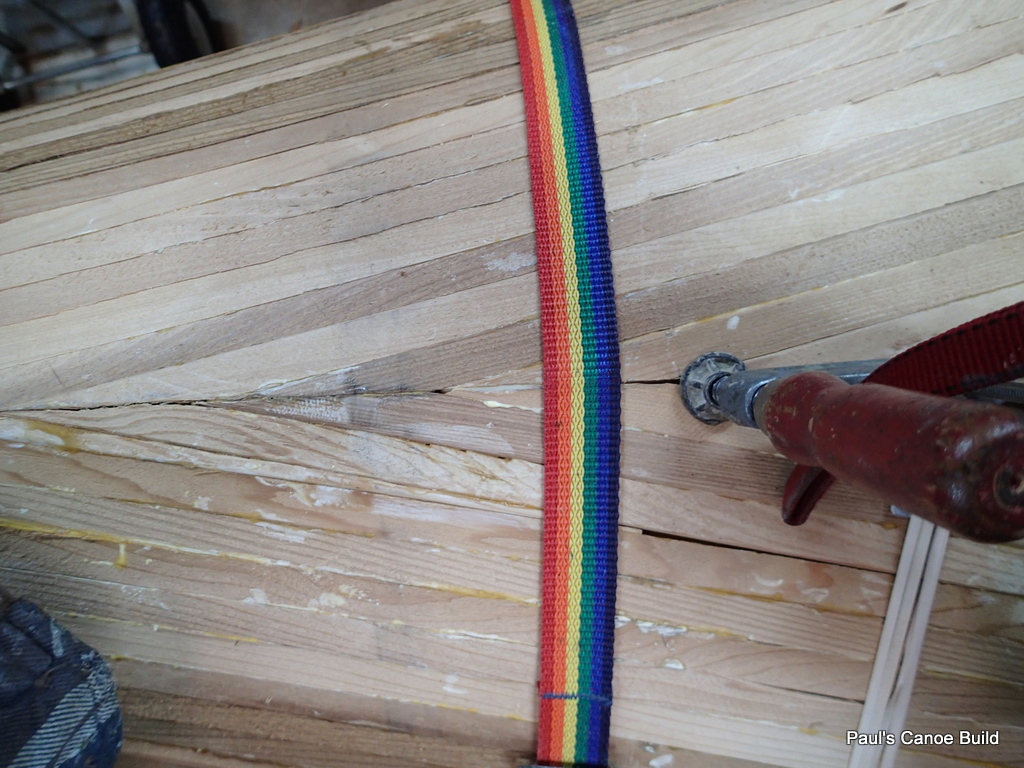
Strip seven lines up. “Cheater” strip at left.
The “F” clamp keeps both sides of the canoe even.
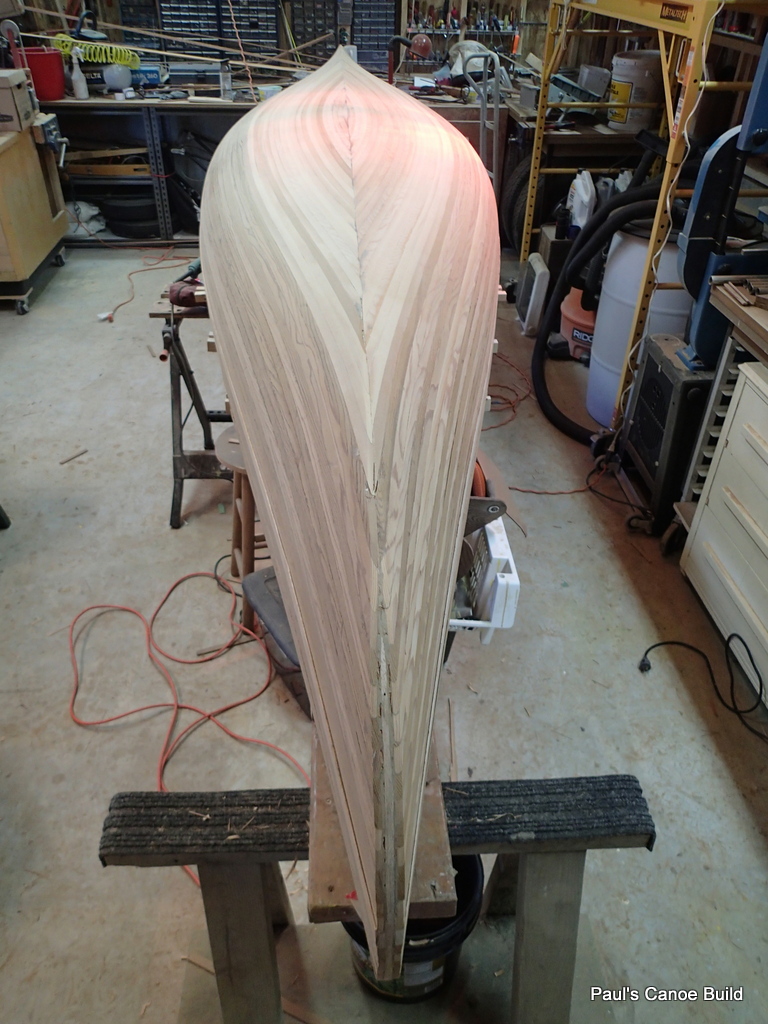
As the strips get shorter, there is less “bend” in them (flatter canoe bottom).
We decide to try fitting two strips (8 & 9) at once. We start to run into a problem. From now on, the “F” clamps will only hold one strip at a time in alignment.
Strips 8 & 9. With shorter strips, we have more rubber-band clamps per length of strip.
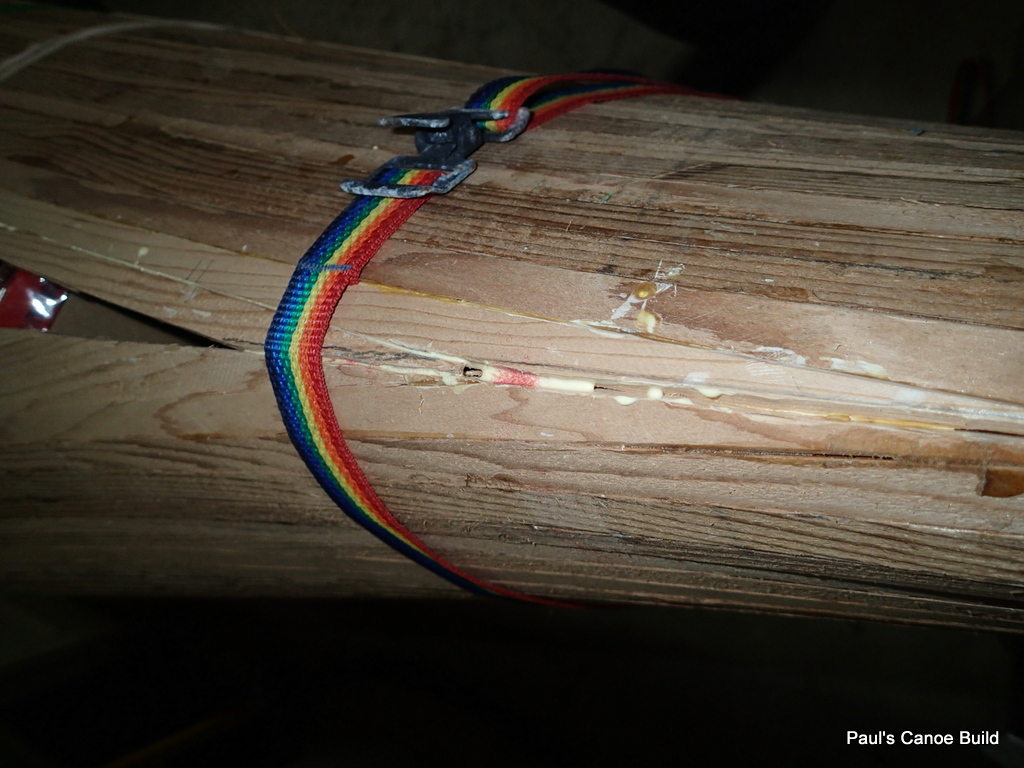
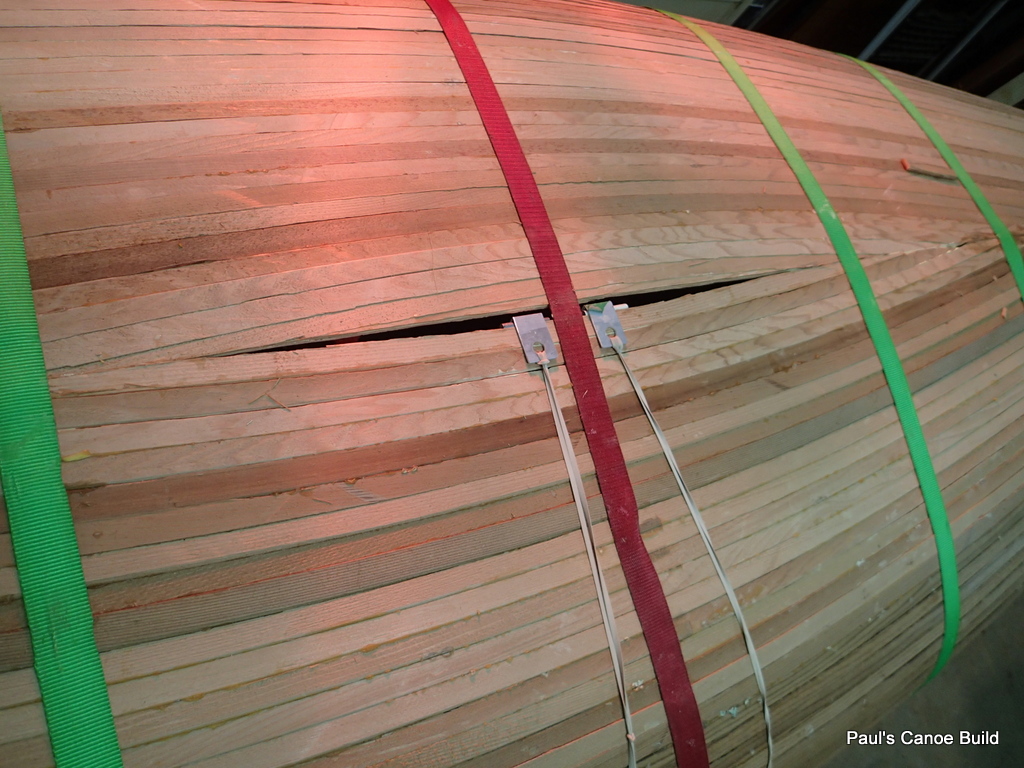
To keep the rubber-band clamps from damaging the “cove”, we use Ikea shelving pins in the cove. This keeps the clamps from breaking the edges of the “cove”.

Tenth strip clamped & strapped.
Paul and I have to be very careful with the rubber-band clamps. If they let go they give you a nasty rap on the hands.
Eleventh strip. Strips are getting shorter.
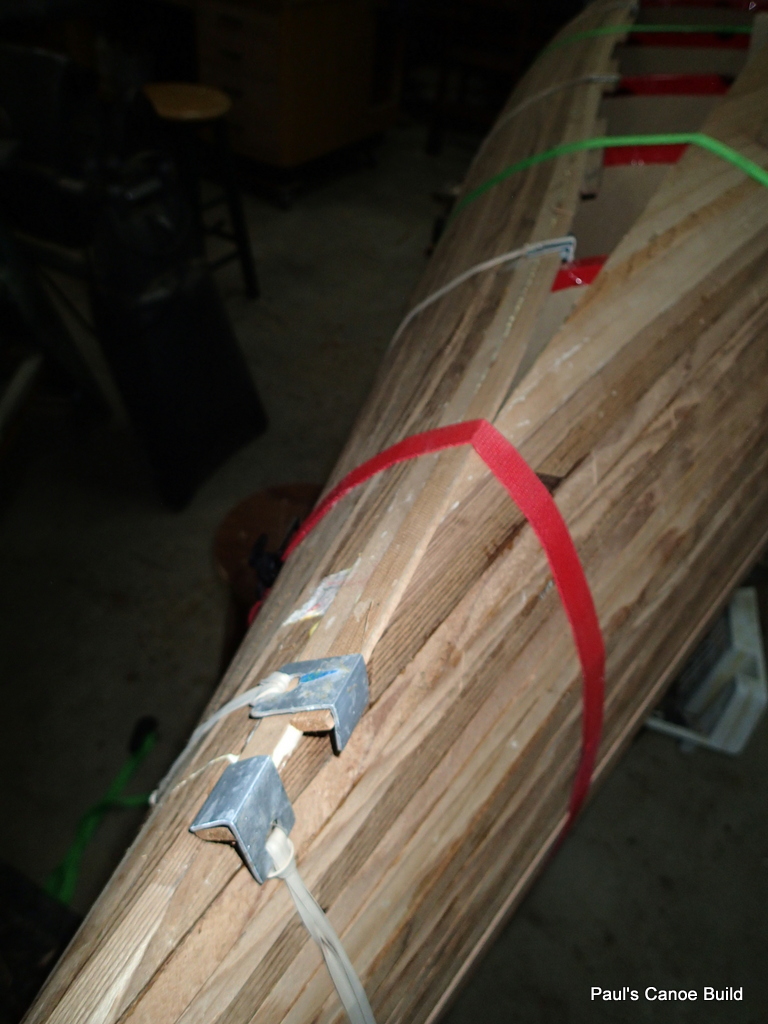
The straps keep the strips from buckling. This is the last time we will use a strap at mould station #3.
We hold the strip on the canoe and mark where the strip crosses the centre line. We measure the length of the matching strip bevel. We mark the strip. Then we cut.
Cutting the bevel for the strip at twelve down and seven to go.
We put a small wedge strip under the strap to hold the “clamping strip block” more tightly in place.
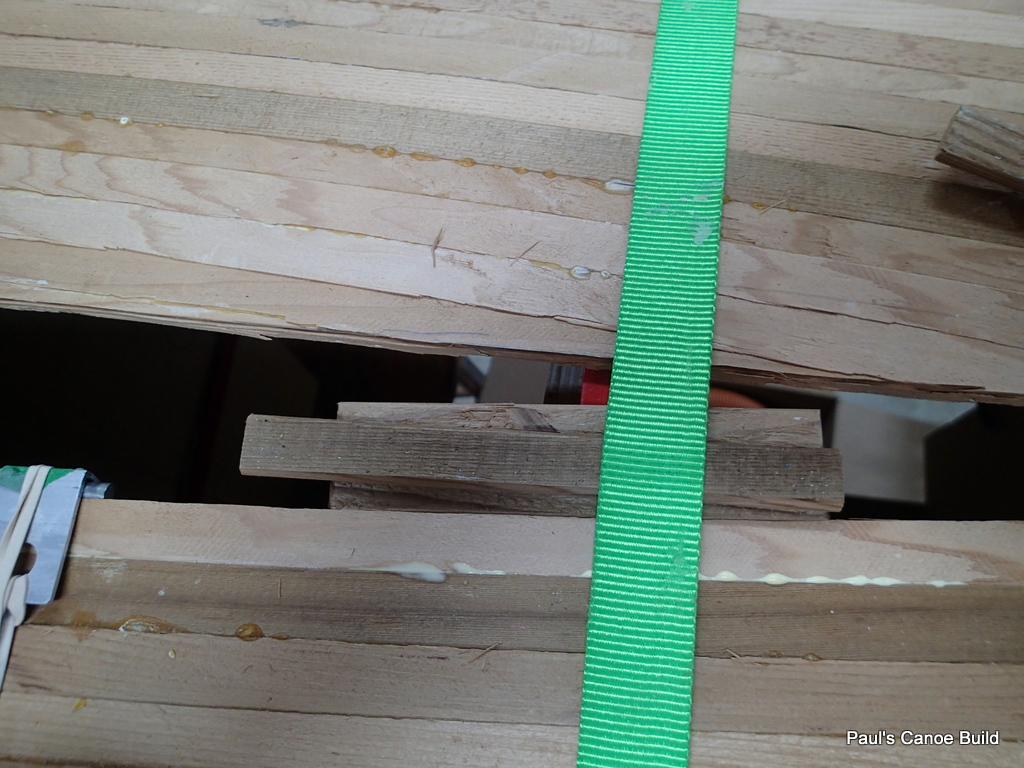
Wedge strip in action.
We aim to get glue squeeze out along the strip.
Strip twelve goes on. Seven to go.
We have the routine down pat…Fit, glue, clamp, come back when dry. Fit, glue, clamp…..
A couple of clamps keep the strips aligned. Twisting the wedge strip (top) helps keep the strips even.
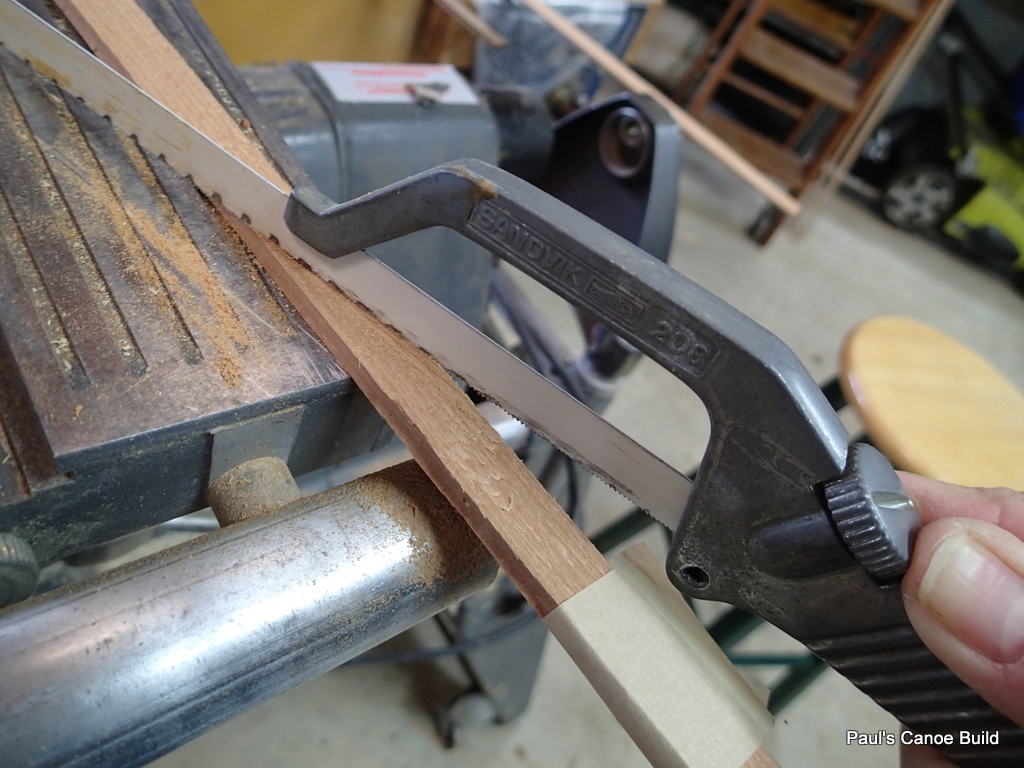
If the fit between the two sides of the canoe is not “perfect” we mix up a little glue and sawdust to use as a filler. We also develop a better technique:
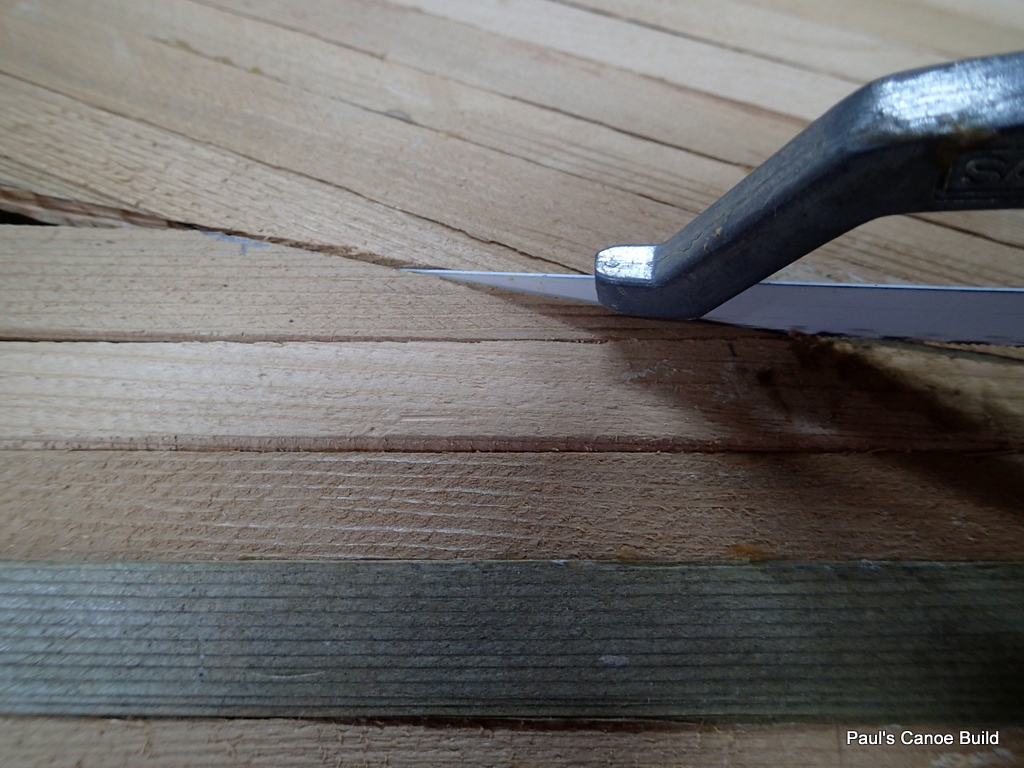
Using a hacksaw blade to fit the strips.
We run a saw blade down between the offsetting strips to even out the joint.
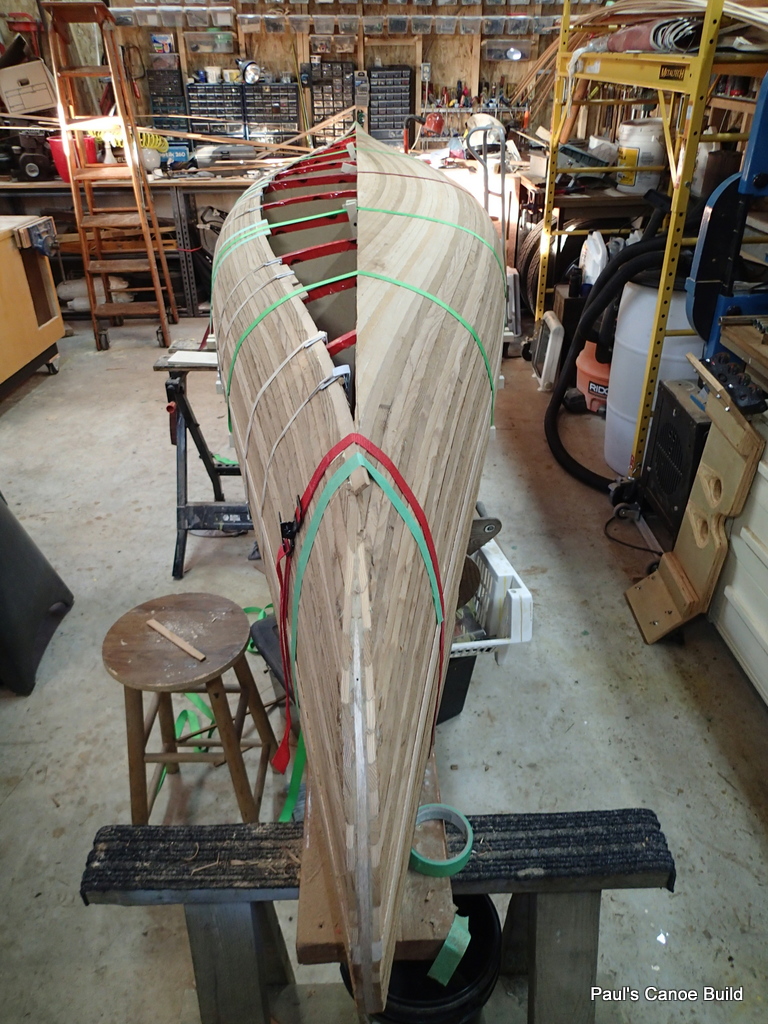
Fifteen down and four to go.
The next strip to be fitted is on the left. With the shorter strips, we can use one long one for both sides.

Sixteen down and three to go. The red glow is from a heat lamp. My shop is unheated.
We are using “F” clamps to keep the two sides of the canoe even.
“F” Clamp keeps it even, South end.
North end:
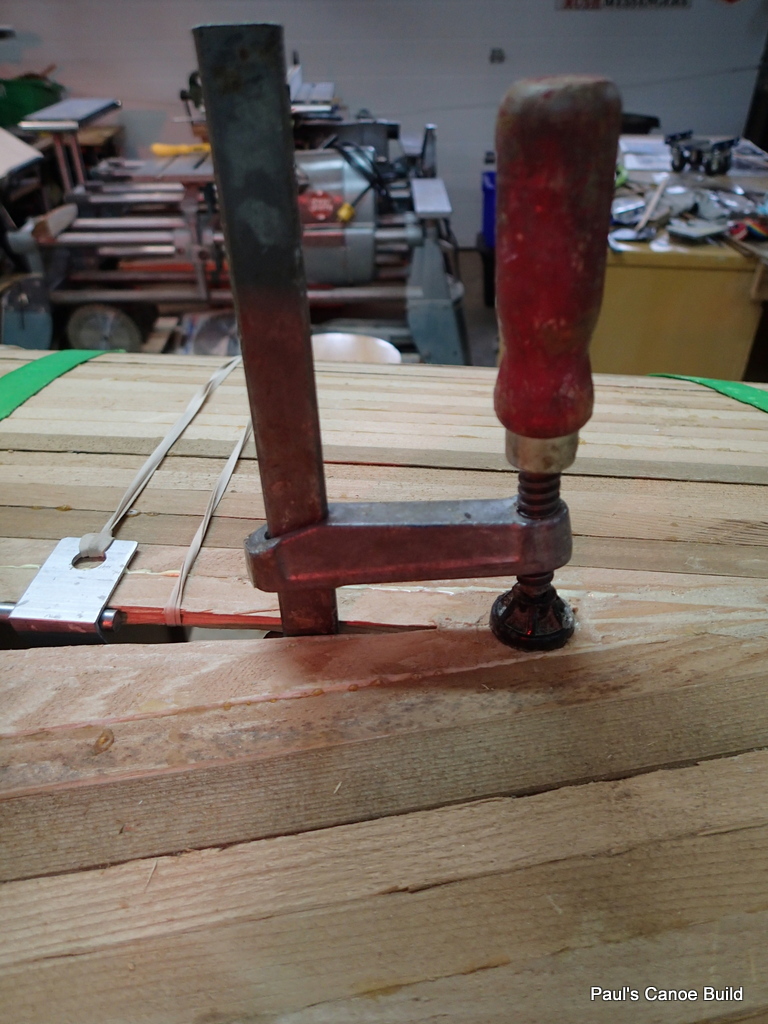
“F” Clamp keeps it even, North end. You can see where the rubber-band goes over the cove, it damages the edges of the cove.
Because of the cove on the strips, we decide to fit the last three strips at once.
Fitting three at once. Strips 17 & 18 are in. Notice that the straps are loose.
The big problem will be “clamping the strips together. We cannot use the rubber-band clamps when the last strip is fitted, and if the last strip is too wide when we “wedge” the strips in, it will cause the canoe to separate along the keel line.
Using the 1″ belt sander to shape the last strip.
Fortunately there is not much “twist” in the strips as we are at the flat part of the bottom.
A lot of glue later, the last strip in!!!!
Lookin’ Good!!!
Letting the last strip dry. The red stick holding the strips flat is taped up with tuck tape so the glue will not stick to it.

We use two sanders, Paul has the 5″ orbital, and I use the 1/3 sheet sander. Dust masks mandatory.
We are using 80 grit sandpaper to start.
Paul has decided to sand the oak accent strip flush with the sides of the canoe.
We use the shop dust control to keep the dust down. The shop will still need a through dusting after all the sanding.
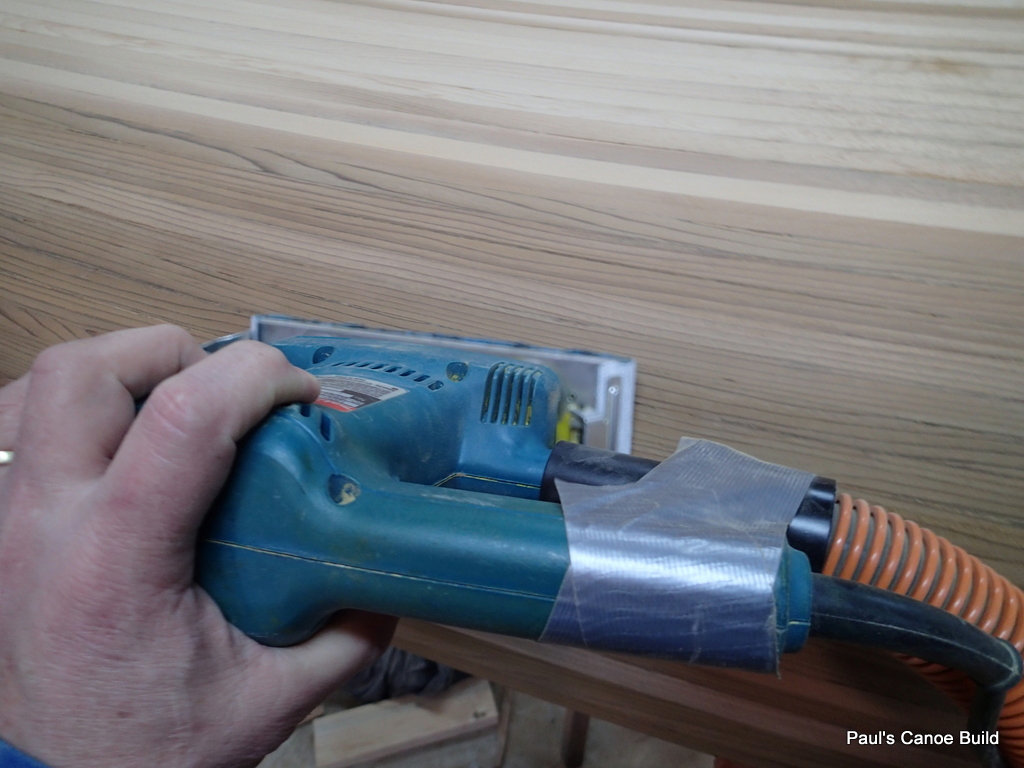
Dust hose taped onto sander. Still dusty. 80 grit.
We give the hull a rough sanding. We fill all of the cracks between the strips with a mixture of glue and sawdust. When we are done I wash the hull to remove the excess filler and raise the grain.
Rough sanding wet-down. Canoe colour looks good.
After the hull dries and when Paul is at work, I continue with the 1/3 sheet sander. 120, 150 & 220 Grit sandpaper.
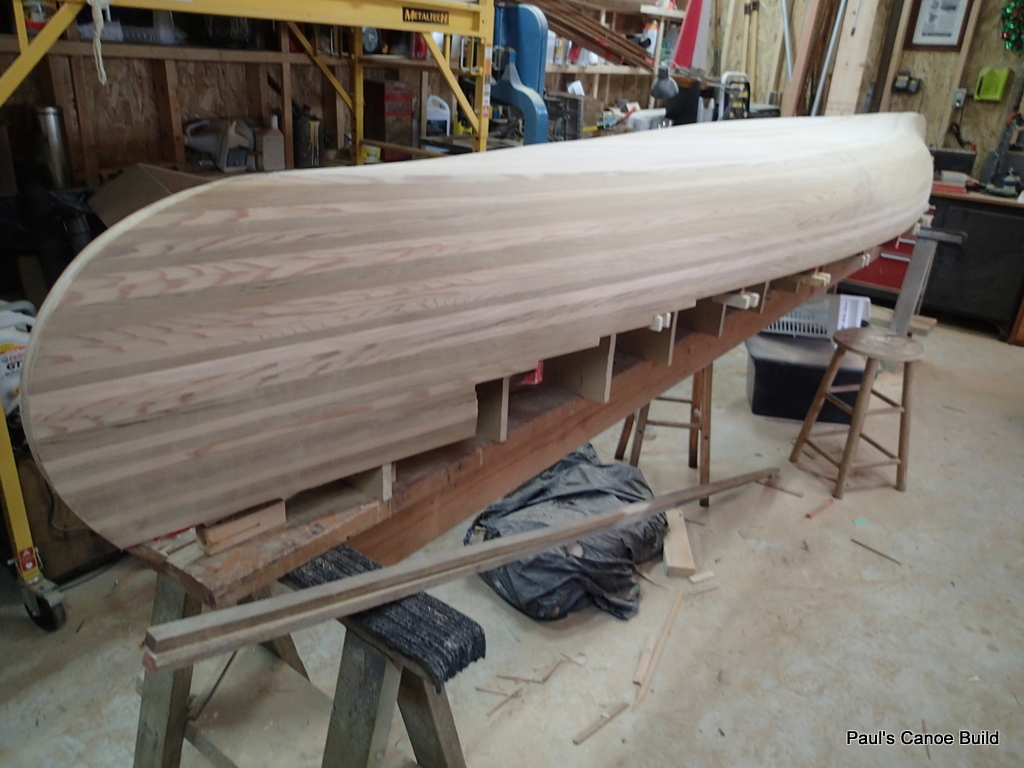
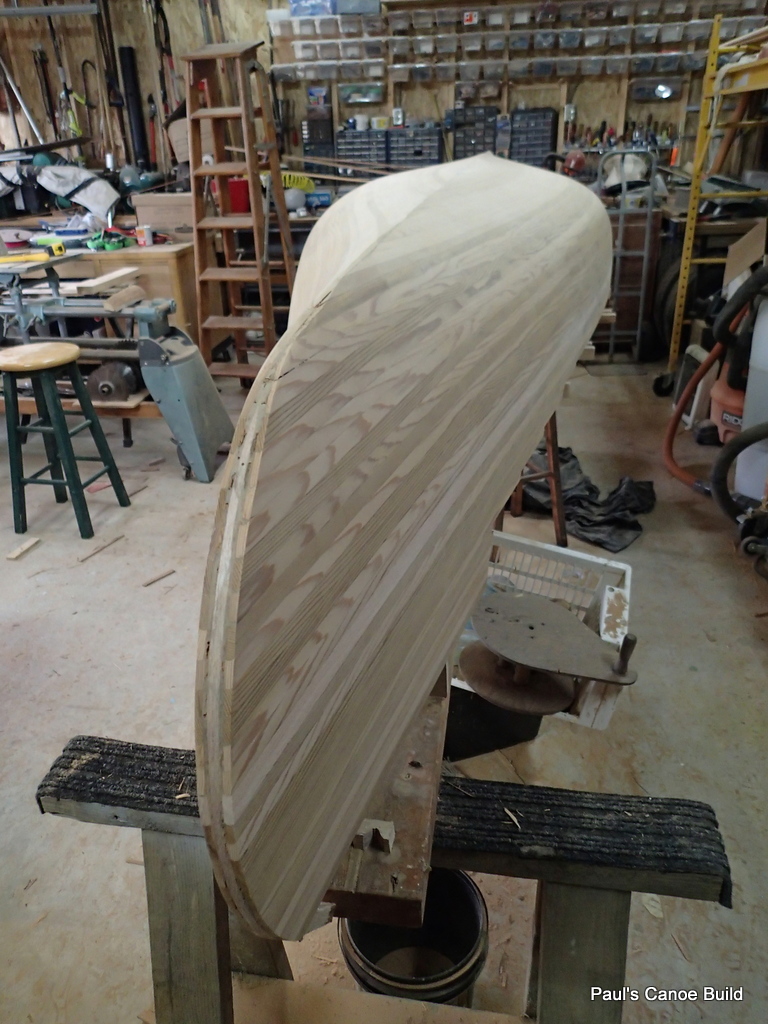
A few pictures of the sanded hull. Where the picture looks blurry, that is wood dust I have not vacuumed up yet.

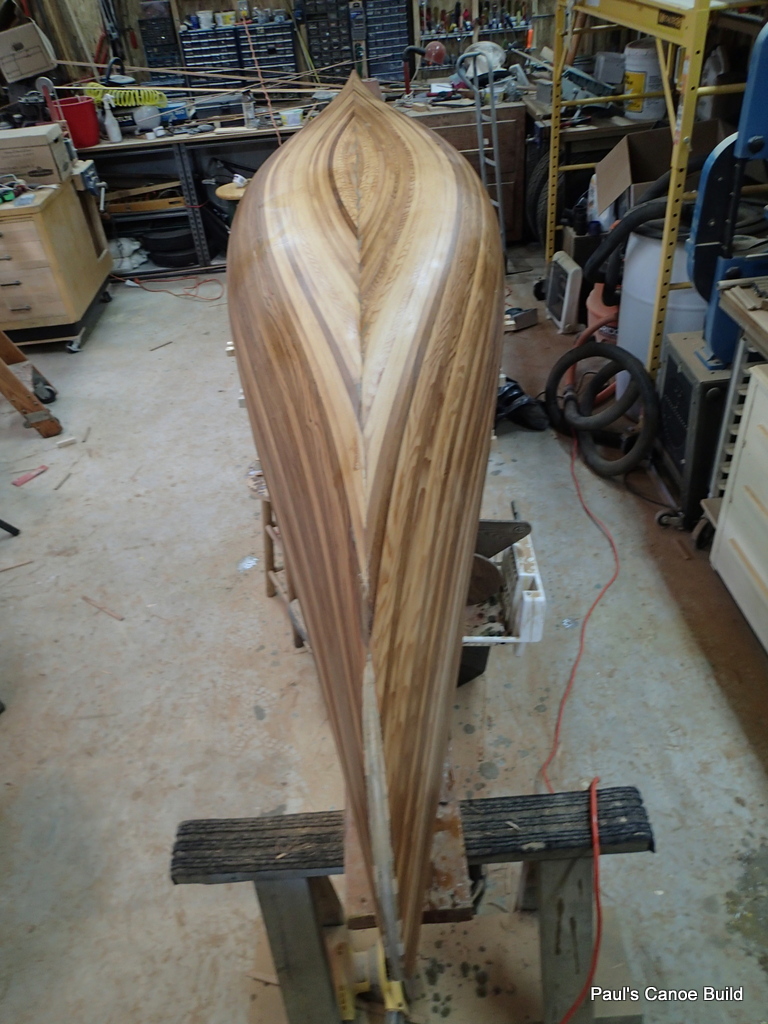
Paul’s Canoe, South-West side.
Paul’s Canoe North-West side.
Paul’s Canoe South-East side.

The next steps will be to laminate on the outer stems, a final shaping & sanding. Then Epoxy & cloth.
Cheers,
Mike