A situation faced by many an Oarsman…
What do you do when your Son (or Daughter) tells you that they are a paddler?
…Why you build a canoe in your new garage/workshop with them of course!
PAUL’S CANOE BUILD
My son Paul wanted to build a cedar-strip canoe.
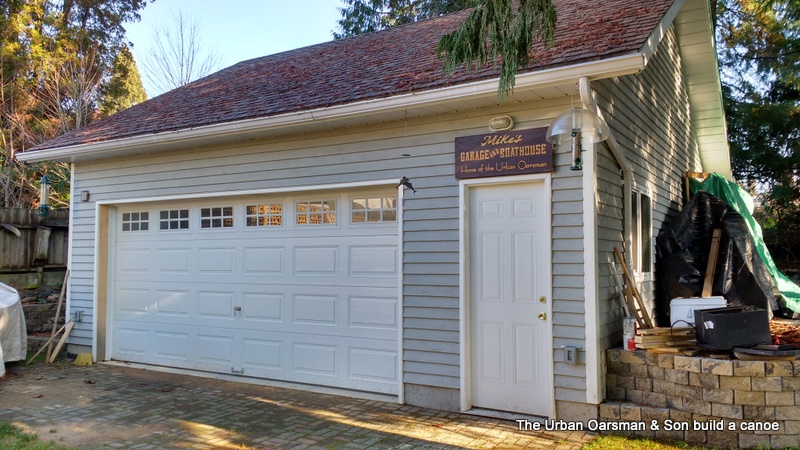
I found some cedar strips and a strongback for sale on Craig’s List. A fellow had build a canoe and had about 50 ¾” bead & cove strips, about 50 1¾” square edge strips, a 1¾” by 8″ by 16′ long clear red cedar plank, and a strongback left over from his project. (we never did see the finished canoe) With my new Garage/Workshop finished and Gwragedd Annwn refurbushed and out of the way, this will be the first new build.
Paul has chosen The Bear Mountain “Hiawatha” design by Ted Moores from his book “Canoecraft”. To quote “Canoecraft”: “This Bear Mountain design has a look that is as traditional as its name, its sheer-line and bow profile harking back to the native forebears of modern canoes. Its underbody, however, has been shaped to conform to the most up-to-date concepts in paddling efficiency. The hull is a shallow arch with a moderately flat keel-line that flows into a shallow vee to become a fine deep vee at the bow for directional stability, speed and maneuverability. The vee is carried as far back as possible so that it acts like a keel for tacking. As a general purpose or light tripping canoe, it was designed in the tradition of contemporary American cruiser, achieving its optimum waterline shape when paddled level, not heeled over”..
Here is the design from Canoecraft:
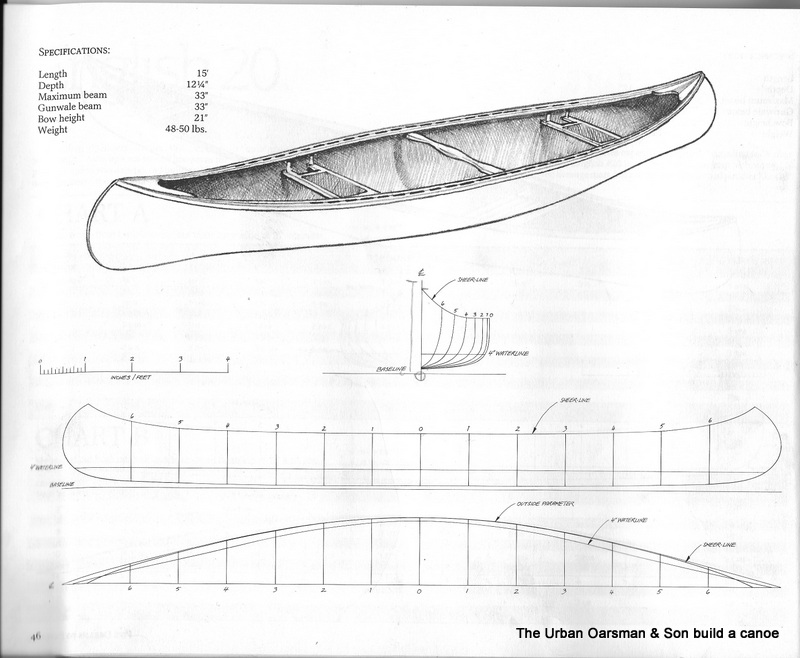
Paul’s Canoe plans
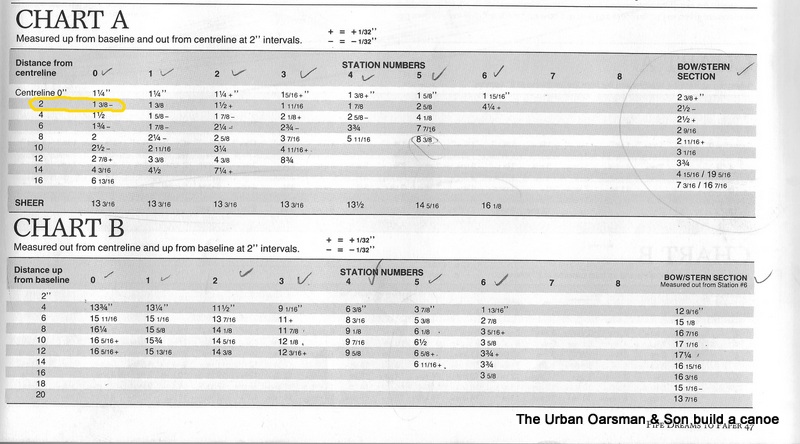
Paul’s Canoe plans offsets
The way Ted Moore has done his table of offsets it to have two sets of points. “Chart A” shows the points on parallel lines drawn 2” apart up from the baseline. “Chart B” shows the points on parallel lines drawn 2” apart from the centreline of each form. A station is also a form or a mold. So on “Chart A”, for Station 0 (or the middle form) at 2” from centreline, there is a point 1⅜-“. This is really just graphing, the only difference being that the axis are the baseline and the centreline and one of the two coordinates for each point is on the 2, 4, 6, 8, 10, 12, 14, or 16 inch line from the baseline. In “Chart B” one of the coordinates is a multiple of two inches away from the centre line. is exactly two or a multiple of two inches away from the centre line.
The way to make this work is to draw a grid of 2” squares onto the wood you are using to make your forms. I got a deal on some MDF cut-offs from a sign company across the street from Martin Marine.
Here is what the points look like plotted out on paper. The red are from “Chart A”, the green from “Chart B” This is for one-half of Station number 0 or the middle form.
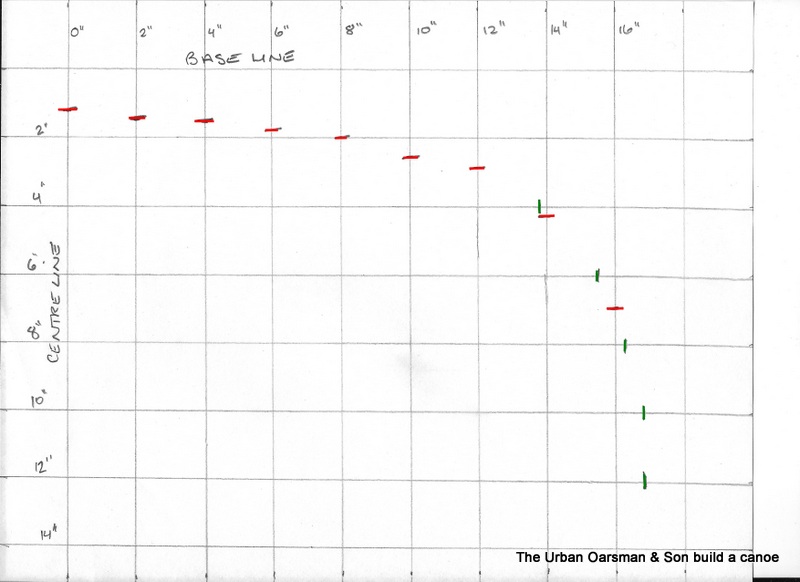
Table of offsets plotted
You can make out the shape of the middle form, for the middle of the canoe.
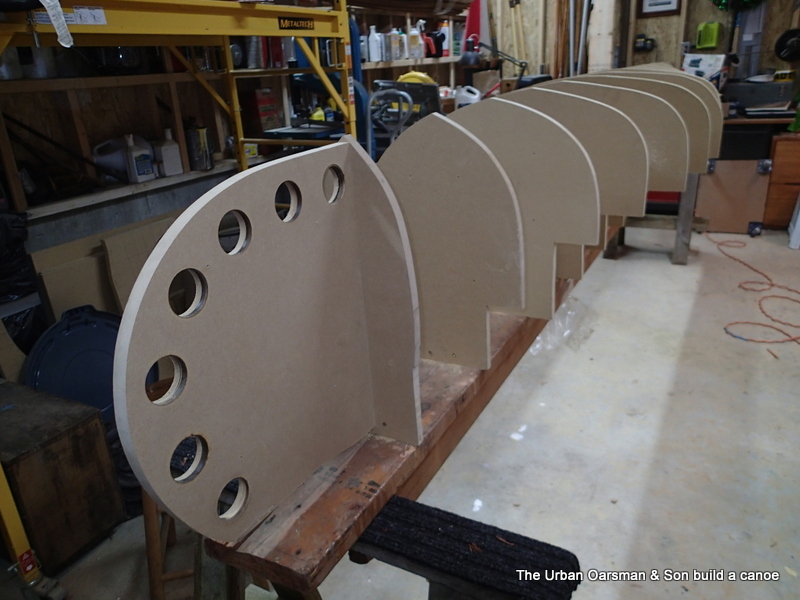
The next step is to draw out all of the offsets onto all of the forms. You end up with 15 forms/moulds, 7 pairs (Station numbers 1, 2, 3, 4, 5, 6, the Bow/stern sections and form/mould 0).
One trick you can do is to cut out the forms/moulds in pairs by temporarily screwing the pairs of forms/moulds together. Then you only have to drill one set of holes for the finishing nails and drawing out the cutting lines. Cutting out the forms/moulds out in pairs also helps make the two more identical. If you get really picky, you can reverse one of the forms in the pair during sanding to ensure that both sides are the same.
Remember you will need a centre line on EACH side of EACH mould for aligning them onto the strongback later.
Then using a jig (a block of wood with the alignment hole drilled with a drill press) to insure that your pilot holes are drilled square, pre-drill holes at all of the points. One trick is to cut out the Bow/stern moulds together, as well as two #1s, two # 2s etc.
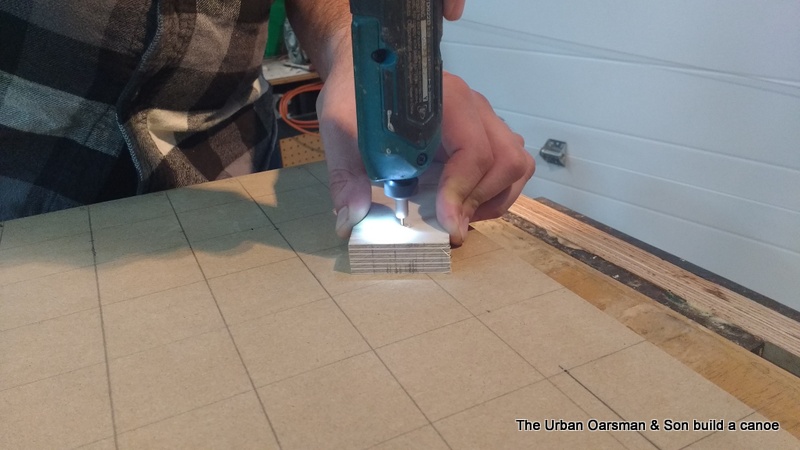
Drilling pilot holes
Tap in finishing nails into all of the holes:
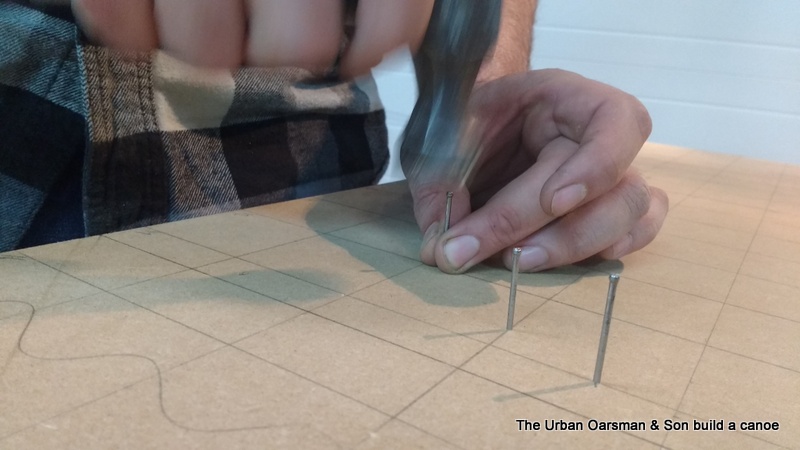
Nail tapping
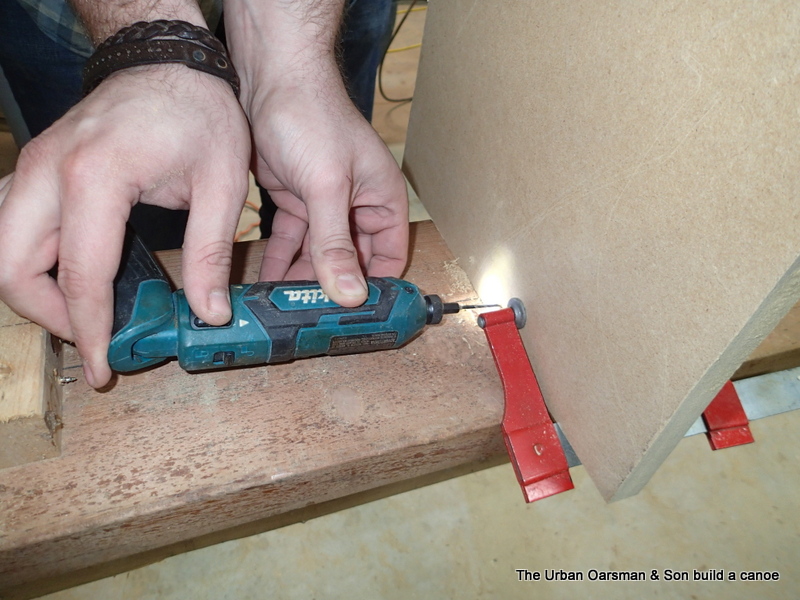
We used piano wire held next to the nails to draw a line for the outside of the forms.
Paul then used a jigsaw to cut out the forms. He cut the lines proud and then used the Shopsmith 12” sanding disk to sand the forms down to the mold line. Note that he is doing the forms/moulds in pairs. Two of the temporary screws are visible at the top of the picture.

Sanding forms to the line
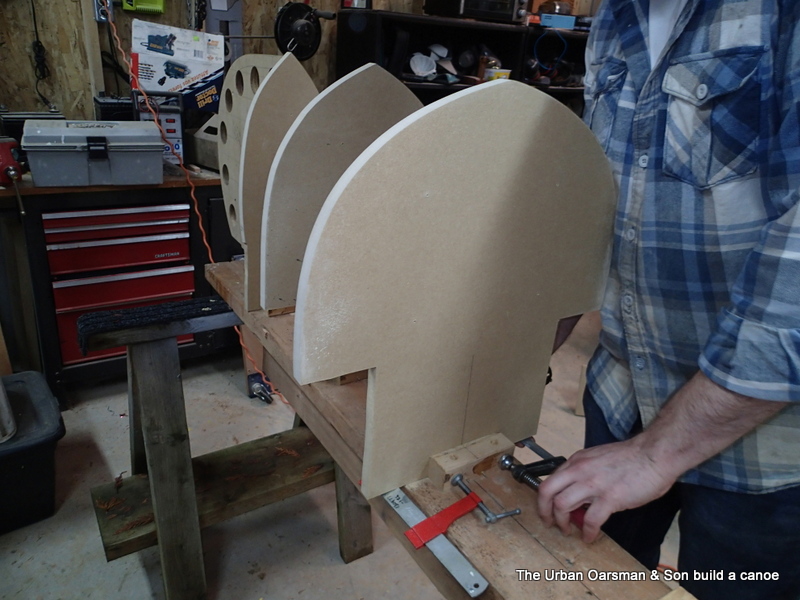
Paul then used a hole saw in the drill press to cut out holes for clamping the bow and stern piece laminations. Ted Moore recommends 2” diameter holes about 4” apart, centre to centre, 1” from the edge.

Bow & Stern form with clamp holes cut
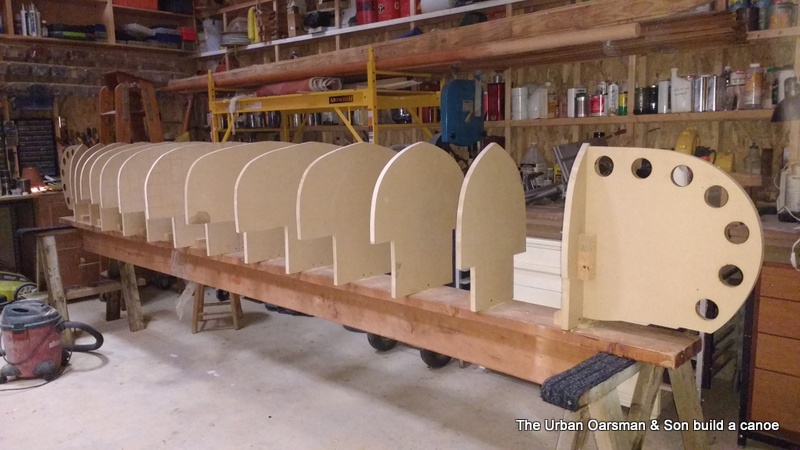
The next step is to mount the Bow/stern forms/moulds to form/mould #6. We used clamps to temporally hold everything together while we made sure that everything was in alignment. We decided that our inside stem/stern pieces would be ¾” wide so the bow section is at where Station #6 form/mould is ¾” across, at the top in the picture. We used screws to hold everything together.
You have to have a straight line down the centre of your strongback to centre the forms/moulds to. It is also good to have one straight, square edge to measure from.
We squared up and leveled our strongback. We started with Station mould #0, placing it in the middle of the strongback. As our strongback was level, we used a plumb bob, held to the centre line on the form, to insure that our station mould was aligned to the vertical.
We clamped everything together and then used a hammer to tap the mould into square.
Drilling pilot holes to mount moulds to strongback
When we were satisfied that everything was square, we pre-drilled every hole and then screwed it together. We then placed the bow and stern mould onto the strongback, insuring that the bow and stern were 15’ apart. We then put in the rest of the forms/moulds.
Putting moulds onto strongback
You do a lot of looking along the forms, checking to see if the canoe looks fair, that all of the tops of the forms/moulds line up, that one does not look to be up or down compared to the others.
Forms attached to strongback
Well that is where we are as of December 4th.
Ready for stem laminations
Paul says that he will be up to work on the canoe every Sunday until it is finished. Next steps? Laminating the inside stem pieces, preparing the cedar strips. If we do not have enough, we will cut some from the cedar plank we have. Paul will also sort the strips trying to get a pleasing planking pattern happening. He is hoping to finish the hull bright.
Good rowing (maybe good paddling) to you,
Mike, the Urban Oarsman.